by successfulbob | photography, photography education, photography marketing, success education
I often talk about getting your name out in your community by writing and distributing press releases. And photographers often come back with, “I tried that! It didn’t work!”
Sending out press releases, and getting them printed is an art as well as a science. And it takes ongoing effort. It is not a one shot deal. The editors need to get to know that the material you send on a regular basis is of good quality and will take little effort from them as far as editing goes. Any single press release may or may not get printed due to, space limitations, subject matter, style of writing, time constraints, etc…
I will tell you that if you write solid content that is not just ‘puff piece information’ about your business the more time you send in press releases the more times they will be printed. Here’s an example of an appearance in local newspaper in Sedona, Arizona the Red Rock News.

Red Rock News article from press release by me…
Press releases sent out to different media outlets can come out at different times depending on their needs. If you write a release that is less time sensitive you have more chance of getting the article in print as press releases tend to get used to fill out space that’s empty when the deadline is coming up fro the presses to roll. I they need to fill 7 column inches and your release is standing by ready to go. There you are… Having images in your submission adds more versatility for the editor. See this article in another paper for different layout possibilities from the same information.
Learn how to write good press releases. Find subjects that work for your target media. And send out those releases. For more ideas or help in giving good press releases get in touch with me.
Yours in Creative Photography, Bob
by successfulbob | fine art photography, landscape photography, Lumix GH4, Lumix Lounge, photography, photography education, photoshop tutorial
I have the new Firmware upgrade on the Lumix GH4 and there is a bonus feature called 4K photo mode and I like it. You can set the camera to 4K capture and still have the choice to set your aspect ratio where you want it. But you can choose 16:9 to match your video wide screen or go 4:3 or 3:2. Even square will give you a 2880X2880 pixel size image to work with.
Years ago when I first heard about the idea of pulling still frames from video I was very skeptical. “What now I have to look through 1000’s of frames to make my choice?? NO way!”
Well that was then and this is now. It’s actually much easier than I thought it would be. You watch the video. When you see what you want stop the video move forward or backward a couple frames and capture it. Done!
Want a series from a child’s first birthday cake? Choose exactly the expressions you need with no, “Man, I wish I had caught that cute little smile…”
Capturing a lightning storm?
Hummingbirds at a feeder?
A stream with splashing water?
Bride and groom walking down the isle?
Roll some video and make your choice. With the Lumix cameras you can even play back the video and grab your still frames right in the camera before downloading! I’m sure you can think of many different instances where this feature could come in handy. I know I did when I started pondering more…
Let’s face it, no matter how good the technology is in our cameras mages need a little work in post to bring out their best. Here’s a still video capture from Oak Creek. I was experimenting with some ideas that didn’t work out involving water and Photoshop Blend Modes but I had this nice little bend in the stream captured as a square. Here’s how I gave it a little zing.
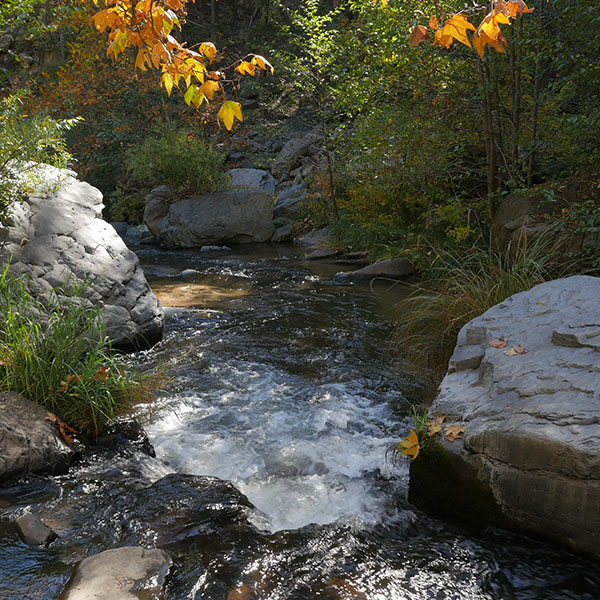
Original capture frame grab from 4K video.
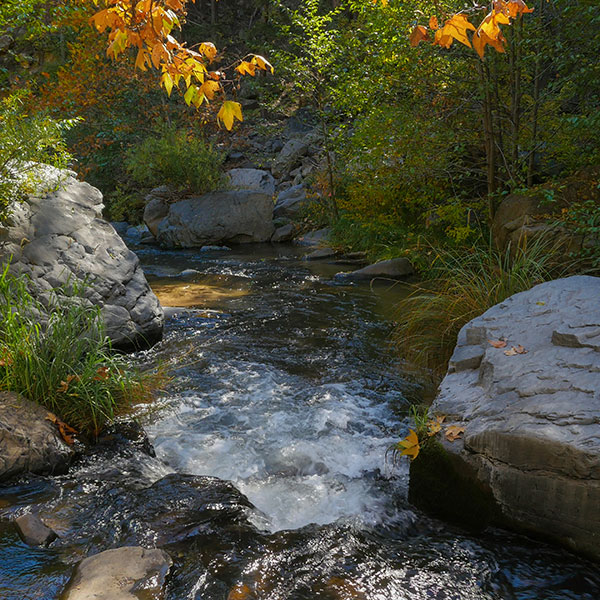
There were a couple small hot spots addressed with a bit of cloning.

This needed a little curves bump to add contrast and a light vingette.
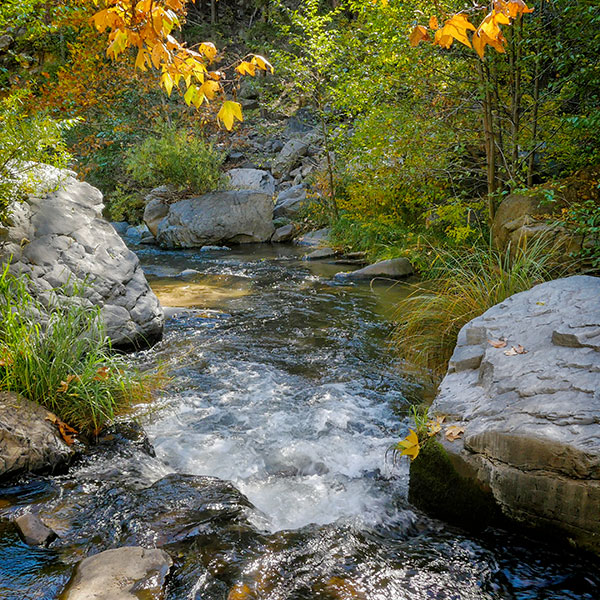
To add even more snap and ‘tooth’ to the rocks NIK’s Tonal Contrast filter was added.
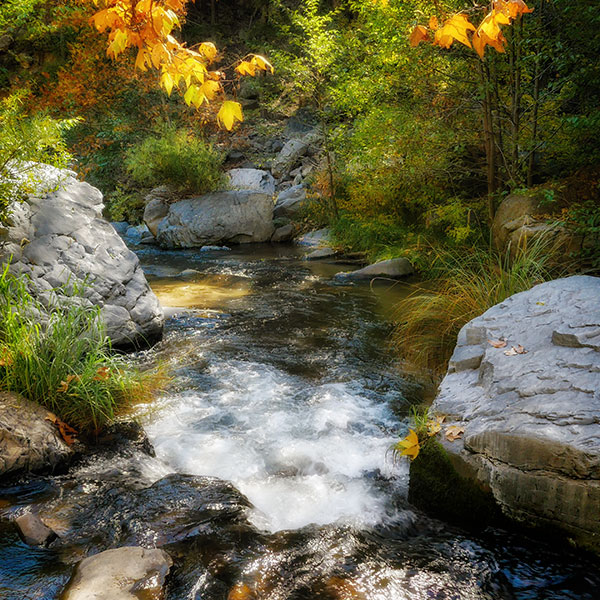
A final NIK filter called Glamor Glow was used with a mask to keep the rocks sharp detail to contrast with the rest of the photo.
by successfulbob | charity photography, event, Lumix GH4, people photography, photography marketing, success education
One of the ways to keep your name and face in front of your community is through volunteering your photography services to help in raising awareness for causes or raising money for charities.
Last Saturday night was a case of creating images from the Oktoberfest event put on by one of the local Rotary Clubs. Funds are raised and Oktoberfest will support many local causes – The Rotary Club of Sedona Red Rocks and their efforts within the community. Our club offers Red Rock High School Seniors $1000 scholarships, supports the West Sedona School Summer Reading program, Teacher of the Year program, dentistry for qualifying needy children and we were instrumental in raising the funds needed to open the Sedona Splash Park – open in July 2014.
Rotary International is the world’s largest charitable organization whose stated purpose is to bring together business and professional leaders in order to provide humanitarian services, encourage high ethical standards in all vocations, and help build goodwill and peace in the world.
Here’s a few images from the day…
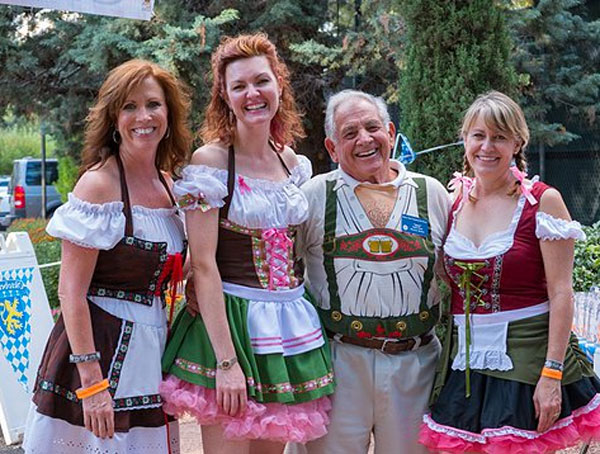
Lots of people get into the spirit with the costuming. These are some of the volunteers and greeters.
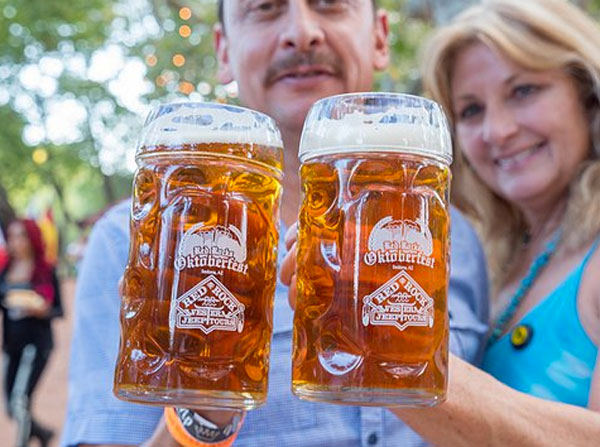
The Red Rock Oktoberfest beer mugs that are part of the goodies people get with their donation.

People get into the spirit and come in costume to the event.
Things you should look for when volunteering…
Web site link recognition.
Recognition as a sponsor of the event.
Make sure images used for publicity for the event are credited on posters, advertising materials and news releases.
Make sure you send an invoice for your services so the organization knows the value of your donation.
Don’t do this just for the recognition. You should believe in and support the organization’s goals.
What are you waiting for? Get out there and support your favorite charity!
Yours in Creative Photography, Bob
Images created with the Lumix GH4
by successfulbob | photography, photography - art quote, photography education
When was the last time you talk a long walk outside of the box?
“What the heck are you talking about Bob??” I’m talking about expanding your skill set by trying new and different things with your photography. There is a tendency I notice among many photographers that they get into a groove in creating a certain kind of imagery, very well I might add, but not growing and developing their craft. It’s bee said that a groove is nothing more than a well smoothed rut. But that’s not today’s Photo/Art Quote.
We check in with Pablo for that…

“I am always doing tat which I cannot do, in order that I may learn how to do it.” Pablo Picasso
The way I attack this is to assign myself personal projects. Whether it is to expand photography skills to another genre or push the boundaries of what I can accomplish with Photoshop. And, I try to do this often. I recommend at least try something really out of your wheelhouse at least once a month. I try to learn something new each day and have a project at least once a week.
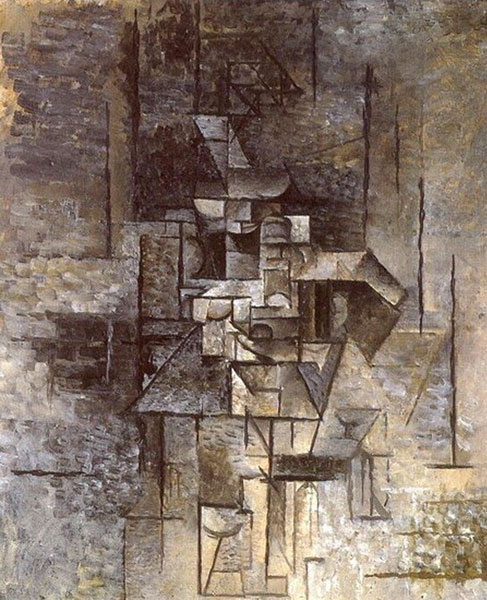
Pablo_Picasso, 1910-11, Guitariste, La mandoliniste, Woman playing guitar, oil on canvas
Remember when you first got into photography? The playing? The wonder? The constant asking of the question, ‘What happens if I do that?’ Get back to it. Experiment! Play! Ask ‘What if?’ more often. If you do I think you’ll get back to the fun of being a photographer.
Yours in Creative Photography, Bob
PS – As a side bonus almost all of my personal projects have turned into dollars down the road… Food for thought.
by successfulbob | black & white, musician photography, people photography, photography, photography education, photoshop tutorial
If you send out press releases or images for ads that will be appearing in newspapers I highly recommend a few steps to ensure that you get good looking images when the paper goes to print.

Eric Miller image converted to black and white using the LAB mode in Photoshop with a curves bump.
Number one – Do not send a color image unless it is possible the image is going to be printed in color. Many times in the newspaper world since they are on deadline and shorthanded the conversion from a color image to black and white is to desaturate the image. Period. There is no consideration for the tones or where they fall or what colors are going to come forward. I highly recommend using a method I have made with a Photoshop Action.
Convert the file to LAB Color Mode In the Channels Palette Select the B Channel and Delete it. Then Select and Delete Channel Alpha 2. Convert the file to Greyscale Mode. Convert the file to RGB Mode. Add a Curves Adjustment Layer. Pull down on the 3/4 tone and up on the 1/4 tone in the Curves Dialog box adding contrast to the image.
This makes for a pretty clean BW and with the Curves Adjustment Layer you can make changes to the highlights and shadows if necessary before saving the file. If you would like this action already complete rather than building it yourself send me an email and I’ll get it to you.
The other thing that will help your image stand out in newsprint is to sharpen your image until it almost looks too crunchy on your screen and when printed with the spread of ink it will be sharp in print. If an image is not ‘over sharpened’ this way the spread of ink will make it look soft. Here’s what I do…
Flatten the image. Go to Filter > Sharpen > Unsharp Mask with these settings – Amount 500% Radius 1.7 Threshold 7. Your image will look frightening! Wait there’s more… Go to Edit > Fade Unsharp Mask Change the Mode to Luminousity and fade to 40% Opacity. Your image will look a bit sharp but will print beautifully on newsprint at these settings. Want that action? Email me.
Conversion and sharpening will make your images stand out from the rest…
Yours in Creative Photography, Bob

