In looking through my files for some examples of in-camera panoramic photos I came across some more examples I wanted to share. I feel the format adds another arrow to the creativity quiver. Here’s a few made with the Lumix GX7.
Outside Salt Lake City – Panorama format is perfect for telling the dramatic landscape story.
Another from the Salt Lake City Trip.
A different way to share a scene.
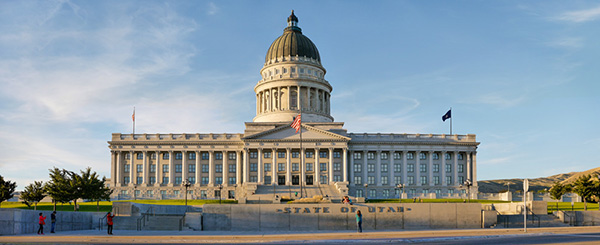
As I was going through my photos, I realized I didn’t share a slightly different idea to leverage the in-camera panorama feature. Sometimes the resulting photo just doesn’t quite cut it as far as capturing the scene. Or you want a file that will have a different aspect ratio but is still a panoramic image. Or, you need more pixels but don’t have time to create a full set of images for future stitching. So here’s two rows followed by the final.
Showing the dome.Showing the base.
Here’s the final with the two stitched in-camera panorama images using Adobe Photoshop.
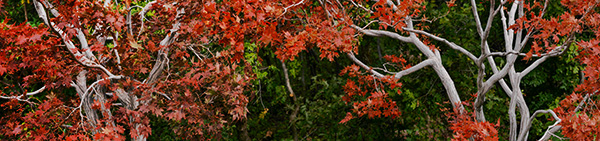
From the Red Butte Arboretum in Salt Lake City.
One more.
Think about the ways you can use the panorama feature. I don’t have one at my fingertips, but you can also make the panorama vertical.
Let me put this out there if you don’t already know. I love the panoramic format!
Red Butte Arboretum – Salt Lake City Utah. In-Camera Panorama Lumix GX7 Shot a few years ago.
Panorama images are not the be all and end all they are there to tell a story that can’t be told in the two by three or three by four ratio. Sixteen by nine is becoming a more ‘standard’ image size to our eyes because we see it more often in movies, television, and our phones.
This post was triggered by a question about the in-camera panoramic photos vs. shooting individual images and stitching photos in post production. Here was the question, “When I use the Lumix G7 it does a Gatling gun shoot as I shift the camera left to right and we all know you shouldn’t be moving a camera when shooting a landscape. I’m curious the quality difference between one shot at a time and stitched in an editor vs. the G7 spray technique.”
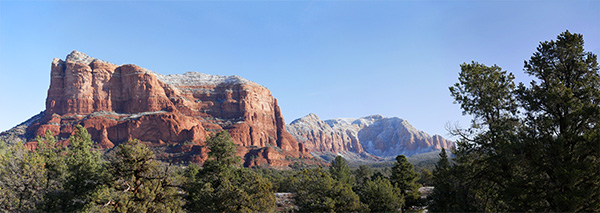
Courthouse Butte in Sedona – In-Camera Panorama. Print to about 27 inches.
Great question. We have different tools for different jobs. The in-camera panorama feature is a tool for the convenience of capturing a scene quickly and being processed for output immediately. For example, you want to share a scene on social media that is panoramic in nature. The camera will produce a completed image that can instantly be uploaded via the camera’s built-in Wifi. It is also a fine way to capture a scene as a memory that will only live in the digital world where higher resolution is not a necessity. That’s not to say you can’t make a beautiful print from the in-camera pano, I’ve made some beauties.
Advantages of in-camera panoramic photos. Immediate gratification. Ideal for web presentation and medium sized prints.
Now to the advantages and drawbacks of a stitched image.
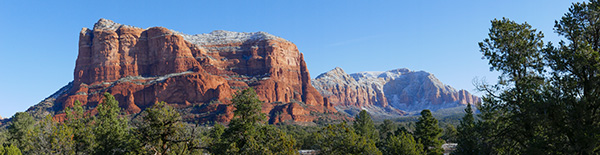
In the capture of individual images to create a panoramic in post-production, you can shoot in the RAW format which will give you a larger file and the ability to finesse the most quality from the file. The larger size files when combined allow for printing very large size images. The only down-side is that post-processing is necessary before you can share the picture as a panoramic.
Same scene as above. Ten frames stitched in Adobe Photoshop. Easily print to about Seventy-eight inches. Note the details and color were more available from the RAW file information.
Final thoughts. Use the best of both worlds. Make an in-camera pano to make a quick record of your scene. It can be utilized as a reference for the future building of your panorama or quick sharing of your view in social media. Make your individual images for large format printing.
There is a new Firmware version out for the GX85 the leverages the 4K video feature called Post Focus. Post Focus will run a little video capture that will make an image with approximately forty focus points. You can pull any of the still frames, and each frame of the video is focused in a different place. You can then play back the video in camera and select any frame you wish and save as an eight megapixel still frame. See the video below.
You ask, “Wait a minute Bob, why is this a nice feature?”
Number one, it enables you to choose what’s in focus in the image after the fact. For example, you are capturing an image of someone’s face with a VERY shallow depth-of-field without a lot of time to check on your focus point. You can dial in the corner of the eye or the beginning of the iris or the other eye if you’d like for creative possibilities. Here’s the cool part. You can take a few of these images and put them together with a process called Focus Stacking and control exactly what is in focus or out of focus in your photo.
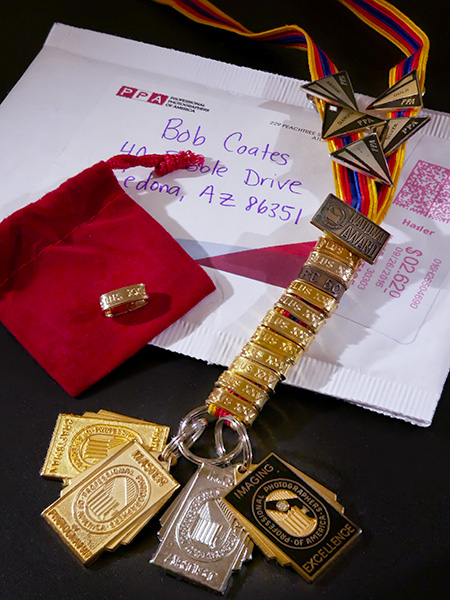
Single still frame with just the middle portion of the image in focus bringing attention to the Plus 25 bar placed on the red bag.
Number two on the cool list, we can now do the focus stacking right in camera and have it saved as a jpeg right to the card. This can save a bunch of time. Before you had to take the video into another program, save each image as a single frame and then run those frames through Photoshop or another program to obtain your stacked focus image.
This image was Focus-Stacked in-camera to show detail throughout the entire range. Total time for processing about thirty-seconds
Nuber three, you can use this feature the way I have been to get a hyper-focus image but stacking all the images together. This will allow you to use a macro lens which can give incredible detail. Usually, that detail is very shallow depth-of-field, but with Focus Staking you can get focused detail from the front to the back of the image.
Here’s the video showing all the points of focus that were captured. The original is a little over one second long. I slowed it down to about twenty percent so you can see it move through all the focus points.
This is a photo of the representation of my achievements and service to photography through Professional Photographers of America (PPA). The bar on the red bag is the newest sent to me and shows 25 merits earned through service, education, and imaging competition. The medals on the bottom of the ribbon are degrees earned and the small rectangle in the PPA National Award presented by Arizona PPA. As members of the association, we are charged with wearing the medals at conventions and PPA events. It is a message to other members that we are accomplished photographers available to answer questions.
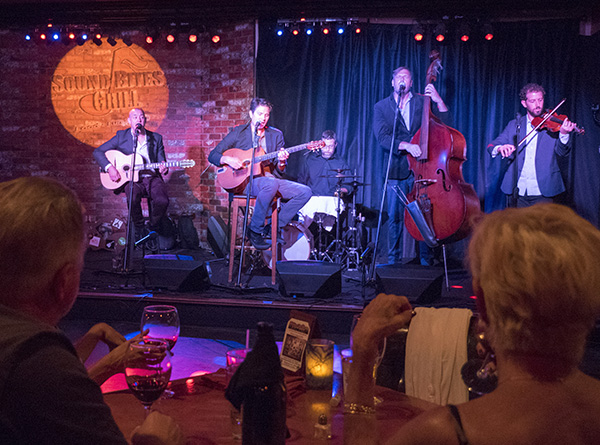
Photographing musicians during a live performance can be a bit of a challenge.
But I dig it!
If you follow this blog you know I am charged with creating the marketing images for bands who play at Sound Bites Grill in Sedona. Also, the ‘Wall of Fame’ is a record of performers who have graced the stage and is becoming a history of entertainment at the restaurant. To date, there are over eighty art pieces presented on the wall.
Here is the latest.
The Black Market Trust Band
Here is the finished piece as presented on the ‘Wall of Fame.’
While the band is performing, I isolate each member and extract them from the scene and then blend them back together while creating the art piece for the wall. These were captured with the Lumix GX7 and the 35-100mm f2.8 Vario lens. After each member is placed on the new canvas layers of texture, drop shadows, and lighting effects are added to create depth and dimension.
While the musicians are on site, I gather their ‘message to the house’ and autographs for inclusion in the final art piece. These are signed in black Sharpie on white paper. After scanning, using Adobe Photoshop they are imported to the final image, sized and inverted to white text. The Blend Mode of the Layer is changed to Screen. This makes the inverted paper, which is now black disappear with no further selections necessary.
Images for the newspaper are also prepped. I shoot in color but do the prep to black and white for the best printing results. Many times a color image is just changed to greyscale by the paper and using NIK Silver FX Pro 2 makes for better contrast and tones. These were captured with the Lumix GH4 and the 12-35 f2.8 Vario lens.
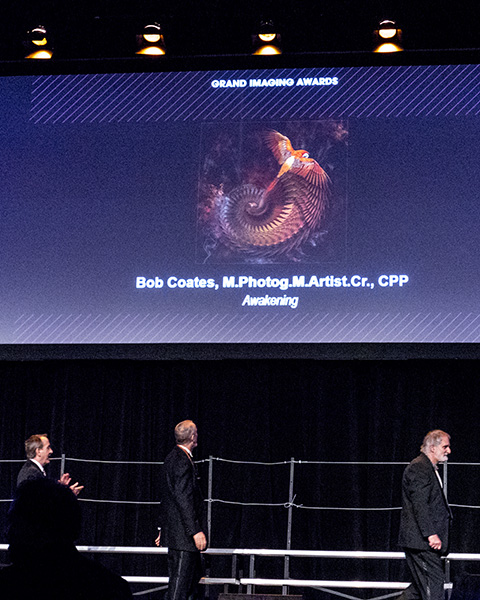
I was excited to receive a call while on vacation with my wife in New Mexico from PPA headquarters. They were calling to share the news that I was named to the Top Ten in the Illustrative Category. I learned I was eligible for a Grand Imaging Award. Unfortunately, I did not earn a GIA Award but I was named to the World Photographic Cup – Team USA It was quite and honor to have an image be recognized at that level.
A photo taken by a friend as I headed across the stage during the Grand Imaging Awards at the PPA Convention in Atlanta, Georgia last week.
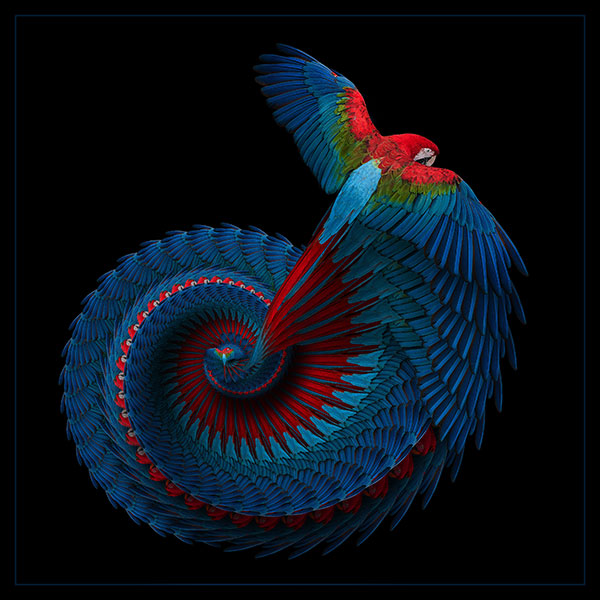
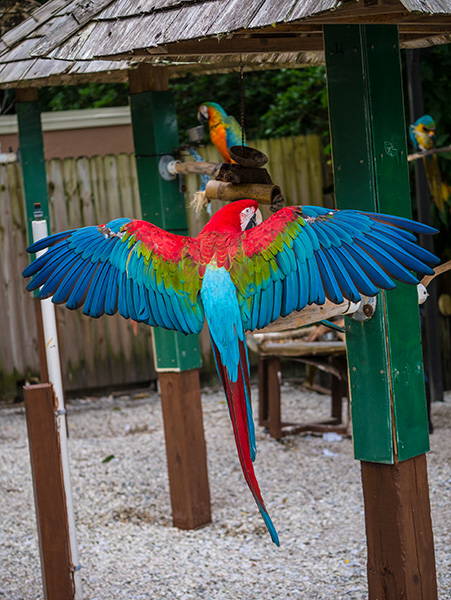
Here’s a better look at the image. It was created using a macaw that I photographed at Sarasota Jungle Gardens in Florida. The bird was extracted from the scene and duplicated numerous times into a spiral nautilus composition. Texture, smoke, shadows and color layers were added to add more depth and dimension.
This is the final image.
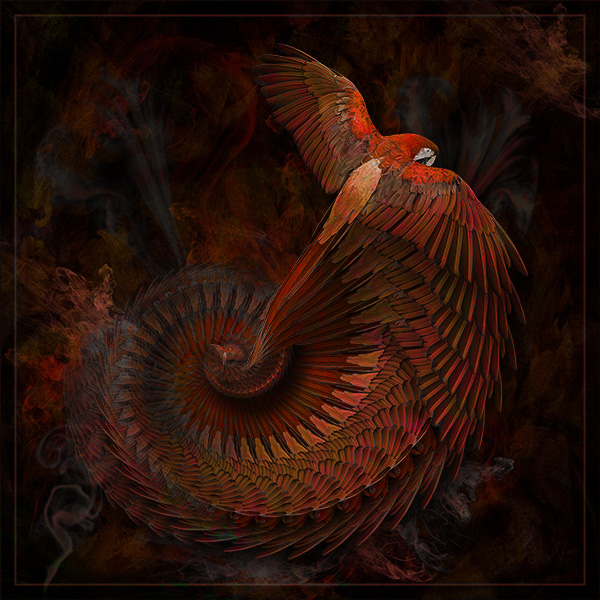
Here is an earlier version on the way to the final.
Original capture – Tech info from original capture Lumix GX7Lumix Vario 35-100mm f2.8 1/250 sec f2.8 ISO 400
Had a radio show interview with Mike Tabback on the weekly Tech Talk radio show. I’m on once a month to chat about cameras, photography, shooting techniques, Photoshop and more…
In this weeks episode we chat about some of the new Lumix cameras and our Luminary meeting in Sarasota, Florida. In the second half we talk about the International Photographic Competition for photographers put on by Professional Photographers of America. I am one of 45 the Judges who volunteer almost a week of their time to judge and critique entries. It is quite an honor and intense experience to be part of that event!
For infrared conversion of my cameras I use LifePixel. Infrared allows you to put an older camera to use and opens up a new time time of day for productive image creation.
Fotopro tripods are well worth checking out. You can learn about the ones I use and recommend by clicking on the Fotopro Tripods link at the top of this page. If you want to see what other tripods might fit your needs check out the Fotopro.com website. Check back with me before you buy as a Fotopro Ambassador I’m able to get you discounted pricing including complementary continental USA shipping for my followers that you won’t find through retail outlets.
Learn Photoshop in a fun environment. Aaron Nace applies the right amount of fun with easy to understand and follow tutorials. Actions and brushes are included with lessons!
Lightning, waterdroplets, sound, time-lapse, HDR sequences, smiles and much more control for your camera!
Cameras Get Smarter -
A High Speed Smart Camera Remote
Best embroidery ever. Give Queensboro a try, get a $20 instant credit to get started by clicking on the logo! They specialize in great quality custom logo apparel and promotional products with the best customer service.
Platypod has become a great resource for being creative in getting your camera gear easily into unusual places. As an Platypod Pro I get to work/play with the gear even before it comes out. Head over to Platypod, subscribe to the newsletter and you will get special discounts reserved only for subscribers.
 Outside Salt Lake City – Panorama format is perfect for telling the dramatic landscape story.
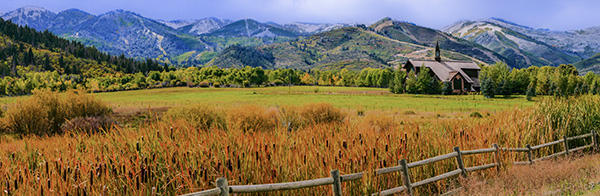 Another from the Salt Lake City Trip.
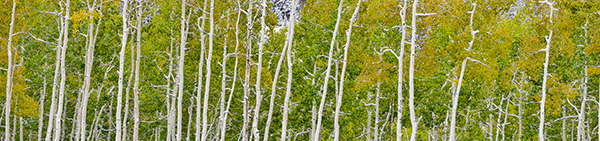 A different way to share a scene.
 Showing the dome.
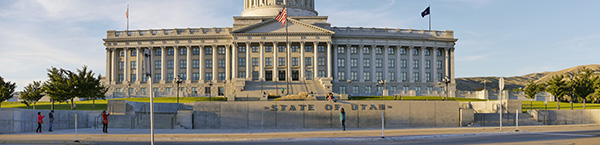 Showing the base.
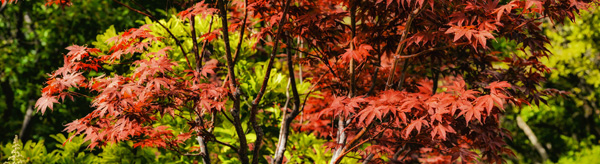 From the Red Butte Arboretum in Salt Lake City.
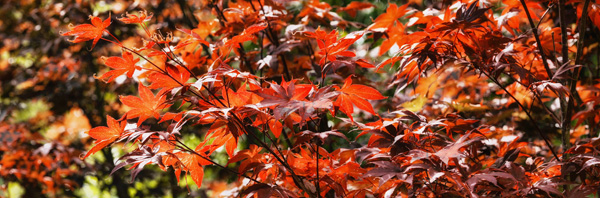 One more.