This post was inspired by questions about getting a solid exposure of the moon with detail. Many photographers have issues with this. We’ll start with the ‘Sunny 16 Rule’. Note that I put the exposure rules in quotes in the title of this post. That’s because technically there are no rules because any exposure is the correct exposure if it helps to tell the story you are trying to share.
No matter who tells you something it is always important to test for yourself. ALWAYS! (example below)
The exposure rules I’m going to share here can get you to a place where you can start your journey and attain an exposure that will render highlights and shadows visible within an acceptable range without losing detail in either one. Once you know this happy place, it can be a handy starting place and to check your metering equipment in your camera and light meter.
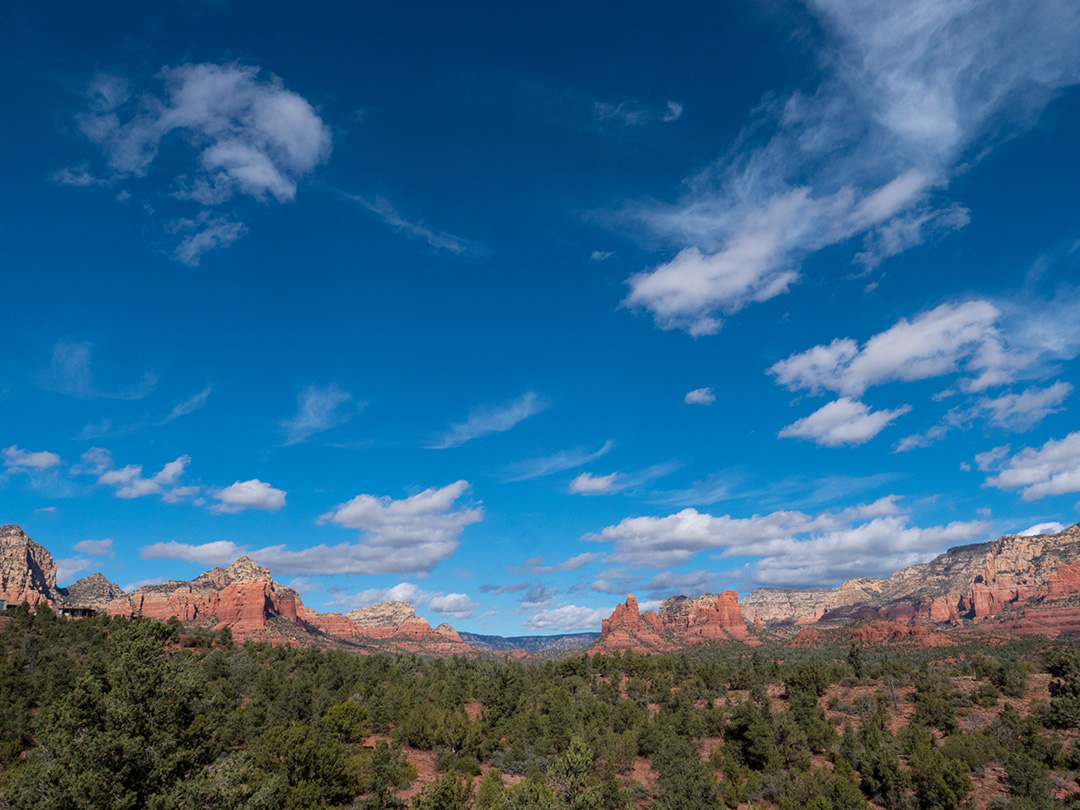
The Sunny 16 Rule in action with Sedona’s red rocks. Lumix GH5with 12-60mm Leica
Exposure settings f16 1/400th second at ISO 400
The first rule is the Sunny 16 Rule. On a sunny, cloudless day scene, this rule states that if you set your camera to f16 and your shutter speed to 1 over your ISO setting you will get a proper exposure. If your ISO is set to 400, your settings would be f16 at 1/400th of a second. It will be correct. For additional creative control within the rule just keep the ratios between shutter speed and f-stop. If you want a shallower depth of field, for each change in aperture change the shutter speed. f8 is two stops different from f16, so the shutter speed would need to be 1/1600th second with our 400 ISO setting. Be aware that small tweaks in 1/3rd of a stop can make quite a difference in how the scene renders. A slight underexposure
Let’s move to the moon. I shared a piece of info I was told without testing. (sorry about that! working to rectify it ASAP) I was told we could use the ‘Moony 11’ the same way we use the Sunny 16 rule. I apologize for passing that info on without testing first. After testing, I found that the reality for getting a nice exposure of the moon was the ‘Moony 8 Rule’. Set your aperture for f8 and use the reciprocal of your ISO for your settings. Even though the moon is a reflection of the sun, it is traveling through a couple of layers of atmosphere and absorbing some of the light itself. It turns out Moony 8 seems to be the way to go.
Light clouds crossed the moon and changed the exposure to 1/60th of a second still at ISO 400
While the Sunny 16 rule is for the exposure of the scene lit by the sun. The Moony 8 is to achieve texture on the moon itself.
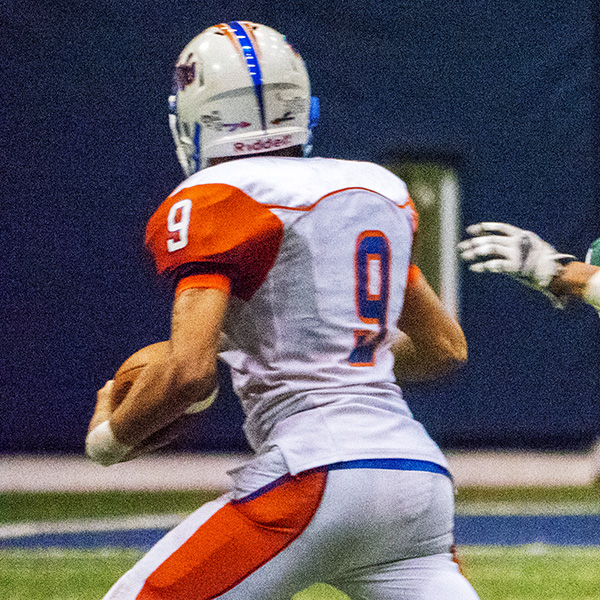
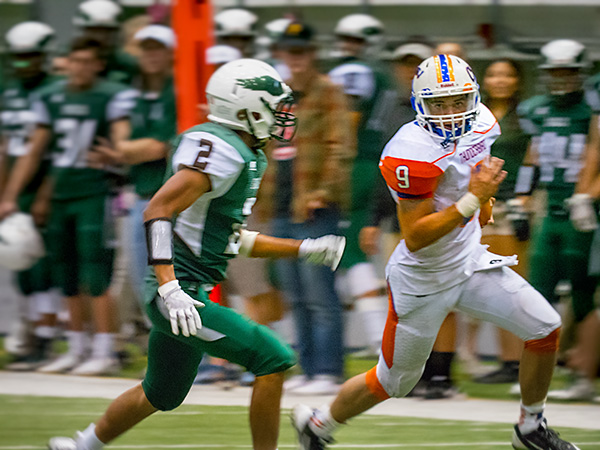
Check the previous post on my first trial photographing sports with the Lumix GH5 and the Lumix G Leica DG Vario-Elmarit 100-400mm lens. This is an incredible combination. In the images shown yesterday, the ISO was set to 6400, and I found some of the photos didn’t quite have the stopping power for which I was looking.
I cranked up the ISO to 12,800. WOW for stopping power, but there was added noise. The great thing is the noise can be handled in post-production pretty easily with reliable results.
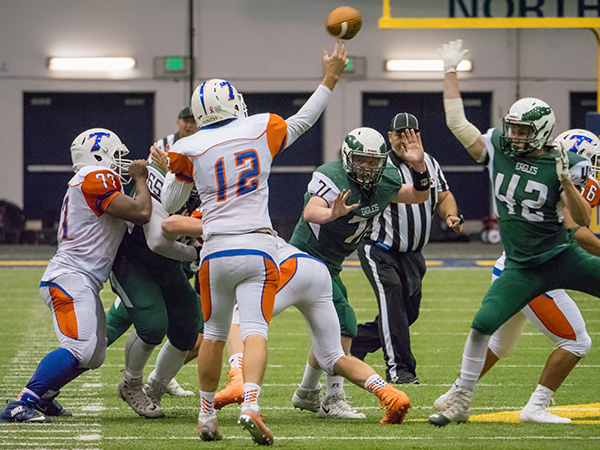
Image photographed at ISO 12,800! Lumix GH5with Lumix G Leica DG Vario-Elmarit 100-400mm lens (200-800mm 35mm full-frame equivalent)
Image photographed at ISO 12,800! Lumix GH5with Lumix G Leica DG Vario-Elmarit 100-400mm lens
Setting the camera to IS) 12,800 gave me enough shutter speed to stop the action. The noise was heavy, but I didn’t find it objectionable because of the lack of anti-alias filter. This makes the noise more like the days of film. It’s a very organic feel.
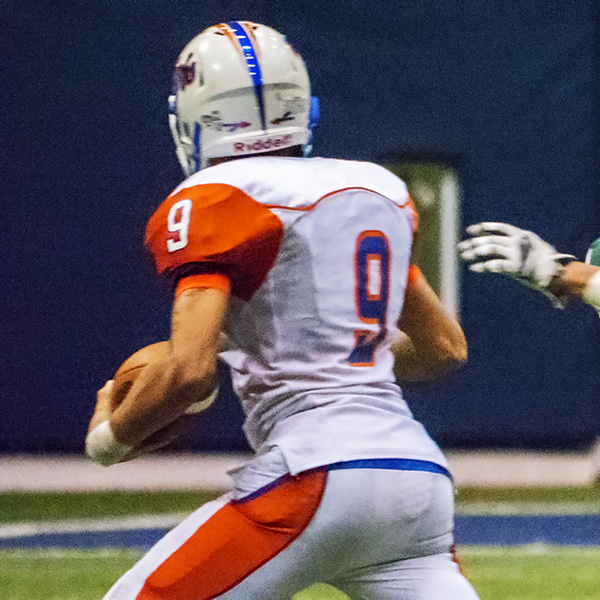
Here’s a small section with the noise from 12,800 ISO. Very organic but possible a little distracting for some.
Here is the same section of the image with MacPhun’s Noiseless CK filter applied. Either image prints well but many prefer the noise reduction version.
MacPhun has changed their name to SkyLux as they are putting together versions of their software for the PC world as well as MAC machines. Here’s a link to pre-order LUMINAR with a discount. See more info below.
Yours in creative Photography, Bob
Luminar 2018 offers everything a modern photographer needs for photo editing, including new filters powered by artificial intelligence, significant speed improvements, a dedicated RAW develop module and a forthcoming in 2018; digital asset management platform.
Users will also benefit from the new intelligent Sun Rays filter, LUT support, and real-time noise removal. With workspaces that match different styles of editing, Luminar adapts to deliver a complete experience that avoids clutter and complexity.
Luminar 2018 has been re-built from the ground up for dramatic performance boosts. Existing filters deliver more vibrant colors and depth in less time. A brand new streamlined user interface speeds up working with presets, filters, and masks. With the full support of pro options like layers, masks, and blending modes, complex repairs and photo composites can be easily accomplished.
Luminar 2018 will be available for pre-order November 1-15, and released on November 16.
Pre-Order Pricing:
Current users of Luminar may upgrade at a special pre-order price of $39 ($49 MSRP)
New users can purchase Luminar 2018 at a special pre-order price of $59 ($69 MSRP)
A collection of bonuses will also be included with every purchase.
Beta testers are eligible to receive an additional $10 discount
Pre-Order Bonuses:
A Pack of signature presets and textures fro pro photography Nicolesy
An Exclusive pack of LUTs
1-Year Power plan from SmugMug ($72 value). For new accounts only
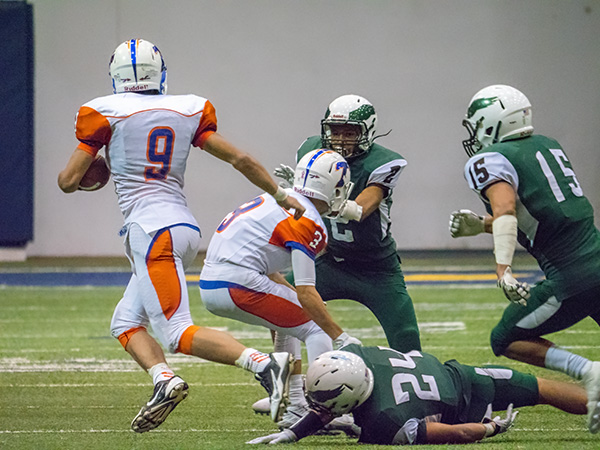
First, let me start this post with the fact that I do not shoot sports on a regular basis. The best photography in any genre, especially fast-moving subjects, comes from practice. Knowing the game and anticipating where the peak action will occur makes a considerable difference in the quality of the images.
On with the post.
With that disclaimer out of the way, I felt that it would be an interesting exercise to photograph a football game under the lights. Karl Mullings (find Karl’s work here), a photographer friend from Flagstaff among others, had been asking me how the GH5 camera would do under the lights with fast-moving action. I only had experience with the camera in low light shooting wildlife so I couldn’t give him a qualified answer. He asked if I would bring the camera and photograph a football game with him.
Off to Flagstaff where there were a couple of surprises in store. Lighting was lower than I thought it would be Due to my inexperience there was a challenge in finding the action. During the first quarter, I found myself missing a lot of shots cutting off the players as they ran out of the frame. I started to get the hang of it a couple of quarters later and here are some results.
Image photographed at ISO 6400 Lumix GH5with Lumix G Leica DG Vario-Elmarit 100-400mm lens (200-800mm 35mm full-frame equivalent)
I was surprised by the reach and handhold-ability of the camera and lens combination. The five-axis in body stabilization, plus the lens stabilization was pretty amazing in allowing a reasonably slow shutter speed while almost stopping action with no camera blur.
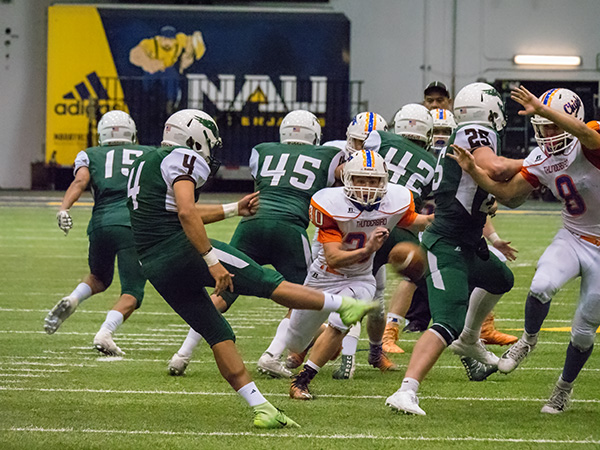
Image photographed at ISO 6400 Lumix GH5with Lumix G Leica DG Vario-Elmarit 100-400mm lens
Image shot at ISO 6400 Lumix GH5with Lumix G Leica DG Vario-Elmarit 100-400mm lens
My buddy Karl, hard at work on the sidelines.
Tomorrow we’ll talk about freezing action even more using an ISO of 12,800 and post processing of images.
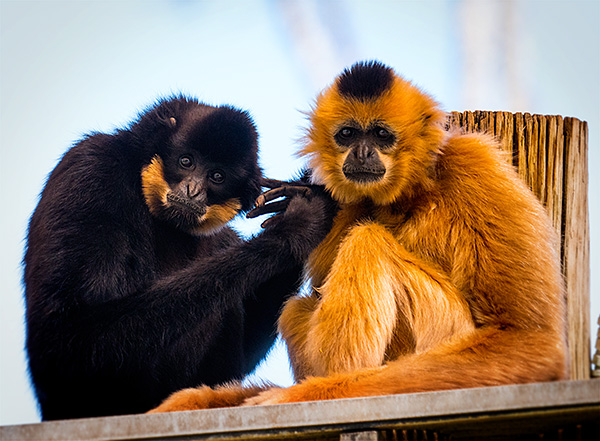
The zoo can be a great place to begin to study animal behavior to help make you a better wildlife photographer.
When I photograph wildlife, I try to get behavior images that I believe have a bit more impact than capturing the animals while they are stock still. The secret to making that work is learning and knowing an animal’s micro-movements that occur just before they are about to do something different. Often you will see a small twitch. A turn of the head or some other indication they are about to move. The only way to see that is to watch intently over long periods of time and patterns will begin to emerge.
Primates in the Phoenix Zoo. I had to be exceptionally patient in waiting for eye contact with these Gibbon (buff cheeked?) monkeys.
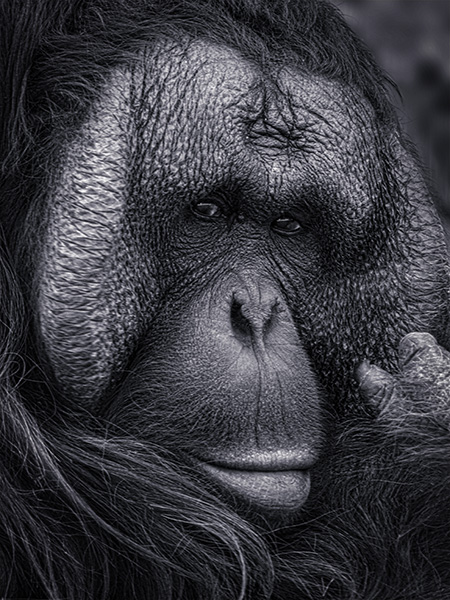
Again, I was waiting for eye position helped make this a more moving portrait of the orangutan. This image was captured at 1/30th of a second handheld with an 800mm equivalent lens. (see my camera notes below)
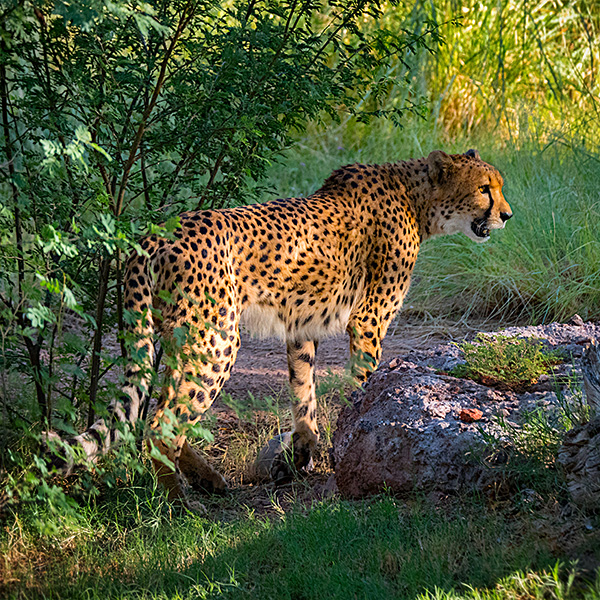
A beautiful animal, the jaguar, looks to another across the pen.
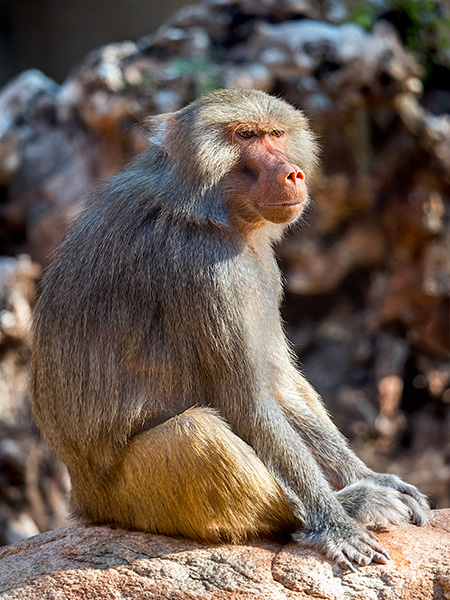
This baboon appears lost in thought. Primates being as close to human expression as you can get in the animal kingdom keep me interested for long periods of time.
One of the things I find extremely helpful in photographing wildlife is a lens with a long reach. This can allow you to fill the frame with your subject. All of these images were made with the Lumix GH5 and the Leica 100-400mm DG Vario-Elmar f4.0-6.3 lens. The five-axis image stabilization and the lens stabilizer working together allow for hand-holding and getting sharp images. The jaguar was at 1/800th of a second. The Gibbons were at 1/320th of a second. If an animal is still such as the baboon, the 1/160th of a second is no problem at all.
The tools we have at our beck and call are kinda amazing and allow us to capture photos that were virtually impossible only a few years ago.
I was always a little hesitant about photographing the sky after dark. Never could quite make it work out. Either the focus was off, or exposures were wrong, or both!
Then it came time for me to start working on those captures as I was jealous of those who were killing it in the night sky photography showing incredible renditions of the Milky Way.
If you have had the same problems let me share some of the things that have made a difference for me.
The focus was often a problem for me. Couldn’t quite get the hang of not being able to see my subject in the dark. Either the foreground was out of focus, or the stars were less than stellar until I put in the time and did some serious testing. Using Panasonic’s Lumix cameras has given me a perfect way to set focus and know I am going to get solid detail throughout the image. It’s quite simple and no need to be on scene before dark to get focus. Yay! See the capture of the back of the camera below.
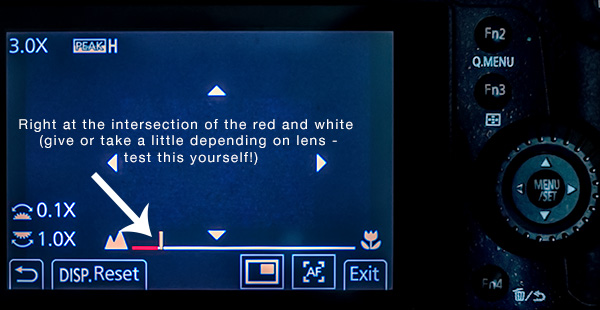
Camera back of the GH5 showing the Manual – Mode focus screen
To get this view set your camera or lens to manual focus mode and touch the focus ring. The assist will give a small 10X magnified view. You won’t need this. Bring your attention to the bar across the bottom. There is a white line that goes from macro to mountain. Just before it gets to the mountain you’ll see a red bar. That’s the sweet spot. Set your focus right in the notch between the red and white portions of the stripe. Done! Test this for yourself.
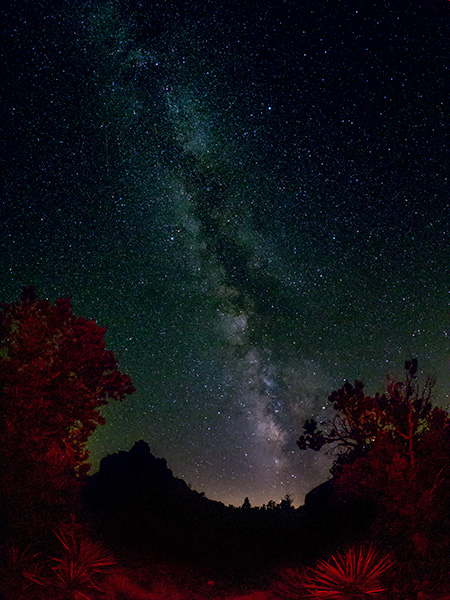
The other important piece of the puzzle is to use the fastest lens available. Having a very wide aperture allows the sensor to be exposed to the most light allowing for lower ISO settings.
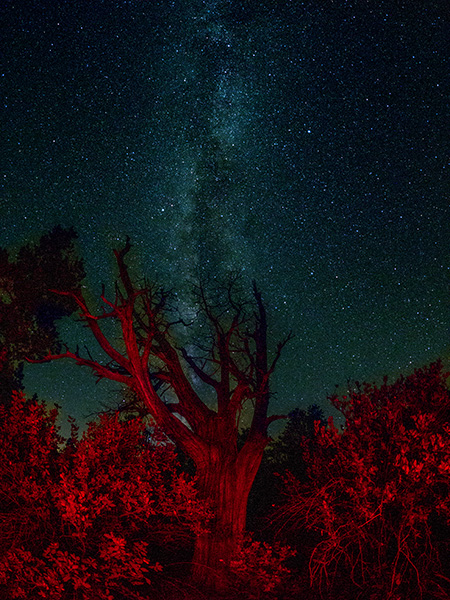
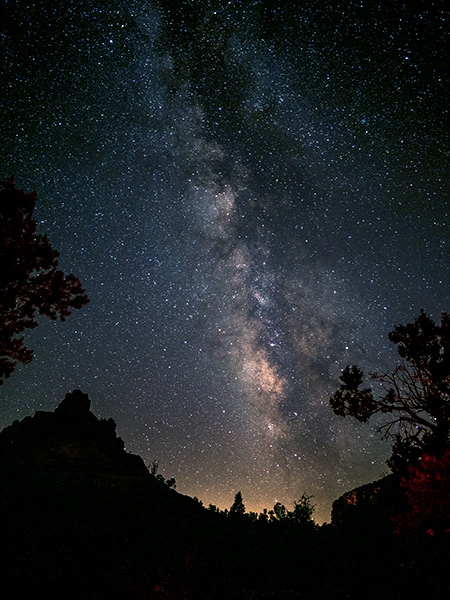
Bell Rock in silhouette to the left with the Milky Way, Sedona, AZ with 12mm Leica DG Summilux f1.4 lens
Images were captured with the Lumix GH5 camera. Lenses listed above.
In another post I’ll share some ideas on post, processing using Adobe’s Photoshop to get the most out of your captures.
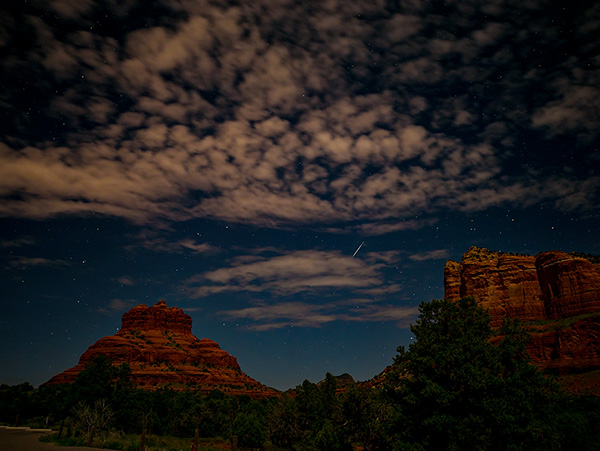
Out for the second night of trying to catch the Perseids Meteor Shower. The largest amount of visible streaks across the sky were scheduled for the early hours of Sunday morning.
Set the alarm for 12:05 AM. Wake up 11:58 PM. Check cloud cover. Looks OK. Dress. Hop in the car. Head to the pre-scouted location at Bell Rock Vista one of my favorite rock venues for photos in Sedona. (partly because it’s five minutes from my house.)
About one minute of time lapse from three cameras.
Note clouds and lightning to the south. Thankful there’s an open to the sky ‘window’ to the north.
Set up cameras. Yes, cameras plural. When photographing images for time-lapse video one thing you end up with is time. Once a camera is set, and recording do not touch, bump or adjust unless you would like to restart the sequence.
Camera one – Lumix GH5 with Leica 12mm Summilux f1.4 lens. This camera and lens combination ended up giving me the cleanest, sharpest files. I set the camera for RAW capture. Note that RAW files can chew up some real estate on your card. Make sure you have a large capacity. **
Camera two – Lumix GX85 with the Leica 15mm Summilux f1.7 lens. This set-up is a great go-to set up for night skies.
Here’s a single still image from the shoot. Processed in Photoshop
Camera three – The Lumix FZ2500 with a built-in 25-480 Leica DC Vario-Elmarit F2.8-4.5 lens. This is best shot at the 25mm setting to keep the f2.8 aperture. As you’ll note in the video, this is the only camera lens that showed condensation toward the end of the sequence. It was a VERY moist and humid night. This camera must generate a little bit of heat as time goes on. In less humid situations I wouldn’t see this as a problem.
A great resource for deciding what exposure settings to use including various camera and lens combinations may be found here. I highly recommend checking out the rest of Ian Norman’s blog Lonely Speck. Lots of helpful info there to set you on the right path. Remember the guide gives you a starting point. You still must experiment to get the most from your experience.
Yours in Creative Photography, Bob
Working on my settings for better quality imagery. Any lack of quality is purely operator error!
** The GH5 has two cards slots and can be set to behave in a variety of ways including to continue recording on the next card when one fills up. Very handy for lots of captures. When not gathering images for time-lapse the cards can be set to be an automatic back-up by writing to the cards simultaneously, RAW files to one card, jpegs to the other, videos to one card and stills to the other, etc. But I digress.
For infrared conversion of my cameras I use LifePixel. Infrared allows you to put an older camera to use and opens up a new time time of day for productive image creation.
Fotopro tripods are well worth checking out. You can learn about the ones I use and recommend by clicking on the Fotopro Tripods link at the top of this page. If you want to see what other tripods might fit your needs check out the Fotopro.com website. Check back with me before you buy as a Fotopro Ambassador I’m able to get you discounted pricing including complementary continental USA shipping for my followers that you won’t find through retail outlets.
Learn Photoshop in a fun environment. Aaron Nace applies the right amount of fun with easy to understand and follow tutorials. Actions and brushes are included with lessons!
Lightning, waterdroplets, sound, time-lapse, HDR sequences, smiles and much more control for your camera!
Cameras Get Smarter -
A High Speed Smart Camera Remote
Best embroidery ever. Give Queensboro a try, get a $20 instant credit to get started by clicking on the logo! They specialize in great quality custom logo apparel and promotional products with the best customer service.
Platypod has become a great resource for being creative in getting your camera gear easily into unusual places. As an Platypod Pro I get to work/play with the gear even before it comes out. Head over to Platypod, subscribe to the newsletter and you will get special discounts reserved only for subscribers.
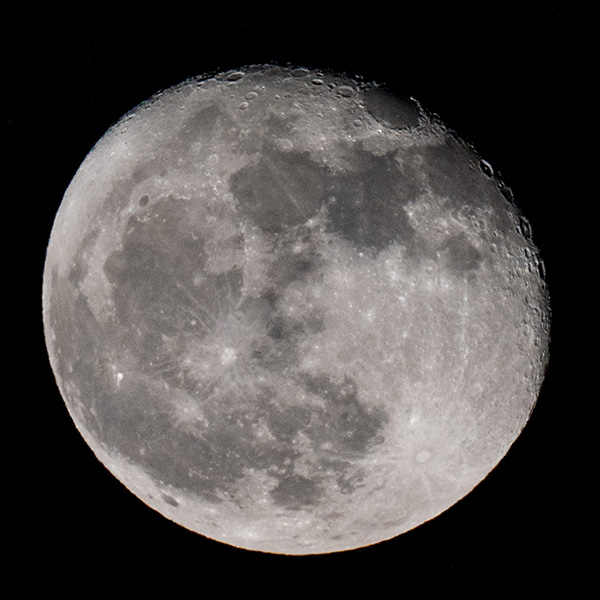 The Moony 8 rule for the lunar surface low in the sky. Lumix GH5 with the Lumix G Leica DG VARIO-ELMAR 100-400mm f4-6.3 LENS
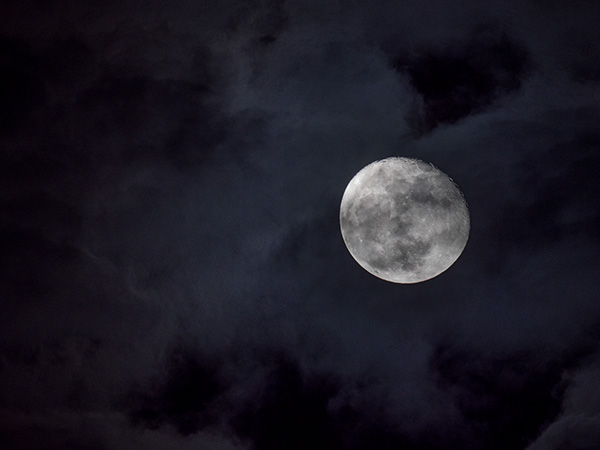 Light clouds crossed the moon and changed the exposure to 1/60th of a second still at ISO 400