by successfulbob | black & white, cloud photography, infrared photography, Lumix G6, Lumix Lounge
Infrared Cloud Images
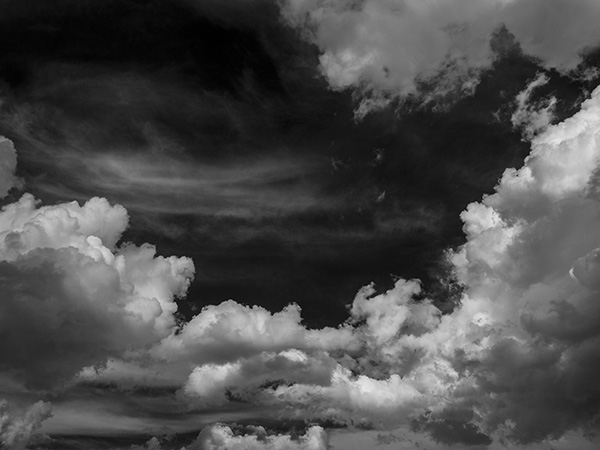
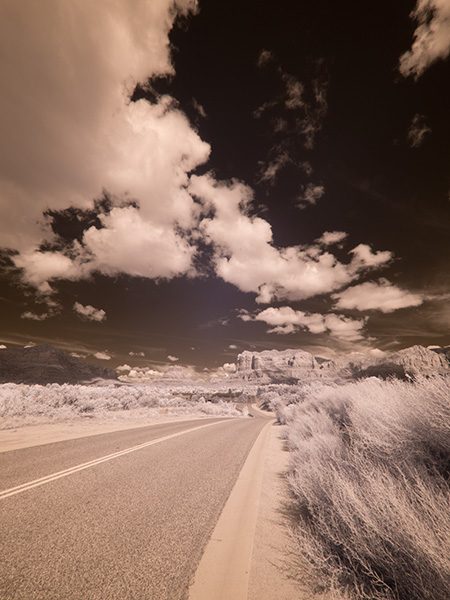
I enjoy the high-contrast look of clouds when photographed in infrared. I use a Lumix G6 with the filter changed out to infrared by LifePixel.
Processed in Adobe Camera RAW
Clouds can have lots of personality when paired with an infrared capture. The high contrast can be a lot of fun. I’m starting to collect IR cloud images just as I have for my regular work. Having a library of clouds can help add interest to art photo composites.
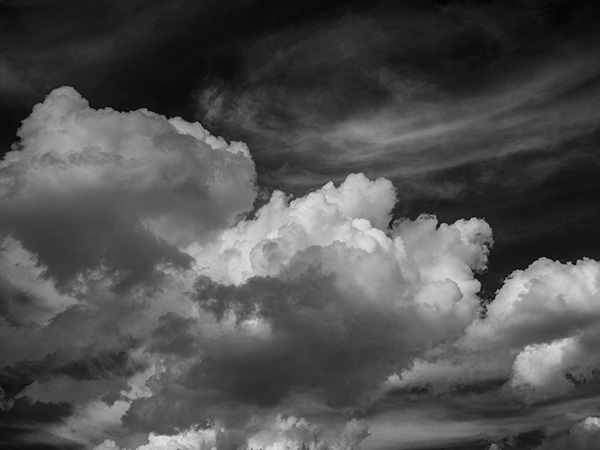 These were taken in Sedona.
I was cooking dinner and looked out of the window and saw the clouds starting to march through the area. They only showed this kind of depth for a few minutes. If you see cloud formations happening, take it ASAP. Usually, if you wait a little bit, or drive down the road a little ways you won’t get what you were looking for as clouds are an ever changing kaleidoscope of shape and form.
Yours in creative Photography, Bob
Save
Save
by successfulbob | black & white, cloud photography, infrared photography, landscape photography, Lumix G6, Lumix Lounge
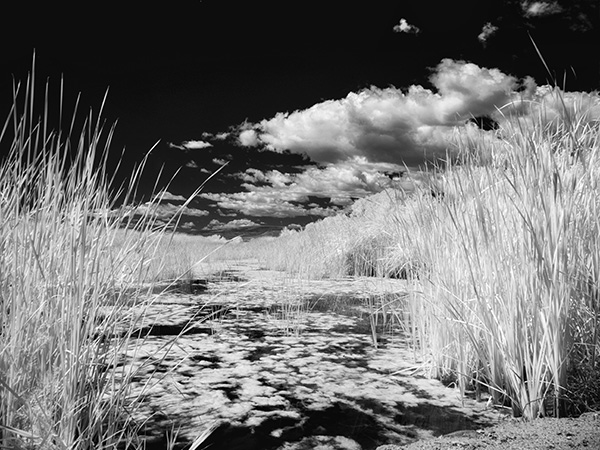
Infrared Image Wetlands Near Sedona, Arizona
The Lumix G6 is coming in very handy now that it is converted over to infrared capture by LifePixel. Midday is not the best time in the world for catching beautiful photos with standard color capture. But move to infrared and the middle of the day is a whole new world.
I was out scouting some new areas to photograph with wildlife and really didn’t think I would be capturing any images but I had the new Lumix GX85 and the 100-300mm lens and had some fun there in spite of the time of day. (check the post here) And I also had the G6 in IR. This is one of the advantages to shooting with micro 4/3rds gear. I was able to have all these options with me with no strain when hiking around and scouting. Used to be I would leave gear behind until I was absolutely certain I wanted to make images. Now opportunity abounds and I’m having more fun and getting more images.
Sedona Wetlands (learn more about them here). Designed land to help with the processing of wastewater while creating habitat for wildlife. There are quite a number of species taking advantage of the new ‘watering holes’!
I’ve started to narrow down my processing of infrared images. I have bee taking the RAW file and lowering the color and tint sliders to 0. Dialing in highlight and shadow to taste. A pinch of Clarity. Add some black. Add some white. Then tweak the contrast. Open the image and take it to NIK Color FX Pro 4 for a little Glamour Glow and we are looking pretty good. Once I am pretty certain this is the processing path I want to take I’ll set up a preset in ACR which will dial in all the goodies to get me close then tweak. When I set that up I’ll share it here on the Successful-Photographer blog. You can see a bit more in-depth info on this IR conversion in this post on LifePixel.
Yours in Creative Photography, Bob
by successfulbob | black & white, cloud photography, infrared photography, landscape photography, Lumix G6, Lumix Lounge
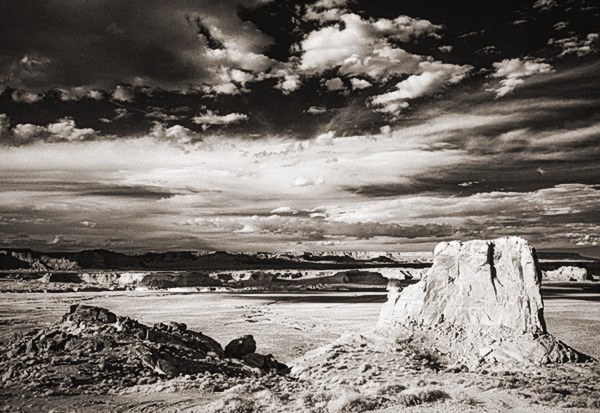
Stud Horse Point Infrared Photography – Page Arizona
Infrared imaging can add interest to a scene that otherwise would be OK but rather mundane. I have a Lumix G6 that I had converted to IR by LifePixel. It’s great to take an older camera that isn’t getting much use and have it converted to Infrared. Or if you don’t have an older candidate that will work you can but up a used camera and have it repurposed.
But why is it good Bob?
Some times of day are just not conducive to solid imagery. Usually, midday is less than ideal for making photos and that is when IR photography can shine especially when there are clouds and or trees in the scene. Here was an example where I wasn’t thrilled witht the lighting. We were hoping for great color in the sunset. You know how that goes. All looks good then falls flat. Rather than come home empty handed I kinda like the outcome of these.
Outside Page, Arizona – Stud Horse Point
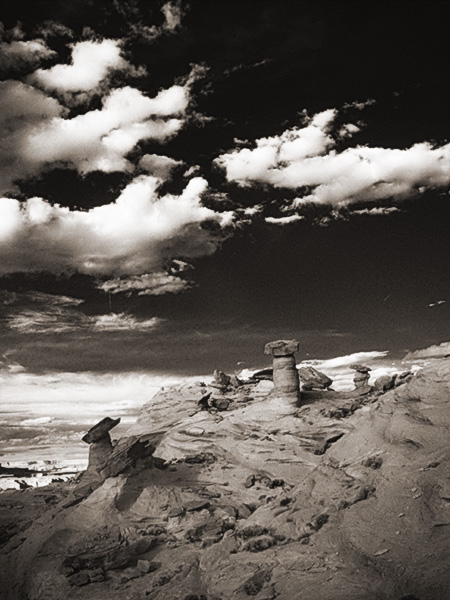 Hoodoos at Stud Horse Point
When capturing IR photos I tend to shoot in RAW + jpeg with the camera set to black and white. The black and white allows me to get a better sense of how the scene will render as the RAW image will come in with a magenta cast. I also bracket exposures as the camera’s meter and histogram are still ‘thinking’ in full spectrum color mode.
I picked the RAW images I wanted to process. Then output them to Photoshop and added some dodging and burning. Then took the image to NIK ColorFX Pro 4 to add some Glamour Glow and a little grain to emulate the look of film IR. As a final step, I evened out the overall color and added a light sepia tone over the image using a Hue/Saturation action.
Yours in Creative Photography, Bob
by successfulbob | 4K photo mode, 4K video, cloud photography, landscape photography, photography, photography software, time lapse
Settings for Time Lapse Video
In a previous post I showed you a finished time lapse video captured from the parking lot of Mariposa Restaurant in Sedona overlooking the red rocks after having lunch there last Sunday afternoon. While having a great lunch we were watching the clouds clear after a bit of weather. And you guessed it, I had to run home and grab my gear. Today I’d like to share some ideas on what settings to look at when thinking about creating your own time lapses.
Depending on your scene and how long you would like to cover it you should decide the space between your image captures. Math comes in handy here and you will start to have an idea of your settings almost by instinct. For example, depending upon the speed of moving clouds I’ve found the interval that works for me is between three & five seconds. The rate that the images should be played back is between 12-24 frames per second. The time lapse in the previous post covered a period of about 40 minutes with 3 second intervals and 24 fps. This translated into a video that was about 35 seconds long. Now not being a fan of that much math here is a calculator that will help you figure things out including how much memory you will need to have in your camera to complete your session.
Time Lapse Calculator
Time Lapse Calculator from PhotoPills. You can download your own for your web site or get the App to calculate while on site. Try it right here you’ll like it!
Lumix Time Lapse Processing Features
A great feature in the Lumix cameras like the GX8 used to capture this time lapse is the ability to process the video in camera choosing from a large number of settings in quality and frame rate. When calculating how much memory you need to have on your card remember you’ll need room to process and store the final video as well. I processed out the video using the 4K setting. 4K is four times bigger than HD video which means you can place it in an HD timeline then have room to pan and zoom which adds a lot to the final product. There are many programs you can use but I used Adobe Premiere Pro CC.
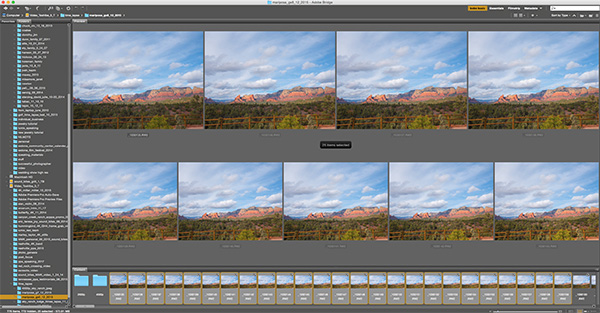 Screen Capture of still files in Adobe Bridge.
I shoot in RAW so I can process the original files for stills or for color tweaking if necessary. Then process out the files into jpegs and use a free program such as Time Lapse Assembler to put your video together. (link for MAC for link for PC. There are plenty of free or freeware programs to choose from. Find the one you like.
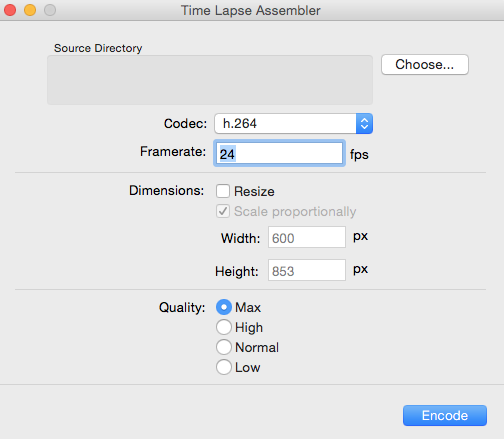 Time Lapse Assembler window. I like it because it’s pretty simple and straightforward!
Shoot longer than you think is necessary. The first couple times out my time lapses were only seven seconds which was a little disappointing. Use the calculator above to save yourself some heartache.
Yours in Creative Photography, Bob
by successfulbob | black & white, cloud photography, infrared photography, landscape photography, Lumix G6, photography education
As you can probably tell by my lack of posting the last few days it has been extremely busy in bob’s world. Had a full two day shoot for the Sky Ranch Lodge after their remodel. I’ll share some photos with you as soon as the processing is done along with some of the techniques I used to get the images.
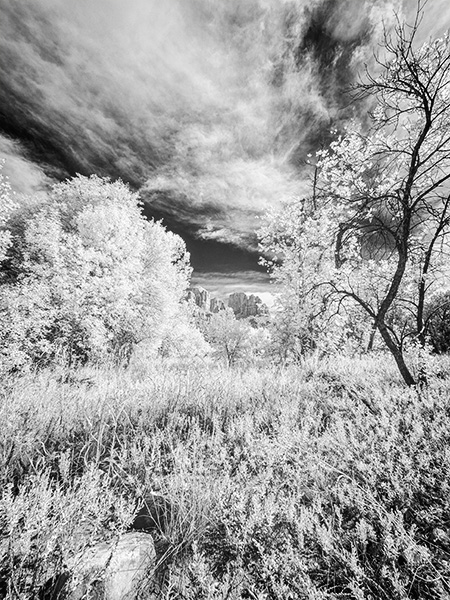
In the meantime, I did have a chance to process another image from my infrared photography. I really enjoy black and white images and the infrared adds another whole new dimension to it. I converted my Lumix G6 through LifePixel with a 750 NM (standard) IR filter. This gives you images that are on the pink side and of course need some processing to get them into final shape of Infrared BW images. As I practice and process more I am able to get a better range of tones throughout the photo.
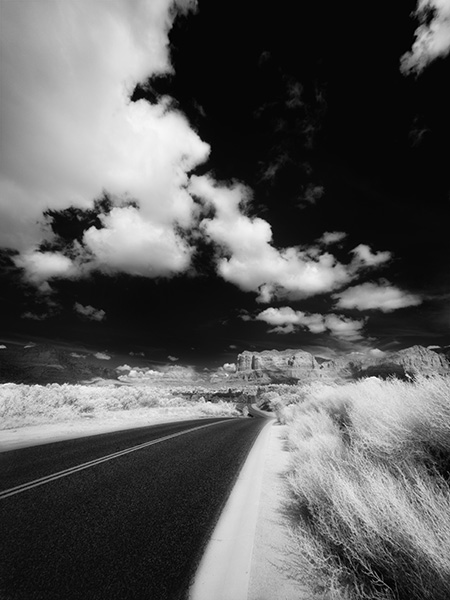
Captured in the Village of Oak Creek, Sedona, AZ. Courthouse Butte is the main rock formation.
Here’s the IR image Straight out of Camera Note the pink cast. Finding I need to underexpose a bit in order to not loose highlights even though the histogram indicates it is with the scope. You have to remember that the histogram is letting you know about visible light not necessarily infrared exposure.
One of the really great things about having a dedicated IR camera is the ability to set recording for RAW + jpeg and have both images to work from in post production. If you shoot only in RAW you don’t get the processing from the camera. I set the camera to capture BW images so I can get a ballpark preview of the scene as I work.
You don’t need to convert a camera to IR you can always go ‘old school’ with a Wratten IR filter in front of your lens. The problem with doing that is your exposure time will be lengthy and focus can be a bit of a pain as IR light rays and visible light focus at a different depth on the sensor so additional calculations need to be made. (although the extended time might be cool for capturing cloud movement!) Might have to pick up an IR filter myself too…
Best part is infrared photography really opens up the mid-day time slot for creatively capturing images as it is usually too much contrast for regular photography.
Are you shooting IR yet?
Yours in Creative Photography, Bob
by successfulbob | cloud photography, infrared photography, landscape photography, Lumix G6, Lumix Lounge, photography, photography creativity, photography education
Live, learn and practice some more.
This is the continuing story of learning to see and capture infrared images with my newly refurbished Lumix G6 camera from LifePixel where I added a straight IR filter to the camera… (see Part One or Part Two)
Photographing with a camera that has had it’s sensor replaced by with an infrared filter makes IR photography MUCH easier than the olden days of film when fogging a roll was easy and focusing not so much. But as with all things photography making it easier doesn’t necessarily lead to stellar results. You still need to learn to ‘see’ in infrared. A helpful tool is the use of photographing in RAW +jpeg. You can set the camera capture mode to black and white The capture is in color AND black and white. If you have what you need and are happy with the ‘natural’ in-camera capture in black and white you are ready to go…
So far I am not.
RAW file to the rescue. As you saw in part two there are multiple ways of addressing the final IR image and many ways to get to the final image you have in your brain. We still have the words of Ansel Adams to fall back on to create a more artistic rendition of a scene. Paraphrasing for today’s world here, ‘The RAW capture is the score, the processing and final print the performance.’ Just as a conductor can get more out of his orchestra but pulling exhorting his individual musicians to do their best we can manipulate each pixel in each color space to give us the tones we desire.
Some of the things I’ve dabbled with…
Two or three different processing pulls from the RAW files for different areas of the image.
NIK Silver FX Pro 2. to convert to black and white and tweak ‘colors’ into the tones I was looking for.
Channel Mixer Adjustment Layer after the file was open in Photoshop.
Black and White Adjustment Layer.
Hue Saturation Adjustment Layers.
And mixing and matching all of the above techniques to taste…
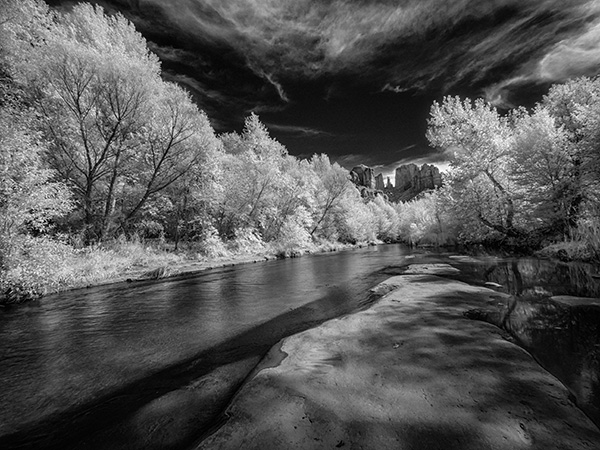
We don’t have a lot of deciduous trees in Sedona, but the banks of Oak Creek lead a parade of trees down from Flagstaff. Having the color information available in the file and Layers and Masks in Photoshop allowed me to create the contrast and tones I was looking for…
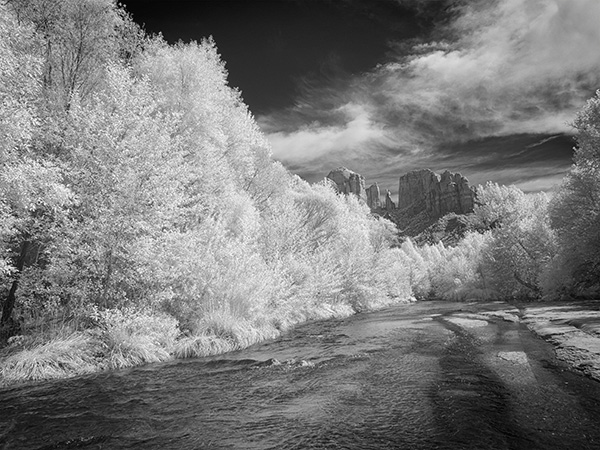
Same scene from a slightly different angle and different processing lead to an image, while still BW IR has a totally different feel than the one above.
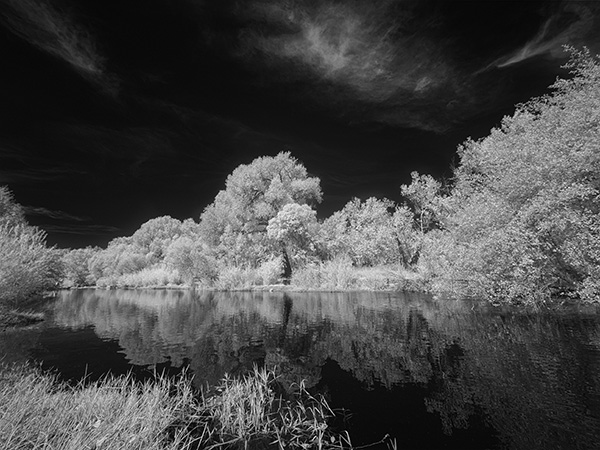
As always don’t forget to turn around… Many times there is an enticing image waiting behind you.
Moving off the creek banks led to this….
I see IR as a great new tool in my quiver. Makes photographing at mid-day very interesting. Can’t wait until I start to learn more about new capture and processing ideas to really push the look.
Yours in Creative Photography, Bob

