by successfulbob | commercial photography, fine art musician portrait, inspiration, marketing, photographer of musicians, photography marketing
This is my seventh year working with an entertainment restaurant. The original relationship was due to a personal project I created and shared with them. A quick recap for those pressed for time will find I photographed a restaurant to learn and practice new photography techniques. I gave the restaurant a framed print. For the full story check out part one on photofocus
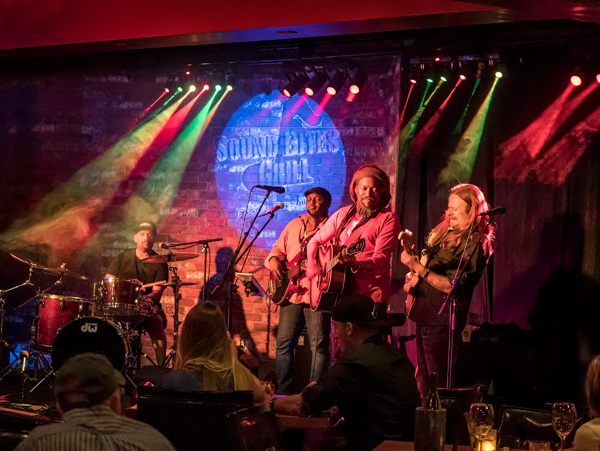
The story continued and involves another personal project involving a musician, which was also shared with the owners. When the owners saw my artwork they decided to feature the bands and other entertainers in more of an artistic style. While making the artistic images I also supply the restaurant with additional photos for publicity, posters, marketing and social media.
The trade deal
It would be very difficult for a restaurant to pay cash for this service as the amounts can add up very quickly, especially in the beginning, when many new performers were being documented. I’m a big fan of win-win situations so we worked out a trade agreement.
Hall of Fame
The Hall of Fame has grown to 130 or so images. I create an artistic rendition of the musicians from their live performance. It would be very difficult to track down people after the fact for autographs. I have them provide their signature and ‘message to the house’ with a black sharpie pen on white paper. I invert the printing from black on white to white on black. Change the Blend mode in Adobe Photoshop to Screen and text will appear white. Viola, I have their ‘autograph’ for the art.
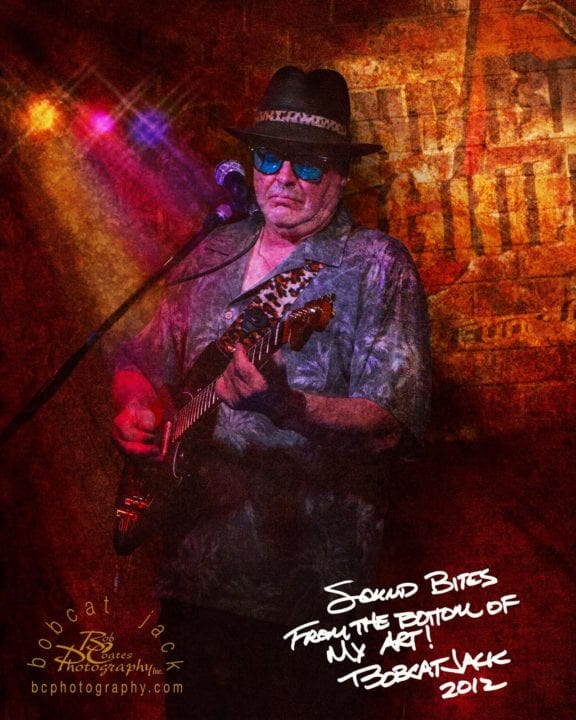
Bobcat Jack: Blues-man with signature and logo art
As part of the deal, art images are printed and framed to 8×10 and hung in the Hall. Additional images are uploaded for the publicity, poster and marketing purposes.
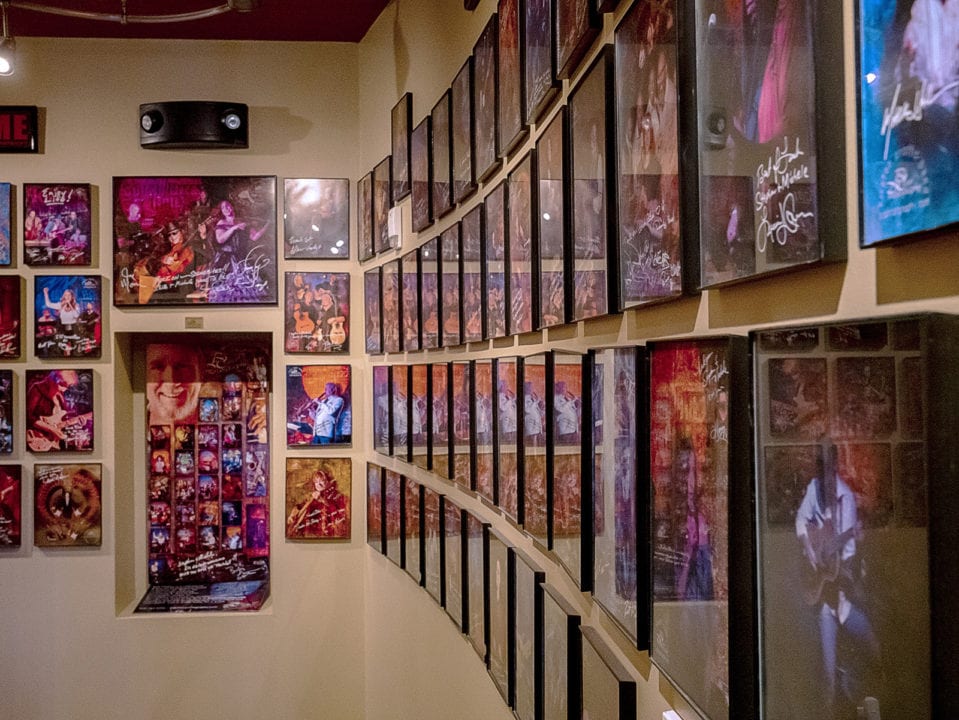
One corner of the SBG Hall of Fame
Additional benefit
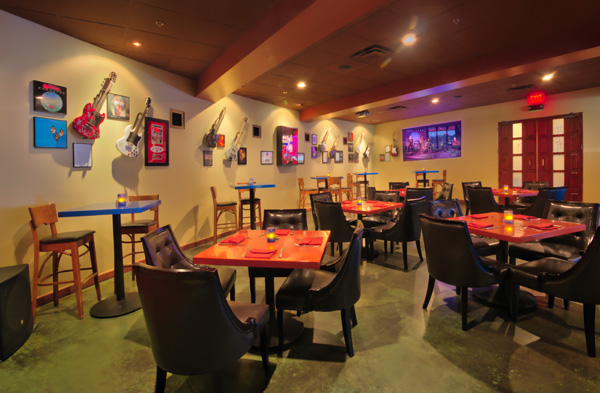
In addition to the trade, each of the images is branded with the Bob Coates Photography logo. A metal print in a niche promotes my story and the Hall of Fame information (look in the back of the Hall photo above). I make this deal out to be not only a win-win opportunity but a win-win-win all the way around!
Yours in Creative Photography, Bob
by successfulbob | commercial photography, marketing, Marketing Monday, photography, photography marketing
Monetizing personal projects is important to me. I’ve found it to be a profitable way to build my business. You can too!
First connection
I made a twilight photo of my favorite local restaurant while experimenting with showing the lighted interior at sunset. I learned the easiest way to make an interesting architectural photo of real estate was to set the camera on a tripod. Then capture images over a time period of 20-45 minutes and blend them together in post.
After this image was made I entered it in the Arizona Professional Photographers Association annual image competition. After receiving feedback from the judges I realized there was more to learn with this technique. While the image did not merit it earned an above-average red ribbon. If that was all I got from assigning and completing this personal project it would have been a winner. But I didn’t stop there.
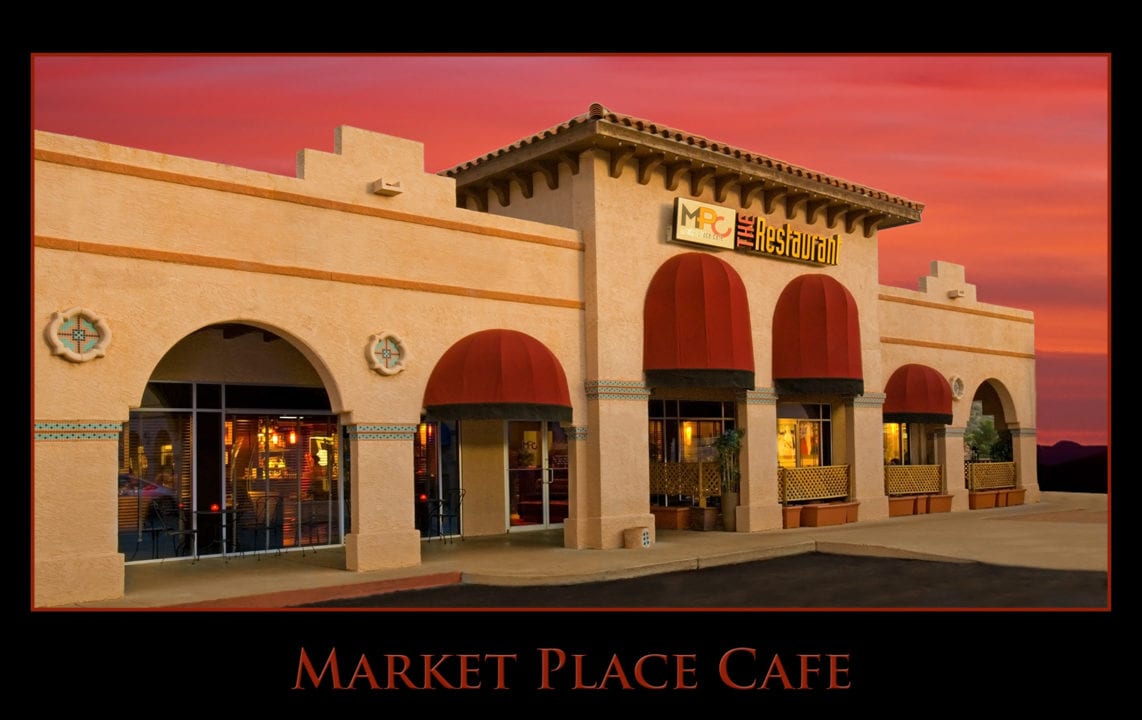
Original personal project image from 2009 that eventually led to lots of work
I framed the print, adding the award winning ribbon and my business card and offered it as a gift to the restaurant. Even though the image had room for improvement the owners loved it. On display in the restaurant in a high traffic area was solid exposure in and of itself. Even more, it helped cement my relationship with them.
New project
Fast-forward about a year and the owners sold this restaurant. I was hired, because of working with the owners in the past, to help promote the renovations of a new space and create interest and excitement for the opening.
We came up with the concept of combining the photos with text. The voice of the owner was used, explaining the thought process of the demolition and decor choices. These were in the form of a set of ‘Polaroid’ photos released over time before the opening party. One example is below you can see more in the extended story on Photofocus.
Additional revenue
I added additional revenue to the project by offering to design customized music inspired metal prints to decorate the niches in the main dining room.
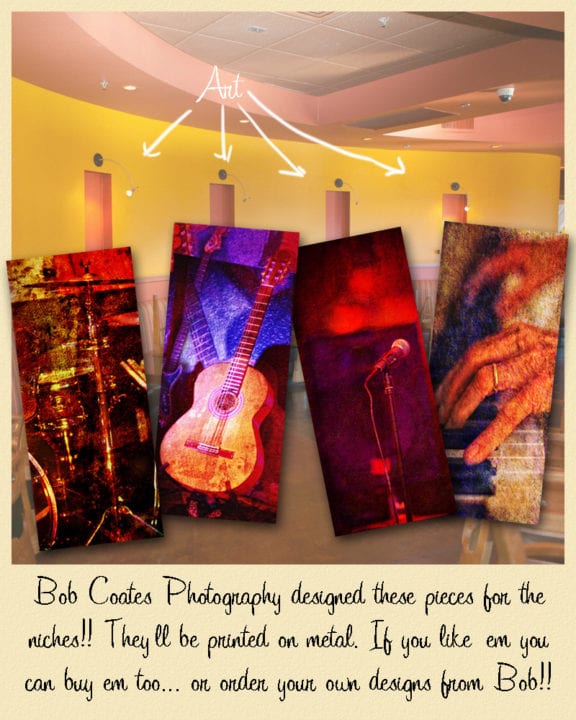
Music niche art images, created specifically for this restaurant
Then it was time to create all the marketing images, which included food, interiors and exteriors with the surrounding red rock views.
To be continued
There were many other images made as you can imagine. It started with making an image on spec and sharing it with a potential client. This story continues in part two where there is cross-pollination with a previous personal project involving the musician. More details on my Photofocus blog post.
Yours in Creative Photography, Bob
PS – See part two of this post here
by successfulbob | commercial photography, Lumix G9, photography, photography creativity, photography education, photography gear, photography lighting resources
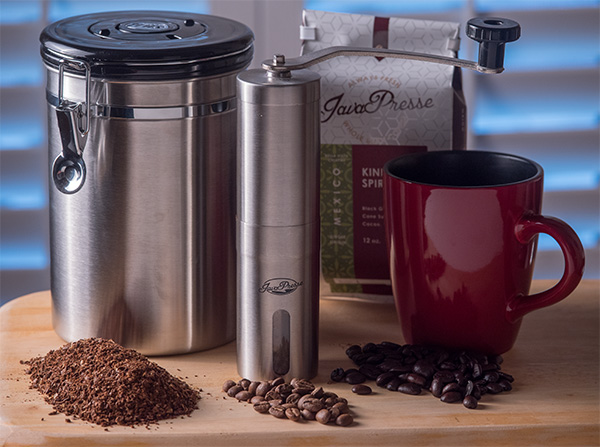
Java Presse – Coffee Shoot
The Genesis of a Commercial Shoot
Not quite ‘nectar of the gods’ but I’ve found some serious joy in my morning coffee. It was a gradual process to see the pleasure I now have in the morning ritual and enjoyment of grinding beans, brewing and enjoying coffee.
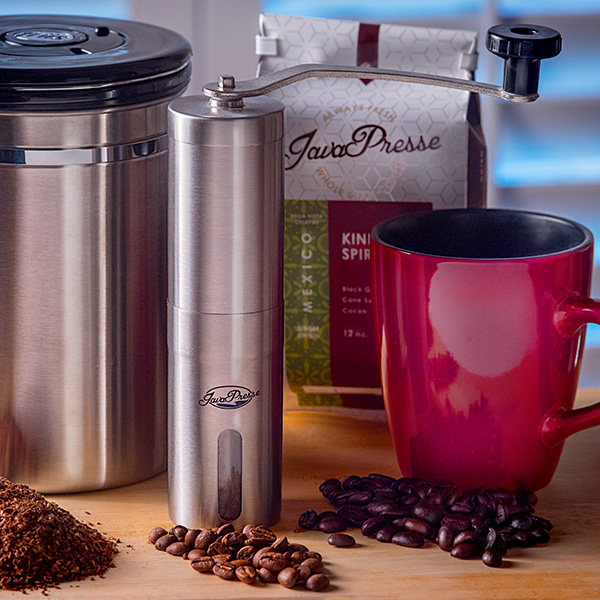
Java Presse Coffee image square format final crop
It started with some friends showing the benefits of grinding beans for French Press coffee. Good stuff.
I found myself getting frustrated with the ‘static cling’ that was generated by using an electric grinder that had a plastic bin for catching the grounds and left little trails of tiny grounds scattered along the counter. This led to looking for a mill that had a stainless steel basket. Research showed that prices were more than I wanted to pay. Which turned out to be a good thing! Because that led me to the stainless steel coffee grinder from Java Presse.
The grinder led me to lots more information about the whole process of roasting coffee, the freshness of the beans and proper preparation for the French Press that I use. Thanks to Java Presse the entire experience has turned my morning coffee into an enjoyable ritual. And who knew that freshly roasted beans, ground fresh just before brewing could make such a difference.
I’m a coffee convert.
Photography Process
And, now on the photography section of the making of a commercial image of the product. You can see the final photo at the top of the post above. Below is how the photo was built.
Good, solid commercial images should look effortless and clean. It takes a bit more to achieve the look. I make this happen by creating several images with different lighting patterns which are later combined in Adobe Photoshop. This comes in handy for items that have different levels of reflectance such as the stainless steel of the grinder and coffee storage container as well as making sure logos are readable.
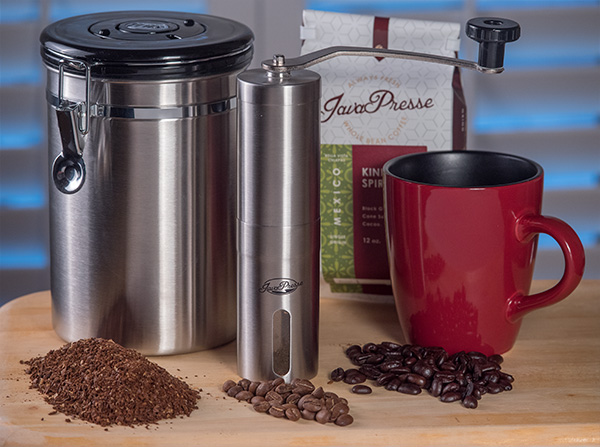 Note the harsh light patterns in the metal especially the one crossing through the logo on the grinder
 Using a reflector I reshot the scene to give more pleasing light on the stainless steel, but now the reflections that give the image life are gone
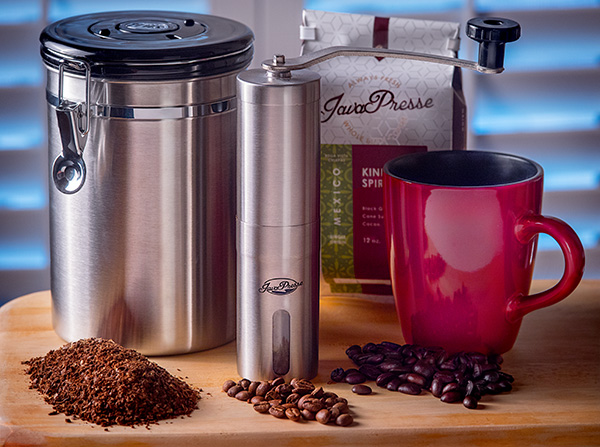 See the difference between the two blended images. Logos are a much easier read, and there are highlights right where they are needed without distraction
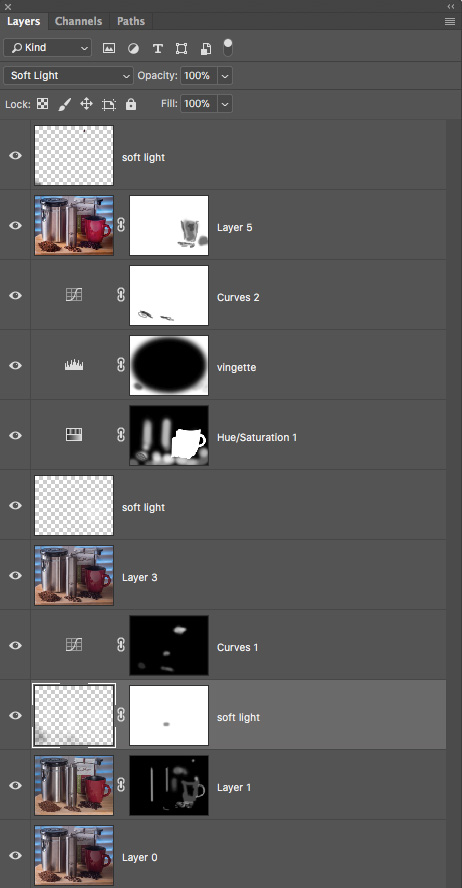 Photoshop Layers Palette is showing some of the work with Masks used to help create the final image.
I also used Skylum software (formerly MacPhun) software called Focus CK. CK stands for Creative Kit. It is a very handy sharpening and blurring tool for directing attention where you want. I often use the ‘Macro’ setting on its layer and mask in what I need.
Yours in Creative Photography, Bob
PS – Here’s the gear I used in this shoot.
2 Fiilex LED lights with softboxes
Lumix G9
LUMIX G X VARIO LENS, 35-100MM, F2.8 ASPH
White foam core panel
Posing table
Tripod Necessary for keeping images in registration for compositing the lighting
Ball head for tripod – Siri Model K-20X
by successfulbob | commercial photography, Lumix G9, photography, photography education, photography gear, photography software
Tether the Lumix G9 Camera
I was working on a commercial job photographing product for the Crystal Magic website today. I’ve got to tell you the tethering experience with this camera was sublime. I know that is some pretty intense emotion for working with a camera. But, if you’ve worked with other systems that don’t hook up quickly to the computer or drop the connection in the middle of a shoot, numerous times, you know exactly how I feel.
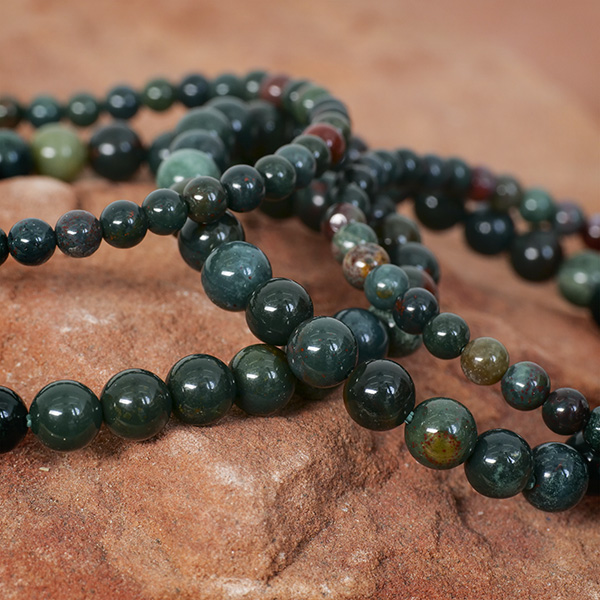
Here’s one of the finished beauty shots of the bracelets showing the detail and closeup color.
I’ve been shooting with this set-up for a while and realized I hadn’t shared the ease of this and how wonderful it is when you are working on set with a designer or other creative. When they can see exactly what is happening with the live view, it speeds the setup time immensely. And, then immediately see the finished exposure seconds later, while moving RAW files, well what can I say? Wahoo!
I was working with Molly from https://www.crystalmagic.com, and we were shooting a large number of bracelets that needed multiple shots of each. With Molly getting confirmation on each Item and angle as we worked it sped up the process immensely.
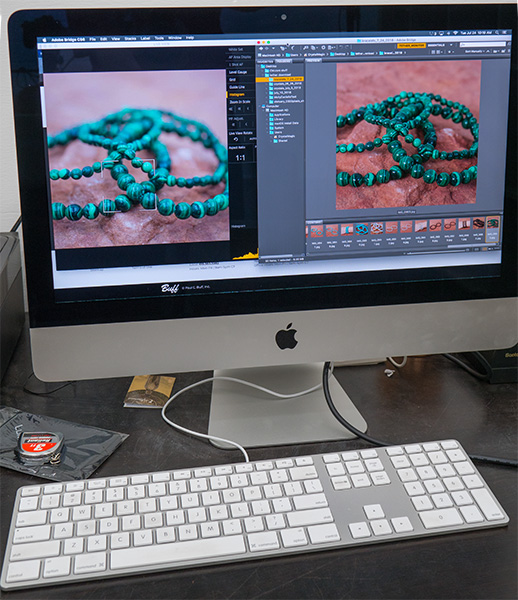 Screen showing Live View from the with Adobe Bridge on the right with the captured photo
With the free download of Lumix Tether which you can get with Lumix G9 camera ownership, you can control the camera, use Live View and move images to your computer in a snap via a USB cord. I shoot to a folder on my desktop and link Adobe Bridge to that folder. When an image is photographed, you can see it almost immediately.
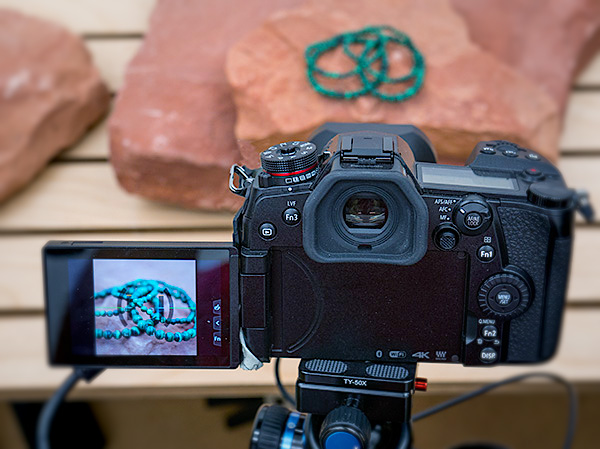 Lumix G9 on set. Note that the camera is set to show what the image will look like in a square format.
All images on the website are to be square aspect ratio. The camera is set to show that to make it easier to determine composition. It’s a great feature, but in case you want to view the entire image in 2/3 or 4/3 format after the fact you can strip away the crop and see all of the photos, but only if you shoot in RAW. If you shoot in jpeg, the crop factor is baked into the file.
In a couple of weeks I will be doing a video on the full use and ease of setup on the G9 and Lumix Tether system.
Yours in Creative Photography, Bob
by successfulbob | commercial photography, LumixGH5, people photography, photography, photography gear, photography lighting resources
Go Pet Friendly – Part Two
Here’s a follow-up to the post from the other day about shooting an author’s photo and some support images for a book project. Amy Burkert and her husband Rod are on the road searching and researching pet friendly travel venues and a book is being written about traveling with pets as an addition to the Go Pet Friendly website
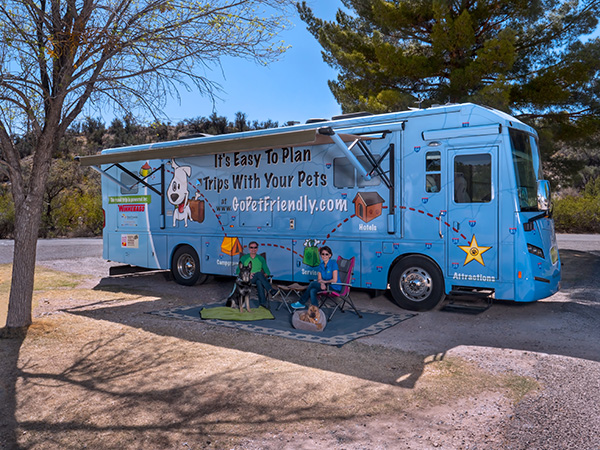
One of the images was the whole crew and the thirty-seven foot Winnebago with which they travel the country. Lighting conditions were a bit on the contrastly side with high sun and shade under the awning.
Go Pet Friendly home on the road and the family that lives there.
I used two Paul C Buff White Lightning X-3200 lights to control the contrast of the scene. The main light was fitted with a thirty-six-inch Octabox and the other was used for fill with a thirty by sixty inch foldable softbox camera right. A couple of braketed exposuers were made to get a lighter exposure on the tree that was in shadow to bring back some detail that would have blocked up otherwise.
The lights were powered with Paul C Buff Vagabond Mini battery packs. Portable power comes in very handy on location as it keeps from dealing with cords. It makes it easier to position lights exactly where you would like them to be.
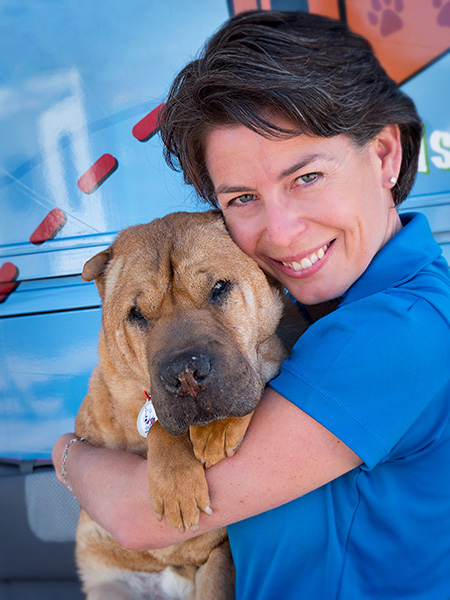
Amy also wanted to show off her ‘children’ Ty and Buster.
 Amy and her dog Ty pose for a portrait
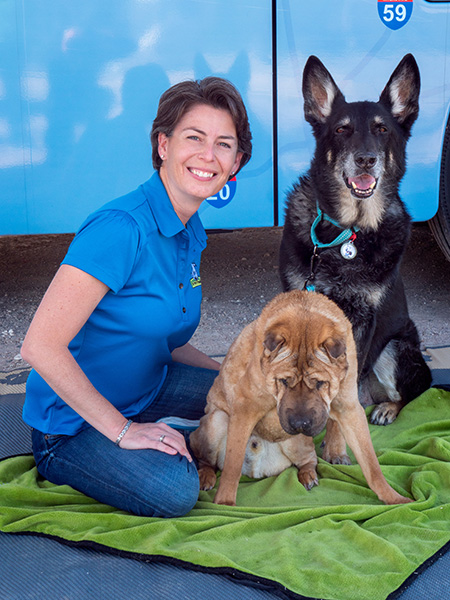 Amy, Ty and Buster pose in front of the RV
Images captured with the Lumix GH5 and the Leica 12-60mm G LEICA DG VARIO-ELMARIT PROFESSIONAL f2.8-4.0 lens
Yours in Creative Photography, Bob
by successfulbob | commercial photography, lighting, LumixGH5, photography lighting resources
Go Pet Friendly – Book Session
I don’t often share my commercial work on Successful-Photographer. I probably should.
So I will.
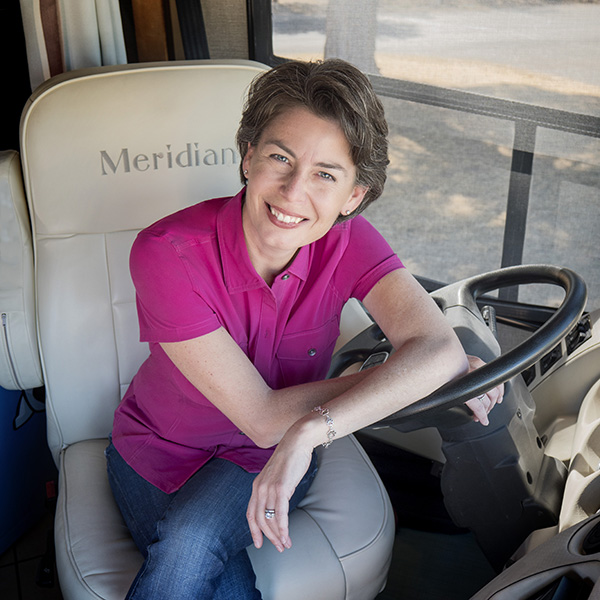
I received a call from a pleasant voice asking about a photography session for a book cover. Images needed would include an RV, two people, and two dogs. The owner of the friendly voice is named Amy Burkert. She and her husband Rod have been on the road for about six years traveling the country in an RV, looking for pet-friendly places and sharing their findings via their blog https://blog.gopetfriendly.com
The main photo Amy for which Amy was looking was her back cover author’s image. Especially for the book, she has written, the image should make her appear open, friendly, and inviting while telling a bit of her story. I always ask plenty of questions before coming up with a plan for the capture.
What is the layout of the book? Do you need a horizontal or vertical photo/ Have you considered your wardrobe? What background would you like to have, studio or environmental? What story do you wish to convey?
Amy at the wheel of the thirty-seven foot Winnebago
After all the questions were answered, we ended up with Amy behind the wheel as she does most of the driving while they are on the road. There wasn’t a lot of room for supplemental lighting which made me reach into my bag for LED lighting bricks from Fiilex. With three of the bricks, I was able to add some fill light and get some background separation. These battery operated lights are color and brightness tunable and can be tucked into tiny spaces.
I choose a high angle from which to shoot to enhance Amy’s friendly and open feel. When the subject is looking up in an image it makes the viewer feel they are looking down on the person. It didn’t hurt that the camera likes Amy and she was entirely comfortable in front of the camera.
I supplied a horizontal and a square version of Amy’s portrait. Additional support images were made of the RV with Rod and the rest of the crew including the two dogs Ty and buster which I’ll share in a future post.
Images were made with the Lumix GH5 and the Leica 12-60mm f2.8-4.0 Lens
Yours in Creative Photography, Bob

