by successfulbob | landscape photography
Edge of light
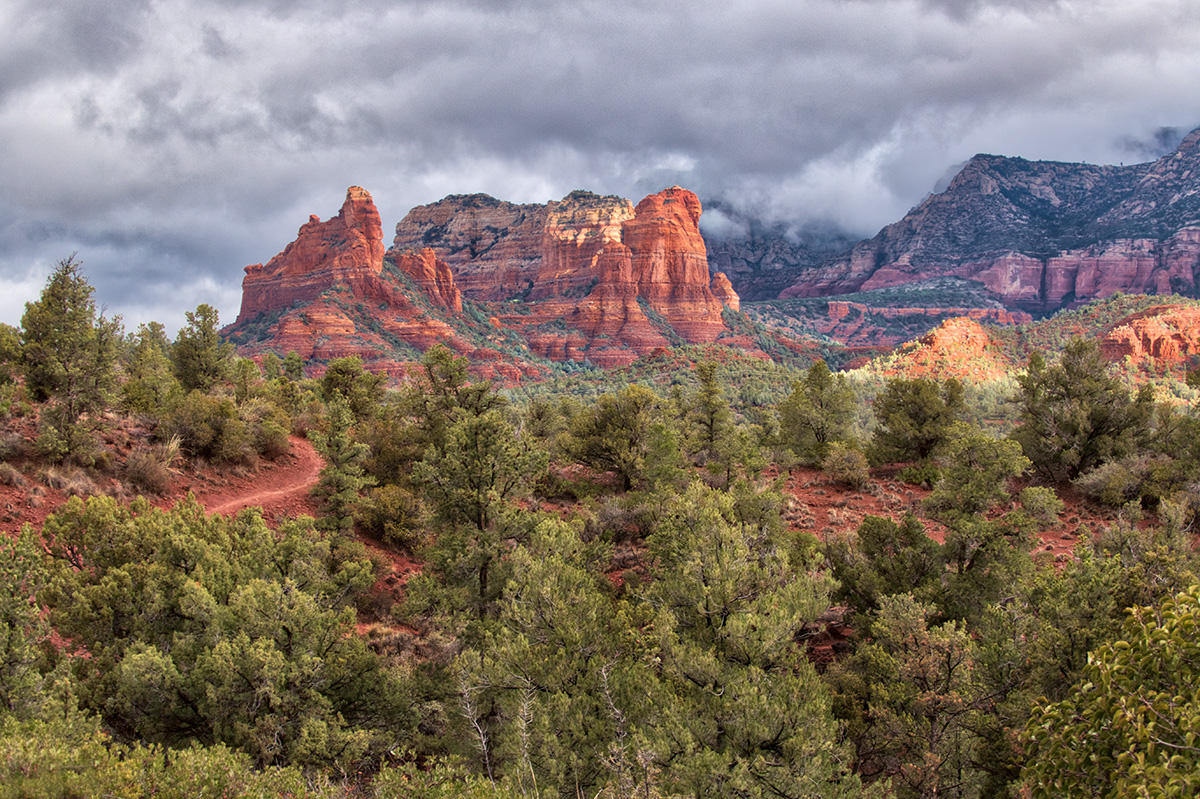
Living in Sedona, I have been privy to lots of beautiful changing scenery due to changing light conditions. The most interesting images happen on the edges of light when sunrise or sunset occurs. Or, when you find the edges of light where light spills through a window or under an overhang. Storms arriving or clearing are often wonderful ways to capture a different look.
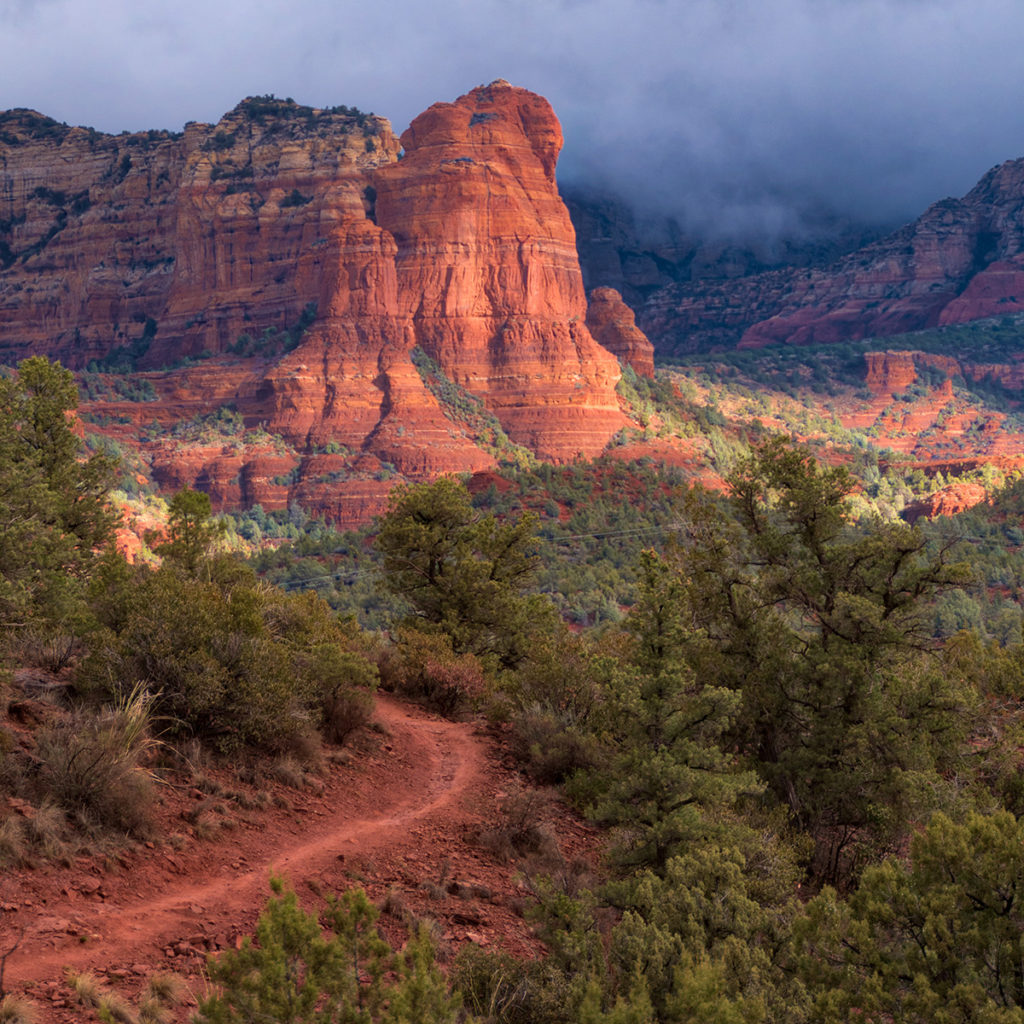
Red rocks with a square crop. A path leads into the scene from the corner.
Car camera
Light as this is often fleeting in a landscape. I always keep a “car-camera” available for moments such as these. It’s a Panasonic Lumix FZ2500 — an all-in-one camera that can go from 25mm wide to 480mm zoom. It has lots of features including the ability to capture up to seven stops of exposure on a single button push (and can bracket focus as well, but that’s another post).
Different landscape compositions
Photographing a scene can be composed in many different ways. And, each individual way tells a slightly different story of the scene. I’ve found over the years that whatever grabs my interest in a passing landscape is just a starting point and any car stop should include exploring the area just a bit more.
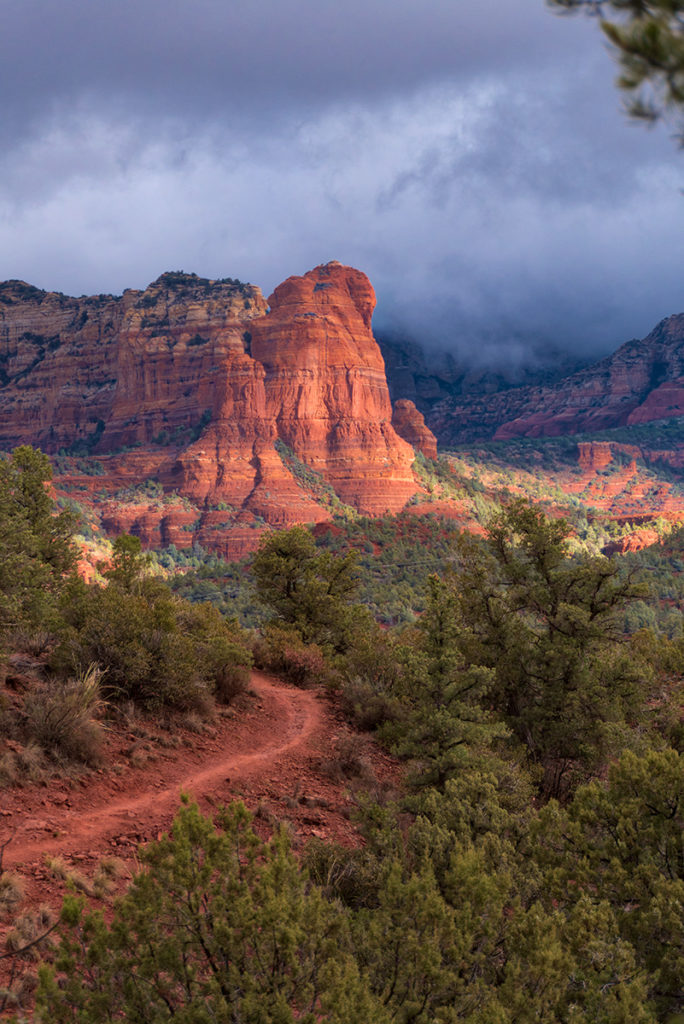
A vertical crop gives an entirely different feel to the scene.
Learn more
I wrote a bit more in-depth on this subject on the Photofocus blog. Learn more here.
Yours in Creative Photography, Bob
by successfulbob | Guest Post, landscape photography, Lumix G9, photography, travel photography
Travel in China – Xi’an – Part Two
Guest Post – Ken MacAdams
Ken’s continuing images and stories from Xi’an, China. See the last post here.
“For this blog edition, let me introduce you to some background of this interesting locale.
 This is Fengqing Park, one of the many beautiful parks within the city.
It’s a quiet place where the locals come from dawn to dusk.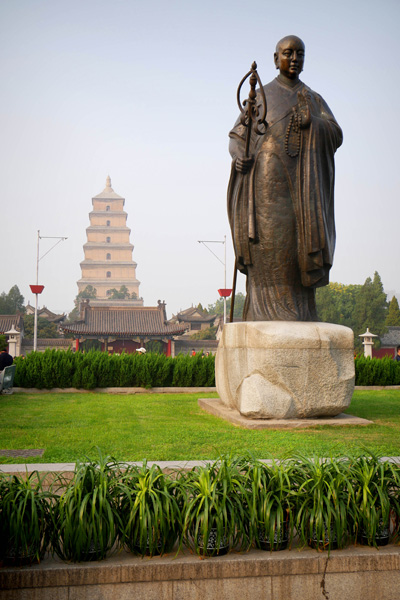 Wild Goose Pagoda with the statue of the monk credited with bringing Buddhism to China.
 Woman dressed in Period costume at the Little Goose Pagoda.
In the history of China, Xi’an has played a large and significant role – one that stretches longer in time than perhaps any other city in China. It acted as the capital of China for over 1,100 years, and has never fallen out of importance. Archaeological and art discoveries in and around the city tell a tale of China’s development from prehistoric times until the height of the imperial period. Many tombs and sites remain un excavated to this day. Xi’an is geographically located in the center of present day China.
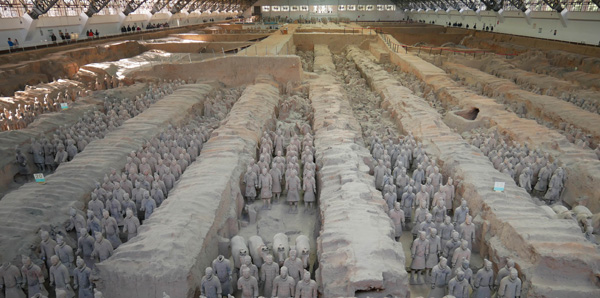 Pit 1. This is the first pit that was discovered and where excavation began.
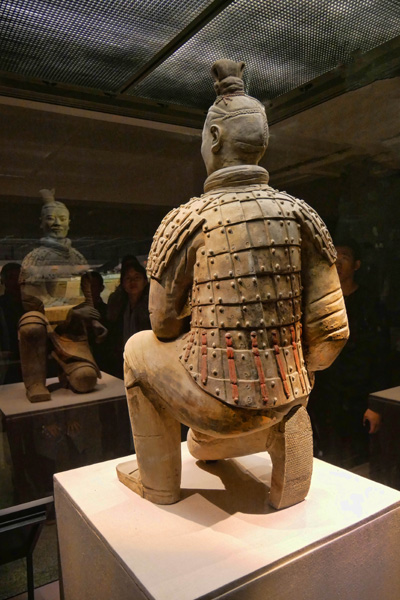
It is estimated there are 6,000 soldiers buried here.Note the armor detail and remaining paint pigment. The sole of his shoe even has tread detail!
Xi’an lies on the Wei River in the Shaanxi Province, and served as capital at different times for the Zhou, Han, Sui, and Tang dynasties. The origins of Xi’an can be traced to the 11th century BC, when rulers of the Zhou dynasty founded a city about 10 miles from present day Xi’an. In 221 BC the King of Qin conquered the other feudal kingdoms in the region to become the First Emperor. During his rule, he extended various sections of the Great Wall to keep out the fierce northern tribesmen, but perhaps more notable was his standardization of the Chinese written language, coinage, and weights and measures. It was Qin who was responsible for another of the greatest wonders of the ancient world – his army of terracotta warriors.
 This is the bronze chariot for the Emperor. It weighs almost 2,000 lbs., and silk fabric was found inside.
 More from Ken’s adventures next week!
Ken has always loved to travel, so when he made a common connection with the fact that either a long day pounding the streets of some foreign city, or shooting the last dance at a wedding, a good part of his physical

weariness came from lugging around his big heavy DSLR. That’s when he started looking at alternatives – and ended up selecting Panasonic Lumix Micro Four Thirds gear.
Ken is rarely without a camera, and the next great photo travel experience – whether local or abroad – is always in the back of his mind! A longtime resident of the Four Corners, and when he’s not out on the road, he enjoys some of the great outdoor opportunities found there – mountain biking, hiking, and Jeeping.
by successfulbob | cityscape photography, Guest Post, landscape photography, Lumix G85, travel photography
Travel in China – Xi’an
Guest Post – Ken MacAdams
Ken has been traveling in China and settling in for long periods. His last visit was for quite a while in Xi’an. Enjoy his images and commentary.
“I’ve been in Xi’an for nearly two months now. Living like a local has great rewards. In my apartment complex, I play on the jungle gym with the little kids (who come running and squealing to me – babbling away in Chinese that I can’t understand) when they spot me walking by! I go to the local street market to purchase my fruits and vegetables with my neighbors. I ride the bus with university students, businessmen and secretaries going about their daily lives. And nothing is more rewarding than the toothless old granny who bursts into a smile when I say “Neho” (hello) as we pass on the street!
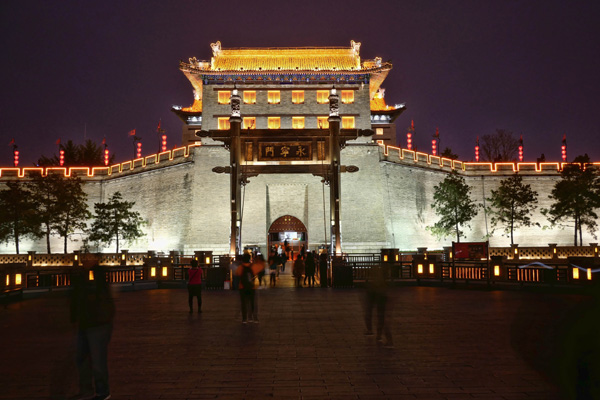 The drawbridge over the moat with the archers tower behind.
This wall is the only ancient city wall completely intact in China. This is one of the archers towers over the drawbridge. Besides longbows, they had crossbows capable of reaching 1/4 of a mile. It would have been deadly to try to gain entrance uninvited!
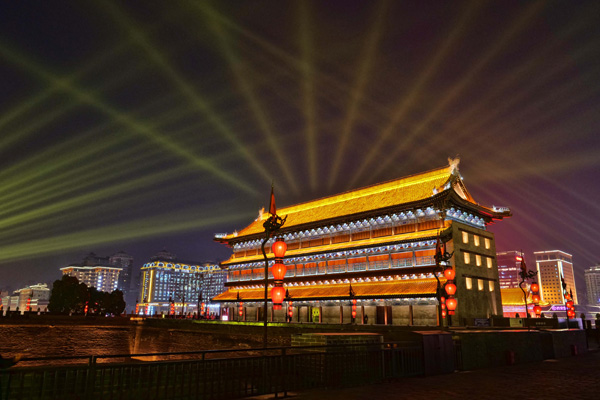
The lights at nighttime are magic!
As a tall Westerner, I stand out, but I find the Chinese people very warm and welcoming, even if there is a huge language barrier! The “translator” app on my phone gets a daily workout, but many of the younger folks have studied some English, and although bashful about using it, they’ll often come to my rescue!
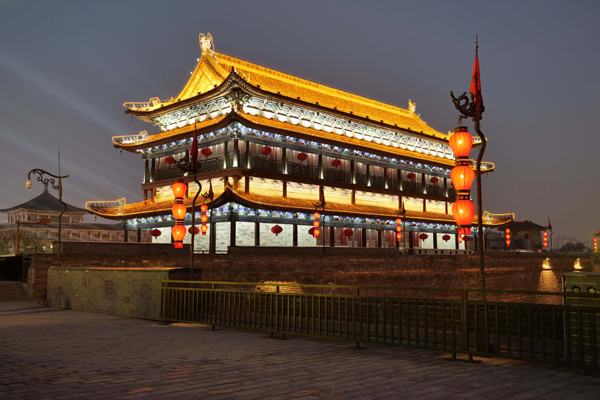 This is a temple on the ancient wall.
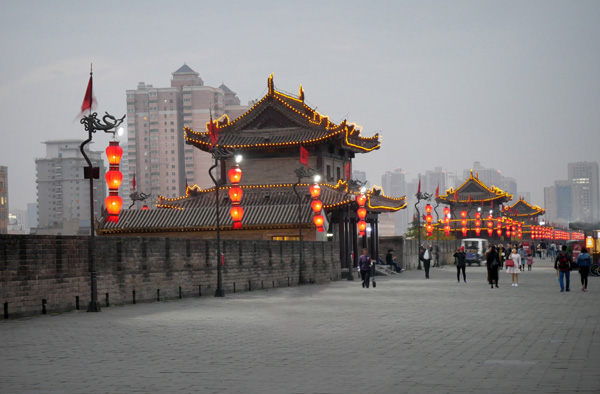 Guard towers stationed along the top of the wall. Note the smog in the atmosphere.
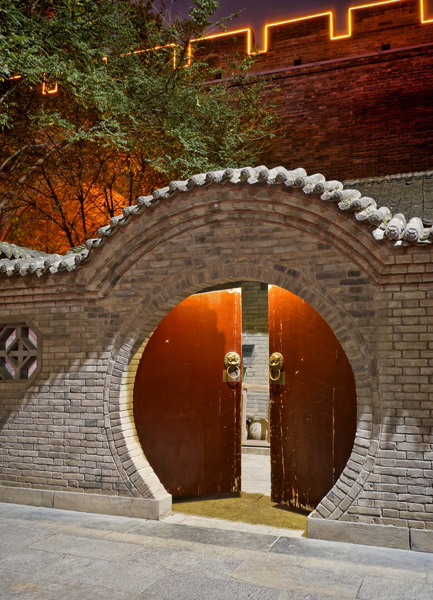 Entrance way along the wall.
 Although I concentrate most of my time in Xian, I travel out to photograph in provinces to the east and west. China continues to expand routes serviced by their high speed “bullet” train, the futuristic aerodynamic trains that travels at 200 MPH. Travel between major cities is quick, quiet, and competitive with air travel. To me, traveling on the train, is just part of “living like a local.”
More from Ken and Xi’an, China Next Friday!
Ken has always loved to travel, so when he made a common connection with the fact that either a long day pounding the streets of some foreign city, or shooting the last dance at a wedding, a good part of his physical
weariness came from lugging around his big heavy DSLR. That’s when he started looking at alternatives – and ended up selecting Panasonic Lumix Micro Four Thirds gear.
Ken is rarely without a camera, and the next great photo travel experience – whether local or abroad – is always in the back of his mind! A longtime resident of the Four Corners, and when he’s not out on the road, he enjoys some of the great outdoor opportunities found there – mountain biking, hiking, and Jeeping.
by successfulbob | infrared photography, landscape photography, Lumix G6
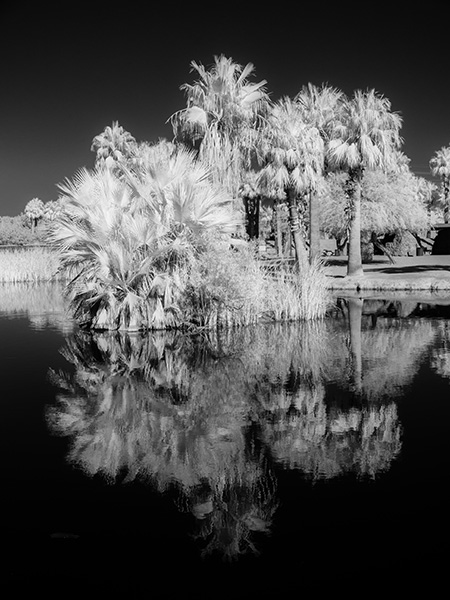
Papago Park, Phoenix Arizona
Infrared Imagery
When the sun is high in the sky, and the contrast makes for images that would be too ‘eh’ for making regular color photos it’s time to break out the infrared camera. Infrared is soooo much more natural to capture with a digitally converted camera with Live View. The Live View allows you to see in real time how the image will look in black and white. This is a massive thing as even to try to focus when we were capturing Infrared photos in the film days your filter had to be so dark that you would need to remove it to focus. AND, there would be an adjustment that you had to apply because IR capture focused on a slightly different plane from your regular focusing.
Enough about the past hassles of IR capture here are a couple of images I made yesterday at Papago Park.
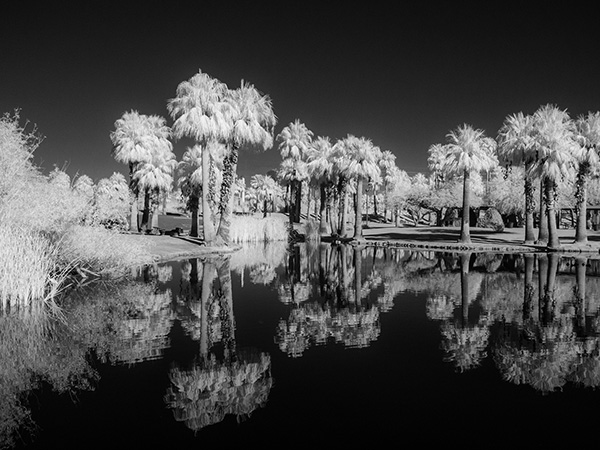 I quite enjoy the high contrast of the water and sky with the light palms
The IR converted camera file initially comes out a magenta file, so it needs some massaging in Adobe Photoshop to be the BW we’ve come to know and love.
Some Notes on How I processed these images
There are lots of convoluted processing possibilities to getting the IR look. In this case, I’m coming up just a wee bit short on the full IR feeling, but I like the results. In Photoshop I remove the color by decreasing the saturation, adding Clarity, opening shadows or highlights. I also adjust the Temperature slider making the blue sky and the water reflecting the blue sky darker.
As a final touch, I use Luminar 2018 as a Plug-in and add an Orton Effect or possibly a Glow depending upon the image feel for which I am going.
Camera is the Lumix G6 (using an older camera collecting dust on your shelf for conversion is fine as long as it has Live View) Conversion done by LifePixel. There are varieties of IR filters you can choose to check out the info here. I have gone with the old standard.
If you have any questions, give me a shout.
Yours in Creative Photography, Bob
by successfulbob | landscape photography, Lumix G9, photography creativity, photography gear
Interpreting the Red Rocks – Juuuust a Little Different
If you have followed this blog and my work for any length of time you know that I often like to take my images further than a ‘straight’ photograph. I have found a weird thing while working on this process. There are times to get a certain look you need to make what I would normally consider a ‘bad’ photograph. One that is either under or overexposed to create the vision in your using certain textures.
Here’s a case in point. The density range for this image was huge in that I was shooting the flower in the shade and the background was in full sun. I originally bracketed this scene to get a ‘correct’ exposure. I processed that, but when I went to work, I found that I had better results with the image that was a single exposure rather than having all the detail that Aurora HDR 2018 software would provide.
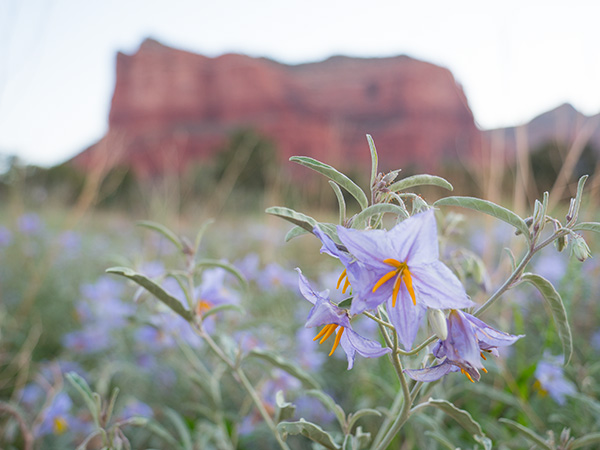 Here is one of the bracketed images slightly over-exposed. Little to no detail in the sky.
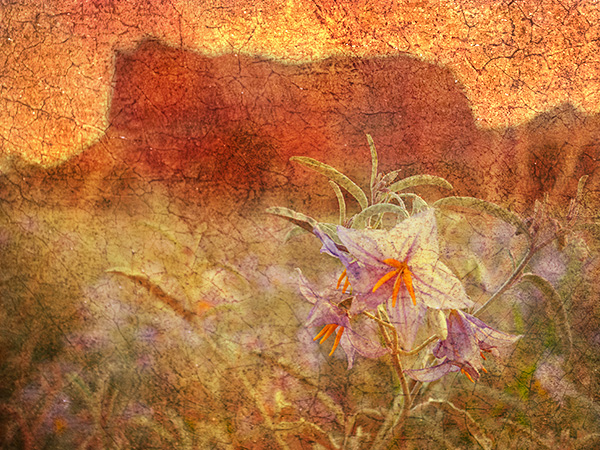
The little to no detail in the sky gives the texture a chance to shine. I used texture from a small section of an old painting in various blend modes to achieve the image below.
Here is my artistic rendition of the image.
I think the plain image needed some help other than making a full range of tones visible. I work photos in many different ways before I find the vision for which I was looking.
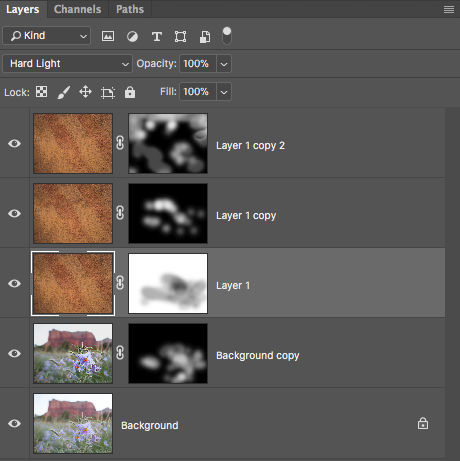 Here is the Photoshop Layers Palette from the image above. Note: all Layers had a different blend mode applied and Masks were used to extract or cover the information I did or didn’t want.
Lumix G9 with the Leica DG Vario-ELMARIT Professional Lens, 12-60MM, F2.8-4.0 was used for this capture. The fully articulating screen is helpful when framing an image where the camera is low to the ground. Saves getting down to try and look through the viewfinder and also save work in the laundry for clothes that have been doused in dirt!
Yours in Creative Photography, Bob
by successfulbob | landscape photography, Lumix G9, photography, photography gear
Red Rocks of Sedona – Part Two
Since I have started back to hiking through the red rocks in Sedona once again, I’ve had a great time making images that show the best part of hiking. For these images, I was using the Lumix G9 and the 12-60mm Leica DG VARIO-ELMARIT f2.8-4.0 lens. This combo has a substantial reach and weighs in about three pounds which is hugely manageable on trails that are considered wilderness by the forest service. Wilderness trails mean clambering over, up and down medium size rocks, so the weight is a factor.
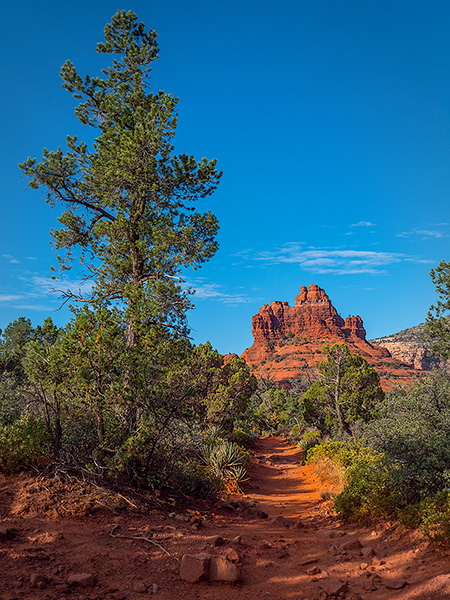
Wilderness area trail photo of the back side of Courthouse Butte – Sedona, AZ
As the trail moves toward another iconic feature called Bell Rock
Meet my twisted friend the juniper.
Lots of interesting junipers litter the sometimes otherworldly landscape of Sedona. Fun fact – the seeds need to pass through a bird to germinate.
This from an article on Lubbock Online by ELLEN PEFFLEY who taught horticulture at the college level for 28 years, 25 of those at Texas Tech, during which time she developed two onion varieties. She is now the sole proprietor of From the Garden, a market garden farmette. You can email her at [email protected].
“The fruit botanically are cones but, unlike pinecones that are dry and open, the fleshy and fused closed scales of juniper resemble berries, thus the reason fruit of juniper is usually referred to as a berry. Berries mature over 18 months, at first green and turn a dark-blue purple or bluish color as they mature. Berries are visible during the winter months. Each berry develops six triangular, hard black seeds, which are eaten and scattered by frugivorous birds.
“A word for the word jar: frugivorous, defined by Merriam Webster as fruit-eating. Fruit is the preferred food for frugivorous birds, which swallow the fruit whole, digest the fleshy scales, pass the hard-shelled seeds through the gut and disperse the seeds. This is why seedling junipers pop up in unusual surroundings.” http://www.lubbockonline.com/life/2017-01-09/peffley-juniper-berries-sought-birds-food-flavor-base-gin
Yours in Creative Photography, Bob


