
by successfulbob | landscape photography, Lumix GX85, Lumix Lounge, panorama
Lumix GX85 In-Camera Panorama Photos
If you follow me and my work you’ll find I enjoy capturing panoramic photos. Maybe it’s because I live in wide-open spaces. Whatever the reason they give a slightly different viewpoint of an area that doesn’t come across in storytelling in any other format.
Today I wanted to share a couple ideas about the in-camera feature in a lot of the Panasonic cameras. Stitched panoramic photos and how I use them. When I want a full-on capture of a panoramic scene I will tell you I shoot multiple images and stitch them together using Photoshop or another program. That is what will get the best quality beyond a shadow of a doubt. I will also, depending on the density of the scene shoot bracketed exposures to ensure the highest quality rendering for a print including the highlights and shadows.
Let’s give you a little preview of one of my favorite spots to photograph here in Sedona.
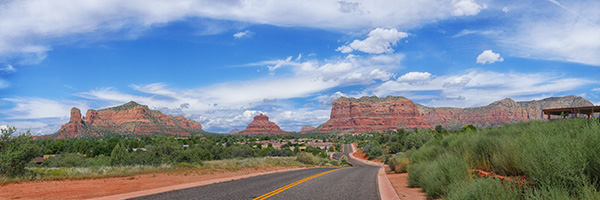
Castle Rock formation with Bell Rock and Courthouse Butte in the Village of Oak Creek in Sedona, Arizona
This image came out of the camera 6100 pixels wide 1/2000 sec ISO 800 f13 with Lumix Vario 35-100 f2.8 lens
When I want a full-on capture of a panoramic scene I shoot multiple images and stitch them together using Photoshop or another program. That is what will get the best quality beyond a shadow of a doubt. I will also, depending on the density of the scene, shoot bracketed exposures to ensure the highest quality rendering for a print including the highlights and shadows.
I use the in-camera pano feature more as a ‘sketch’ of a scene. Why is that? Number one – When making the pano capture there can be some slight stitching errors. You’ll sometimes find these in very simple areas like plain blue sky or conversely in very, very detailed areas. Number two – The files are rendered as a jpeg which means that the camera settings are baked into the file and that information will be stripped during the compression process. Number three – Finally, the files are not that large. Panoramas tend to need to be printed large to appreciate them.
So why do them in camera at all? I mentioned the ‘sketch’. Number one – This finished jpeg stands as a quick reference of the scene which can be filed with the RAW captures. Number two – It can be uploaded via the in-camera Wifi to send off to others to share what I’ve just seen. Number three – There might not be time, for example when traveling with others to complete a full-on capture of the frames. Number four – Sometimes I am just looking for a ‘record’ of the area to remember to go back to because there weren’t great conditions. I do this when scouting locations.

An overcast day in Sedona. This image ends up with quite a bit of ‘depth’ due to the weather and distant mountains. In-Camera Pano 7600 pixels wide. 1/100th at f7.1 ISO 800
Hope this give you some ideas on how to leverage features in a way you might not have considered before.
Yours IN Creative Photography, Bob
Save
by successfulbob | landscape photography, Lumix GX8, Lumix Lounge, panorama, photography, photography software
Panorama Photography – In Camera
Playing with my Lumix GX8 in panorama mode is a fun time. Being able to have a panoramic image of the scene in front of you stitched in-camera can be a great help. Sometimes these are all I need. Sometimes there can be a bit of a ‘hitch-in-the-giddyup’. Let’s look at the good, the bad, and the sometimes ugly and how to make the best use of all of them.
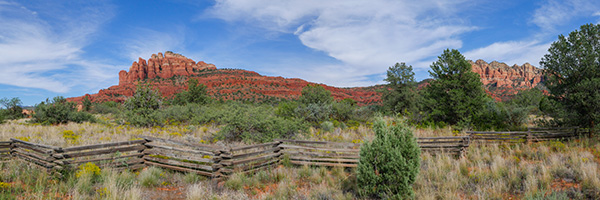
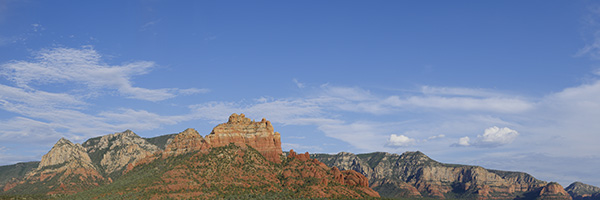 Sedona, Arizona red rocks – All panoramas were captured with Lumix GX8 in panorama mode
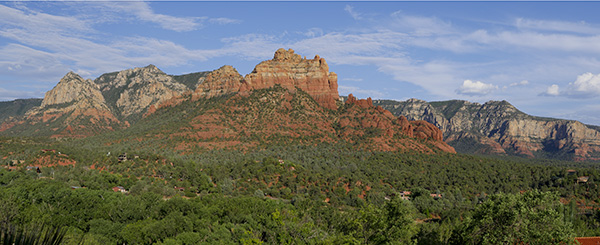 Here’s the same view with a different amount of foreground
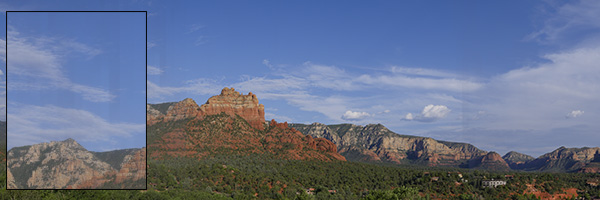
Sometimes a panorama gives you the field of view you are looking for, but its height is just not quite right. Then it’s time to do another row and stitch them together in post-production.
 The two panorama images above combined in Adobe Photoshop
When making in-camera panoramics proper technique is imperative. I learned an old videographer’s trick that makes for better captures. Point your feet where you would like the panorama to end. Place the camera against your forehead and lock elbows down to the side. Use your stomach muscles to rotate the lens to the start of the pano. Press the shutter and use the stomach muscles to turn to the end of the image. With in-camera images, I recommend going past where you wold like the final part of the picture to finish because the image will cut off a little before it appears to in the viewfinder. There’s a ‘Goldilocks’ speed for the rotation. You don’t want to go too fast or too slow. You want to move ‘just right’ to help the camera give you a good image. If it is radically wrong, the camera will notify you that it can’t process the image because of processing errors.
 Poor technique led to lines captured in the image. It’s important to play your panorama back to ensure you’ve achieved a good result. It can sometimes show OK with a quick glance. I will often shoot the scene a couple of times to make sure I’ve got a good clean result.
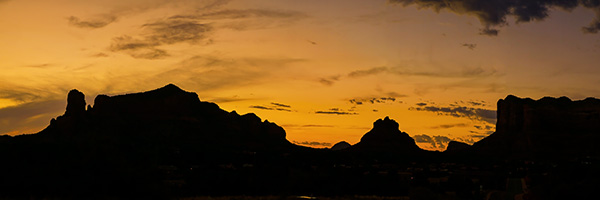
Panorama in silhouette. I saw this scene developing in the distance and stopped the car the first chance I could. I used MacPhun’s Intensify plugin* for Mac to help bring the scene back to what had attracted me to make the image. By the time I was able to pull over the sky had started to lose its color. The software brought back the sky as it was moments before.
We have incredible tools at our disposal in the photographic world. I enjoy learning how to push them to the next level.
How about you?
Yours in creative Photography, Bob
* Special deal on MacPhun’s Intensify and Uplet (a software for uploading images to Instagram from your computer)
by successfulbob | landscape photography, Lumix GX8, Lumix Lounge, panorama, photography gear
Photography in the Marsh in Delaware
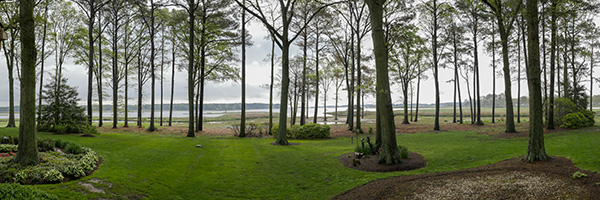
While the weather during the time I was on a family visit was less than stellar I thought I’d give you an overview of the scene from my mother-in-laws backyard. Photos of some of the wildlife from another post.
These two panoramic photos were captured with the Lumix GX8 and the Vario 12-35mm f2.8 lens. Very lucky to have this area as a playground when visiting.
 View from the front. Panoramic Mode with the camera oriented vertically. Settings 1/1000 sec f4.0 ISO 800 18mm (36mm in 35mm equivalent)
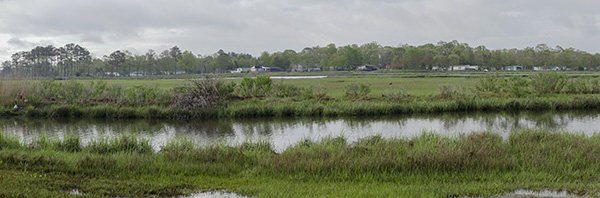 View from one side. There’s a similar view on the other side with even less evidence of man in the view. Settings 1/2000 sec f4.0 ISO 800 35mm (70mm in 35mm equivalent)
The in-camera stitching on the GX8 is pretty amazing. In straightforward situations it makes a great pano. If you have highly complex subject matter like trees and/or patterns you might want to take two or three passes and check the details before moving on. If it is something very important I will make the in-camera panoramic and the I will also shoot the individual images in RAW for later stitching if I want super high quality. Many times I’ve been pleasantly surprised that I didn’t need to use the RAWs but I always like to back myself up.
Yours in Creative Photography, Bob
by successfulbob | landscape photography, lens baby, Lumix GX8, Lumix Lounge, panorama, photography
Da#M it!
I got all the way up the hill to the cliff dwellings and realized I left the fisheye from Lens Baby in the car. Gotta tell you I almost didn’t go get it. I also gotta tell you it probably isn’t such a great idea to run 15 minutes up a steep hill at 7500+ feet. I was sucking some serious wind when I got back up to the top.
Annnnyy waayy… I thought I try some different things with the fisheye lens because of the relatively small spaces in the caves. Once I got my breath back I mounted it on the Lumix GX8 and here’s what I started to play with.
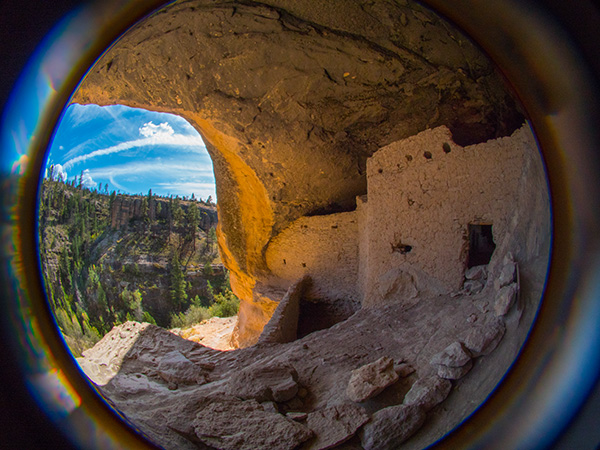
Here’s a ‘straight’ Circular Fisheye image from the dwellings. The full fisheye effect is a little cut-off because of the micro 4/3rds format.
Gila cliff dwellings photo captured in a different way with the Lens Baby
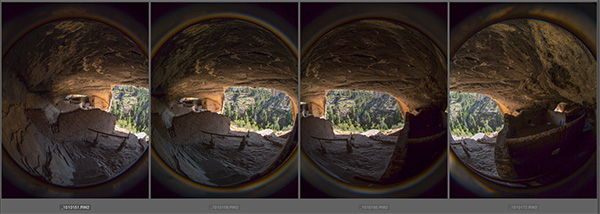
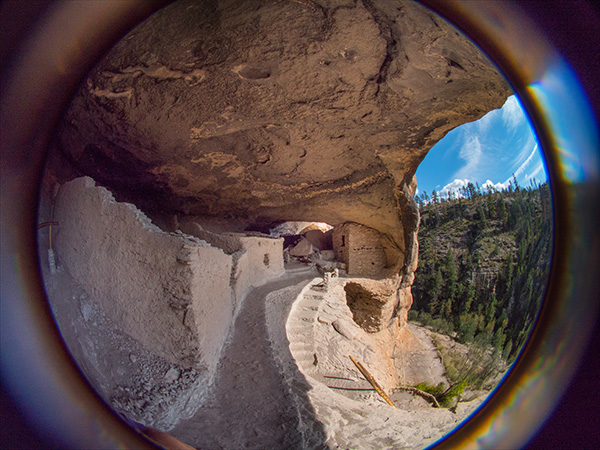
Then I thought I’d try to push the envelope a bit further an do a panorama. Here’s the individual captures…
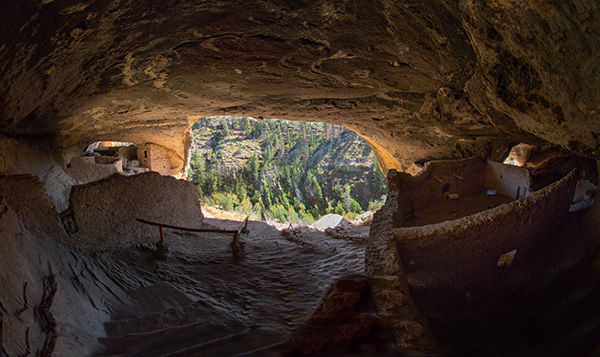
And the stitched image… Don’t try to have Photoshop stitch this for you it locked up on me. I guess the circular edges gave it fits so I did the stitching the old fashioned way… by hand with masks.
I enjoy trying new and different things and was surprised by the final result.
Experiment.
Play.
Have fun.
Make mistakes.
Learn.
Yours in Creative Photography, Bob
by successfulbob | landscape photography, Lumix GX8, panorama, photography education, photography gear
I really enjoy the field of view you can achieve with a panoramic photo. The Lumix GX8 is pretty solid with the in-camera stitching when you need a quick capture of the scene for sharing… And with this version going to print. There are still some occasional stitching errors in areas with lots of confusing crossing details or areas with hardly any detail but I had to look really, really hard to find a small error in one of the tree clumps… Sweet!
This is the view on the way to Cathedral Rock in Sedona, Arizona. Heading down Verde Valley School Road in the Village of Oak Creek (view of the right side of Cathedral Rock)
Here’s a tip that some people don’t think of when creating Panos. Turn the camera to the vertical position as you make your capture. This will give you some more vertical room. You can also capture a next ‘row’ of image and stitch them together in Photoshop or your favorite Pano program.
One more thought to help get smoother stitching… Point your feet toward or slightly past where you would like the pano to end. Then pivot your stomach muscles to the beginning of the captures and use your stomach muscles to move the camera with your elbows tucked in and the camera touching your forehead.
Yours in Creative Photography, Bob
by successfulbob | cloud photography, landscape photography, Lumix GX8, Lumix Lounge, panorama, photography education, photography gear
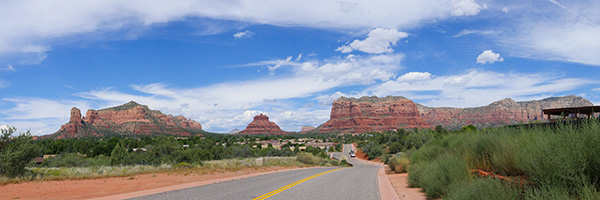
Playing some more with the in-camera panorama stitching on the Lumix GX8 again… This time in the Village of Oak Creek with Bell Rock and Courthouse Butte as the stars of the show. I used the 20mm f1.7. This combo worked very well when keeping the lens pointed straight ahead. If you tilt the camera up there will be a bit of bending of the horizon.
Here’s the original capture SOOC with a minus 2/3rds of a stop exposure adjustment to bring down the sky to a deeper blue. One of the benefits of being able to see what you camera is capturing I could tell that it was going to be a bit overexposed before shooting.
Here’s the finished image with a bit of post production. Darkened the road. Removed a couple vehicles. Increased saturation a little. Added some contrast with Google’s NIK Detail Enhancer. The only place I ran into a stitching evidence was after applying the Detail Enhancer the blue portions of the sky showed the beginnings of unwanted lines. Using a Layer Mask took care of that problem.
This image could easily print to 14 X 42 inches and probably larger if I wanted to work at it a bit and depending on what material I was printing on.
Yours in Creative Photography, Bob

