OK. Extension tubes don’t necessarily equate to macro photography. But, they can let you focus very close, and in some cases, you can replicate macro photography. Getting in close and showing people things that won’t be noticed by the naked eye can get you some excellent images. If you are not officially into macro photography but want to play, extension tubes are the way to go. Let’s call this close-up photography!
A true macro lens can be anywhere from $700 and up new. A set of extension tubes goes from $7 to $229. I don’t recommend going with the absolute cheapest as the builds seem to be a little rough. (I’ve tried) I’ve found a great set of tubes for about fifty bucks. Vello extension tubes are a great cross in build quality to performance. You can see them here. Vello Micro 4/3rds Extension Tubes
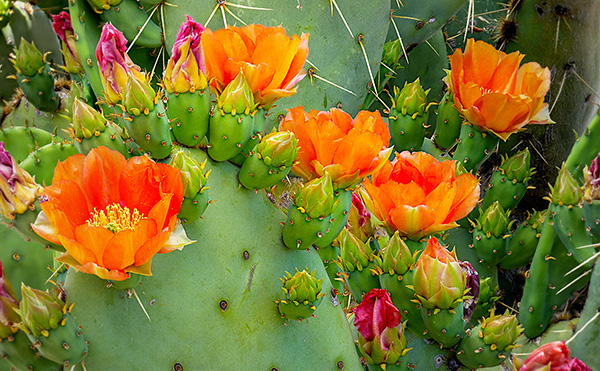
Some examples from a recent hike below
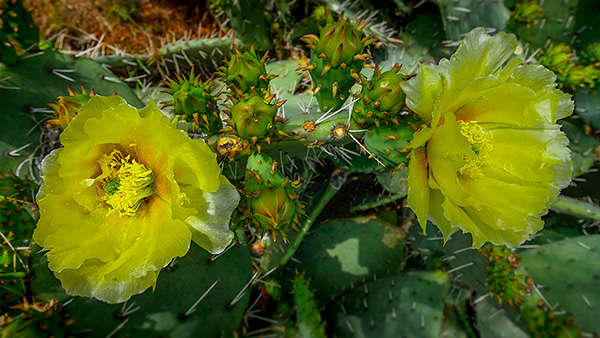
All flowers in this post are smaller than the size of my fingernails. All Images Photographed with the ** Lumix G9 and the 12-60mm Leica DG Vario-Elmarit f2.8-4.0 lens w/ Extension Tubes
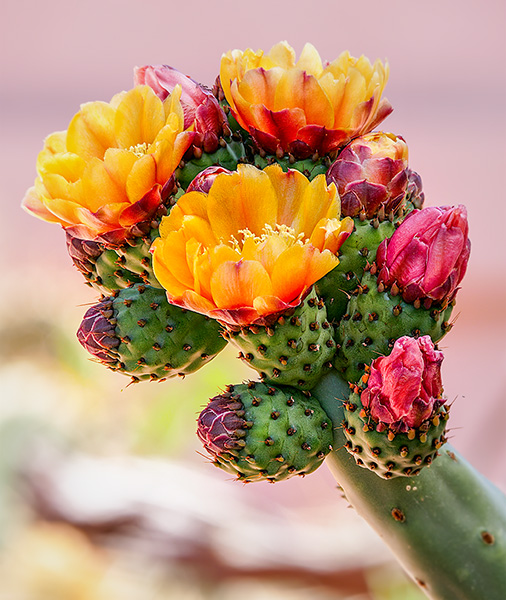
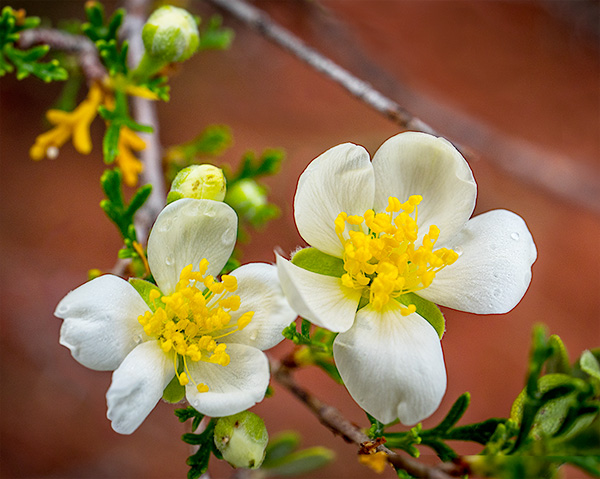
Two images blended together to extend the depth of field.
If I were working the flowers, I would be on a tripod and automatically bracket my focus for subsequent stacking in post-production. In this case, I focused on the front flower and then on the back flower bloom and used Photoshop Layers to blend the two by hand with a mask.
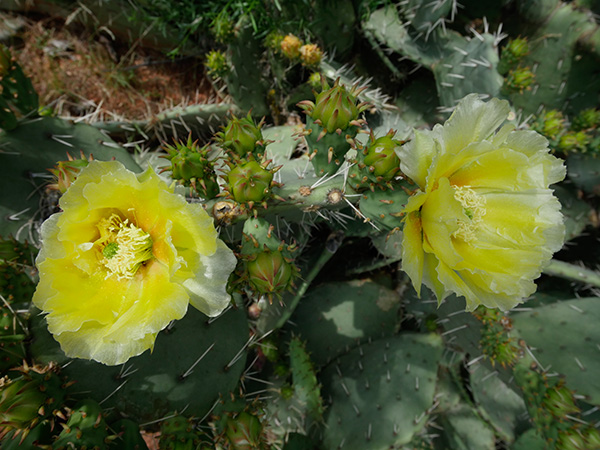
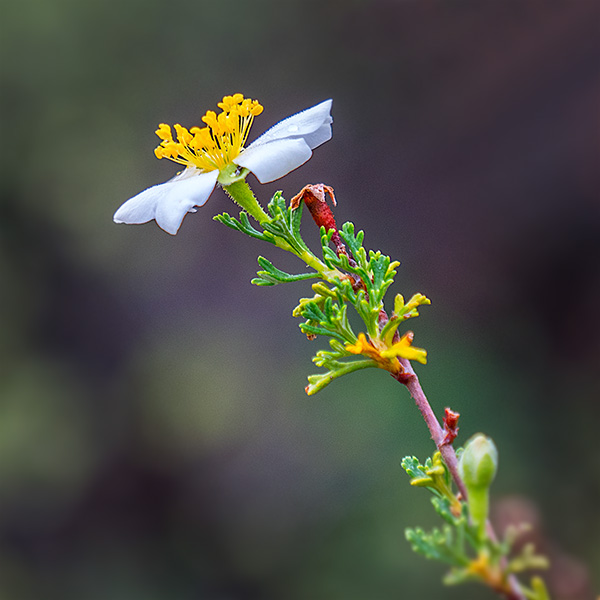
An example of the camera settings. For this image – 1/100th sec F11 ISO 800
If you want to go full macro and you are in the micro four-thirds camera systems, I find some beautiful results with the 45mm Leica DG Macro-Elmarit f2.8 lens. BTW, as this lens is a 90mm (35mm equivalent view), it also makes for a nice head and shoulders portrait lens. Dual use is always a winner in my book!
Yours in Creative Photography, Bob
** Lumix G9 Camera is on special for $200 off regular MSRP (not sure how long this will last)
Professional Photographers of America
Southwest District – Artist Category
The other day I shared the Photographic Open results for the PPA Southwest District Photographic Competition. Today I share my results from the Artist Competition. All four images were judged to be of Merit category quality. They all scored in the low 80’s to earn a District Seal.. Because they did not score above an 85, they will not have a chance to be judged for the PPA Loan Collection. Very proud of these results. With all four being judged a Merit when they are entered into the International Photographic Competition (IPC) I will earn a Bronze medal in the August judging and receive it at the convention next year in Atlanta.
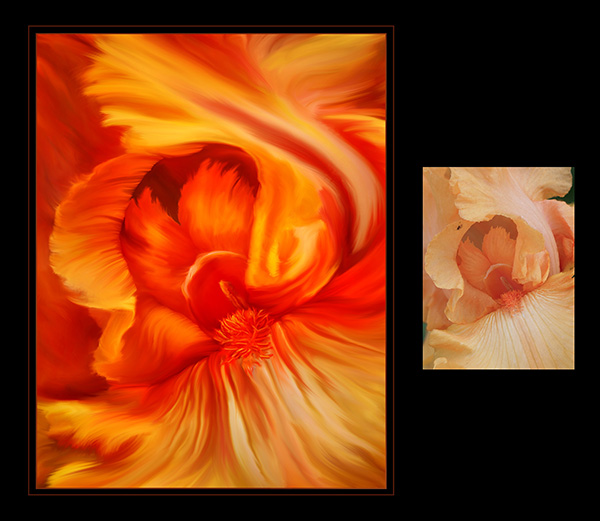
This image is titled Grand Opening. I’ve been experimenting with some new techniques with art brushes in some of my art.
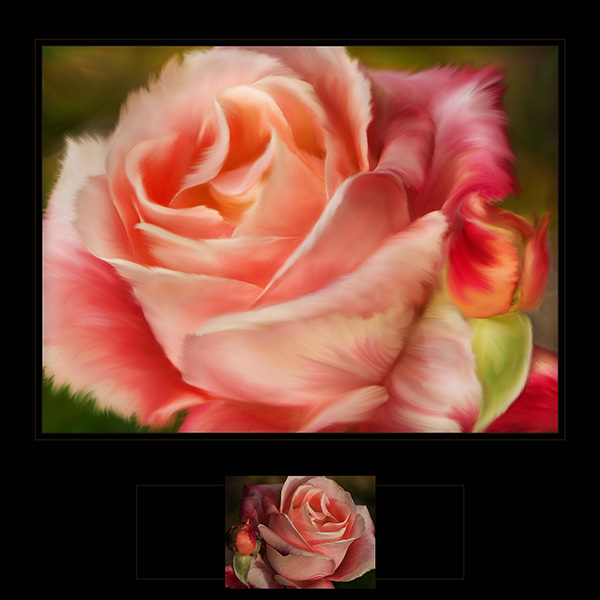
The judging in the Artist Category is, of course, on the final image but also the transformation from the original to the final is examined for the amount of change and how well those changes to the image were accomplished. That is why there is a reference image. This allows the judges to see the starting point of the project.
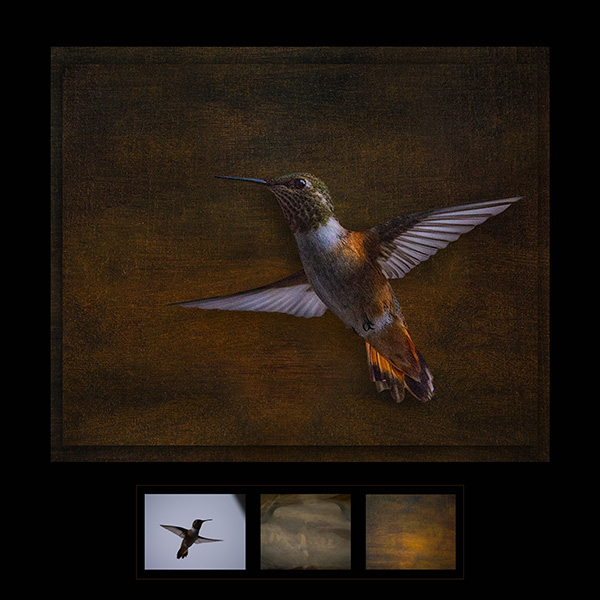
Hummingbird Study is the transformation of a slightly underexposed image of the bird that was extracted from the scene and worked into an artistic background
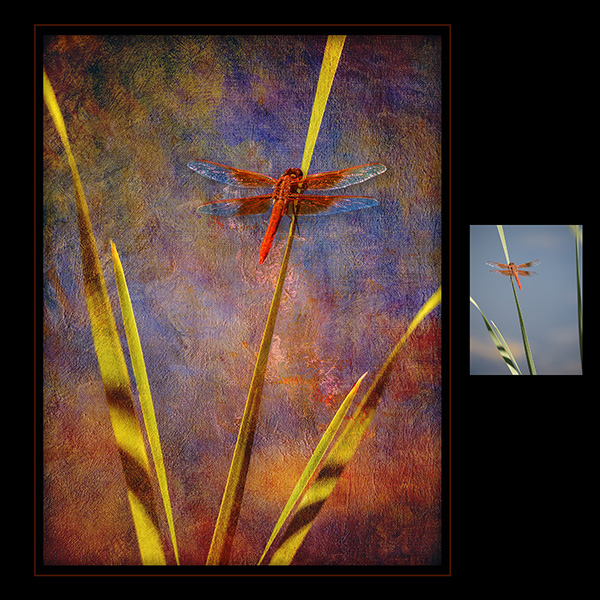
A dragonfly pausing in the morning light becomes transformed with some Layers of texture and various color and lighting treatments.
This rose has moved from a photo to a classical feel of a painting. In all cases, there are many renditions of an image as it goes through the transformation process.
I participate to keep myself motivated to learn new techniques and ways of processing images so I can stretch my artistic goals. I am so very fortunate to be working in a medium that has the untold potential for transforming images. If I ever felt that I had mastered the medium entirely, it would be time to move on to the next adventure.
Here’s my new best friend ‘Scoot.’ Scoot makes it possible for me to move about as I work to rehab my Iliopsoas muscle. The scooter is there for a bit of support when the pain in my a** gets too intense. But mobility leads to some possibilities.
Meet ‘Scoot’ My new best friend for a while.
I broke out the Lumix FZ2500 because of its range and all in one 24-480mm f2.8-4.0 Leica DG Vario-Elmarit lens. This is the first time I’ll have a camera in my hands in over a week. Can you say withdrawal?? I had asked my wife Holly to bring a camera to the hospital to document some of the things going on around me. Too much pain, not enough sleep and worrying about the camera being in a hospital environment. My wife told me I was nuts to even think of doing that, once again proving that my wife is the smarter of the people in our marriage… and I was wrong again.
Onward to day’s walk to the end of the driveway. I made it under the mesquite tree and was pausing for a break. Lo and behold I was enjoying the soft fuzziness of the yellow blooms against the beautiful blue sky. Off the get the camera and an excuse for a bit more exercise.
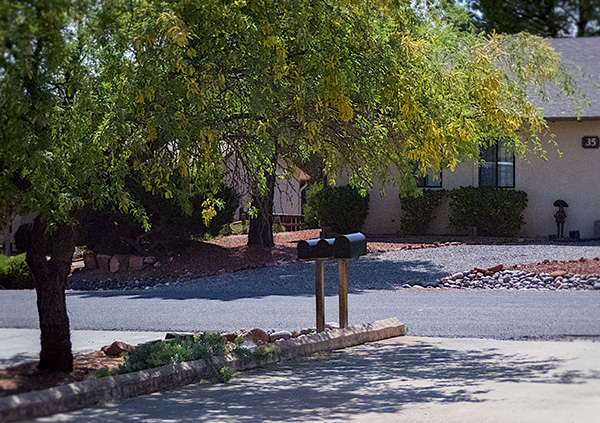
Goal. The shade under the mesquite tree at the end of the driveway.
Once underneath the blooms, I started looking for some interesting compositions.
The sharp yet soft bloom of the mesquite against the Arizona blue sky.
A pollinator visits the yellow bloom
I guess I’ll have to be creative find images within this 100-foot circle until I can begin to range further.
I enjoy the ability to create time-lapse video in the Lumix line of cameras. Built into the cameras are settings that many cameras need an add-on to complete the captures. One of these is an intervalometer which makes it possible to set the number of images to record and the timing in between each capture that is made. Even better is the in-camera processing to see your videos almost immediately without having to download images to a computer for processing.
In today’s post, I’m going to look at three versions of in-camera processing and then another version where the jpeg files were downloaded, processed through Adobe Camera RAW and then run through Time-Lapse Assembler for a different look. Time-Lapse Assembler is a free download.
First, let’s take one of the original jpegs that I processed through Adobe Camera RAW and added a little zip and pizazz with the MacPhun Plugin from their Creative Suite called Focus CK.
Original SOOC (straight out of camera) capture
Cropped to 16×9 aspect ratio and added some clarity and saturation in Adobe Camera RAW. Then finished off with MacPhun’s Focus CK plugin to add a bit more snap and intensity.
Here are the three versions processed straight out of the Lumix GX8 camera sized to 4K. You can choose any number of settings for size along with the number of frames per second. I used 6 fps, 12 fps, and 24 fps. Because I made these in 4K I am able to add additional movement to the videos without loosing quality.
Images were resized to 16×9 aspect ratio and saturation along with clarity was added. They were then saved out to jpegs. The files were processed into a six-image fps and twenty-four image fps videos. These were not able to have panning and additional movement as they were processed to HD size.
Let’s look at some more examples of using the Post Focus Photo Mode (see part one here).
The focus is all throughout the image. Detail works in this case.
With the post focus mode used to capture this image there is still a soft bokeh even though the camera used every focus point in the processing. But because the background is so far in the distance the background stays very soft and all the flowers are super sharp.
I’ve been testing the Lumix GH5 and the Post Focus Mode in which the camera leverages a 6K Photo Mode wherein the camera creates a short video clip using all two-hundred and twenty-five focus points. Any one of these points can be pulled as an eighteen MegaPixel file. Or a range of images choosing a set of focus points. Or even better, it will combine all of the focus points into a fully focus stacked final image. This is an amazing technology to secure a look that is not possible in a regular capture with a camera. I love leveraging this tech to create artistic images.
For infrared conversion of my cameras I use LifePixel. Infrared allows you to put an older camera to use and opens up a new time time of day for productive image creation.
Fotopro tripods are well worth checking out. You can learn about the ones I use and recommend by clicking on the Fotopro Tripods link at the top of this page. If you want to see what other tripods might fit your needs check out the Fotopro.com website. Check back with me before you buy as a Fotopro Ambassador I’m able to get you discounted pricing including complementary continental USA shipping for my followers that you won’t find through retail outlets.
Learn Photoshop in a fun environment. Aaron Nace applies the right amount of fun with easy to understand and follow tutorials. Actions and brushes are included with lessons!
Lightning, waterdroplets, sound, time-lapse, HDR sequences, smiles and much more control for your camera!
Cameras Get Smarter -
A High Speed Smart Camera Remote
Best embroidery ever. Give Queensboro a try, get a $20 instant credit to get started by clicking on the logo! They specialize in great quality custom logo apparel and promotional products with the best customer service.
Platypod has become a great resource for being creative in getting your camera gear easily into unusual places. As an Platypod Pro I get to work/play with the gear even before it comes out. Head over to Platypod, subscribe to the newsletter and you will get special discounts reserved only for subscribers.
 All flowers in this post are smaller than the size of my fingernails. All Images Photographed with the ** Lumix G9 and the 12-60mm Leica DG Vario-Elmarit f2.8-4.0 lens w/ Extension Tubes
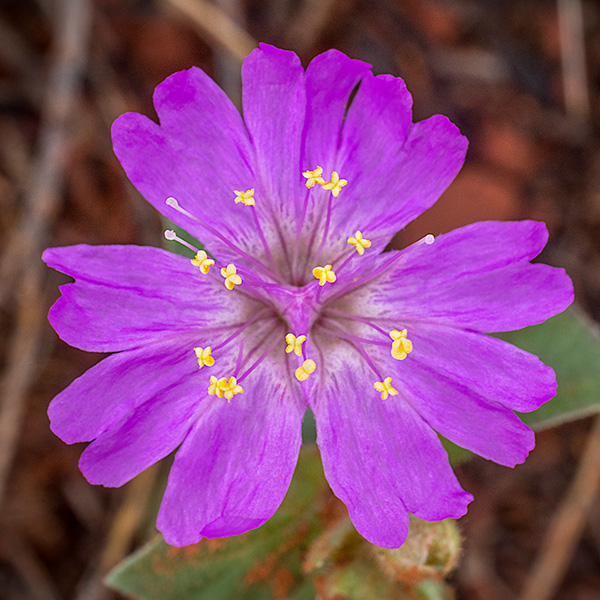 An example of the camera settings. For this image – 1/100th sec F11 ISO 800