Creating Good Animal Photos from a Captive Environment – Part Two
Last zoo post I was sharing some ideas on learning wildlife photography skills while photographing captive animals. See Part One here
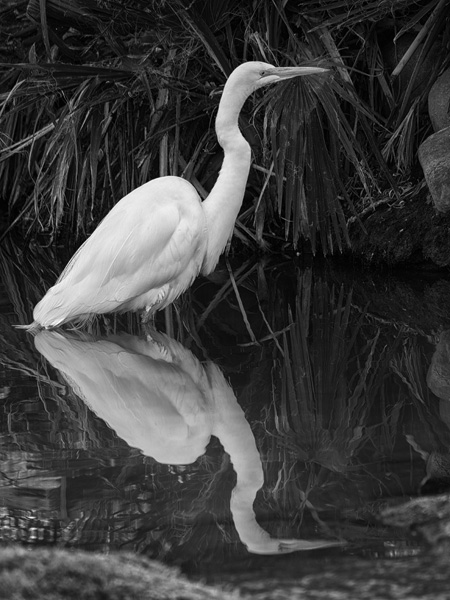
I followed this Great White Egret until the reflection was completed from beak to tail. The black and white treatment brings the bird to the highest contrast attention
One of the essential skills is to learn to queue on behavior. This means learning to see when the behavior will change. What will happen when you look at the feathers shaking in a certain way or excrement fall from a bird. These are indicators that signal flight or a change of wing position and either of those can lead to a more interesting photograph.
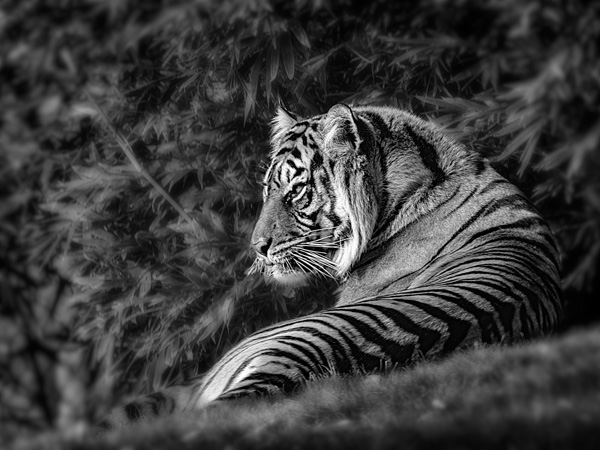
Processed this image to BW also. Slight sharpening of the tiger using Skylum software as an Adobe Photoshopplug-in. I also softened the foreground and background with a gaussian blur as well as a darkening Curves layer Significant help for me that increased my ‘keepers’ in photographing images of animals in zoos, parks and in the wild was a lens that has a long reach. The micro 4/3rds Panasonic Lumix system has been an enormous help. Being able to handhold an 800mm equivalent lens makes a huge difference because of the mobility and distance from the animals. The less you disturb your prey and having the ability to still fill the frame is golden.
Don’t lose sight of other opportunities when photographing wildlife. This split tree trunk was good for an abstract look of colors and tones.
My main camera these days is the Lumix G9. The stabilization system gives an extra six and one-half to seven stops of hand-holdability. This means that hand holding a lens of 800mm equivalent at 1/60th of a second is very possible with sharp results. My favorite lens is a zoom lens – Leica 100-400mm f4.0-6.3
Bombay Hook National Wildlife Refuge – Smyrna, Delaware
I’ve been a bit remiss in posting. Travel for speaking. Travel for family visit. And catching up upon return fronfrom the travel makes Bob a bad boy. But, I’m back and with plans to have more posts even when traveling to judge images &speak in Oregon and do a seminar and a couple workshops for the Festival of the Cranes in Socorro, New Mexico in the middle of November. We’ll see how that works out!
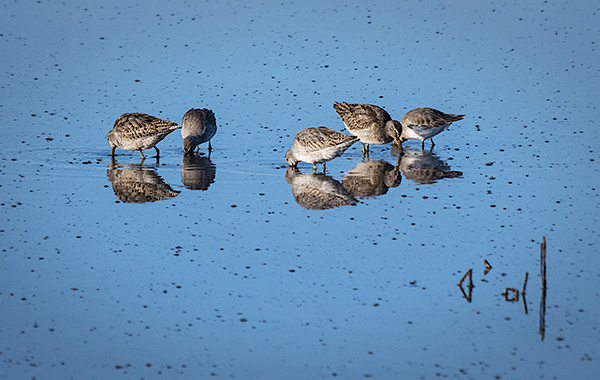
Dunlin Sandpipers enjoying breakfast
While on the family visit I made it up to the Bombay Hook National Wildlife Refuge. I spent the day making images and talking photography with my friend Ned Levi. This was the first time we met in person. I highly recommend spending quality time with your peers. It’s wonderful how much you can learn from each other. (learn more about Ned and his blog)
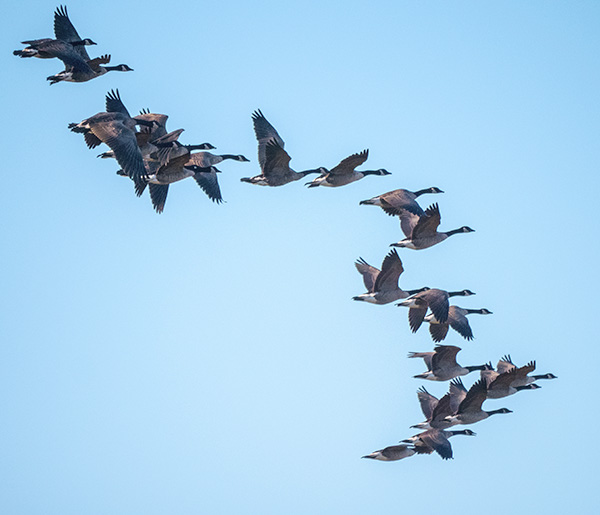
Thought this was an interesting formation of the Canada Geese. I normally enjoy them mor eisolatedbut the overlap of the birds is kida cool. Watcha’ think??
If you have not spent time in wildlife refuges there are some protocols that make the system work for everyone. If you do go please follow the rules and regs. use the longest lens you have and do your best to not disturb the wildlife. There’s an expression, “Take only images, leave only footprints.” Not sure I have the exact words but you understand the sentiment.
This is from the Refuge website and the rules are much the same in all refuges.
Know Before You Go
The wildlife drive is open from 1/2 hour before sunrise to 1/2 hour after sunset daily.
The visitor center is open weekdays from 8:00 a.m. to 4:00 p.m. year round.
During spring and fall weekends, the visitor center is open Saturday and Sunday from 9:00 a.m. to 5:00 p.m.
The visitor center is handicapped accessible and has educational displays and videos.
The visitor center is closed on Federal Holidays.
The visitor center is closed on weekends during July, August, mid-December, January, and February.
Check the website or call to find out about refuge road closures during bad weather and hunting season. During summer months, visitor should bring insect repellent and wear long-sleeve shirts and long pants.
To protect wildlife and their habitat and to provide the best opportunities in wildlife observation and photography, it is important not to disturb, injure, or damage plants and animals on the refuge. In fact, it is a prohibited act as stated in 50 CFR 27.51. This disturbance includes flushing birds and other wildlife or using mechanical or electronic devices to lure birds closer for observation or photography. Please remember to take only memories and photographs and leave only footprints.
Unmanned aircraft systems (Drones) are prohibited.
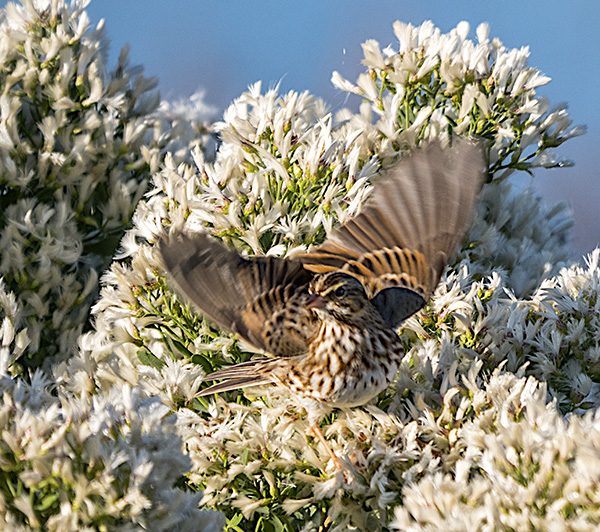
A simple houe wren was dancing in and out of the flowering bush. Behavior and movement photos are my aim.
Images were made with the PANASONIC LUMIX G Leica DG Vario-Elmar Professional Lens, 100-400MM, F4.0-6.3 ASPH mounted on the Lumix G9.
Not quite ‘nectar of the gods’ but I’ve found some serious joy in my morning coffee. It was a gradual process to see the pleasure I now have in the morning ritual and enjoyment of grinding beans, brewing and enjoying coffee.
Java Presse Coffee image square format final crop
It started with some friends showing the benefits of grinding beans for French Press coffee. Good stuff.
I found myself getting frustrated with the ‘static cling’ that was generated by using an electric grinder that had a plastic bin for catching the grounds and left little trails of tiny grounds scattered along the counter. This led to looking for a mill that had a stainless steel basket. Research showed that prices were more than I wanted to pay. Which turned out to be a good thing! Because that led me to the stainless steel coffee grinder from Java Presse.
The grinder led me to lots more information about the whole process of roasting coffee, the freshness of the beans and proper preparation for the French Press that I use. Thanks to Java Presse the entire experience has turned my morning coffee into an enjoyable ritual. And who knew that freshly roasted beans, ground fresh just before brewing could make such a difference.
I’m a coffee convert.
Photography Process
And, now on the photography section of the making of a commercial image of the product. You can see the final photo at the top of the post above. Below is how the photo was built.
Good, solid commercial images should look effortless and clean. It takes a bit more to achieve the look. I make this happen by creating several images with different lighting patterns which are later combined in Adobe Photoshop. This comes in handy for items that have different levels of reflectance such as the stainless steel of the grinder and coffee storage container as well as making sure logos are readable.
Note the harsh light patterns in the metal especially the one crossing through the logo on the grinder
Using a reflector I reshot the scene to give more pleasing light on the stainless steel, but now the reflections that give the image life are gone
See the difference between the two blended images. Logos are a much easier read, and there are highlights right where they are needed without distraction
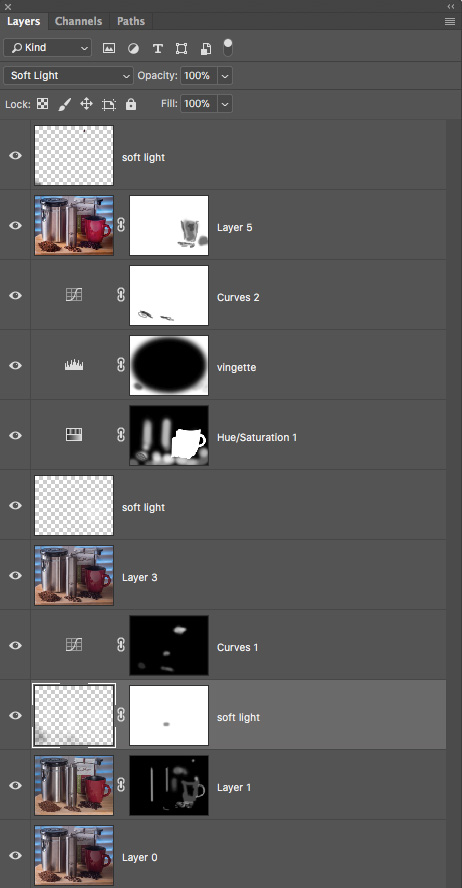
Photoshop Layers Palette is showing some of the work with Masks used to help create the final image.
I also used Skylum software (formerly MacPhun) software called Focus CK. CK stands for Creative Kit. It is a very handy sharpening and blurring tool for directing attention where you want. I often use the ‘Macro’ setting on its layer and mask in what I need.
I have a preference for ocean sounds after having lived in the Caribbean for 20 years but any water sounds are helpful with calming my mind. I spent about an hour on Oak Creek at Cathedral Rock capturing small moments of the creek experience. I took some time this morning editing the footage so that you can enjoy the experience as well.
The video is two minutes long and shows some of the different water patterns along this section of the creek.
I didn’t have myfull video kit with tripod and fluid head for proper zooming and panning. Did the best I could with a tiny little five-inch tripod that I keep with me in my shooting bag for just such an occasion. The occasion being I didn’t want to hike with the full tripod kit. With the light weight of Lumix gear, a small tripod can come in quite handy! The camera was Lumix G9 with the Leica DG Vario-ELMARIT Professional Lens, 12-60MM, F2.8-4.0 Lens. Sound was also recorded from the mic that is built in to the camera. Shot in 4K 24p mode.
I edited the footage with a screen capture program that is for MAC computers called ScreenFlow from TeleStream.
The video was captured in the middle of September when there is some monsoon water flow.
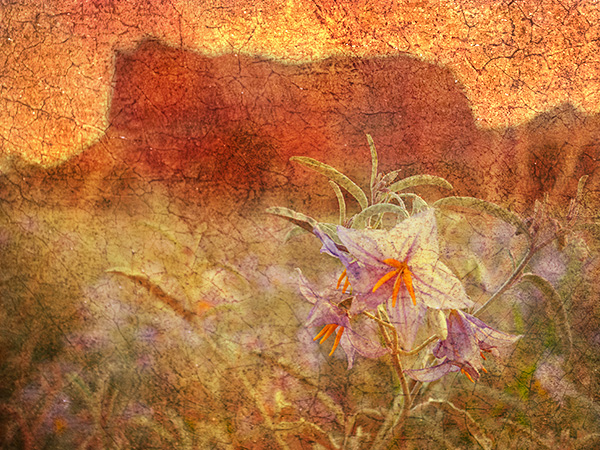
Interpreting the Red Rocks – Juuuust a Little Different
If you have followed this blog and my work for any length of time you know that I often like to take my images further than a ‘straight’ photograph. I have found a weird thing while working on this process. There are times to get a certain look you need to make what I would normally consider a ‘bad’ photograph. One that is either under or overexposed to create the vision in your using certain textures.
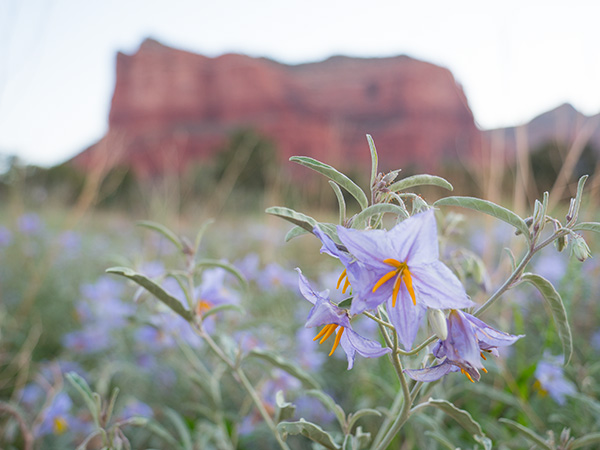
Here’s a case in point. The density range for this image was huge in that I was shooting the flower in the shade and the background was in full sun. I originally bracketed this scene to get a ‘correct’ exposure. I processed that, but when I went to work, I found that I had better results with the image that was a single exposure rather than having all the detail that Aurora HDR 2018 software would provide.
Here is one of the bracketed images slightly over-exposed. Little to no detail in the sky.
The little to no detail in the sky gives the texture a chance to shine. I used texture from a small section of an old painting in various blend modes to achieve the image below.
Here is my artistic rendition of the image.
I think the plain image needed some help other than making a full range of tones visible. I work photos in many different ways before I find the vision for which I was looking.
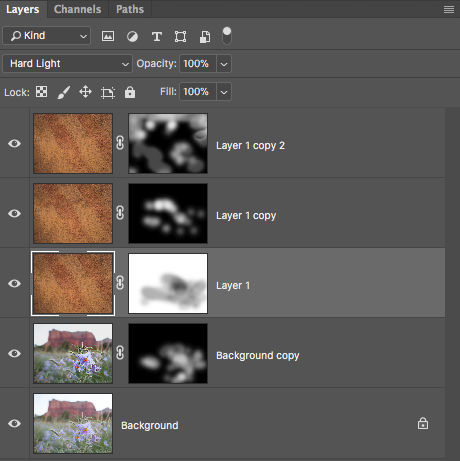
Here is thePhotoshop Layers Palette from the image above. Note: all Layers had a different blend mode applied and Masks were used to extract or cover the information I did or didn’t want.
Lumix G9 with the Leica DG Vario-ELMARIT Professional Lens, 12-60MM, F2.8-4.0 was used for this capture. The fully articulating screen is helpful when framing an image where the camera is low to the ground. Saves getting down to try and look through the viewfinder and also save work in the laundry for clothes that have been doused in dirt!
For infrared conversion of my cameras I use LifePixel. Infrared allows you to put an older camera to use and opens up a new time time of day for productive image creation.
Fotopro tripods are well worth checking out. You can learn about the ones I use and recommend by clicking on the Fotopro Tripods link at the top of this page. If you want to see what other tripods might fit your needs check out the Fotopro.com website. Check back with me before you buy as a Fotopro Ambassador I’m able to get you discounted pricing including complementary continental USA shipping for my followers that you won’t find through retail outlets.
Learn Photoshop in a fun environment. Aaron Nace applies the right amount of fun with easy to understand and follow tutorials. Actions and brushes are included with lessons!
Lightning, waterdroplets, sound, time-lapse, HDR sequences, smiles and much more control for your camera!
Cameras Get Smarter -
A High Speed Smart Camera Remote
Best embroidery ever. Give Queensboro a try, get a $20 instant credit to get started by clicking on the logo! They specialize in great quality custom logo apparel and promotional products with the best customer service.
Platypod has become a great resource for being creative in getting your camera gear easily into unusual places. As an Platypod Pro I get to work/play with the gear even before it comes out. Head over to Platypod, subscribe to the newsletter and you will get special discounts reserved only for subscribers.
 I followed this Great White Egret until the reflection was completed from beak to tail. The black and white treatment brings the bird to the highest contrast attention
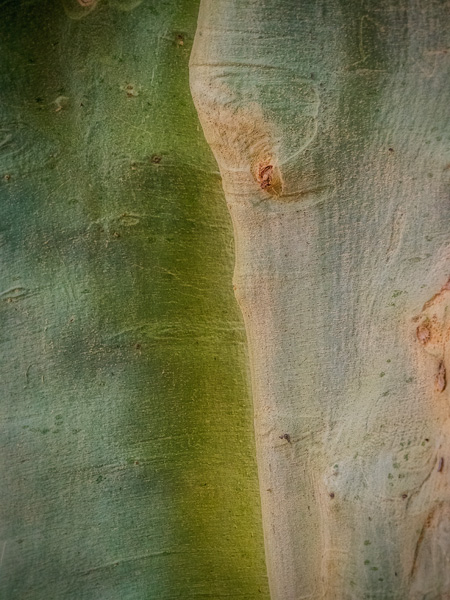 Don’t lose sight of other opportunities when photographing wildlife. This split tree trunk was good for an abstract look of colors and tones.