
by successfulbob | landscape photography, Lumix GX85, Lumix Lounge, panorama, photography, photography creativity, photography gear, photoshop tutorial
Working a Scenic Landscape
The light was fantastic. Scenery amazing. Time? Very short!
I was on my way to a photo shoot in the evening and saw the moon just starting to peek above the horizon as the light from the fading sun had already dropped below in the west. I grabbed the Lumix GX85 and the 7-14mm f4 lens to see what I might capture in the few minutes I had available. I don’t usually like to rush when a situation like this appears, but duty and a deadline called.
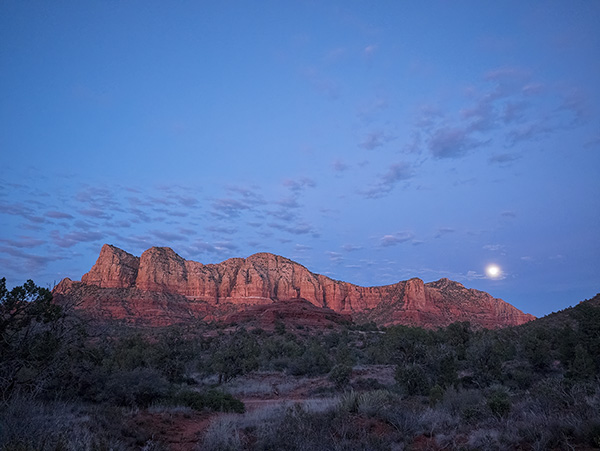 This was the first quick image to make sure I had something in the can.
I first quickly grabbed an overall scene-setting image. Then I tried a couple quick grab shots. I ran down the parking lot to get a better overall view. Having the wide angle lens gave me a lot of the scene but I knew I would need more to be happy.
 Nine image panorama capture for further work in post. Note the images have already been adjusted a bit in Adobe Camera RAW
I set up and shot a nine image panorama with the camera in the vertical orientation to gather as much info as possible. Already the light was starting to fade and my job was calling.
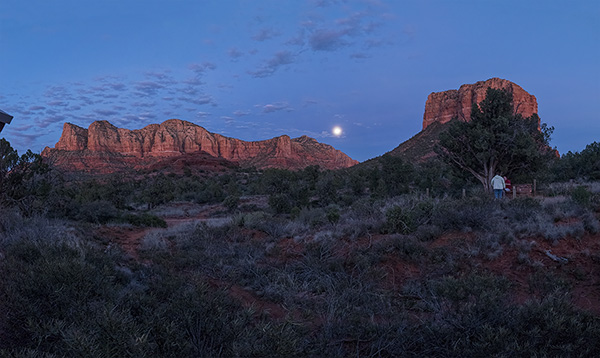 Image output after using Photomerge in Photoshop.
I allowed the Adobe Photomerge tool to do a lot of the heavy lifting for me. I highlighted the images in Adobe Bridge selected Photomerge from the Tools drop-down menu Tools>Photoshop>Photomerge… Layout was set to Auto. The following text boxes were checked. Blend Images Together for obvious reasons. Vignette removal. This was checked because the lens had a bit of vignette and would have made for messy skies. A reason for not checking the vignette box would be if you had files that had no vignette because the files could process faster. Geometric Distortion Correction. You can try working without this but I have found in a scene like this the red rocks would have curved. Content Aware Fill Transparent Areas. When a handheld pano is made like this there is often areas that don’t completely fill the rectangle of the final image. Photoshop will look around and use it’s best guess to fill the areas. You can check on them quickly as it will also leave a selection around the areas it filled in case you need to make some adjustments. In this particular case, it did a great job. All setings are available for you to play with if you don’t get the exact results for which you are looking.
Post-production is a huge help in these instances to obtain quality images.
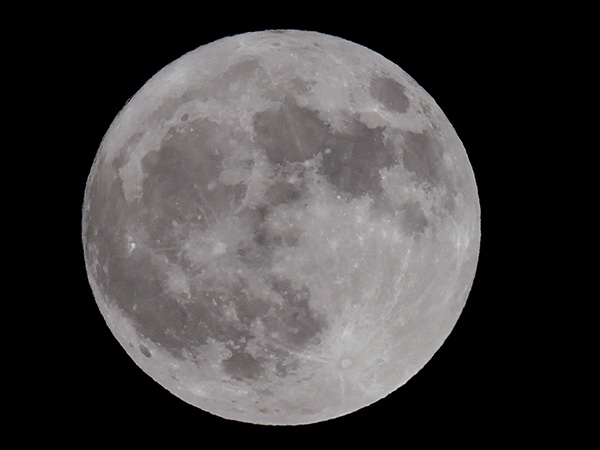 I pulled a full moon from my files as the moon area was blown out. Another case of the eye being better than the camera. If I had more time I would have bracketed exposures to get the detail I needed.
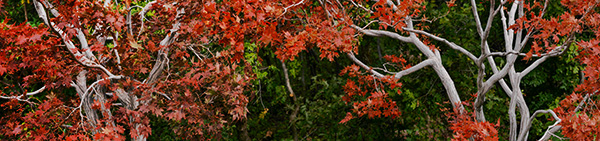
Here’s the final. The moon has detail. The image was cropped to bring attention where I wanted it and
a little judicious Cloning was used to remove the couple under the tree.
If you have any questions or comments give me a shout!
Yours in Creative Photography, Bob
Save
Save
by successfulbob | Lumix G7, Lumix GX7, Lumix Lounge, panorama, photography
Possibilities of Panoramic Photography
Let me put this out there if you don’t already know. I love the panoramic format!
 Red Butte Arboretum – Salt Lake City Utah. In-Camera Panorama Lumix GX7 Shot a few years ago.
Panorama images are not the be all and end all they are there to tell a story that can’t be told in the two by three or three by four ratio. Sixteen by nine is becoming a more ‘standard’ image size to our eyes because we see it more often in movies, television, and our phones.
This post was triggered by a question about the in-camera panoramic photos vs. shooting individual images and stitching photos in post production. Here was the question, “When I use the Lumix G7 it does a Gatling gun shoot as I shift the camera left to right and we all know you shouldn’t be moving a camera when shooting a landscape. I’m curious the quality difference between one shot at a time and stitched in an editor vs. the G7 spray technique.”
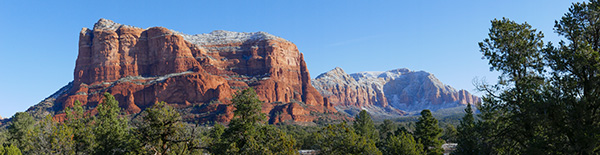 Courthouse Butte in Sedona – In-Camera Panorama. Print to about 27 inches.
Great question. We have different tools for different jobs. The in-camera panorama feature is a tool for the convenience of capturing a scene quickly and being processed for output immediately. For example, you want to share a scene on social media that is panoramic in nature. The camera will produce a completed image that can instantly be uploaded via the camera’s built-in Wifi. It is also a fine way to capture a scene as a memory that will only live in the digital world where higher resolution is not a necessity. That’s not to say you can’t make a beautiful print from the in-camera pano, I’ve made some beauties.
Advantages of in-camera panoramic photos. Immediate gratification. Ideal for web presentation and medium sized prints.
Now to the advantages and drawbacks of a stitched image.
In the capture of individual images to create a panoramic in post-production, you can shoot in the RAW format which will give you a larger file and the ability to finesse the most quality from the file. The larger size files when combined allow for printing very large size images. The only down-side is that post-processing is necessary before you can share the picture as a panoramic.
Same scene as above. Ten frames stitched in Adobe Photoshop. Easily print to about Seventy-eight inches. Note the details and color were more available from the RAW file information.
Final thoughts. Use the best of both worlds. Make an in-camera pano to make a quick record of your scene. It can be utilized as a reference for the future building of your panorama or quick sharing of your view in social media. Make your individual images for large format printing.
Yours in creative Photography, Bob

by successfulbob | landscape photography, Lumix GX85, Lumix Lounge, panorama
Lumix GX85 In-Camera Panorama Photos
If you follow me and my work you’ll find I enjoy capturing panoramic photos. Maybe it’s because I live in wide-open spaces. Whatever the reason they give a slightly different viewpoint of an area that doesn’t come across in storytelling in any other format.
Today I wanted to share a couple ideas about the in-camera feature in a lot of the Panasonic cameras. Stitched panoramic photos and how I use them. When I want a full-on capture of a panoramic scene I will tell you I shoot multiple images and stitch them together using Photoshop or another program. That is what will get the best quality beyond a shadow of a doubt. I will also, depending on the density of the scene shoot bracketed exposures to ensure the highest quality rendering for a print including the highlights and shadows.
Let’s give you a little preview of one of my favorite spots to photograph here in Sedona.
Castle Rock formation with Bell Rock and Courthouse Butte in the Village of Oak Creek in Sedona, Arizona
This image came out of the camera 6100 pixels wide 1/2000 sec ISO 800 f13 with Lumix Vario 35-100 f2.8 lens
When I want a full-on capture of a panoramic scene I shoot multiple images and stitch them together using Photoshop or another program. That is what will get the best quality beyond a shadow of a doubt. I will also, depending on the density of the scene, shoot bracketed exposures to ensure the highest quality rendering for a print including the highlights and shadows.
I use the in-camera pano feature more as a ‘sketch’ of a scene. Why is that? Number one – When making the pano capture there can be some slight stitching errors. You’ll sometimes find these in very simple areas like plain blue sky or conversely in very, very detailed areas. Number two – The files are rendered as a jpeg which means that the camera settings are baked into the file and that information will be stripped during the compression process. Number three – Finally, the files are not that large. Panoramas tend to need to be printed large to appreciate them.
So why do them in camera at all? I mentioned the ‘sketch’. Number one – This finished jpeg stands as a quick reference of the scene which can be filed with the RAW captures. Number two – It can be uploaded via the in-camera Wifi to send off to others to share what I’ve just seen. Number three – There might not be time, for example when traveling with others to complete a full-on capture of the frames. Number four – Sometimes I am just looking for a ‘record’ of the area to remember to go back to because there weren’t great conditions. I do this when scouting locations.

An overcast day in Sedona. This image ends up with quite a bit of ‘depth’ due to the weather and distant mountains. In-Camera Pano 7600 pixels wide. 1/100th at f7.1 ISO 800
Hope this give you some ideas on how to leverage features in a way you might not have considered before.
Yours IN Creative Photography, Bob
Save
by successfulbob | black & white, HDR photography, infrared photography, landscape photography, Lumix G6, Lumix Lounge, photography creativity
Infrared Photography Panorama Style
“The sailing clouds went by, like ships upon the sea.” — Henry Wadsworth Longfellow
Clouds scudding across the azure skies. Words can take you to some beautiful places but as the Chinese say, a picture is worth a thousand words. That’s why I keep an eye peeled on the sky. When the clouds start racing, or even lumbering through the red-rock country of Sedona I grab a camera because interest is added to the scene.
Even if it’s mid-day, I grab a camera and head outdoors. My camera of choice for these times is infrared. I enjoy the high contrast black and white rendering of clouds rendered against a deep dark sky. A Lumix G6 was converted by LifePixel and it has expanded my shooting times as infrared shines when it’s time to put the camera up for regular color photography. I used the Kit lens that came with the camera and was pleasantly surprised at the solid quality of the captures. (G Vario 14-42mm f3.5-5.6) It makes for a super light-weight combo.
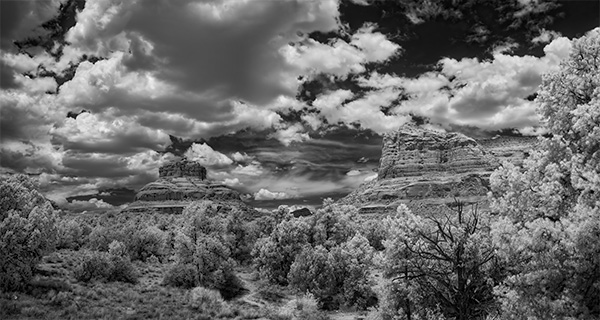
Bell Rock Vista in Sedona – Infrared Panoramic image with Courthouse Butte
I tend to try to push the envelope and experiment when I’m on self-assignment. In yesterday’s adventure, it was to add panorama to infrared. It took quite a bit more work. I’ll let you be the judge to see if it was worth it.
Five images overlapping by about 40% were captured. With the camera set to black & white, three exposures one stop apart were saved in jpeg format to ensure detail in highlight and shadow areas once they were processed. Each set of three images were treated in Aurora HDR software.
 Screenshot of images used before processing
Each of the final five images was loaded into Adobe Photoshop to process the panorama. Whoops! That was an unusual fail. Could be the handheld capture caused some extra deformity in the files. Usually, I can depend on Photoshop to render a solid panorama but with this set of images, there was way too much distortion in the resulting output. (I’ll experiment with these files again when I have some more time and see if different rendering intent might be of help) I couldn’t find my AutoPano Pro software on this computer so I resorted to having Photoshop load all the files into Layers and added my own Masks blending the images together by hand. It’s good to remember the ‘Old School’ methods when the automatic software options aren’t there for you.
Yours in Creative Photography, Bob
PS – Another cloud description I enjoy. “Clouds hastening like messengers through heaven.” —John Hall Wheelock
PPS – Cloud quotes referenced in this post were found in The Free Dictionary by Farlex. I’m book-marking that page for future reference!
Save
by successfulbob | landscape photography, Lumix GX8, Lumix Lounge, panorama, photography gear
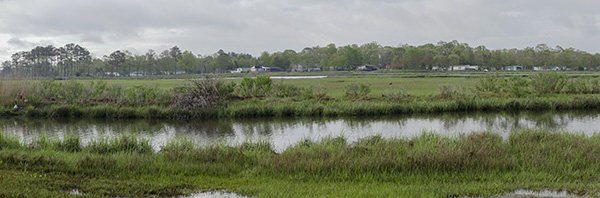
Photography in the Marsh in Delaware
While the weather during the time I was on a family visit was less than stellar I thought I’d give you an overview of the scene from my mother-in-laws backyard. Photos of some of the wildlife from another post.
These two panoramic photos were captured with the Lumix GX8 and the Vario 12-35mm f2.8 lens. Very lucky to have this area as a playground when visiting.
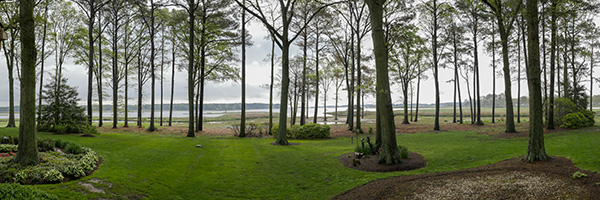
 View from the front. Panoramic Mode with the camera oriented vertically. Settings 1/1000 sec f4.0 ISO 800 18mm (36mm in 35mm equivalent)
 View from one side. There’s a similar view on the other side with even less evidence of man in the view. Settings 1/2000 sec f4.0 ISO 800 35mm (70mm in 35mm equivalent)
The in-camera stitching on the GX8 is pretty amazing. In straightforward situations it makes a great pano. If you have highly complex subject matter like trees and/or patterns you might want to take two or three passes and check the details before moving on. If it is something very important I will make the in-camera panoramic and the I will also shoot the individual images in RAW for later stitching if I want super high quality. Many times I’ve been pleasantly surprised that I didn’t need to use the RAWs but I always like to back myself up.
Yours in Creative Photography, Bob

