I’ve probably mentioned this before, but using an infrared converted camera increases your chances of coming home with a solid image when shooting in the middle of the day. I upgraded my infrared camera from a Lumix G6 to a Lumix GH4. If you have a camera languishing on the shelf not being used I recommend sending it off to LifePixel Infrared for a conversion. I know I was glad I did!
Midday
Those hours between 10AM and 3PM can be brutal on your images due to the high contrast. Infrared images thrive in that environment. I quite enjoy extending my keeper rate by working with infrared imaging.
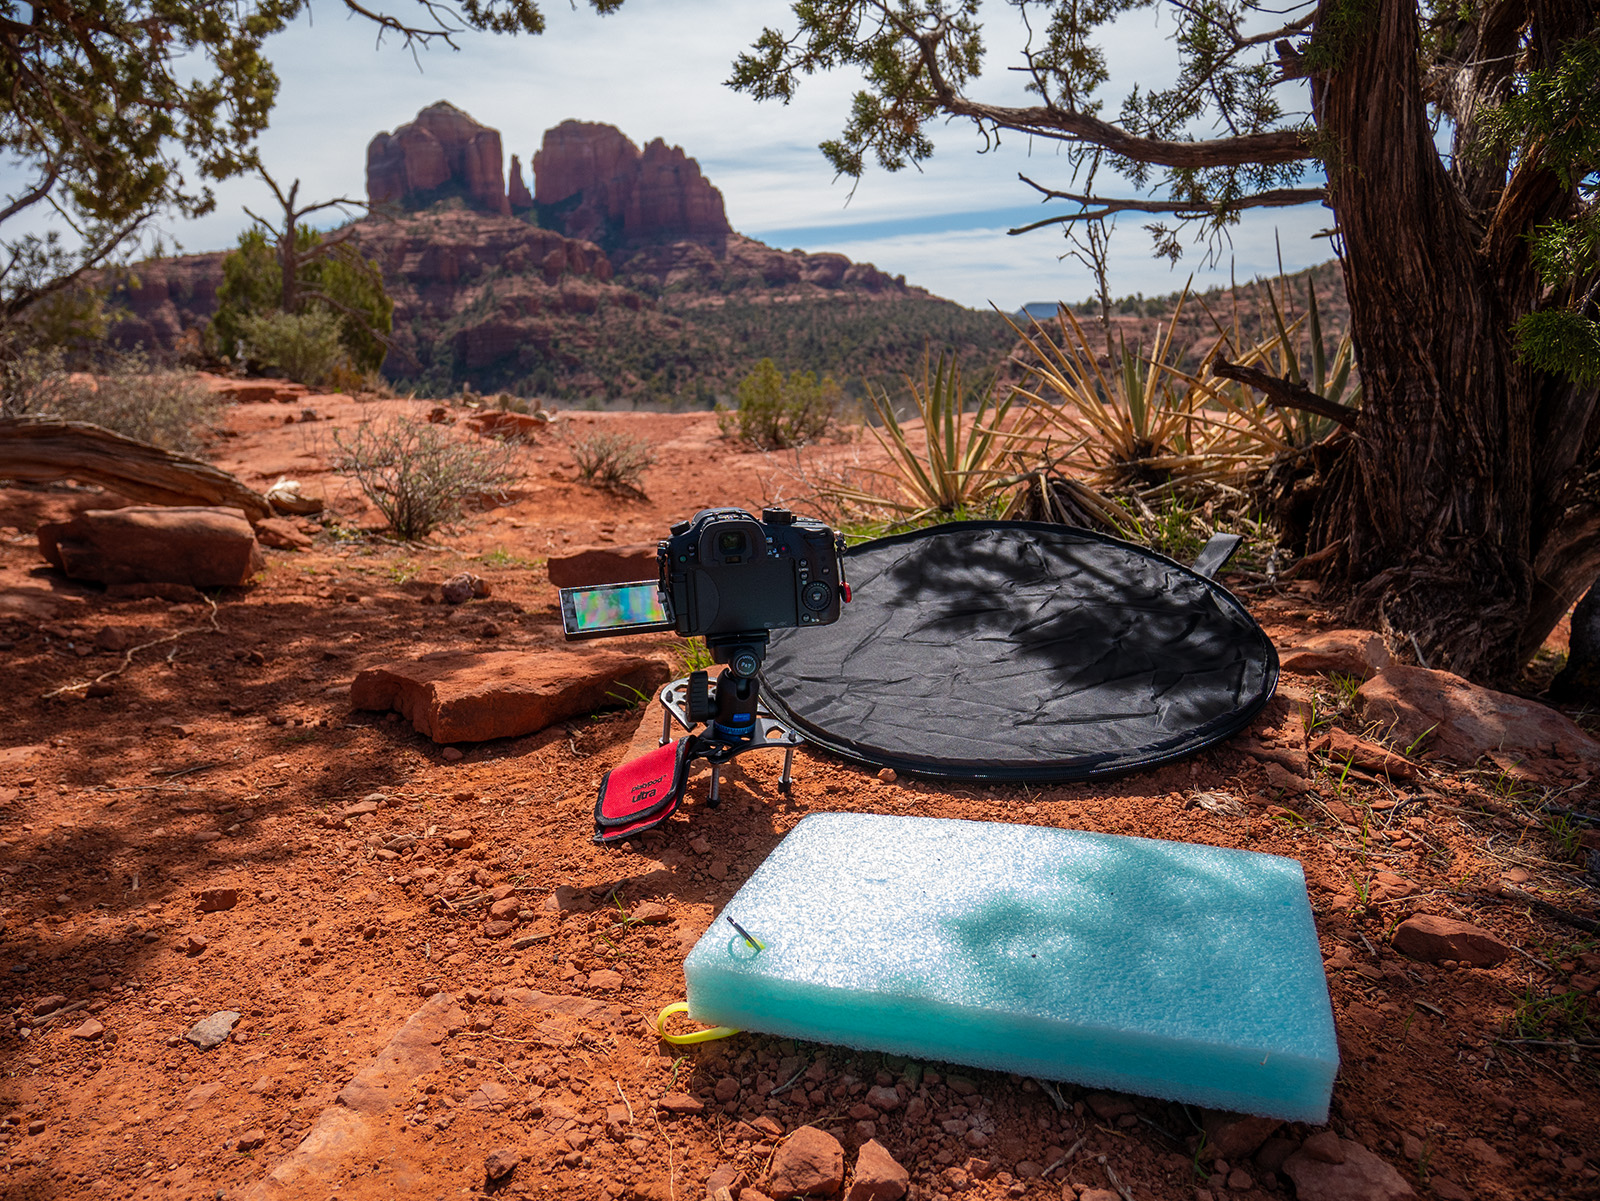
Platypod Ultra
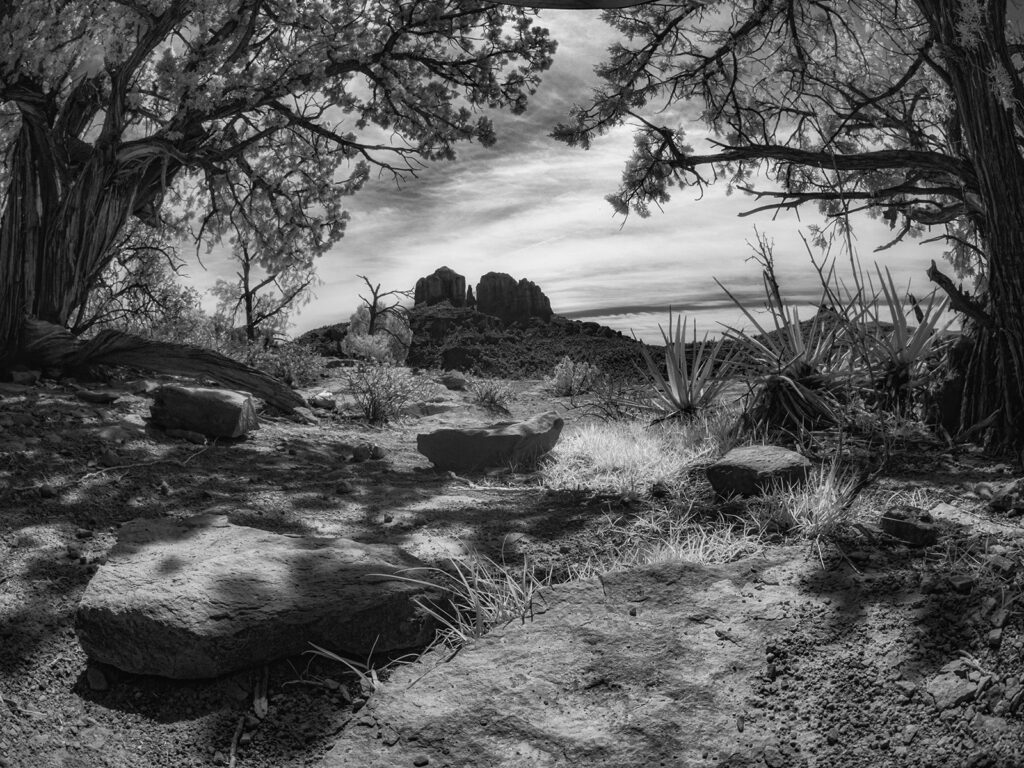
From Sedona, Arizona, Cathedral Rock during midday. Renders in an interesting way using an infrared converted camera.
Another tool I find helpful is being able to easily have my camera low-to-the-ground in the Platypod camera support. I can hang the Platypod from my camera bag and since it is very light I hardly notice it’s there until I see a need for it. The Platypod is extremely helpful, especially if you have a flip screen on your camera. The flip screen allows you to be able to frame and focus the scene without having to get down on your belly. Bonus!
Photofocus
Here are a couple articles I wrote for Photofocus dealing with and expanding the uses of an infrared converted camera. Enjoy! Toning infrared images for a different look Infrared and summertime.
I enjoy infrared photography to extend my shooting day. Harsh light doesn’t do much for regular color imaging. I believe it is beauteous, when captured with a camera that has been converted to infrared.
My current camera was converted to infrared by LifePixel. It is a Lumix G6 (now out of production) I keep a Lumix G Vario 14-140mm lens attached. I stay with the standard 720nm (nanometer) filter. It replicates the original black and white ‘IR look’ I enjoy. I’ve written about IR for several publications.
Here are a few links to try out if you would like to learn more.
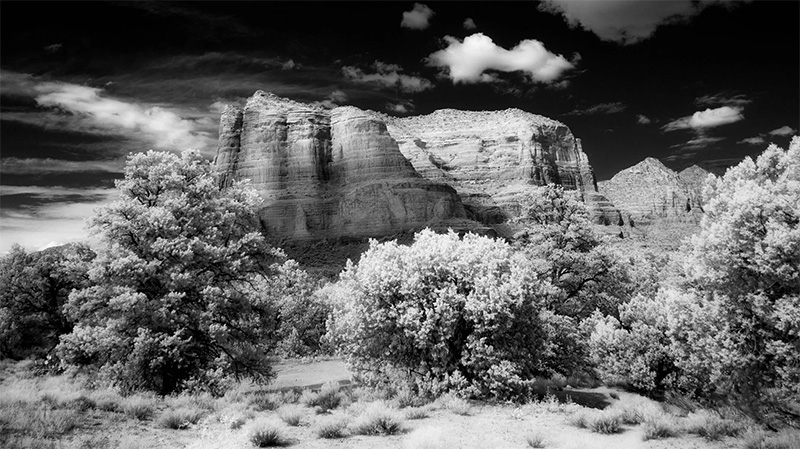
Courthouse Butte in Sedona, AZ created with camera converted to infrared
When the sun is high in the sky, and the contrast makes for images that would be too ‘eh’ for making regular color photos it’s time to break out the infrared camera. Infrared is soooo much more natural to capture with a digitally converted camera with Live View. The Live View allows you to see in real time how the image will look in black and white. This is a massive thing as even to try to focus when we were capturing Infrared photos in the film days your filter had to be so dark that you would need to remove it to focus. AND, there would be an adjustment that you had to apply because IR capture focused on a slightly different plane from your regular focusing.
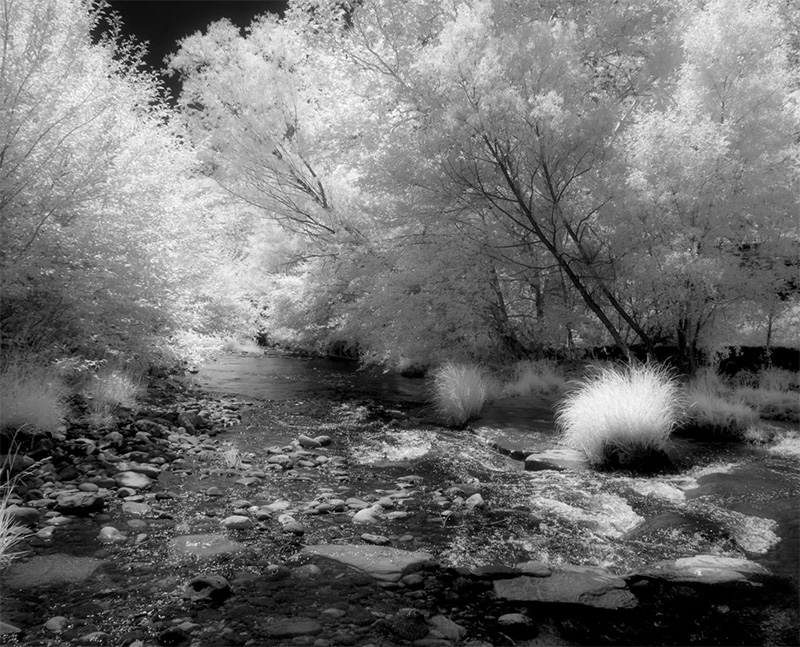
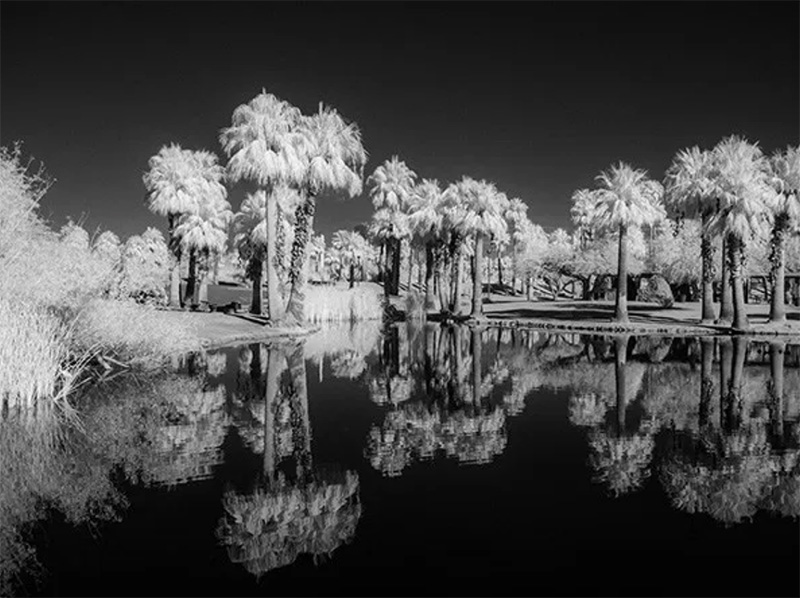
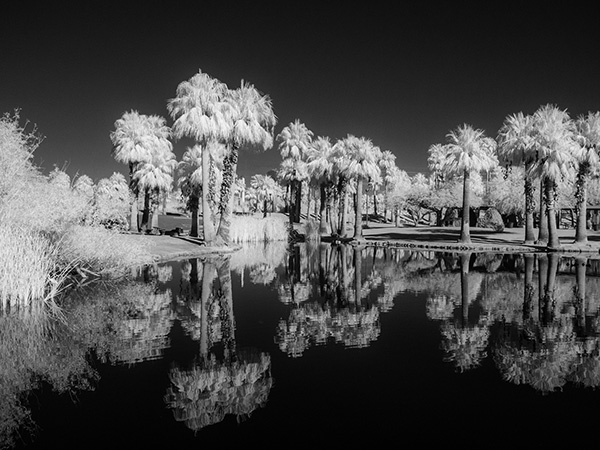
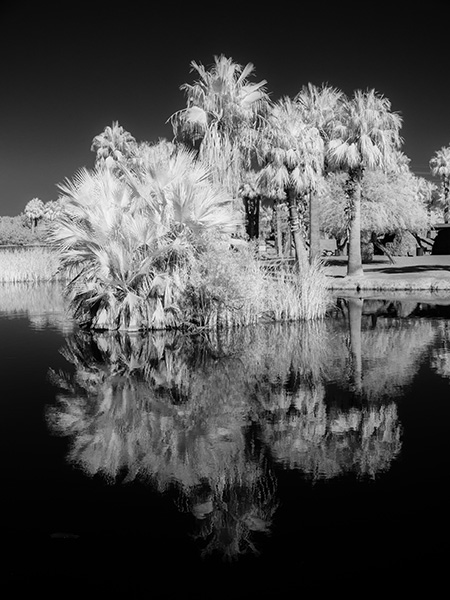
Enough about the past hassles of IR capture here are a couple of images I made yesterday at Papago Park.
I quite enjoy the high contrast of the water and sky with the light palms
The IR converted camera file initially comes out a magenta file, so it needs some massaging in Adobe Photoshop to be the BW we’ve come to know and love.
Some Notes on How I processed these images
There are lots of convoluted processing possibilities to getting the IR look. In this case, I’m coming up just a wee bit short on the full IR feeling, but I like the results. In Photoshop I remove the color by decreasing the saturation, adding Clarity, opening shadows or highlights. I also adjust the Temperature slider making the blue sky and the water reflecting the blue sky darker.
As a final touch, I use Luminar 2018 as a Plug-in and add an Orton Effect or possibly a Glow depending upon the image feel for which I am going.
Camera is the Lumix G6 (using an older camera collecting dust on your shelf for conversion is fine as long as it has Live View) Conversion done by LifePixel. There are varieties of IR filters you can choose to check out the info here. I have gone with the old standard.
I gotta tell ya it is some kind of wonderful to have a creative person who enjoys being in front of the camera! I’ve never had a muse before. For those who might not know the term here’s the Dictionary definition.
Verb (used without object),mused,mus·ing.
to think or meditate in silence, as on some subject.
(in Greek and Roman mythology) each of nine goddesses, the daughters of Zeus and Mnemosyne, who preside over the arts and sciences.
synonyms:
inspiration, creative influence, stimulus;
formalafflatus
“the poet’s muse”
2.
a person or personified force who is the source of inspiration for a creative artist.
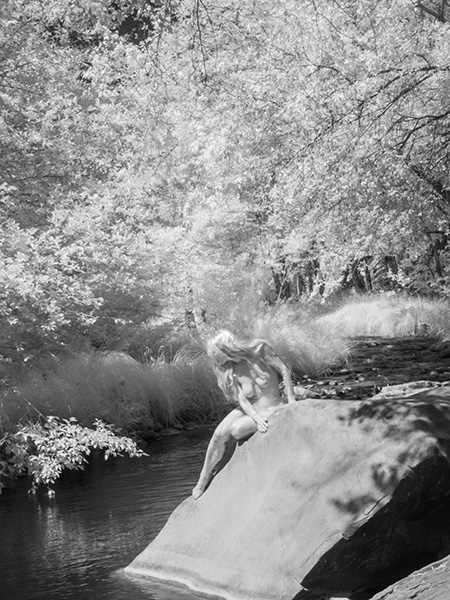
Having a person who is an artist in their own right is a gift. Pash has ideas, shares them with me and then lets the chips fall where they may. We start to make photographs with her thoughts in mind then we go wherever the first situation takes us. She has an intimate relationship with the environment which is usually the starting point. Then I add a couple of thoughts to refine, and we experiment and play, and this invariably leads me to create new imagery that I find exciting.
I usually end up pushing my personal boundaries as we work together. And then, even more, when I get into post-production.
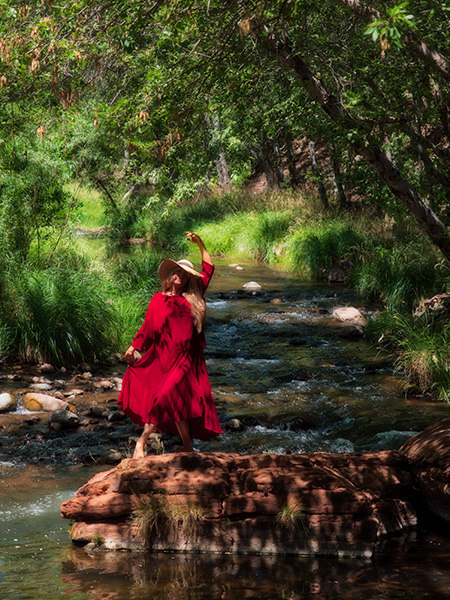
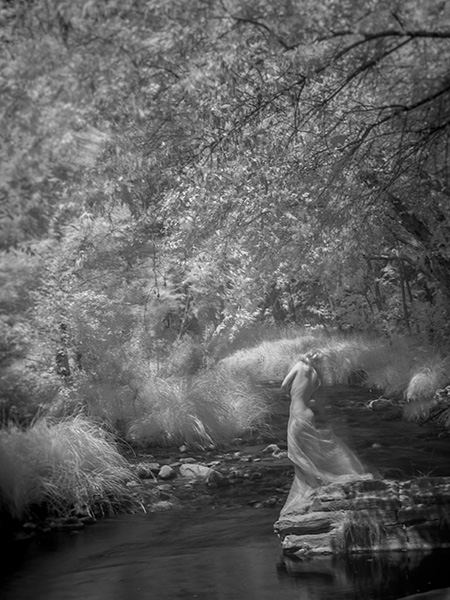
Our latest foray into collaboration led to a photo session on Oak Creek in which she had a thought of ‘creating a mermaid.’ I had the urge to play with infrared and had her do some warm-up posing on the rocks with a dress, flowing cloth and au’ natural.
This Photo has the feeling of a Greek Statue to me. Infrared made with Lumix G6 converted by LifePixel
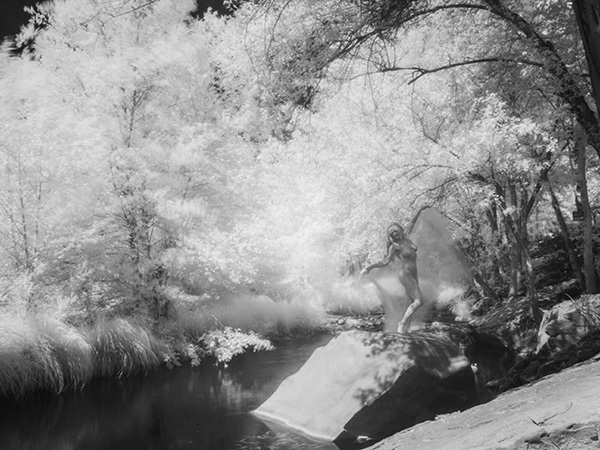
As the session went on, I added Tiffen neutral density filters to extend the time that the shutter would be open.
The neutral density filters extended the time allowing the wind to register in the trees.
This image reminds of one of the classic painters.
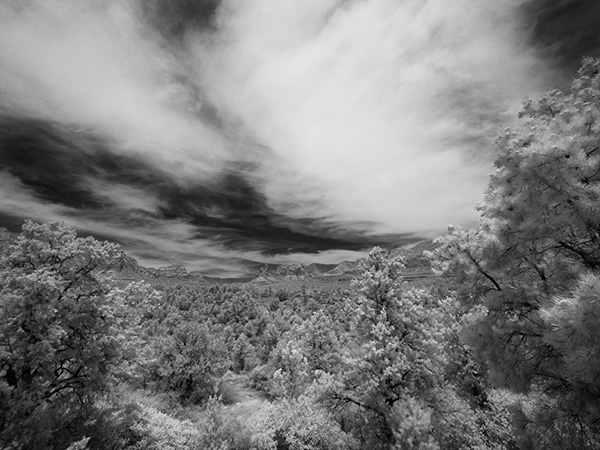
There’s a wonderful restaurant in Sedona; AZ called Mariposa. Award-winning chef/owner Lisa Dahl created a Latin-inspired Grill menu on the hill between Uptown and West Sedona. I highly recommend heading over there for lunch. Good stuff! This was a location that caused me to say, “There should be a restaurant here!’ every time I passed this location. Much of the thought involved had to do with the spectacular view.
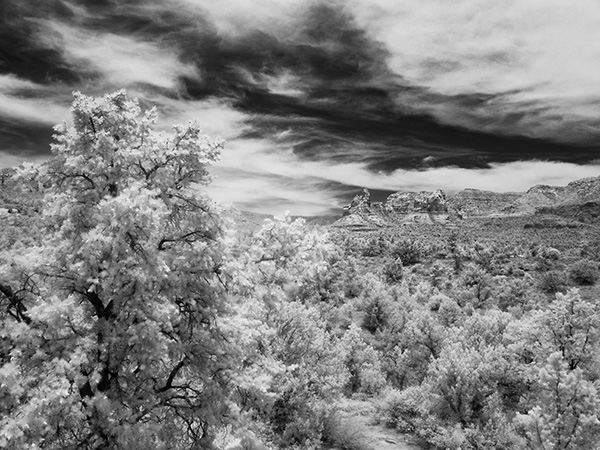
While passing by today, I saw some clouds and thought that a little-infrared imaging was in order. As always I recommend working the scene at least a little bit. Play with composition. Play with cropping. Play with different angles. As I didn’t have a lot of time I didn’t work the scene as much as I might have but here are three images.
First Capture. I only had a very wide angle zoom. The trees kind of overwhelm the red rocks in the middle ground in this rendition.
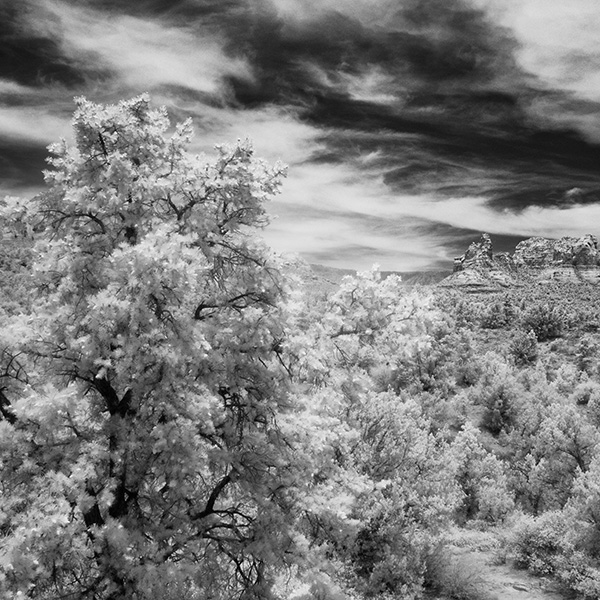
Zooming in a bit and using the play of the foreground tree to balance the red rocks in the background. Using the tighter crop also allowed the sky to read better as there was more movement in the area without clouds.
Here is one last version cropped to a square from the image above. It brings even more attention to the red rocks while honoring the glowing tree.
Images were captured with the Lumix G6 which was converted to infrared by LifePixel. Any camera you have retired just sitting on the shelf after upgrading your equipment can be brought to new life by a conversion. It opens the middle of the day to some creative image making. This is the standard 720nm filter that most looks like infrared of old. Infrared converted cameras that are live view capable make it possible to see the image in real time and not have to make focus adjustments as we once did with film cameras.
I processed these in Adobe Camera RAW and Photoshop to control contrast and set the proper tonal range. I then made a copy of the layer and used Skylum’s Luminar 2018** as a plugin to add a glow to the highlights and tweak specific areas for more contrast control, and then another layer to add a little noise to replicate the look of IR.
Yours in Creative Photography, Bob
** Use CODE COATES to get $10 off if you decide to buy Skylum software such as Luminar and Aurora HDR software.
For infrared conversion of my cameras I use LifePixel. Infrared allows you to put an older camera to use and opens up a new time time of day for productive image creation.
Learn Photoshop in a fun environment. Aaron Nace applies the right amount of fun with easy to understand and follow tutorials. Actions and brushes are included with lessons!
Best embroidery ever. Give Queensboro a try, get a $20 instant credit to get started by clicking on the logo! They specialize in great quality custom logo apparel and promotional products with the best customer service.
Platypod has become a great resource for being creative in getting your camera gear easily into unusual places. As an Platypod Pro I get to work/play with the gear even before it comes out. Head over to Platypod, subscribe to the newsletter and you will get special discounts reserved only for subscribers.