
by successfulbob | cityscape photography, landscape photography, panorama, photography, photography competition
Professional Photographers of America
Southwest District Competition – Photographic Open Results
Professional Photographers of America supports photographic education in many ways. One of those is through the Merit and Degree program. Two of the degrees are image based on that you need to earn thirteen Merits plus another twelve Merits for service or education in the industry.
On the way to International Photographic Competition (IPC) is a proving ground called the Districts. The country is divided into five different Districts of which I am a member of the Southwest District. They recently completed the judging, and I earned Merits for all eight of my entries. Additionally, I received an automatic Loan Collection image for scoring 95 or above. Another image will be judged for Loan when IPC commences August 5th through 8th at Gwinett Technical School just outside Atlanta in Georgia.
I’ll share my images here except for one that will be judged for Loan Collection as the judges are not to have access to any unjuged photos.
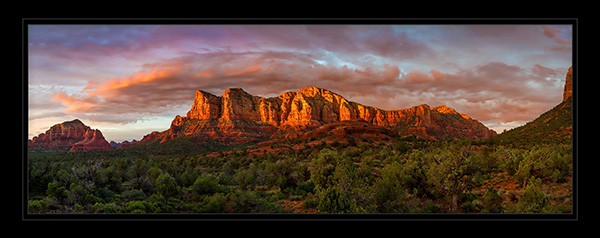 ‘Days End’ – A spectacular sunset on the red rocks in Sedona viewed from Hwy 179.
A slightly different version of this image is available for sale through the Gallery of Modern Masters in the Hillside Shopping area. Day’s End will be automatically accepted into the PPA Loan Collection at the final judging in August because it scored above a 95.
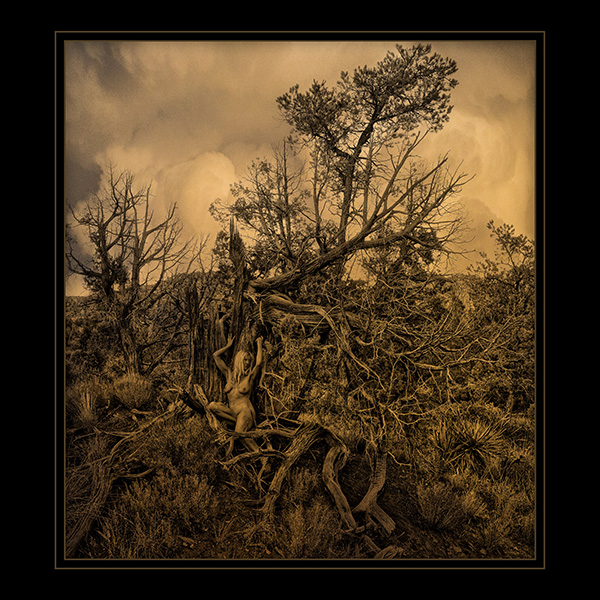 A capture of my Muse Pash Galbavy who is an incredible artist who is in love with nature. She is a life model, mask maker, performance artist and so much more. Other images from this series with Pash are also available through Gallery of Modern Masters. This image earned a Merit score
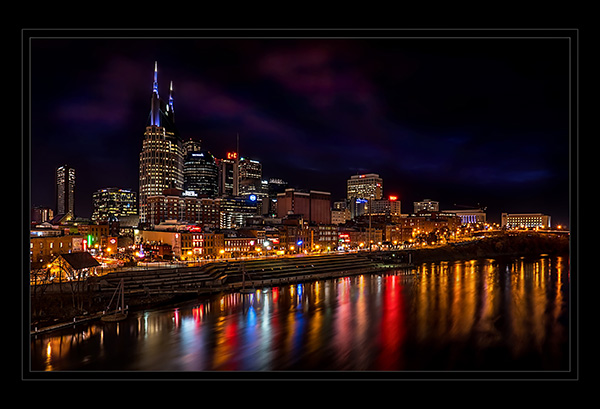 While in Nashville at last year’s PPA convention I hoofed it out to the bridge to capture a night shot of the skyline along the river. This image also earned a Merit score.
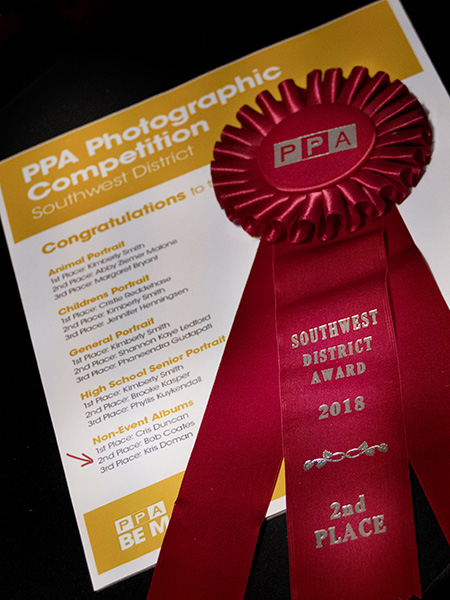 This image will represent the Non-Event album which scored a 92. I can’t share the images from this until after judging for the Loan Collection in August. It scored second place in the category.
These are the Photographic Open Category images. In the next couple days, I’ll share my Artist entries with you.
Yours in Creative Photography, Bob

by successfulbob | landscape photography, Lumix GX85, Lumix Lounge, panorama, photography, photography creativity, photography gear, photoshop tutorial
Working a Scenic Landscape
The light was fantastic. Scenery amazing. Time? Very short!
I was on my way to a photo shoot in the evening and saw the moon just starting to peek above the horizon as the light from the fading sun had already dropped below in the west. I grabbed the Lumix GX85 and the 7-14mm f4 lens to see what I might capture in the few minutes I had available. I don’t usually like to rush when a situation like this appears, but duty and a deadline called.
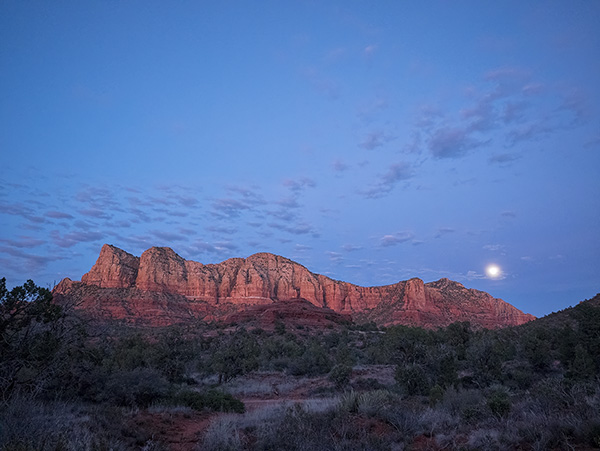 This was the first quick image to make sure I had something in the can.
I first quickly grabbed an overall scene-setting image. Then I tried a couple quick grab shots. I ran down the parking lot to get a better overall view. Having the wide angle lens gave me a lot of the scene but I knew I would need more to be happy.
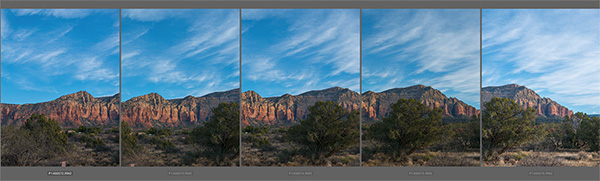
 Nine image panorama capture for further work in post. Note the images have already been adjusted a bit in Adobe Camera RAW
I set up and shot a nine image panorama with the camera in the vertical orientation to gather as much info as possible. Already the light was starting to fade and my job was calling.
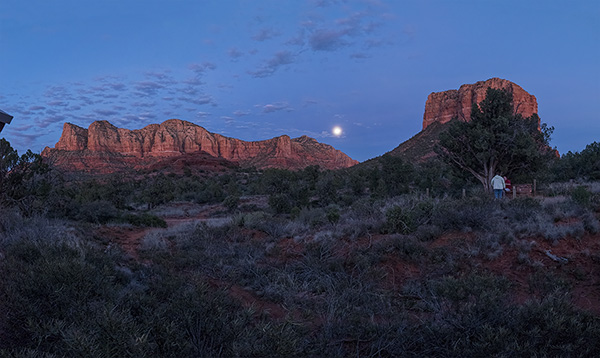 Image output after using Photomerge in Photoshop.
I allowed the Adobe Photomerge tool to do a lot of the heavy lifting for me. I highlighted the images in Adobe Bridge selected Photomerge from the Tools drop-down menu Tools>Photoshop>Photomerge… Layout was set to Auto. The following text boxes were checked. Blend Images Together for obvious reasons. Vignette removal. This was checked because the lens had a bit of vignette and would have made for messy skies. A reason for not checking the vignette box would be if you had files that had no vignette because the files could process faster. Geometric Distortion Correction. You can try working without this but I have found in a scene like this the red rocks would have curved. Content Aware Fill Transparent Areas. When a handheld pano is made like this there is often areas that don’t completely fill the rectangle of the final image. Photoshop will look around and use it’s best guess to fill the areas. You can check on them quickly as it will also leave a selection around the areas it filled in case you need to make some adjustments. In this particular case, it did a great job. All setings are available for you to play with if you don’t get the exact results for which you are looking.
Post-production is a huge help in these instances to obtain quality images.
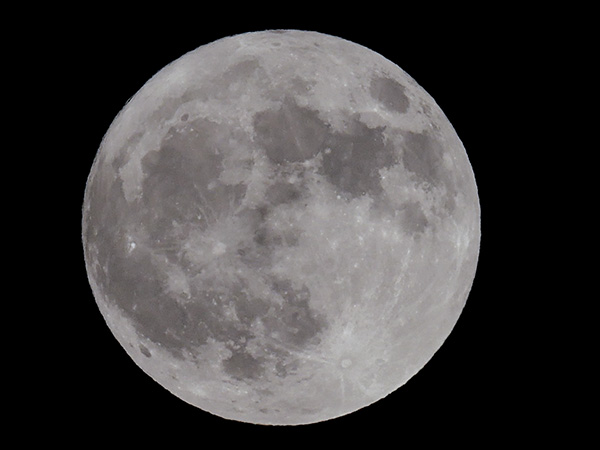 I pulled a full moon from my files as the moon area was blown out. Another case of the eye being better than the camera. If I had more time I would have bracketed exposures to get the detail I needed.
 Here’s the final. The moon has detail. The image was cropped to bring attention where I wanted it and
a little judicious Cloning was used to remove the couple under the tree.
If you have any questions or comments give me a shout!
Yours in Creative Photography, Bob
Save
Save

by successfulbob | landscape photography, Lumix Lounge, Lumix LX100, panorama, photography creativity, photography education, photography gear, photography software
Panoramic Photography – One More Time
Here’s one more use of panoramic photography that I haven’t mentioned in previous posts. Change the number of Mega-Pixels in your camera.
“Say what?” You ask? “And once you explain, tell me why I want to try that?”
Ok, here goes.
You can expand the number of pixels in an image in order to be able to make a larger print by making multiple images and overlapping the capture. After you get back to the studio move those images into your favorite photo stitching programs like Adobe’s Photoshop or AutopanoPro and put the images together. Photoshop has gotten very good at merging images together including a new feature called Content-Aware Fill that can automatically clean up the blank space that can sometimes surround your image.
This morning I had my Lumix LX100 with me. I call this the professional’s point and shoot because it has fast glass and is quite versatile with all important controls on dials just like the old days. No need to move into electronic menus to access your settings. All of this is in a quite small package. But the camera is only 12.1MP which yields a 36-megabyte file. In today’s example, I shot five exposures overlapping each by 30-40 percent. After merging the photos I ended up with a 97-megabite file. 97 divided by 3 equals a 32MP capture.
 Here is a screen capture of the five images when highlighted in Adobe Bridge.
 After the images above were assembled in Photoshop and massaged with Luminar from MacPhun.*
With this technique, you can get file sizes you have only dreamed about with a little extra work. Remember if you want to really make a huge file you can use a long lens and do row after row of images and blend them all together. Make sure you capture each row the same way. I always go left to right and top to bottom during my captures.
Yours in creative Photography, Bob
PS – * Luminar software is currently only available for the MAC platform but from what I understand they will be releasing a PC version later this year. Luminar can be used as a stand-alone processing program or as a Plug-in. There’s a sale on ’til the end of the year the link above will take you there.
PPS – The MacPhun software Aurora 2017 HDR is also on special until the end of the year. I’m enjoying the creative processing from MacPhun products.
by successfulbob | landscape photography, Lumix GX7, Lumix Lounge, panorama, photography, photography creativity
Let’s Talk Panoramic Photography – Part 2
In looking through my files for some examples of in-camera panoramic photos I came across some more examples I wanted to share. I feel the format adds another arrow to the creativity quiver. Here’s a few made with the Lumix GX7.
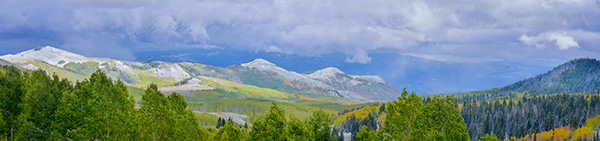 Outside Salt Lake City – Panorama format is perfect for telling the dramatic landscape story.
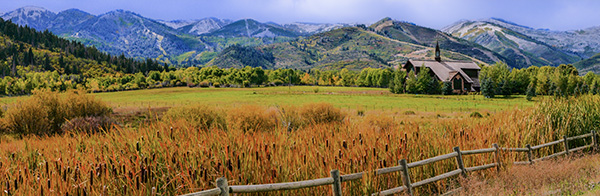 Another from the Salt Lake City Trip.
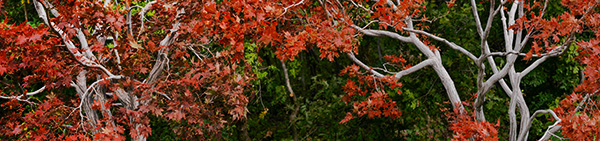
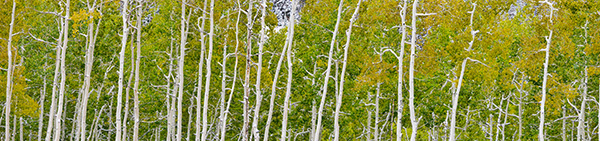 A different way to share a scene.
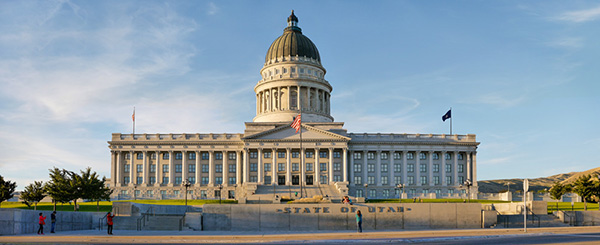
As I was going through my photos, I realized I didn’t share a slightly different idea to leverage the in-camera panorama feature. Sometimes the resulting photo just doesn’t quite cut it as far as capturing the scene. Or you want a file that will have a different aspect ratio but is still a panoramic image. Or, you need more pixels but don’t have time to create a full set of images for future stitching. So here’s two rows followed by the final.
 Showing the dome.
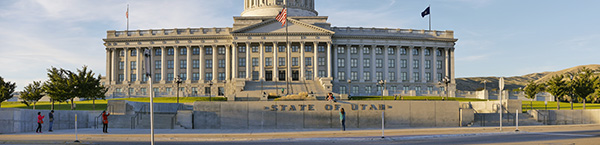 Showing the base.
 Here’s the final with the two stitched in-camera panorama images using Adobe Photoshop.
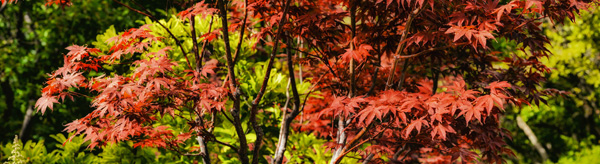 From the Red Butte Arboretum in Salt Lake City.
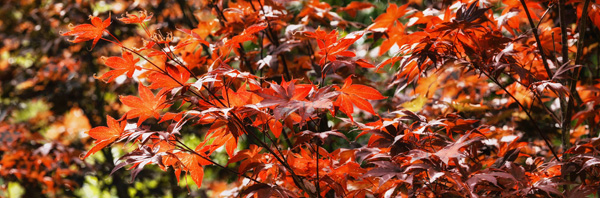 One more.
Think about the ways you can use the panorama feature. I don’t have one at my fingertips, but you can also make the panorama vertical.
Yours in creative Photography, Bob

by successfulbob | Lumix G7, Lumix GX7, Lumix Lounge, panorama, photography
Possibilities of Panoramic Photography
Let me put this out there if you don’t already know. I love the panoramic format!
 Red Butte Arboretum – Salt Lake City Utah. In-Camera Panorama Lumix GX7 Shot a few years ago.
Panorama images are not the be all and end all they are there to tell a story that can’t be told in the two by three or three by four ratio. Sixteen by nine is becoming a more ‘standard’ image size to our eyes because we see it more often in movies, television, and our phones.
This post was triggered by a question about the in-camera panoramic photos vs. shooting individual images and stitching photos in post production. Here was the question, “When I use the Lumix G7 it does a Gatling gun shoot as I shift the camera left to right and we all know you shouldn’t be moving a camera when shooting a landscape. I’m curious the quality difference between one shot at a time and stitched in an editor vs. the G7 spray technique.”
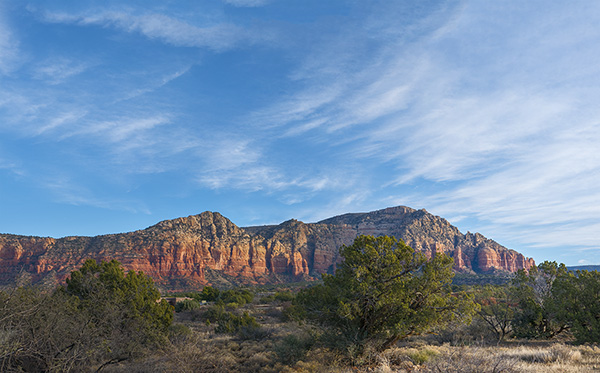
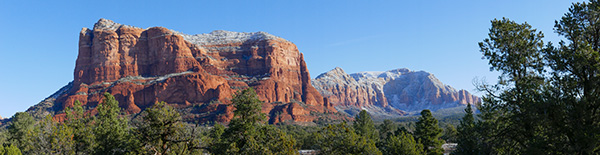 Courthouse Butte in Sedona – In-Camera Panorama. Print to about 27 inches.
Great question. We have different tools for different jobs. The in-camera panorama feature is a tool for the convenience of capturing a scene quickly and being processed for output immediately. For example, you want to share a scene on social media that is panoramic in nature. The camera will produce a completed image that can instantly be uploaded via the camera’s built-in Wifi. It is also a fine way to capture a scene as a memory that will only live in the digital world where higher resolution is not a necessity. That’s not to say you can’t make a beautiful print from the in-camera pano, I’ve made some beauties.
Advantages of in-camera panoramic photos. Immediate gratification. Ideal for web presentation and medium sized prints.
Now to the advantages and drawbacks of a stitched image.
In the capture of individual images to create a panoramic in post-production, you can shoot in the RAW format which will give you a larger file and the ability to finesse the most quality from the file. The larger size files when combined allow for printing very large size images. The only down-side is that post-processing is necessary before you can share the picture as a panoramic.
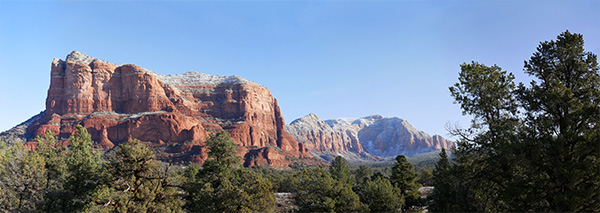 Same scene as above. Ten frames stitched in Adobe Photoshop. Easily print to about Seventy-eight inches. Note the details and color were more available from the RAW file information.
Final thoughts. Use the best of both worlds. Make an in-camera pano to make a quick record of your scene. It can be utilized as a reference for the future building of your panorama or quick sharing of your view in social media. Make your individual images for large format printing.
Yours in creative Photography, Bob
by successfulbob | landscape photography, Lumix GX85, Lumix Lounge, panorama, photography
Multiple Photo Captures – Part Two
Yesterday I shared a time-lapse video shot and processed with my Lumix GX8 and Adobe Premiere Pro.
While those frames were being recorded I used the GX85 to photograph some still images. Here are a couple in-camera panoramas. Cameras are becoming more like portable imaging computers with each new release.
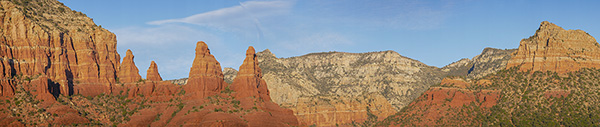 Stitched in-camera Sedona pano. Hwy 179. The camera is held in the vertical orientation to give a slightly taller image. If there was lots of cloud action I would have taken a second pano and stitched them together in Photoshop for an even taller rendition of the scene.
 The field of view depends on how long you continue to pan. A longer panning time gives a different aspect ratio.
Here’s a tip for creating smooth panorama photos with clean stitching. This is an old videographer’s trick. Point your body and feet to where you would like the panorama to end. Then using your stomach muscles turn back to the starting point of the image. Make sure the camera is tight against your forehead and is not tilted. Then using your stomach muscles gently pivot to the end of the field of view. The stomach muscles are larger and more stable giving you a smoother movement resulting in less stitching errors. One final note, there is a preview of your capture in the viewfinder. You will want to go a little bit further than you see or your image will be truncated just a bit. If you are moving too fast or too slow or the light is too low, the camera will return an error message.
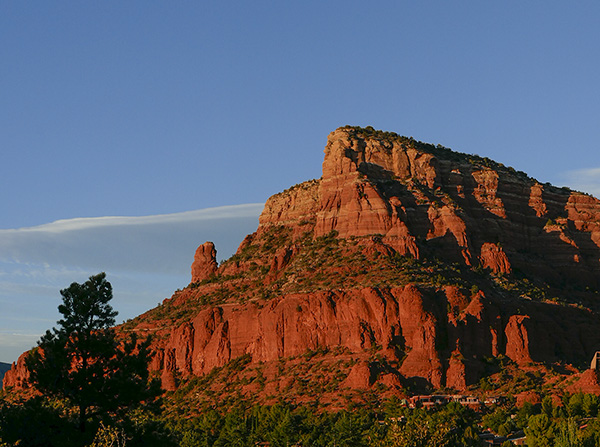
 Of course as the sun begins to set colors can change immensely
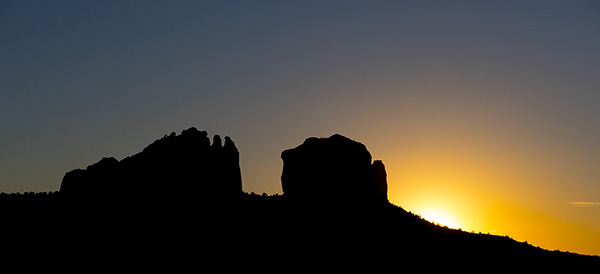 And of course, don’t forget to turn around. This is the back side of Cathedral Rock in silhouette.
Our creative tools are getting better and better. It’s a fun time to be an image maker.
Yours in Creative Photography, Bob
Save