by successfulbob | flower photography, Lumix G9, macro, photography
Extension Tube Macro Photography
OK. Extension tubes don’t necessarily equate to macro photography. But, they can let you focus very close, and in some cases, you can replicate macro photography. Getting in close and showing people things that won’t be noticed by the naked eye can get you some excellent images. If you are not officially into macro photography but want to play, extension tubes are the way to go. Let’s call this close-up photography!
A true macro lens can be anywhere from $700 and up new. A set of extension tubes goes from $7 to $229. I don’t recommend going with the absolute cheapest as the builds seem to be a little rough. (I’ve tried) I’ve found a great set of tubes for about fifty bucks. Vello extension tubes are a great cross in build quality to performance. You can see them here. Vello Micro 4/3rds Extension Tubes
Some examples from a recent hike below
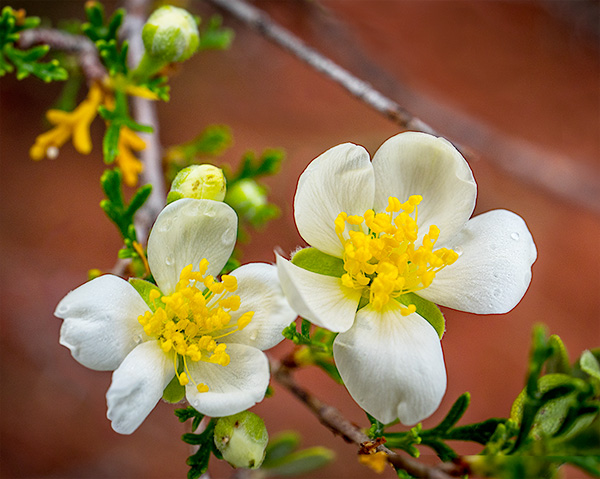
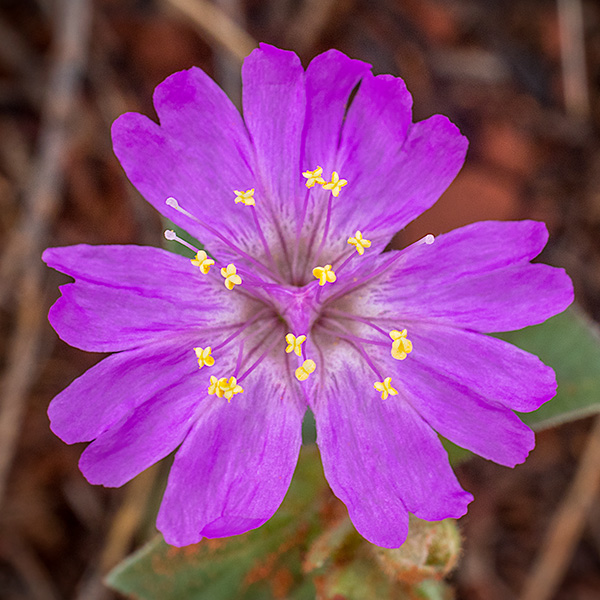
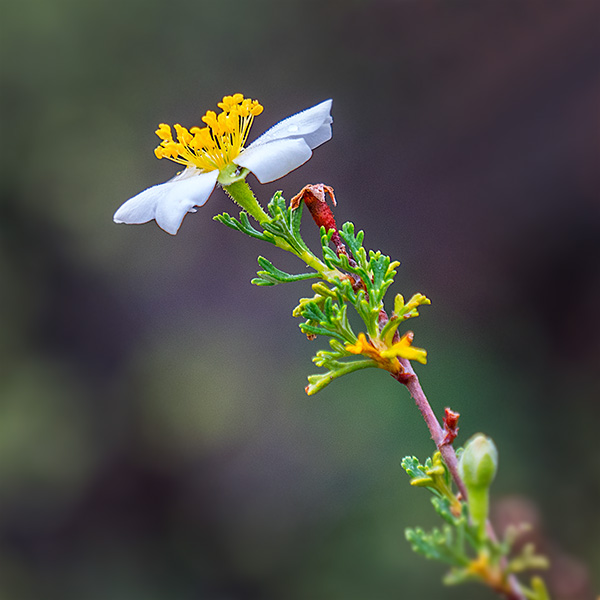 All flowers in this post are smaller than the size of my fingernails. All Images Photographed with the ** Lumix G9 and the 12-60mm Leica DG Vario-Elmarit f2.8-4.0 lens w/ Extension Tubes
 Two images blended together to extend the depth of field.
If I were working the flowers, I would be on a tripod and automatically bracket my focus for subsequent stacking in post-production. In this case, I focused on the front flower and then on the back flower bloom and used Photoshop Layers to blend the two by hand with a mask.
 An example of the camera settings. For this image – 1/100th sec F11 ISO 800
If you want to go full macro and you are in the micro four-thirds camera systems, I find some beautiful results with the 45mm Leica DG Macro-Elmarit f2.8 lens. BTW, as this lens is a 90mm (35mm equivalent view), it also makes for a nice head and shoulders portrait lens. Dual use is always a winner in my book!
Yours in Creative Photography, Bob
** Lumix G9 Camera is on special for $200 off regular MSRP (not sure how long this will last)

by successfulbob | Lumix Lounge, macro, photography, photography software
In-Camera Focus Bracketing
Yesterday I shared info on in-camera focus stacking of images captured with the Post Focus Photo Mode in the Lumix GX85. The PFPM is a great feature for getting images from moving objects, quick captures and times where you won’t need to crop into the image very much because the still frames pulled from the video are eight megapixels. Eight megapixels can get you to a twenty-inch print with no problem but when you want to go big it’s time for a new feature built into the camera.
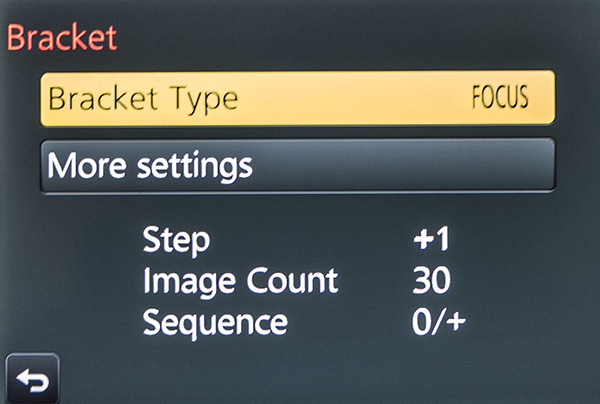
Focus Bracketing is different than the Post Focus Photo Mode in that the camera will be making image captures using the full-size files and changing the focus between each shot automatically. Here’s the screen you will see to set up the capture of multiple images with one push of the button.
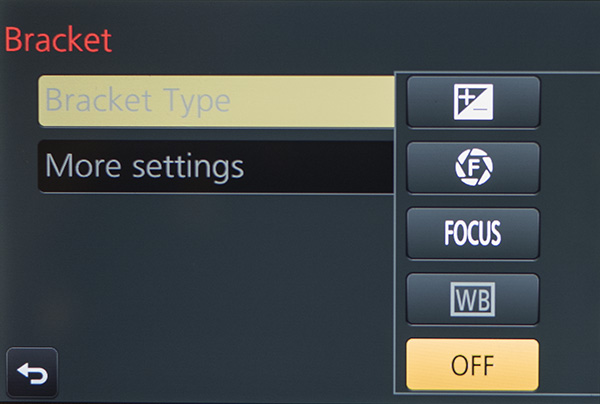 The new Bracket Menu. Options include Exposure Bracketing, Aperture Bracketing, Focus Bracketing and White Balance Bracketing.
 Menu with the Focus Bracket Chosen.
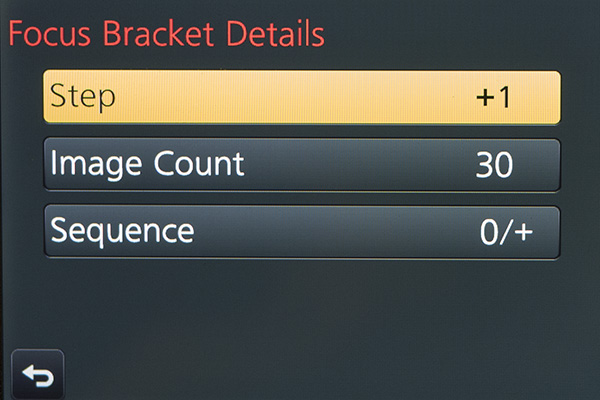 Each one of the menus adds choices. You’ll need to experiment and ‘bracket’ your choices as you learn the results. Step – is the distance that the focus will move on each exposure. Image Count – will be the number of frames made with a single push of the shutter button. You’ll want to ensure there’s enough to cover the scene. Sequence – is the order the images are taken in. Choices are 0/+ to start close and go far (I recommend) or 0/-/+ which will alternate how the bracket is accomplished. I found that Photoshop tends to choke when creating the focus stack using this setting.
Here’s an example of a completed capture and focus stack using Adobe Photoshop taken at Horseshoe Bend just outside Page, Arizona. The Focus Bracketing allowed for a much deeper depth of field in the final image.
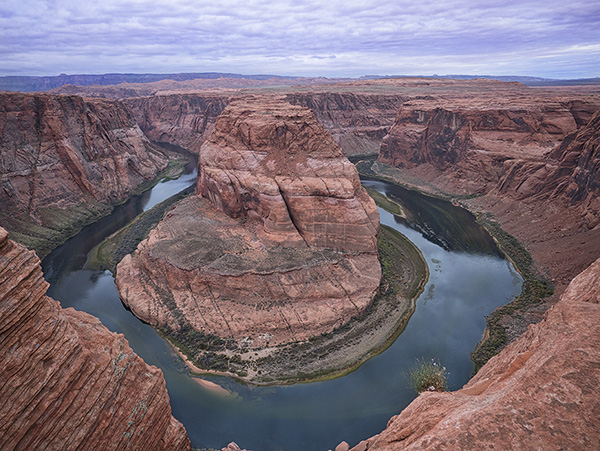 Horseshoe Bend, Page Arizona. The depth of field extends from the near foreground to the far distance.
People ask why do you want to go to all this work? I just set my camera to a smaller aperture like f16 or f22 for deeper depth of field. There is some science that will come into play here. When you use smaller apertures, you will introduce diffraction into your image which will soften the image. There is a sweet spot in lenses between f5.6 and f10, depending upon the lens, that is the absolute best quality the lens can produce. That is the f stop to use when focus stacking. All the sharp areas will be the sharpest and highest quality when combined.
I’ll look at the actual focus stacking technique in a future post using Adobe Photoshop. There are also automatic software solutions like Helicon Focus, Zyrene Stacker, and possibly others for you to check out if you plan to do a lot of stacking.
Til then.
Yours in Creative Photography, Bob
Save
Save
by successfulbob | Lumix G7, Lumix Lounge, macro, photography creativity, photography gear, photography lighting resources
Water Splash Photography Setup
Heads-up here! This is my first foray into photographing water droplets. I’m sharing my current setup, and sure it will change as I learn more and experiment. I am taking you along on my adventure showing you the kind of work I’ve been able to create with this setup. Once again I will share I am no expert with this type of photography. If you’ve got some ideas for me, I’d love to hear them!
This photography is not for the faint of heart. By the way, you CAN do this photography with a couple of Speedlights and in some ways that may be better for more control of the results. I like the variability with the gear which I’ve been working. OK, with the disclaimers out of the way lets look at a water droplet photo and then the layout of all the stuff.
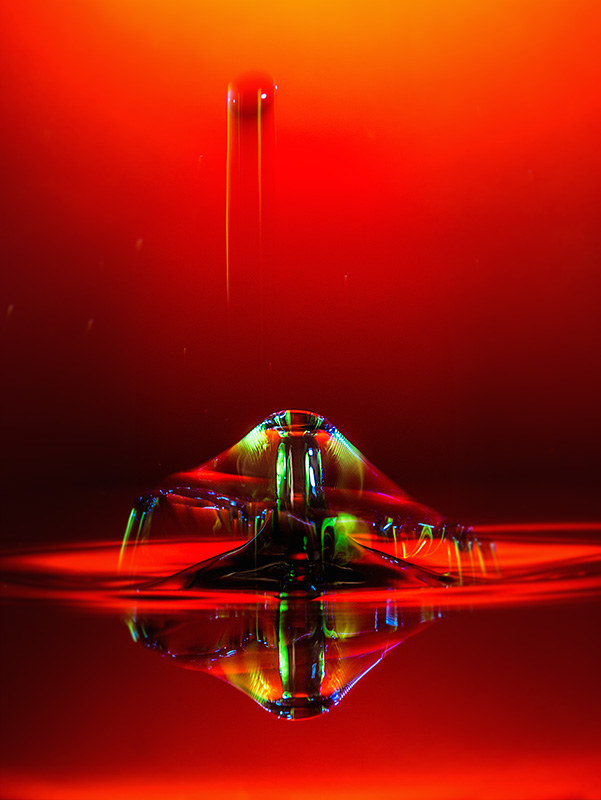
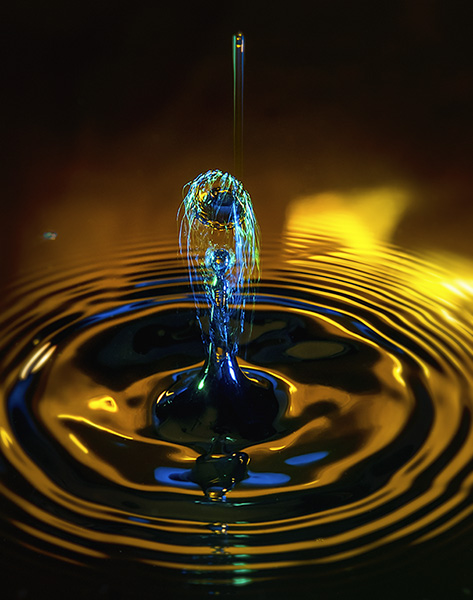
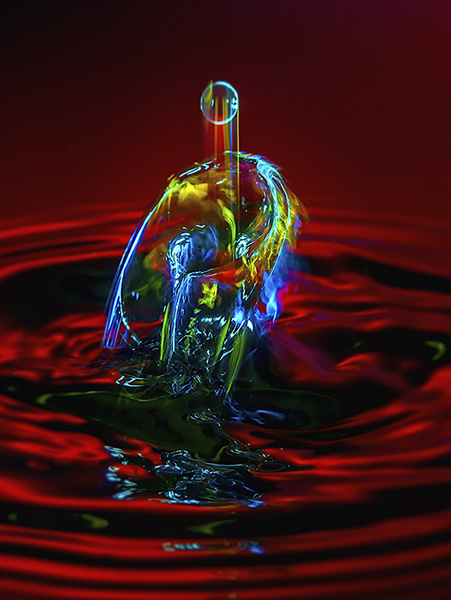
 Photograph achieved with the equipment setup as seen below. Exposures are made at f14 with @ one second ISO 200.
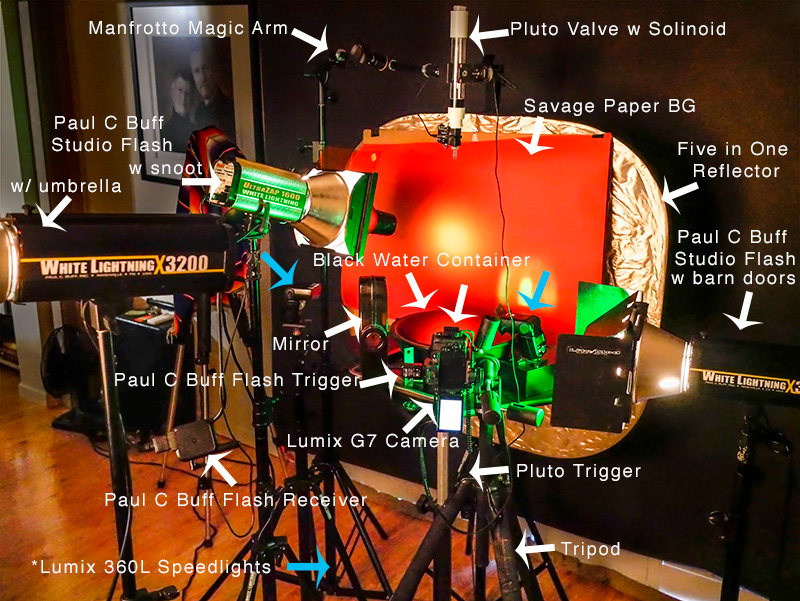 Here’s my gear. I’ll ‘splain below.
I decided to get a little head start on this type of photography by getting some necessary tools. The Pluto Trigger and Pluto Valve can save you a LOT of time. The Trigger is connected to the camera and controls the show. It tells the water drops when to fall. What size they should be and when to trigger the flash. All of these durations are in milliseconds (MS).
Backgrounds are only limited by your imagination. The one showing above is with a colored Savage Paper background. There is a gelled flash with a snoot to vary the light and add interest. With this setup, I have also used a reflective background with a gel over it lit by a flash at various angles and directions. You can use cloth or photos or printed patterns or almost anything you like. As I learn I’m trying to be careful not to overwhelm the waterdrops but we’ll see as I play how that transitions.
I used the Lumix G7 to capture these photos. Lens used was the Vario 35-100mm f2.8 lens with a 10mm or 16mm Vello extension tube. You will need a camera that has a trigger port or can communicate with the Pluto Trigger.
Connected to the camera is a remote flash trigger that fires the flash Paul C Buff flashes from the camera. The Lumix 360L flashes are triggered by the light from the Buff’s because I have them set to Slave Mode. It is the flash that freezes the motion of the water. Adding gels to the flashes adds color and interest to the splashes. In my images, you often see some streaks of color in addition to the frozen droplet. This is because I am using multiple types of flash. The Buff units are not as fast as the Speedlights. And the Speedlights can be of different durations if you change the amount of light you ask them to produce. The lower the power, the shorter the duration of light. Bogen Cine gels Vivid color are juicy. Roscoe gels work well too. You can get gel packs that are just the right size for fitting on your Speedlight. Here’s one from Roscoe holder for the gels.
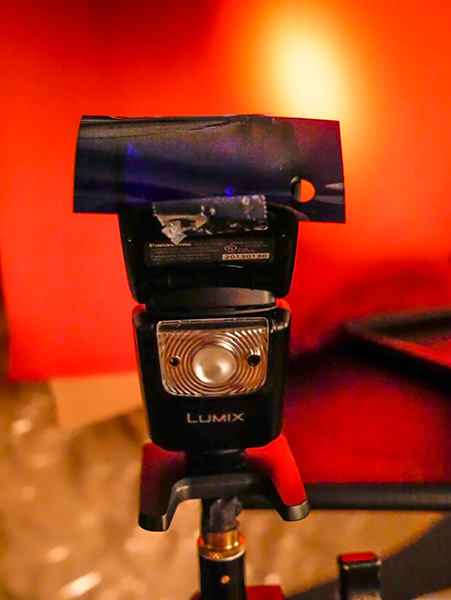 Lumix Speedlight with gel taped in place. Once you see how the gels perform you can also buy larger sheets and cut them to size for larger flashes.
I used a black bowl of water for the reflection. Black allows the color of the background to shine through. Fill the bowl as high as possible, so the edge of it doesn’t show. Science says you can fill a vessel higher than it top because of surface tension. Well, let’s not get into that too far, but as a side note, know that you can put 32 dimes in a shot glass before it overflows after you have filled it with water. Make sure you have a drip tray underneath the bowl or tray to catch any spills as you work.
If you don’t have enough lights, or just want to add another variable, note that you can add a mirror to the set to reflect light back from another direction.
The Manfrotto Magic Arm is extremely helpful in positioning the valve in place over the water. The Manfrotto Super Clamp holds the valve. When you are setting up the position of the water drops, watch where the water drop falls and put something in place to use to set your focus. Remove before shooting.
Working with water droplet photography is like photographing fireworks! You are never quite sure what you are going to get. You get to control the variables but there is never a guarantee and always fun surprises. (well sometimes not so fun but always a learning experience)
If you have any questions, let me know.
Yours in Creative Photography, Bob
Save

by successfulbob | lighting, macro, photography, photography creativity, photography education, photography gear
Water Droplet Splash Photography
I’ve always wanted to attempt water droplet photography.
And now I have!
It’s kinda like photographing fireworks in that you never are quite sure what you are going to capture when the shutter is fired, but you don’t have to wait for the Fourth of July either. This is something that could consume me as there are endless variables to throw into the mix. What can change the look of any image? Type of liquid, the color of the fluid, the temperature of the liquid, the size of the drop(s), flash duration, add another flash, and another, change the background color, add color gels on the flash…
Arrghh! It’s fun if a little frustrating at times when you think you have done everything exactly the same but get an entirely different result. I now understand where someone had said that making these images is part science, part art and lots of luck. As Thomas Jefferson said, “The harder I work the luckier I get.” That might not be an exact quote, but you get the idea.
Here’s are some examples from my first couple of days.
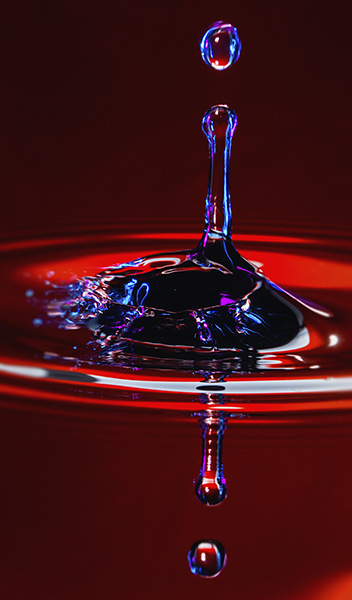
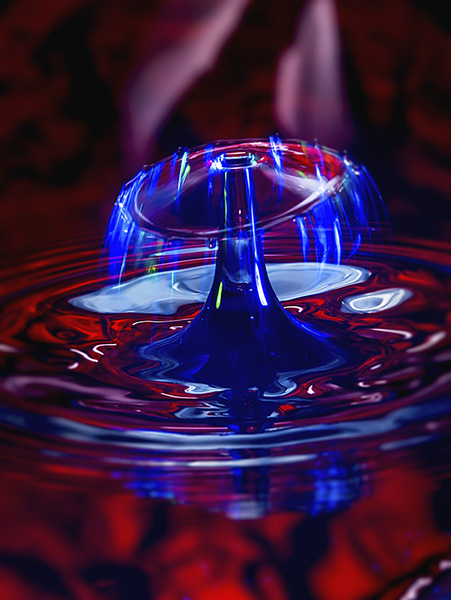
 This is from day one of playing in the water with splash photography
 This from day two shooting. Playing with lights and droplet timing.
 Day Three
 Day Four with thickened water and new timings for dropping the drops.
As I said, the photographing of the drops is part science and part luck. You can increase your luck by adding to the science in your arsenal. I purchased some help in the form of the Pluto Trigger and the Pluto Valve. The Pluto Trigger is a pretty amazing controller for your camera. In this case, the trigger releases the waterdrops and times the firing of the flash. Even with that control, there are still a lot of variables in play.
And I like it.
In the next couple of days, I’ll share my set-up and some things I learned as I have started this new photography genre.
Yours in Creative Photography, Bob
PS – I’ve just bought the Pluto Trigger, and like it so much I’ve signed on as an affiliate
Save
Save
by successfulbob | inspiration, Lumix FZ 1000, Lumix Lounge, Lumix LX100
Professional Photographers of America Convention
Conventions. If you aren’t getting out for face to face learning opportunities I feel you are missing out on a vital link to running a successful business. It’s true that there are many ways in this day and age to learn more photography, art and business skills via DVD’s, online learning with things like UTube, Linda.com and Kelby One etc… BUT, in my mind you are missing out on the personal connections and being exposed to new sights and sounds outside your normal working environment. That stimulation can be key to having wonderful breakthroughs in the art and science of running your business.
Here’s the view out the porthole of the plane on the way to Atlanta. Used the Lumix FZ1000 set to macro mode to get the camera close to focus on the rain trails running by my view…
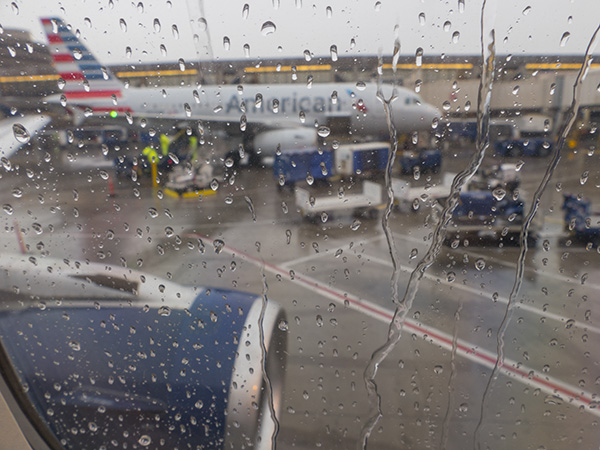 On the tarmac waiting for liftoff in Phoenix, Arizona
If you are here at Imaging don’t forget to say ‘Hi’!
Yours in Creative Photography, Bob