When you enter images into the Merit Image Review at Professional Photographers of America (PPA) to earn photography degrees there are 12 elements which are looked for. One of those 12 elements is presentation. Not adding a presentation is a presentation choice. A better idea is to give your work a finished look. Think about an image that you have printed. It takes on a new life when it is matted and framed. That is the same idea behind the digital presentation techniques I share in this video.
I shared the way I work putting my presentations together in this video. If you have any questions don’t hesitate to give me a shout!
I did a webinar for the Professional Photographers of California (PPC) last week. The subject was Photoshop including some ideas on creating art. Check out the Photoshop Party where I shared some ideas on Photoshop Selections, Blend Modes, Single image HDR with Aurora HDR 2019, creating cloud brushes and more…
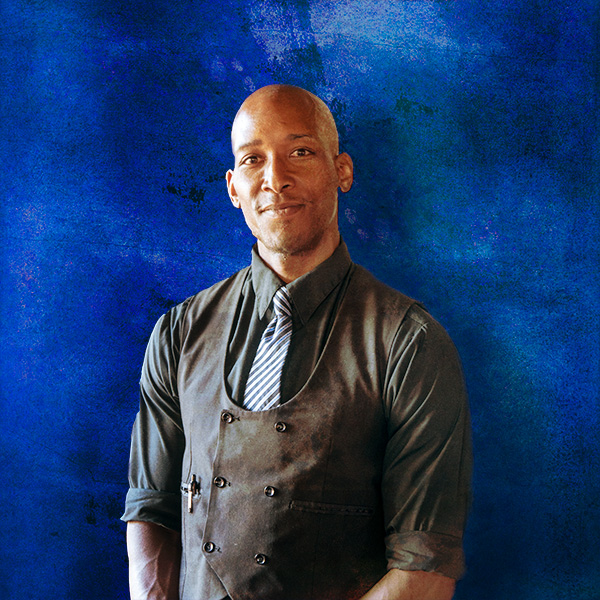
While out to dinner with my wife I was studying, as I always seem to do, the light as it played across the room. I also watch the shadows on faces as people step into different light situations. Ray, the waiter, was standing with the large light source of the front doors shaping his face. I was taken by the way the light split his face. I asked if he would mind stopping for just a moment so I could get a quick capture. He agreed.
While the light and shadow were looking good on him The area in which he was standing left a little something to be desired. In the quest for the best of both worlds I exracted Ray for the scene, he was in and using textures, layers, blend modes and more shadows I created a bit more artistic space for him. As part of this exercise I also placed Ray into a scene I captured near St. Marks Square in Venice, Italy. See the tutorial for more info.
This video was requested by someone who saw the finished product and wanted to know how to accomplish this in post-production.
The image was captured with a Panasonic Lumix LX100 which I call the professional photographer’s point and shoot. Adobe Photoshop was the obvious choice for the completion of the personal project. I am always assigning myself personal projects to experiment, expand my skillset and keep in practice. If you don’t practice your photography and post-production skills on a regular basis, it always seems to be a strain rather than a pleasure to do post-production. Remember that to keep in top form you need to practice regularly, or the rust starts to form quickly. Think about professional golfers coming in from a hard day out on the course and heading straight the putting green or practice range as soon as their round is finished.
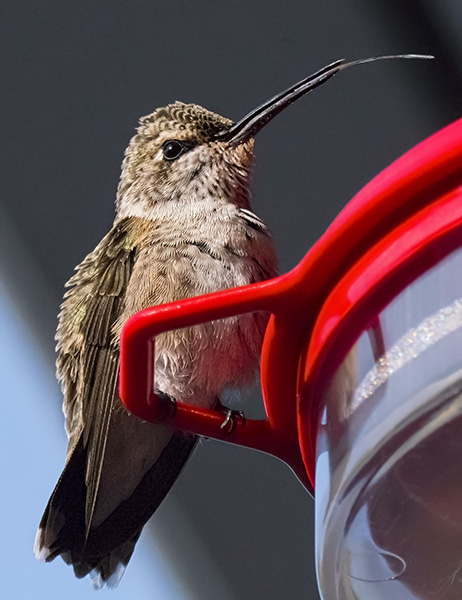
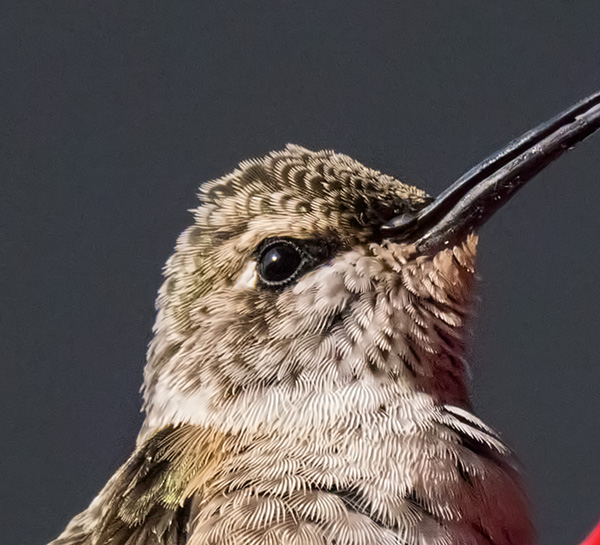
Hanging out this morning and thought I’d do some camera testing with my Lumix GX8 and the 100-300mm G Vario f4-5.6 (200-600mm equivalent) lens. I made these images handheld with stabilization turned on. Settings for these were f14 1/2000th sec at ISO 6400. I’ll share some hummingbirds in motion images at different settings a little later. I became enamored of this little critter because he had so much peppy personality. Looks like he just arrived from a long migration. He’s not one of our local birds and seems a little worse for wear.
Hummingbird Straight out of the camera. He’s checking me out.
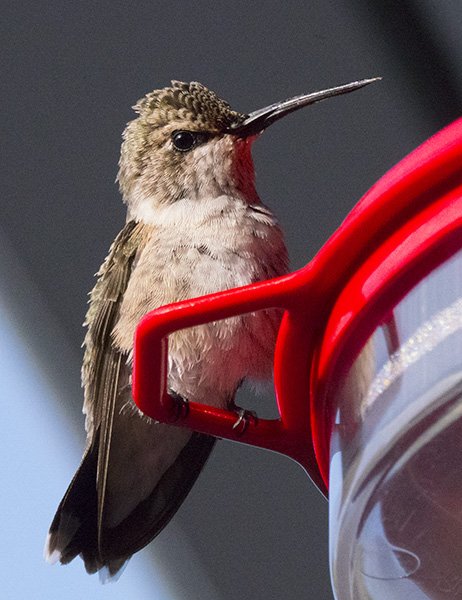
After seeing me, he stuck out his tongue! Not sure if that was social commentary or not. Here’s the little guy after processing with MacPhun Noiseless and MacPhun Tonality (for sharpening the feathers just a bit more. Explanation below)
So these images turned into a processing exercise. Some photographers mention that they are concerned with noise in images from smaller chip cameras like the micro 4/3rds. Personally, I feel that we get a little too hung up on that as the newer algorithms that are used in processing give a very natural feel to the noise that replicates the grain structure we had back in film days. (can you hear my creaky bones as I talk???)
To see if there was an elegant solution for those who have a concern when you push the camera to higher ISO’s thought I’d see how software might be of help. Oh man, it does if you are on a MAC. I’m using MacPhun Noiseless, and it worked a charm. MacPhun is only for MAC OS systems. I’m sure there are similar products for those on PCs. One of the problems I had in the past with noise reduction programs is the removal of detail that I wanted/needed in some parts of the image. I’ll let you decide, but I don’t think that’s a problem anymore!
On to the processing!
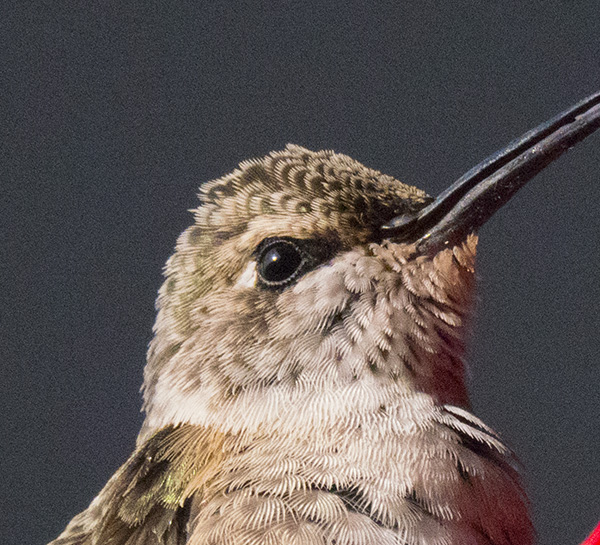
Original detail capture SOOC.
Here’s the image after running MacPhun’s Noiseless software. There are lots of settings and possibilities. This was a fairly aggressive treatment. It smoothed out the noise in the background nicely without losing detail in the feathers.
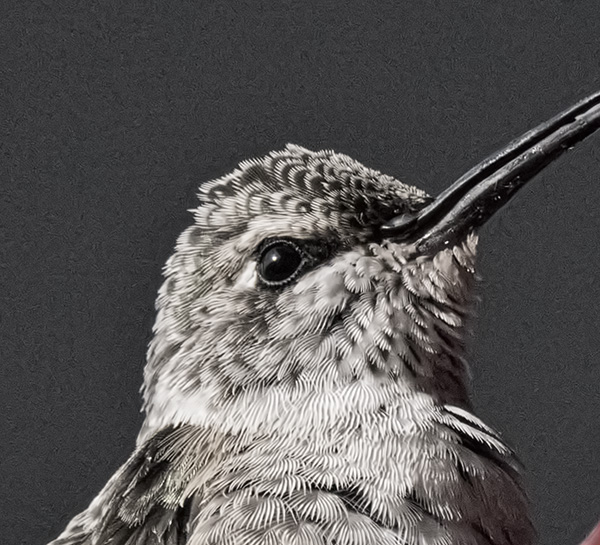
This is the final. I used the Tonality software from MacPhun to sharpen the feathers a bit more. “Wait a minute Bob! isn’t tonality made for making an image black and white?” You bet. But, I liked the controls that allowed me to sharpen small details and micro control the contrast in different areas of the image. The secret is to do this on a separate layer and change the Layer Mode to Luminosity in Photoshop. Then only the information that is Luminous is applied to the image. Using a Layer Mask, I applied the sharpening to only the feathers.
Here is the Tonality layer without a mask. You can see where it sharpened the background as well hence the use of the Mask in Photoshop in addition to changing to the Luminosity Mode.
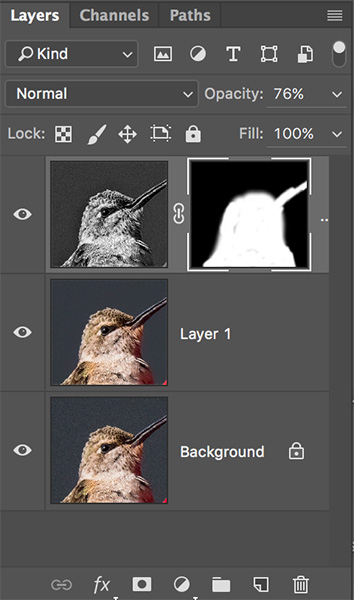
Here’s the Layers Palette. Background Layer is original capture. Layer 1 is with noise removal. Top Layer is Tonality with a mask.
I had an assignment from a game of Survivor we are playing in the Arcanum (a place of growing your photography skills at your own pace with a group of like minded folks. Click the link for a peek under the Arcanum’s hood)
The assignment was to shoot a self portrait to help share a bit of who you are. So I decided to make it a learning experience. Here’s the thought process I went though.
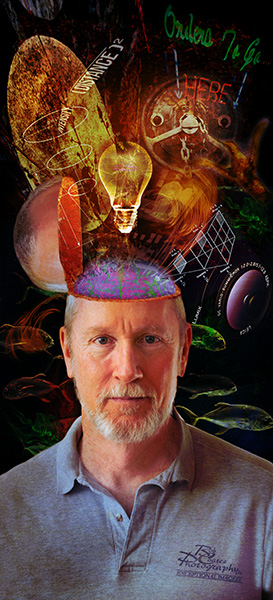
First I wanted to give people an idea of how busy it can be in my head. So the title became ‘Under the Hood’.
Let’s see what’s under the hood in Bob’s Brain…
Set up the photo
Start with a solid head and shoulders studio self portrait. Main light forward and bounced off the wall to get a large source with medium contrast. Two strip light soft boxes with egg-crate grids attached were set to camera left and right slightly behind pointing to skim and add separation and spice to the look. Lumix GH4 camera with the 42.5mm 1.2 Nocticron lens mounted on a tripod with the Wifi activated allowing camera control from my IPhone. I use Paul C Buff lights and modifiers because of the good value, selection and great service when needed.
On to the Photo Art
Original concept was to have a zipper peeling back from my forehead to allow the reveal. After some experimentation that didn’t feel like it was going in the direction I wanted. Next thought was to cut off the top of the head and tilt it back but that made it difficult to show what was coming out of the head. Finally, on the third try I took the top of the head and tilted it to the left and got the base image for which I was looking.
Adding Photo Elements to Tell the Story
Then the search was on to search for and create elements that were to tell the story. Inverse square law. Brain. Smoke brushes. Neon signage. “Wait I’ve got an idea, a light bulb went on in my head.” Textures for blending element together. All images were layered in Adobe Photoshop using various blend modes. You can see the Layers and their Masks used to put this together. Got a question? Give me a shout…
Photoshop Layer stack showing Layers and masks…
Hope this inspires you to take a project and push yourself to a new limit.
For infrared conversion of my cameras I use LifePixel. Infrared allows you to put an older camera to use and opens up a new time time of day for productive image creation.
Learn Photoshop in a fun environment. Aaron Nace applies the right amount of fun with easy to understand and follow tutorials. Actions and brushes are included with lessons!
Best embroidery ever. Give Queensboro a try, get a $20 instant credit to get started by clicking on the logo! They specialize in great quality custom logo apparel and promotional products with the best customer service.
Platypod has become a great resource for being creative in getting your camera gear easily into unusual places. As an Platypod Pro I get to work/play with the gear even before it comes out. Head over to Platypod, subscribe to the newsletter and you will get special discounts reserved only for subscribers.