by successfulbob | cloud photography, photography, photography creativity, photography gear, photography software
Clouds Illusions – Part Two
A couple of weeks ago I shared some clouds and ideas about photographing them and some thoughts on using them in working on your art images. (see the post here)
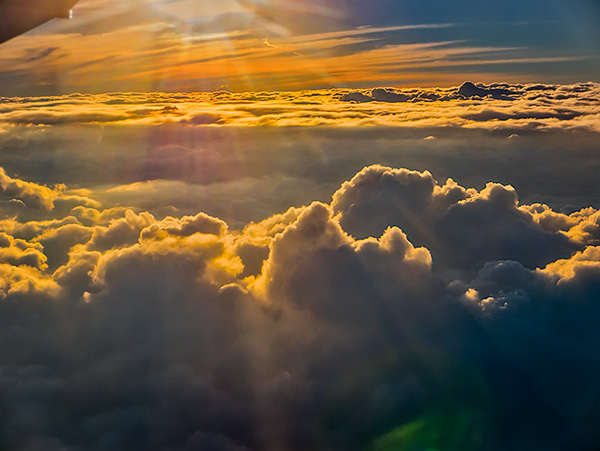
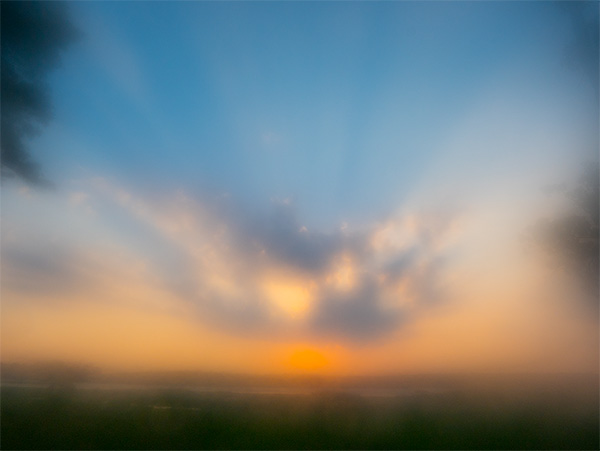
 Sunset was coming together looking over the clouds from the window seat.
I referred to Judy Collins’ song “Both Sides Now” referring to clouds and said I would share some images inspired by Julianne Kost’s book ‘Window Seat.’ After seeing her book, I thought about my pictures out the porthole of the plane as I traveled around the country on my Panasonic teaching forays. I have quite a collection of photos of clouds from above I thought that they deserved a post of their own. So here you go. Images are from the upper side of Both Sides Now.
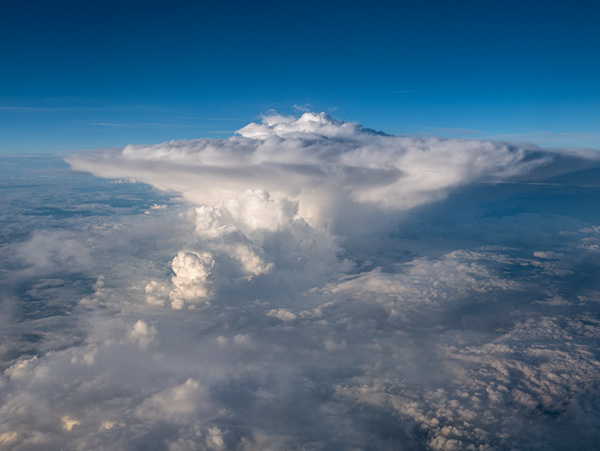 Watching a thunderhead form from this angle is quite different.
 I enjoy the ‘cloudscape’ with its own set of clouds above.
It turns out that all of the cloud photos in this post were made with the Pansonic Lumix LX100 which I refer to as the ‘professional’s point and shoot camera.’ It has a smaller chip, but the lens is sweet and fast. It’s on a magnesium body, and all the critical controls are available on the outside of the camera just as we had back in the day. That said, it has a ton of features we didn’t have then including eleven frames per second burst captures. If you go into 4K Photo Mode, you can pull 3,400-pixel stills at 24 frames per second. And plenty more.
On the downside, it does not have a superzoom so if you get this for travel photos you’ve got to do some zooming with your feet, but that’s what keeps the size down.
It’s on my list to work with the clouds from above and try to put them in art pieces. I’m hoping I can make it work and give almost a sense of ‘Something is wrong here, but I can’t quite figure it out.’ But that will be a post for another day.
Yours in Creative Photography, Bob

by successfulbob | cloud photography, Lumix LX100
Cloud’s Illusions
I enjoy clouds!
At sunrise. At sunset. In the middle of the day. From below. From above. The constantly changing and rearranging palette of shape, form, and color keep me pointing my camera at the sky. I wonder if the Judy Collins song, a trendy song in my youth, might have something to do with it?
“I’ve looked at clouds from both sides now
From up and down and still somehow
It’s cloud’s illusions I recall
I really don’t know clouds at all.”
Judy Collins
Check out the song at the bottom of this post! Turn it on while you are reading.
Here are a few cloud images from the last couple days.
 Look at how many different cloud types are in this section of sky. Out west here in AZ this usually happens when a front is moving in after a dry spell. Just enough wind to change some shape and at different levels of elevation
 When a wonderful cloud situation appears, I usually shoot the heck out of it. Horizontal, vertical. Wide-angle and zoom. All give a different look which may work differently for various applications. For example, You don’t typically want to put an image that was photographed with a long focal length into an image that was made with a wide-angle lens. You can’t always put your finger on it, but it just doesn’t ‘feel’ correct.

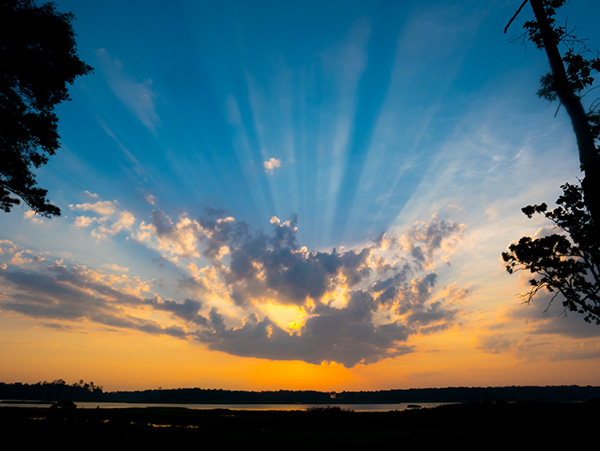
This image from later in the day

And, of course, what would a sunset be without a silhouette to give it a little interest.
You might ask, “Bob, why do you photograph the clouds?” And, I’m glad you did.
Number one, I enjoy them and like to review them when the sky is in a more monochromatic mode.
Number two, sometimes my images might need a little help as the day was cloudless and the right sky can add drama and life to an otherwise ordinary photo. Having a large selection of all types of cloud formations at your beck and call makes for believable results. When changing out a sky in a scene one must match the lighting direction and tone of the image, or it will have that, “That sky was replaced.” look.
Number three, I’ve found that adding cloud images to my artwork can add, life, depth, and dimension through using Photoshop’s Blend Modes. When using Blend Modes clouds can add pizazz because they contain lots of changing tones.
Number four, I’m not alone in my love of clouds. For example, on Instagram the hashtag clouds and cloudfreakHave almost Eighty-four MILLION posts.
The images in this post were captured with the Lumix LX100. This is a handy little guy (just a little bigger than pocket size) to have around. Fast glass, wide-angle to medium zoom range and all controls are available on the outside of the camera. Not necessary to go into the menus after initial set-up of the camera.
I’ll revisit clouds from the other side in a few days.
Yous in Creative Photography, Bob
Judy Collins – Both Sides Now

by successfulbob | cloud photography, landscape photography, Lumix GX85, photography creativity, photography gear
When the Elements Come Together
I’ve heard it called shooting on the edge. Edge of what you ask? Edge of everything. Edge of the weather. Edge of day and night. Any time there is a contrast from the norm it’s a great time to be creating images.
Case in point.
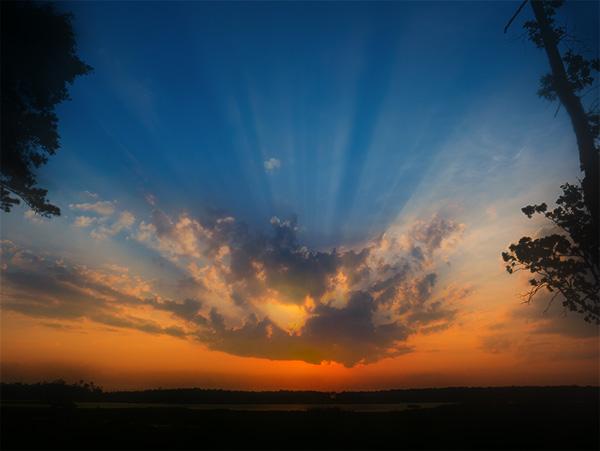
Here’s an excellent argument for always having a camera handy as Jay Maisel always coaches. I walked out of one of the galleries where my art is sold and came across this moment that was there for maybe three minutes.
 The golden light of sunset sneaking through a hole in the clouds
It was the confluence of the elements that I think makes for an interesting photograph. A small shaft of light appeared and highlighted the flag which was lowing in the wind. The background to the flag was enhanced by the darkened and scattered storm clouds.
There is a tendency to go to ground when the weather is not sunny. Most dramatic photography occurs when the weather moves toward the inclement. Next time you see the clouds starting to form head out and see what you can see.
This image was made with the Lumix GX85 ** and the G Vario 12-35mm f2.8 lens. ***
Yours in Creative Photography, Bob
PS – ** I linked to what I consider a geat vacation and always have camera and lenses. Bang for the buck as far as quality. *** Pro level quality lens
by successfulbob | cloud photography, landscape photography, photography creativity, photography software
Software from Skylum (formerly MacPhun)
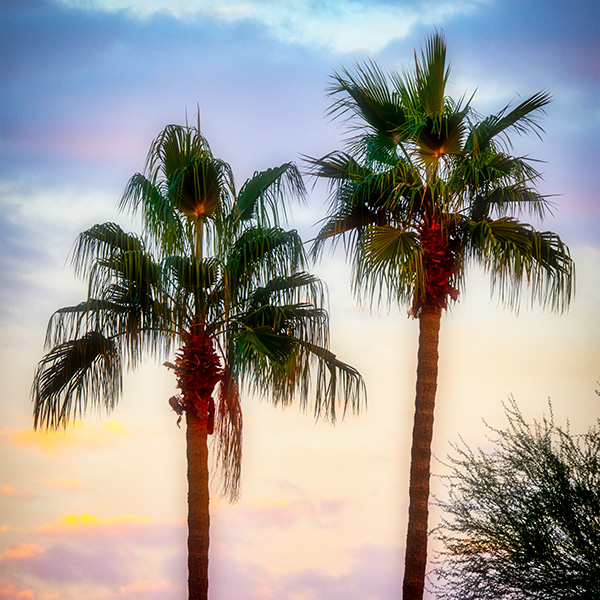
Until December 31st some deals are going on with the number one software program for photographers. I’ll hit you with the details below. I will often use Luminar as a plug-in to Photoshop for finishing work. Here’s an image I processed in the Luminar standalone version.
The things that impress me include the ability to pull detail out of a file that is very close to a silhouette. Color rendering. And the ability to make some artistic choices along the way. I would never have thought when I grabbed the silhouette that I could create an image as you see below.
 Here’s a processed file from Luminar. Palm trees in Phoenix.
 Straight out of camera file. (SOOC)
 About Luminar: Luminar 2018 offers everything a modern photographer needs for photo editing, including new filters powered by artificial intelligence, major speed improvements, a dedicated RAW develop module and a forthcoming in 2018; digital asset management platform.
Users will also benefit from the new intelligent Sun Rays filter, LUT support, and real-time noise removal. With workspaces that match different styles of editing, Luminar adapts to deliver a complete experience that avoids clutter and complexity.
Luminar 2018 has been re-built from the ground up for dramatic performance boosts. Existing filters deliver more vibrant colors and depth in less time. A brand new streamlined user interface speeds up working with presets, filters, and masks. With the full support of pro options like layers, masks, and blending modes, complex repairs and photo composites can be easily accomplished.
Offer Availability: The Luminar 2018 Holiday offer is now live and available until December 31
Pricing: Current users of Luminar may upgrade at a Black Friday price of $49 ($39 with coupon COATES)
New users can purchase Luminar 2018 for $69 ($59 with coupon code COATES)
A collection of bonuses will also be included with every purchase.
Bonuses:
The Shootkit ebook
Preset pack: 20 Festive Texture Presets
500+ Sky overlays for Sky replacement
Video tutorial “How to replace Sky in Luminar.”
EXTRA Bonus
“Capture: Adventures in Photography” ebook by Simon & Lisa Thomas, the world’s foremost adventure motorcyclists
Yours in Creative Photography, Bob
by successfulbob | cloud photography, landscape photography, Lumix GX85, Lumix Lounge, photography gear
Sunrise Photography with Light Rays
On a visit at my MIL’s on the marsh in Delaware last week I found myself up at dawn photographing the sunrise. It’s funny when you are on the road in a different place you tend to get up a little earlier. Sometimes when I am home, I’m pretty darn sure there will be some fun sunrise light, and I fail to get my butt out of bed to get out there and capture it. Luckily I’ve been traveling quite a bit, so I’ve been fortunate to see and capture some lovely images here and there.
Being from Sedona, Arizona I don’t give much thought to the effects of humidity and air-conditioning. This led to a pretty happy accident when I went to raise my camera to my eye to make this image. The lens was covered with condensation. I kinda like the result below.
 Extra soft-focus due to all the moisture on the lens.
Luckily the clouds hung in there for a while which gave the lens time to shed its self-imposed filter. Below see the image Straight Out of Camera.
 SOOC image which gives the RAW materials to help on to a creative image.
I’m a big believer in post processing to give an image all the impact it deserves. The scene shown above does not describe the scene as it was. There were more saturation and punch. We’ve all made images we thought were just like what we saw and been disappointed, especially back in film days, for those that remember that medium.
The image below is much more as the scene appeared, but I’ve also added just a bit of creativity by blending the two images together.
 Two images above combined to give my interpretation of the scene.
The soft image was used as the bottom layer in the Photoshop file. The sharper image was dragged on top and the blend mode changed to Multiply. Multiply has the effect of darkening the image by one full stop of light. I wanted a bit more of the soft and moody photo to add to the photo and lowered the opacity just a bit to help it blend a bit more.
I like it. What are your thoughts??
Image captured with Lumix GX85 and the 12-60mm DG Vario-Elmarit f2.8-4.0 lens. These new lenses are pretty darn sweet although it moves away from the f2.8 setting early on the zoom process. They are well built. Focus smoothly. And a new feature, a locking lens hood.
Yours in Creative Photography, Bob

by successfulbob | black & white, cloud photography, infrared photography, landscape photography, Lumix G6, photography, photography gear
Outdoor Photography – Walking Oak Creek Part Three
This is a four-part series. Here are the links to previous posts. Part one. Part two.
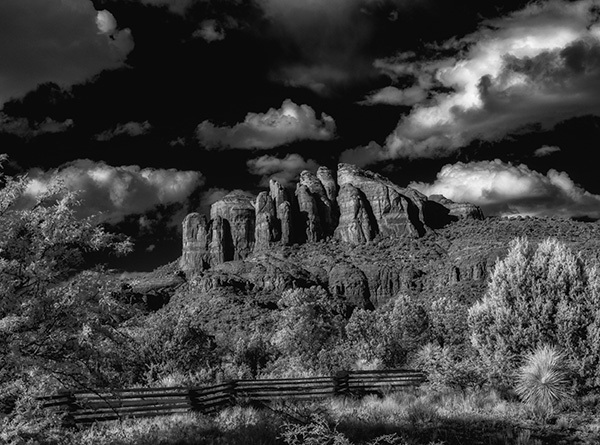
When out photographing for the day the camera that is converted to infrared makes shooting under the sun high in the sky quite interesting. Non-visible light can be captured with an IR converted camera. Lumix G6 (link to newer camera G7) with 14-140mm Lumix Lens. I used LifePixel for my conversion to a 720nm filter. There is quite an array of information on their website to help you decide what kind of IR filter to have installed on your camera. Many people put their older camera models back into service this way.
Usually, mid-day is not an ideal time for making images due to the high contrast of the light. This is exactly what makes creating images with an IR camera work the best. There’s high contrast, but it renders as dramatic with blue skies trending toward black and clouds picking up this iridescent glow. Green vegetation will provide white tones. This complete change in the way we view a scene creates excitement.
 Green trees render white. Blue skies turn black with white puffy clouds. Infrared photo made with Lumix G6 converted to IR.
The benefits to creating IR images in the digital realm is that what you see on the live viewfinder is what you get. To make this happen, I set the camera to monochrome and shoot RAW plus jpeg. The resulting image on the back of the camera makes it easier to judge what the final will be. The RAW files will come into the camera in a magenta color and need processing. The jpeg file will be just as you see them and still need a little post production work but don’t have as much information in the file. The RAW plus jpeg is the best of both worlds.
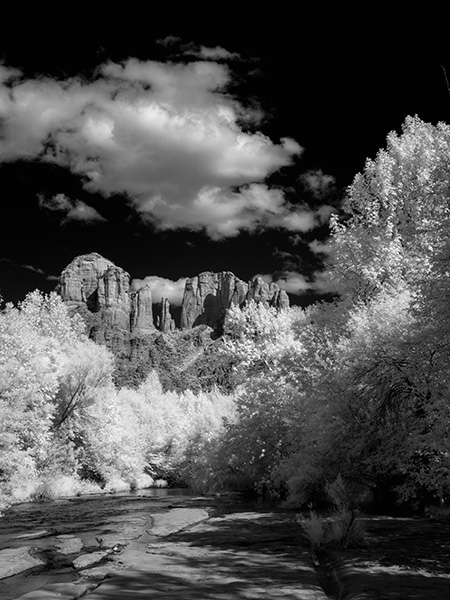
 This photo is a detail of the center of Cathedral Rock. The 14-140mm zoomed for in-camera cropping.
 I enjoy the light and airy feeling of deciduous trees when rendered with infrared.
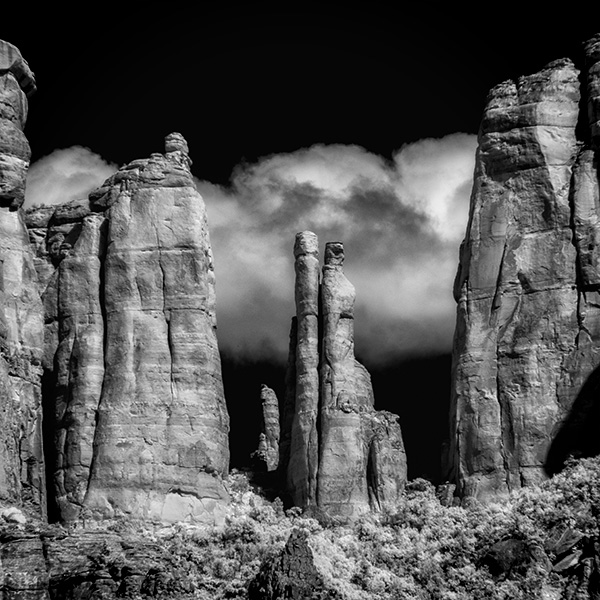
 Taken with side light a bit later than ‘normal’ time of day for IR imagery and with side-light leads to very contrasty image rendering. I like it because it’s a wee bit different. Always looking to experiment.
Yours in Creative Photography, Bob
PS – if you have a question don’t hesitate to give me a shout by leaving a comment!
Save
Save
Save