PlatyPod tripod is a utility tool I’ve started using more often. I bought mine about a year and a half ago and set it aside for a bit, as it was not front of mind. I started using it again and found quite a few new and different ways to support my camera and lights. Now, the Ultra model stays clipped to my Think Tank Mirrorless Mover 20 camera bag.
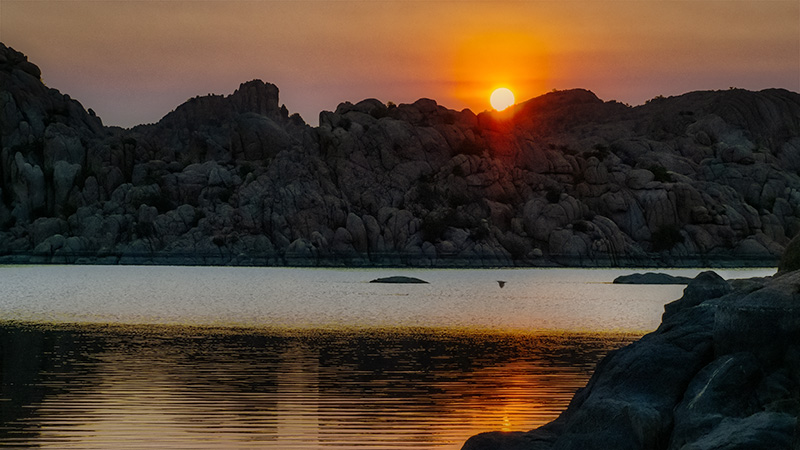
Watson Lake, Prescott, Arizona
Sunrise image selected from time-lapse captures
Having outfitted my car for camping I was able to be on site for sunrise and moon-rise shoots. I’m sharing some of the sunrise footage I made with my Lumix G9. Capturing time-lapse images adds to possible output. Of course, there’s the time-lapse processed at multiple playback speeds. Multiple images can also be processed together for noise reduction or other creative uses. Individual images can be selected for processing different times.
Time-lapse
Link to sunrise video. It is magical seeing time compressed. There is a different perspective when everything is shown faster. The world can be viewed in many different ways. Being a stills photographer/Lens Based Artist I seem to be drawn to what can be shared starting with individual captures. Putting the photos together gives me another creative outlet.
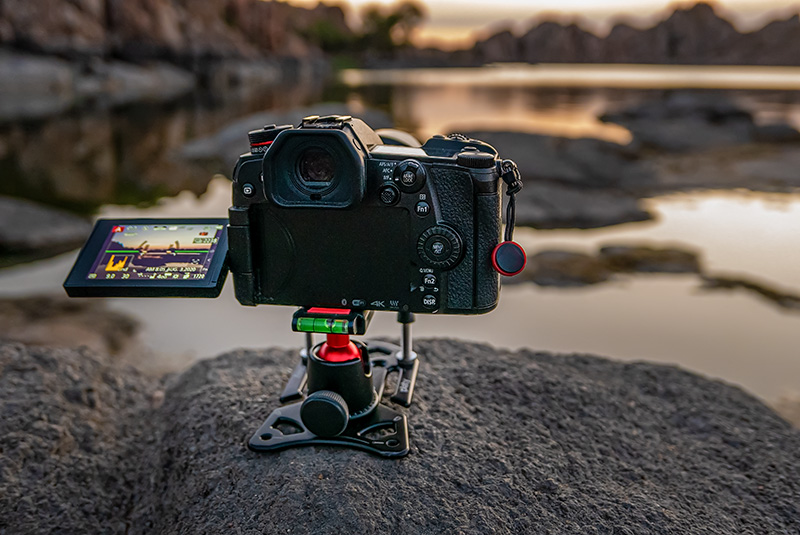
Low to the ground
Platypod Ultra tripod with a couple leveling bolts in place.
When making this set of images I wanted the camera to be low to the ground which, is a perfect use for the PlatyPod tripod. With no legs the camera is not affected by wind and stays steady Many regular tripods can get low as well, but end up with legs splayed.
Yours in Creative Photography, Bob
FYI I am currently creating paid content for PlatyPod.
I’ve been enjoying the cooler air at night photographing Nightscapes and Starscapes. Today’s high was 107 here in Sedona, Arizona. Decided to lay low during the day!
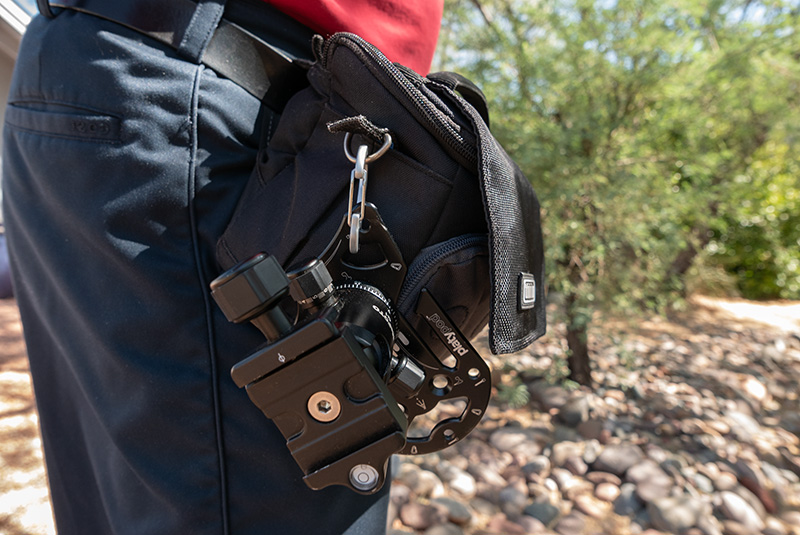
Platypod tripod
I’ve been playing with the Platypod Ultra making some time-lapse videos for them. I bought the Platypod about a year and a half ago and wasn’t using it very much. But when they asked me to work it a little more I’ve been finding more and more uses. In addition, it now hangs off my small Think Tank Mirrorless – 20 camera pouch when I go hiking. I’m finding it gives me a stable platform while adding very little weight to my kit.
I spent a couple nights car camping, AKA boondocking, in my RAV 4 during the last full moon. Here’s a time-lapse I made of the moon for Platypod getting up off the horizon. See more of the boondocking story here.
Yours in Creative Photography, Bob
For those who are viewing this in the Successful-Photographer email notification here’s a link.
https://youtu.be/eDZ22rnivdk
•• The reason I use the Think Tank MM 20 is that it is small but robust. I’ve been using this bag for about five years and it is only starting to show some wear. Know that I am a mirrorless shooter with Lumix and Olympus gear so It’s just the right size. They make larger models such as the MM 30 for larger camera gear
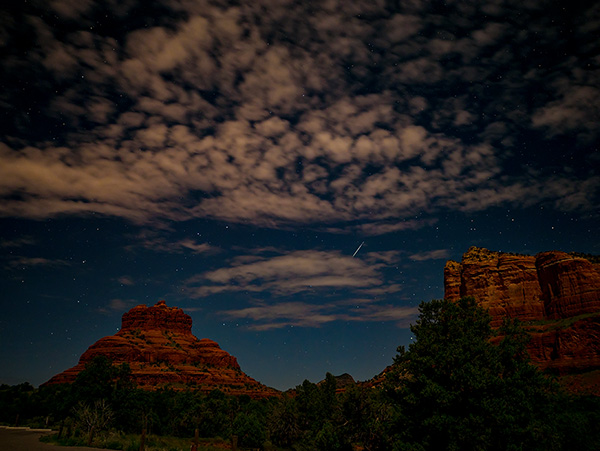
Out for the second night of trying to catch the Perseids Meteor Shower. The largest amount of visible streaks across the sky were scheduled for the early hours of Sunday morning.
Set the alarm for 12:05 AM. Wake up 11:58 PM. Check cloud cover. Looks OK. Dress. Hop in the car. Head to the pre-scouted location at Bell Rock Vista one of my favorite rock venues for photos in Sedona. (partly because it’s five minutes from my house.)
About one minute of time lapse from three cameras.
Note clouds and lightning to the south. Thankful there’s an open to the sky ‘window’ to the north.
Set up cameras. Yes, cameras plural. When photographing images for time-lapse video one thing you end up with is time. Once a camera is set, and recording do not touch, bump or adjust unless you would like to restart the sequence.
Camera one – Lumix GH5 with Leica 12mm Summilux f1.4 lens. This camera and lens combination ended up giving me the cleanest, sharpest files. I set the camera for RAW capture. Note that RAW files can chew up some real estate on your card. Make sure you have a large capacity. **
Camera two – Lumix GX85 with the Leica 15mm Summilux f1.7 lens. This set-up is a great go-to set up for night skies.
Here’s a single still image from the shoot. Processed in Photoshop
Camera three – The Lumix FZ2500 with a built-in 25-480 Leica DC Vario-Elmarit F2.8-4.5 lens. This is best shot at the 25mm setting to keep the f2.8 aperture. As you’ll note in the video, this is the only camera lens that showed condensation toward the end of the sequence. It was a VERY moist and humid night. This camera must generate a little bit of heat as time goes on. In less humid situations I wouldn’t see this as a problem.
A great resource for deciding what exposure settings to use including various camera and lens combinations may be found here. I highly recommend checking out the rest of Ian Norman’s blog Lonely Speck. Lots of helpful info there to set you on the right path. Remember the guide gives you a starting point. You still must experiment to get the most from your experience.
Yours in Creative Photography, Bob
Working on my settings for better quality imagery. Any lack of quality is purely operator error!
** The GH5 has two cards slots and can be set to behave in a variety of ways including to continue recording on the next card when one fills up. Very handy for lots of captures. When not gathering images for time-lapse the cards can be set to be an automatic back-up by writing to the cards simultaneously, RAW files to one card, jpegs to the other, videos to one card and stills to the other, etc. But I digress.
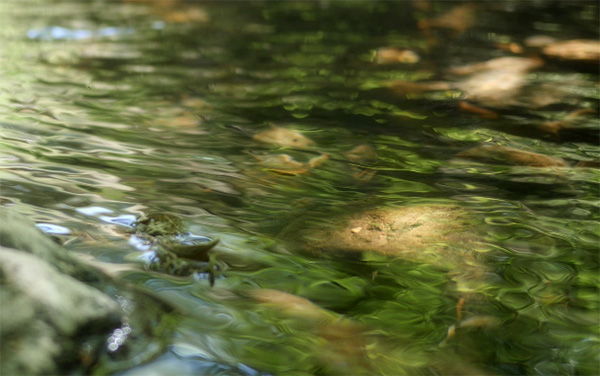
The video below is a time-lapse of Beaver Creek near Sedona, Arizona. Time lapse of water gives a slightly jerky feel at least the way this was captured and processed. These were captured a frame every 2 seconds and processed out to time lapse at 24 FPS 4K video then slowed 50% in post-production in Adobe Premiere Pro. The sound was added from another clip of video captured at the same place.
Watch for ‘The Dance of the spiders’ in the right-hand bottom corner.
Watch the space pictured above when you look at the video and you’ll find my ‘spidey’ friends.
Images captured with the Lumix GX8 and the Lumix G 20mm f1.7 lens. In a couple of days, I’ll share some video from a different day on the creek shot with the same gear and an entirely different feel.
I’m always testing and trying to find out more about the tools that I use in photography and image making. This example is taking a bunch of still images and combining them into a video known as time-lapse.
Time-lapse of water flowing on Beaver Creek in Sedona, Arizona
I used to avoid creating time lapse videos because of all the steps that were involved. Making the images, which involved using an intervalometer and hard to follow calculations to gather the photos. Downloading the pictures. Processing the images. And, finally, combining the images through software into the final video.
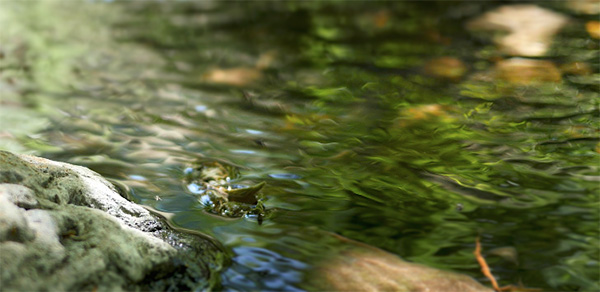
A crop from one of the stills from the spider play video below
There are two things that have gotten me more interested in time-lapse videos, and both have to do with the ease of getting to the final product.
One is the settings built into the Lumix line of cameras which makes it simple to calculate the frame rate and capture of images without additional gear. AND (this is the BIG on) the capability to process finished time-lapse videos in-camera with a variety of settings including speed of playback and quality. This is huge!
The other is a simple processing program called Time-Lapse Assembler. A very easy to use bit of software. Select your images. Set the playback frame rate. Set the quality. And Viola! Time-lapse video complete.
From the same location I set in a new place and in playing back the time-lapse I found the spiders dancing around the scene. You need to watch carefully as they are small critters. I enjoy the shapes and forms of the ripples as they combine and reshpe due to the combining of still frames verses straight video capture.
I got a bit more creative in putting these videos together using Adobe Premeire Pro. Because I was able to process the time-lapse into 4K video size that allowed me to move within the scene zooming in on the spider action. This also allowed for the sound of water to be added. You won’t get sound when making time-lapse video because you are combining still photos. I recorded some other video to get the water sound track.
Images were made with the Lumix GX8 with a LUMIX G II LENS, 20MM, F1.7 ASPH
I enjoy the ability to create time-lapse video in the Lumix line of cameras. Built into the cameras are settings that many cameras need an add-on to complete the captures. One of these is an intervalometer which makes it possible to set the number of images to record and the timing in between each capture that is made. Even better is the in-camera processing to see your videos almost immediately without having to download images to a computer for processing.
In today’s post, I’m going to look at three versions of in-camera processing and then another version where the jpeg files were downloaded, processed through Adobe Camera RAW and then run through Time-Lapse Assembler for a different look. Time-Lapse Assembler is a free download.
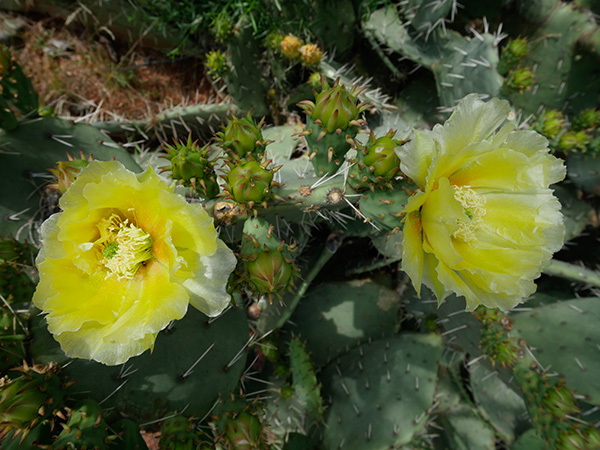
First, let’s take one of the original jpegs that I processed through Adobe Camera RAW and added a little zip and pizazz with the MacPhun Plugin from their Creative Suite called Focus CK.
Original SOOC (straight out of camera) capture
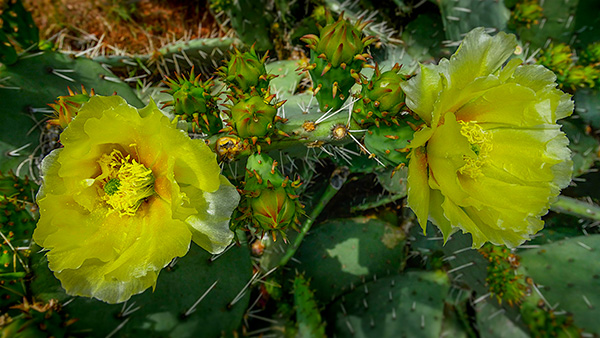
Cropped to 16×9 aspect ratio and added some clarity and saturation in Adobe Camera RAW. Then finished off with MacPhun’s Focus CK plugin to add a bit more snap and intensity.
Here are the three versions processed straight out of the Lumix GX8 camera sized to 4K. You can choose any number of settings for size along with the number of frames per second. I used 6 fps, 12 fps, and 24 fps. Because I made these in 4K I am able to add additional movement to the videos without loosing quality.
Images were resized to 16×9 aspect ratio and saturation along with clarity was added. They were then saved out to jpegs. The files were processed into a six-image fps and twenty-four image fps videos. These were not able to have panning and additional movement as they were processed to HD size.
For infrared conversion of my cameras I use LifePixel. Infrared allows you to put an older camera to use and opens up a new time time of day for productive image creation.
Learn Photoshop in a fun environment. Aaron Nace applies the right amount of fun with easy to understand and follow tutorials. Actions and brushes are included with lessons!
Best embroidery ever. Give Queensboro a try, get a $20 instant credit to get started by clicking on the logo! They specialize in great quality custom logo apparel and promotional products with the best customer service.
Platypod has become a great resource for being creative in getting your camera gear easily into unusual places. As an Platypod Pro I get to work/play with the gear even before it comes out. Head over to Platypod, subscribe to the newsletter and you will get special discounts reserved only for subscribers.