In part Four of this series on outdoor photography, I talk more about the why’s of the gear I carried on this occasion. You can see results from the shoot by checking out part three and working back to the previous posts.
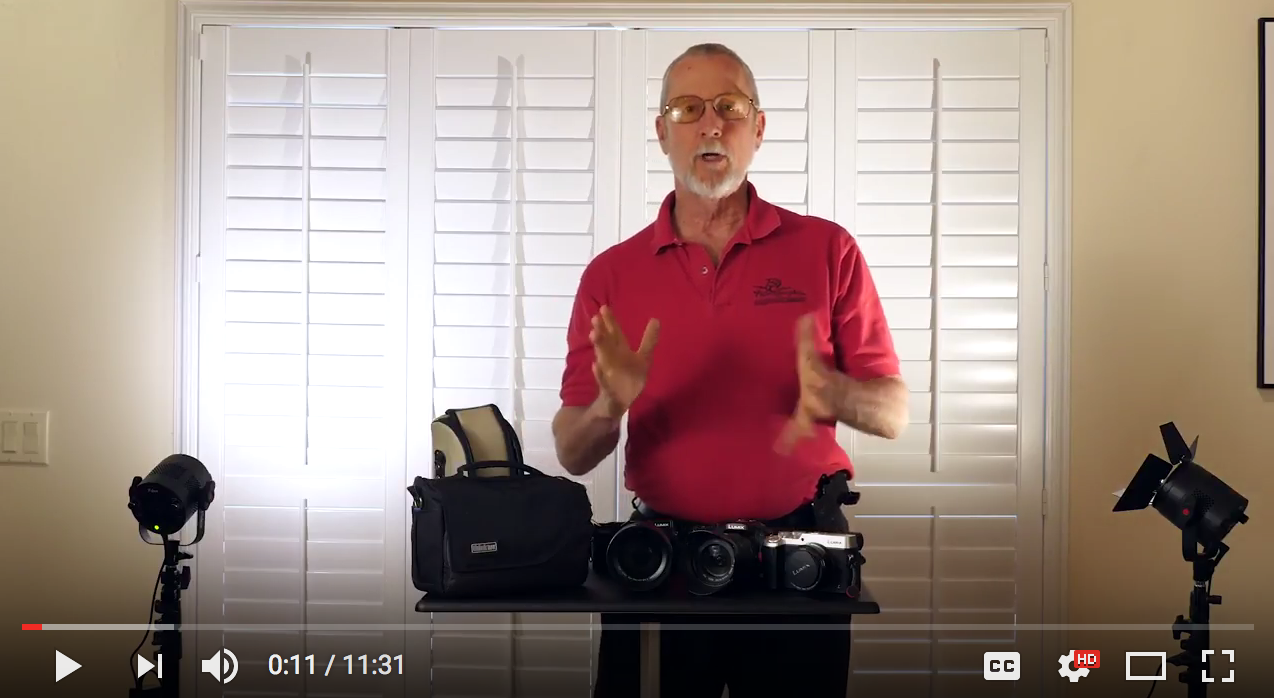
Take a look at the video below for an in-depth look at my photo kit for a full day hike.
Total weight – just less than 15 pounds. If I knew I wasn’t going to be photographing any focus brackets or exposure brackets I could leave the MeFoto Tripod behind. But, you never know. Rather be safe than sorry!
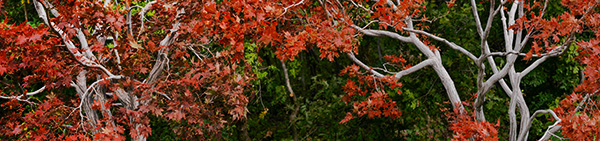
Let me put this out there if you don’t already know. I love the panoramic format!
Red Butte Arboretum – Salt Lake City Utah. In-Camera Panorama Lumix GX7 Shot a few years ago.
Panorama images are not the be all and end all they are there to tell a story that can’t be told in the two by three or three by four ratio. Sixteen by nine is becoming a more ‘standard’ image size to our eyes because we see it more often in movies, television, and our phones.
This post was triggered by a question about the in-camera panoramic photos vs. shooting individual images and stitching photos in post production. Here was the question, “When I use the Lumix G7 it does a Gatling gun shoot as I shift the camera left to right and we all know you shouldn’t be moving a camera when shooting a landscape. I’m curious the quality difference between one shot at a time and stitched in an editor vs. the G7 spray technique.”
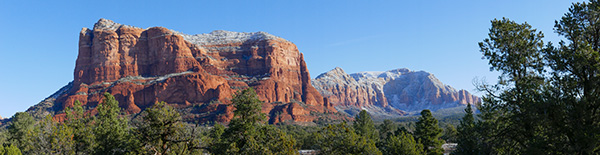
Courthouse Butte in Sedona – In-Camera Panorama. Print to about 27 inches.
Great question. We have different tools for different jobs. The in-camera panorama feature is a tool for the convenience of capturing a scene quickly and being processed for output immediately. For example, you want to share a scene on social media that is panoramic in nature. The camera will produce a completed image that can instantly be uploaded via the camera’s built-in Wifi. It is also a fine way to capture a scene as a memory that will only live in the digital world where higher resolution is not a necessity. That’s not to say you can’t make a beautiful print from the in-camera pano, I’ve made some beauties.
Advantages of in-camera panoramic photos. Immediate gratification. Ideal for web presentation and medium sized prints.
Now to the advantages and drawbacks of a stitched image.
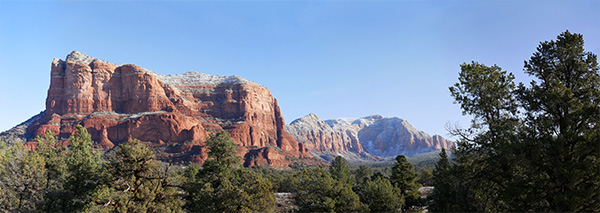
In the capture of individual images to create a panoramic in post-production, you can shoot in the RAW format which will give you a larger file and the ability to finesse the most quality from the file. The larger size files when combined allow for printing very large size images. The only down-side is that post-processing is necessary before you can share the picture as a panoramic.
Same scene as above. Ten frames stitched in Adobe Photoshop. Easily print to about Seventy-eight inches. Note the details and color were more available from the RAW file information.
Final thoughts. Use the best of both worlds. Make an in-camera pano to make a quick record of your scene. It can be utilized as a reference for the future building of your panorama or quick sharing of your view in social media. Make your individual images for large format printing.
Through the Internet, I have met an avid advanced amateur photographer/videographer named Aloy Anderson. Aloy is always pushing to learn new and creative ways to use his cameras. I have never attempted stop-motion video myself even though it is a capability built into the Lumix Cameras. When Aloy shared his project with me, I asked if he’d mind sharing some of his thinking and his process with me. And now with you.
I invite you to check out his stop-motion video called Jungle Movie “Be Brave” and turn the rest of the post over to Aloy. Enjoy!
“My name is Aloy; I’m a photographer and Youtube content creator from Miami. From an early age watching Sesame Street, I’ve always been curious about how to make stop-motion animation films. In those days it took a 35mm camera with “miles” of film to develop which was out of my reach. When I realized my new Lumix G7 had the feature built in I was pleasantly shocked. I had to give it a try. My video “Jungle Movie” my first attempt at a storyline video.
When you enter the stop motion menu on the Lumix camera choose whether you will snap each shot independently with the shutter button or the camera can be set to shoot at your preset interval. I do a little of both to give me time to reposition the set pieces and camera placement. For simplicity, I chose 5 seconds between each shot to give me time to move the characters quickly and get out the way.
Stop-motion can be very tedious and time-consuming, and it’s tempting to take the easy way out by leaving the camera on a tripod in one spot. That would be a mistake akin to watching a whole movie from one angle. I suggest different scenes and locations for variety, using a wider lens to show establishing shots and standard lenses for shallow depth of field moments. Before you begin, have a definite storyboard in mind. I like to use manual focus and exposure for each shot.
Here are some tips.
1) Don’t to move each piece too far between each shot as I did in some of my Jungle Movie. The resulting video will have choppy movement. A few centimeters is a good start.
2) Keep the camera on a tripod or table-top to maintain a solidly grounded scene.
3) Every few shots check to make sure your exposure or focus point hasn’t changed.
4) As you improve, you will know what not to do next time and come up with more complex ways to tell your story.
5) Imperative before you begin, set your camera’s aspect ratio to 16:9 which will allow it to play back full widescreen rather than a smaller 4:3 photo size.
6) Finally, have fun!
I guarantee your first 10-second video attempt may look like a five-year-old did it but you will have a good laugh watching it play back with all its faults.
The good thing about the Lumix is when you’re finished making captures the camera will ask you how to customize your video rendering such as how many frames per second it will be and at what resolution. It will then stitch all those photos together into an MP4 file. The only downside is it will be a “silent” movie. In my case, I imported the MP4 into my video editor and added music and text titles to polish it off. It is crucial to add some form of audio to keep your video engaging. This information is not an exhaustive tutorial by any means, but the fun is learning as you go.
I invite you to visit my Youtube product review channel and my Flickr Photography album. Most importantly I would like to thank Bob Coates for inviting me to write this piece. Hopefully, you will have a good time learning this type of creative way to use your camera.”
Aloy Anderson.
Thanks to Aloy for sharing his first foray into stop-motion.
Yours in Creative Photography, Bob
PS – Most Lumix cameras have the stop-motion and time-lapse features built into the camera. If you have any questions about which camera might be best for your needs let me know.
Heads-up here! This is my first foray into photographing water droplets. I’m sharing my current setup, and sure it will change as I learn more and experiment. I am taking you along on my adventure showing you the kind of work I’ve been able to create with this setup. Once again I will share I am no expert with this type of photography. If you’ve got some ideas for me, I’d love to hear them!
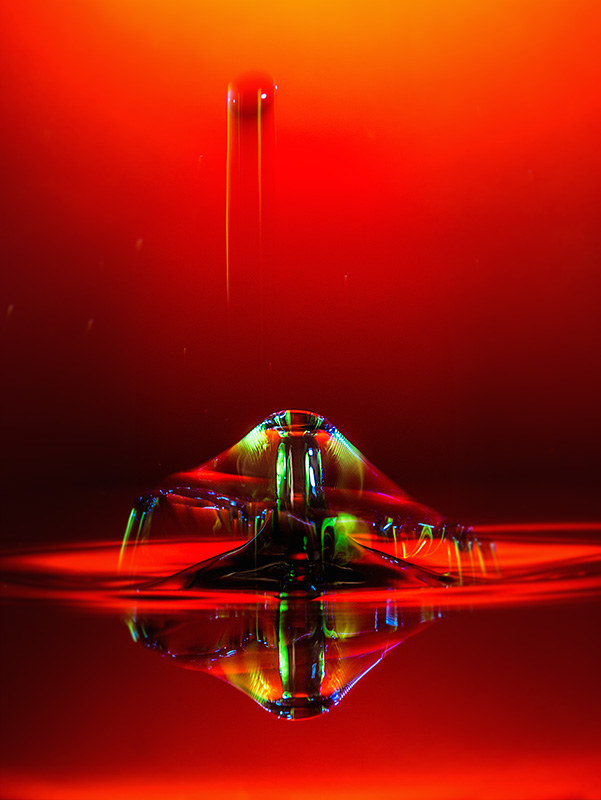
This photography is not for the faint of heart. By the way, you CAN do this photography with a couple of Speedlights and in some ways that may be better for more control of the results. I like the variability with the gear which I’ve been working. OK, with the disclaimers out of the way lets look at a water droplet photo and then the layout of all the stuff.
Photograph achieved with the equipment setup as seen below. Exposures are made at f14 with @ one second ISO 200.
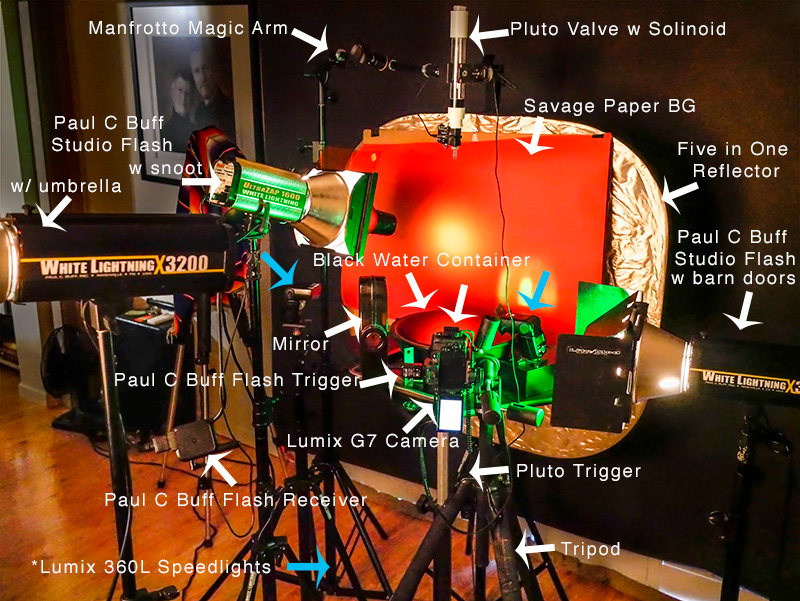
Here’s my gear. I’ll ‘splain below.
I decided to get a little head start on this type of photography by getting some necessary tools. The Pluto Trigger and Pluto Valve can save you a LOT of time. The Trigger is connected to the camera and controls the show. It tells the water drops when to fall. What size they should be and when to trigger the flash. All of these durations are in milliseconds (MS).
Backgrounds are only limited by your imagination. The one showing above is with a colored Savage Paper background. There is a gelled flash with a snoot to vary the light and add interest. With this setup, I have also used a reflective background with a gel over it lit by a flash at various angles and directions. You can use cloth or photos or printed patterns or almost anything you like. As I learn I’m trying to be careful not to overwhelm the waterdrops but we’ll see as I play how that transitions.
I used the Lumix G7 to capture these photos. Lens used was the Vario 35-100mm f2.8 lens with a 10mm or 16mm Vello extension tube. You will need a camera that has a trigger port or can communicate with the Pluto Trigger.
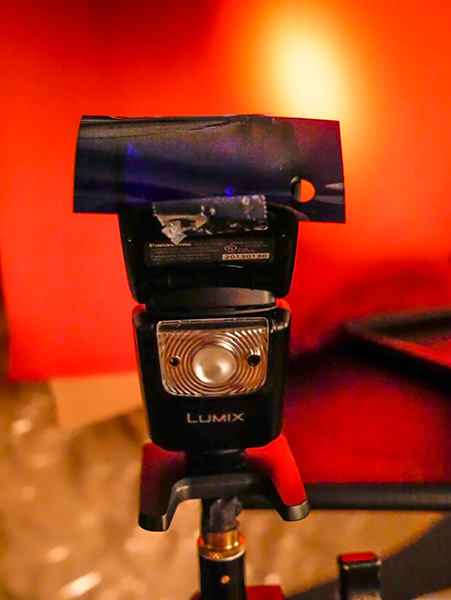
Connected to the camera is a remote flash trigger that fires the flash Paul C Buff flashes from the camera. The Lumix 360L flashes are triggered by the light from the Buff’s because I have them set to Slave Mode. It is the flash that freezes the motion of the water. Adding gels to the flashes adds color and interest to the splashes. In my images, you often see some streaks of color in addition to the frozen droplet. This is because I am using multiple types of flash. The Buff units are not as fast as the Speedlights. And the Speedlights can be of different durations if you change the amount of light you ask them to produce. The lower the power, the shorter the duration of light. Bogen Cine gels Vivid color are juicy. Roscoe gels work well too. You can get gel packs that are just the right size for fitting on your Speedlight. Here’s one from Roscoe holder for the gels.
Lumix Speedlight with gel taped in place. Once you see how the gels perform you can also buy larger sheets and cut them to size for larger flashes.
I used a black bowl of water for the reflection. Black allows the color of the background to shine through. Fill the bowl as high as possible, so the edge of it doesn’t show. Science says you can fill a vessel higher than it top because of surface tension. Well, let’s not get into that too far, but as a side note, know that you can put 32 dimes in a shot glass before it overflows after you have filled it with water. Make sure you have a drip tray underneath the bowl or tray to catch any spills as you work.
If you don’t have enough lights, or just want to add another variable, note that you can add a mirror to the set to reflect light back from another direction.
The Manfrotto Magic Arm is extremely helpful in positioning the valve in place over the water. The Manfrotto Super Clamp holds the valve. When you are setting up the position of the water drops, watch where the water drop falls and put something in place to use to set your focus. Remove before shooting.
Working with water droplet photography is like photographing fireworks! You are never quite sure what you are going to get. You get to control the variables but there is never a guarantee and always fun surprises. (well sometimes not so fun but always a learning experience)
I have been fortunate to live in places with some spectacular scenery and would probably have a hard time living in an urban environment or someplace dull and flat. Sedona, Arizona is the gorgeous place I now get to call home. Red rock vistas and a dry climate that showers us with sunshine two hundred seventy-eight to three hundred days per year.
And, after residing here seventeen years, I still find different ways to view the majestic red rocks thanks to visitors spurring me on. Some visiting friends asked if a helicopter tour would be worth a go and would I be interested in joining them? I said, “Yes indeed!” I was surprised I hadn’t thought to fly the skies with my camera in all that time.
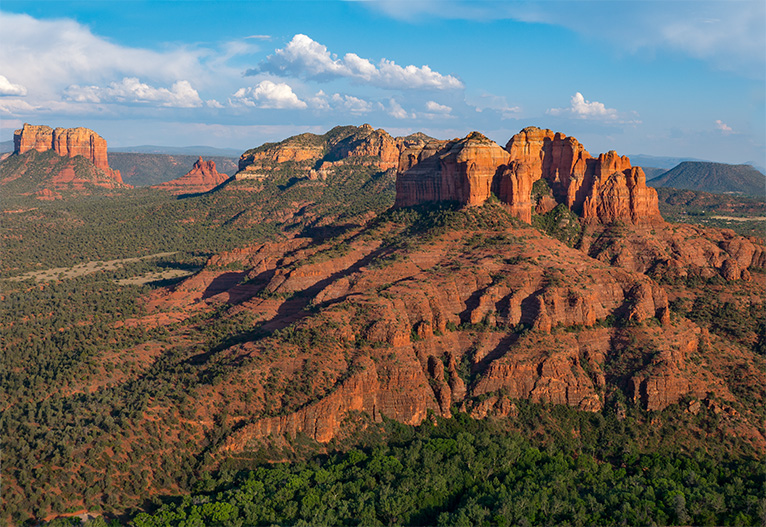
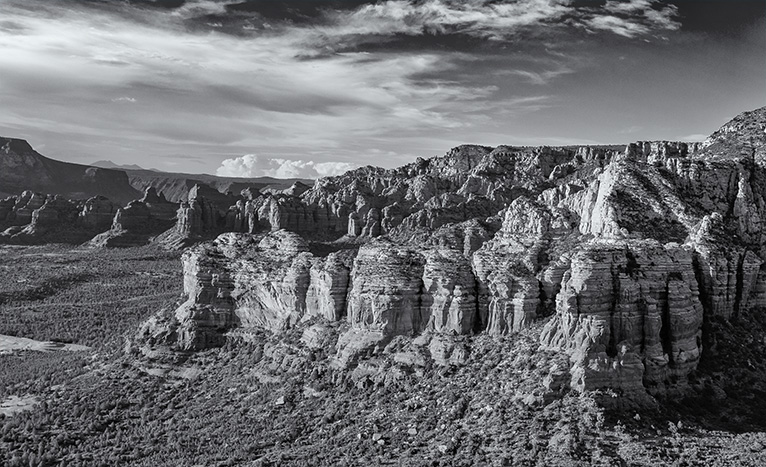
Sedona’s famous Cathedral Rock from the air. Lumix G7 with 12-35 f2.8 Vario G lens @f5.6 1/400 sec. 12mm (24mm FF equivalent) ISO 200
More Red Rock formations. Same gear as above. @5.0 1/400th sec, 19mm (38mm FF equivalent)
Processed in NIK Silver FX Pro2 (available free from Google)
Cathedral Rock is one of the state’s most photographed destinations. I know that I have photographed it on numerous occasions, but never from the air. An artistic rendition of Cathedral Rock was one of my first Merit images in Professional Photographers of America image competition.
Let’s talk about photographing from the air.
I have done photography in the past from the air, but it was always a charter flight where I was calling the shots for the position of the helicopter or plane and the possibility of staying on station or revisiting until I had the shot. With that kind of luxury, there was time to check settings of the camera ensuring they were correct. This flight was going to be a horse of a different color. A sightseeing tour lasting 17 minutes and no do-overs.
I thought about the new technology I have access to in the Lumix cameras and decided to place my trust in it. I’ve talked about this setting once or twice before. It’s called Intelligent Auto. I jokingly refer to it as the ‘Honey, stop the car!’ setting. It calculates the f-stop, shutter speed, and ISO. I have always used it sparingly as I want to make the decisions that control the final look of the image. In this case with no time to devote to changing settings I decided I would concentrate on framing and composition and see how well the camera would do. Shot in RAW to have more latitude to cover exposure but the SOOC files were pretty darn good.
After looking at the metadata for exposure settings (see above) I was surprised to note that the camera had automatically recognized the scene as a landscape and set the camera for ‘Landscape Mode’ – “For landscape photos with background in focus.”
Once again I was pleasantly surprised. Shutter speed was high enough to freeze the scene in spite of the helicopter’s vibration and motion. Exposure was solid for the scene. All-in-all it’s a winner. If this were a commercial shoot for a paying client, I would be working this entirely different but this is a great help in quickly changing situations.
Thinking about visiting Sedona? Check out http://www.sedonaairtours.com for your aerial view of the red rocks. really enjoyed my experience with Sedona Air Tours. They work together as a great team!
Learn more about other attractions in Sedona at theVisit Sedona website.
(You might want to scroll down to play the 1967 hit from the Fifth Dimension called Up, Up and Away while you read the rest of this post.)
Imagine floating in Silence. Beautiful red rock vistas spread before you like towering sculptures.
That was the first thing that came to mind as a surprise when I took a balloon flight over the red rocks of Sedona. Silence only interrupted by the occasional roar of the propane burner to control our height above terra firma. Silence only changed by the occasional comment of a fellow passenger exclaiming about some new deer or rabbit that came into view unaware we were hovering overhead. Gliding over the landscape is an incredible way to experience Sedona.
You can’t beat it with a stick!
I was out on a photo ‘dawn patrol’ with my cameras and fellow Lumix Luminary photographers Suzette Allen & Jon Yoshinaga while they were in town for a visit. We set up for sunrise over the valley and were gifted with the lifting of the hot air balloons. It is always a fun addition to a shoot when the hot air monoliths pass through the scene as a colorful counterpoint to the scenery.
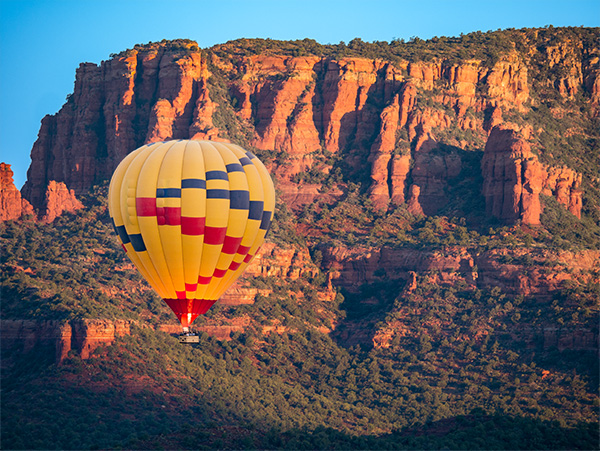
Here are a couple of the photos I captured of visitors heading off to a sky adventure.
Hot Air Balloon lifts off into the azure blue skies over the red rocks of Sedona. Captured with Lumix G7 with 100-300mm f4.0-5.6 Vario lens @f4.9 1/160th sec 193mm (386mm FF equivalent) ISO200
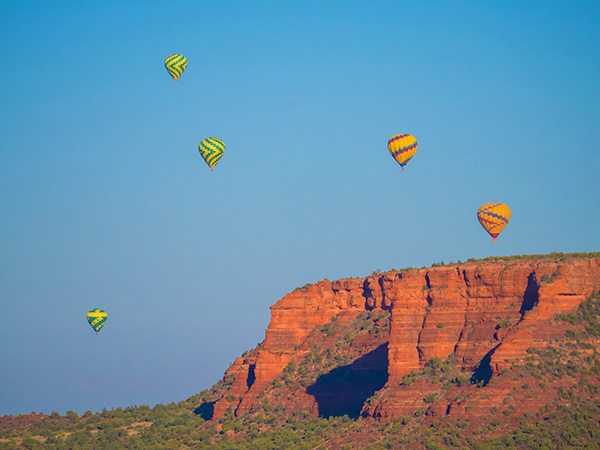
Balloons dot the skies above the Red Rocks. Lumix GX8 with 100-300mm f4.0-5.6 Vario lens @f4.5 1/10000th sec 150mm (300mm FF equivalent) ISO800
For infrared conversion of my cameras I use LifePixel. Infrared allows you to put an older camera to use and opens up a new time time of day for productive image creation.
Learn Photoshop in a fun environment. Aaron Nace applies the right amount of fun with easy to understand and follow tutorials. Actions and brushes are included with lessons!
Best embroidery ever. Give Queensboro a try, get a $20 instant credit to get started by clicking on the logo! They specialize in great quality custom logo apparel and promotional products with the best customer service.
Platypod has become a great resource for being creative in getting your camera gear easily into unusual places. As an Platypod Pro I get to work/play with the gear even before it comes out. Head over to Platypod, subscribe to the newsletter and you will get special discounts reserved only for subscribers.