My writing for the Successful-Photographer blog has been lagging a bit. I’ve been writing for many different publications including Photofocus.com and photography magazines. I’m sort of reminded of the story about the cobblers children having no shoes. Or, on an even more personal note, my dad was a TV repair man always off to help other folks get their sets tuned correctly when I didn’t know that other people in the world didn’t have a green cast. Kidding aside I want to get my home base back to work.
Start off with fireworks
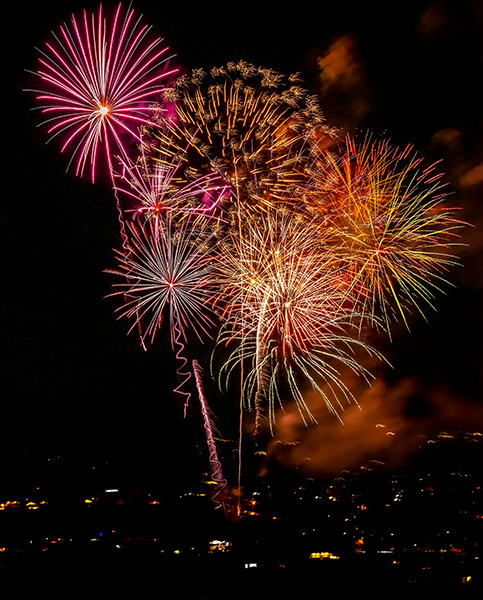
And, what better way to get things going than to set this first new post off with some fireworks??
Four images combined in post production. Captured with Lumix GX85 and the G Vario 100-300mm f3.5-5.6 lens at 100mm. Exposure f/8 four sec at ISO 200
On July 4th Cottonwood, AZ, the next town over from Sedona had a fireworks display. And, in honor of the state of Covid-19 they used all aerial shells so people could spread out to enjoy the night of colors streaking across the sky.
It worked it very well. I’ll share some ideas on capturing your fireworks for next year with some new things I learned. (you may want to bookmark this page) I’ll share my set-up for using three cameras on this post. The next two posts will be on the Olympus LIVECOMP setting and making a time-lapse.
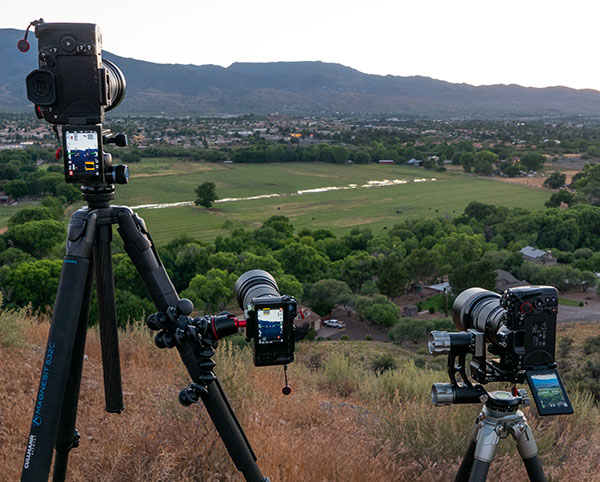
Three tripods
Three tripods set close together allows for different looks.
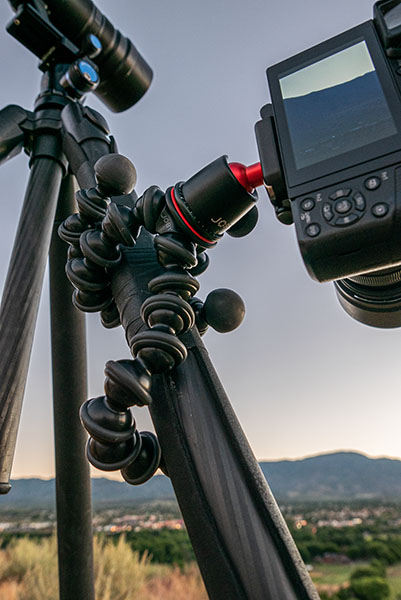
On to the set-up with three cameras mounted on tripods. Two were standard and I added a Joby Gorillapod with legs wrapped around one of the taller tripod legs.
Joby Gorilla tripod holds the Lumix GX85 camera
Two of the cameras were set for capturing five second exposures with a one second delay using the time lapse mode. Somehow one of the cameras got off its time-lapse mode and I ended up firing it by hand. The third camera was the Olympus E-M1 Mark III which was set to LIVECOMP mode which I’ll detail in the next post.
I’ve heard it called shooting on the edge. Edge of what you ask? Edge of everything. Edge of the weather. Edge of day and night. Any time there is a contrast from the norm it’s a great time to be creating images.
Case in point.
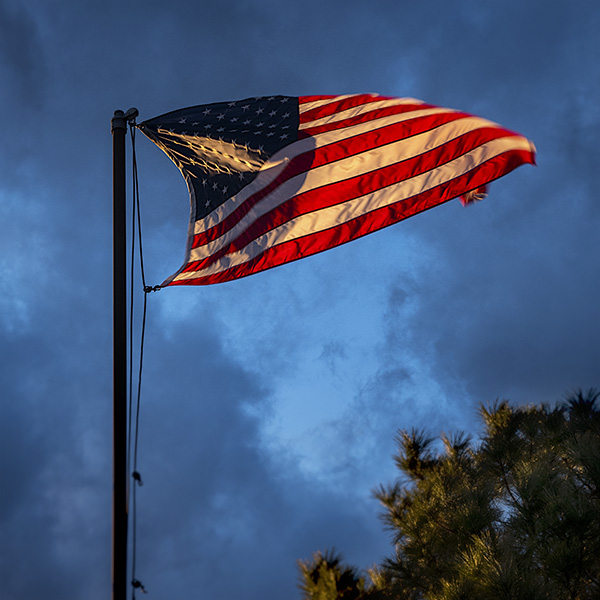
Here’s an excellent argument for always having a camera handy as Jay Maisel always coaches. I walked out of one of the galleries where my art is sold and came across this moment that was there for maybe three minutes.
The golden light of sunset sneaking through a hole in the clouds
It was the confluence of the elements that I think makes for an interesting photograph. A small shaft of light appeared and highlighted the flag which was lowing in the wind. The background to the flag was enhanced by the darkened and scattered storm clouds.
There is a tendency to go to ground when the weather is not sunny. Most dramatic photography occurs when the weather moves toward the inclement. Next time you see the clouds starting to form head out and see what you can see.
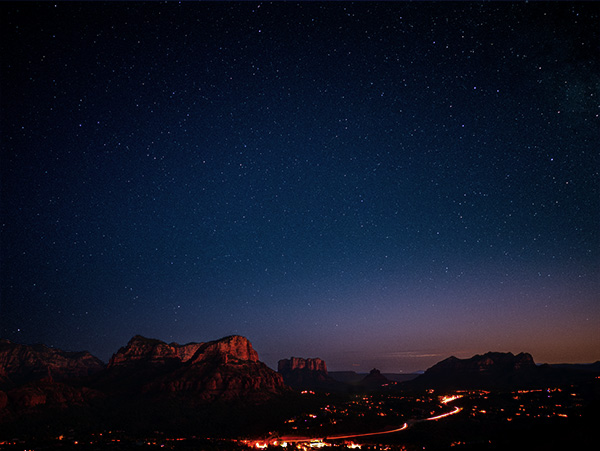
Night sky photography has its own little set of things to think about and prepare. I’ll try to share a few sources I came across in my research in trying to get night sky photos. (some issues covered here)
Lens choice is crucial. Faster glass means better images as they will allow more light to reach the sensor. Wider angle lenses can give you more time to let some of that light through. Look into the rule of 500. It will help you keep your stars as pinpoints as opposed to starting to streak.
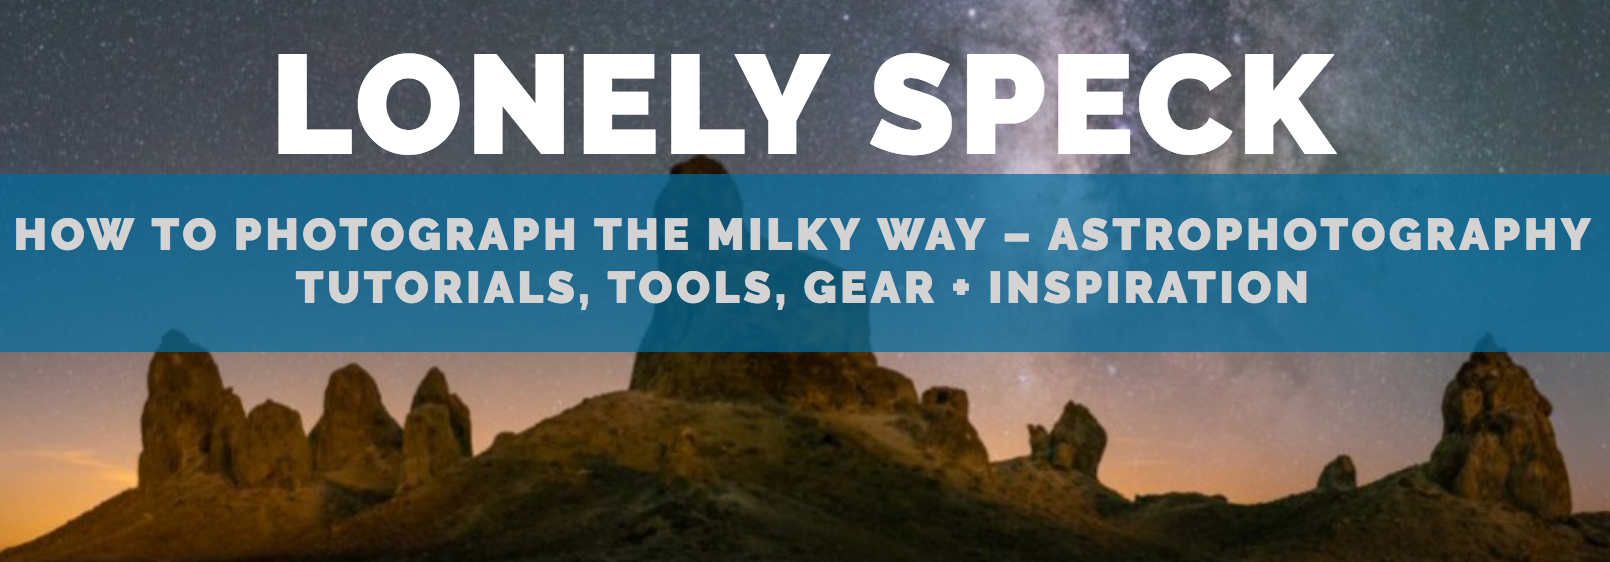
According to the rule, the longest shutter speed you can use before your photo gets blurry is equal to 500 divided by your lens’ focal length. This formula has variables, but it is a good starting point. In my searches, I found this calculator on the Lonely Spec web site. There’s excellent info contained in the calendar that has been a great help to me! The calculator takes all variables into account. Sensor size, focal length, ISO, and aperture. If you are looking for more in-depth info, Ian Norman is rocking it over on his site.
Great resource for night sky photography
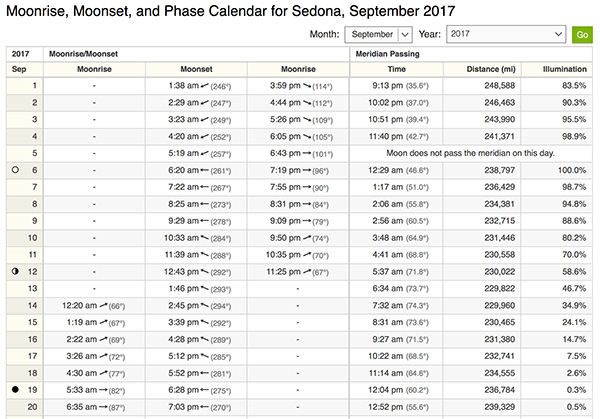
Another important site is timeanddate.com. You can look up the sun or moon cycles, rise and set times along with the direction of appearance on the horizon on the charts. This is handy if you want to find out where the moon will be rising if you are trying to catch rock formations or building with the full moon. (next full moon should be a good one in October AKA Harvest moon)
Above is a moon chart for Sedona, AZ. Go to the site and plug in your town/city name. Use the compass in your phone to see where the moon will come up. Note that if there are mountains and hills between you and the horizon the moon will be moving across the sky a bit and you’ll need to make adjustments.
Stardate is a great site. The more you know about your subject, the better your results will be. For example, if you are trying to photograph stars the darkest skies will be of help and know where, and when, the moon will be in the sky is important. Stardate can also keep you up-to-date with happenings in the heavens.
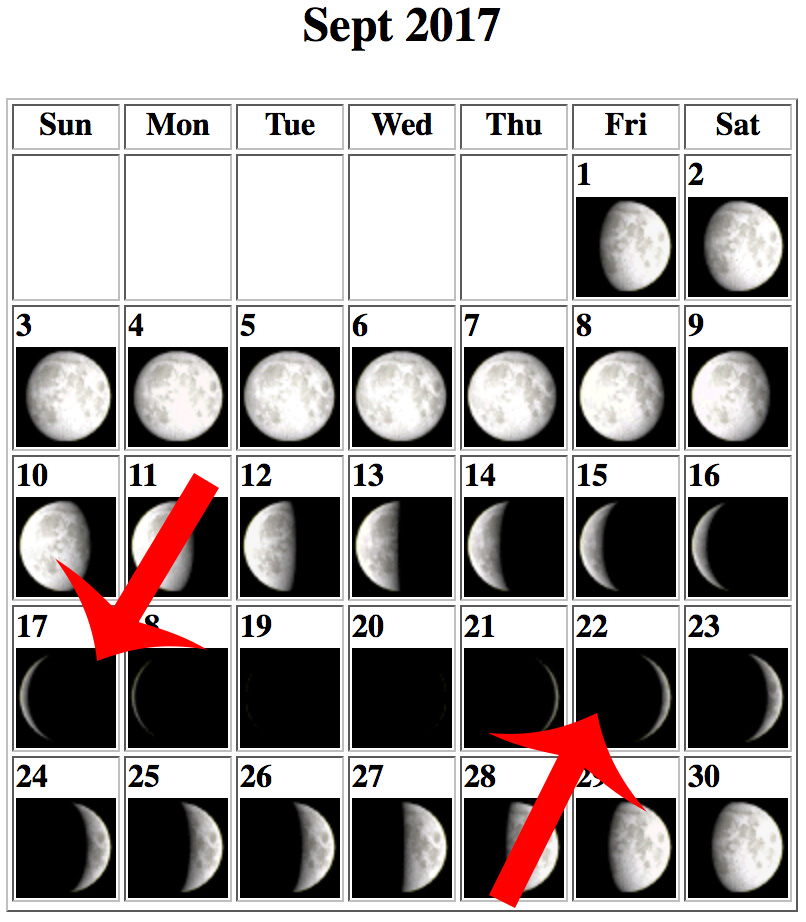
Moon chart with dates. Days around the New Moon are the best for dark skies and better rendition of your stars
The new moon is not the only time for photographing the night skies. A little bit of moon can help render the landscape visible for a different night photography look. Full moon and waxing and waning gibbous moons I tend to shoot for the landscape itself as the extra light tends to make the stars less visible.
Next post, I’ll look at processing the files once you are back at the computer.
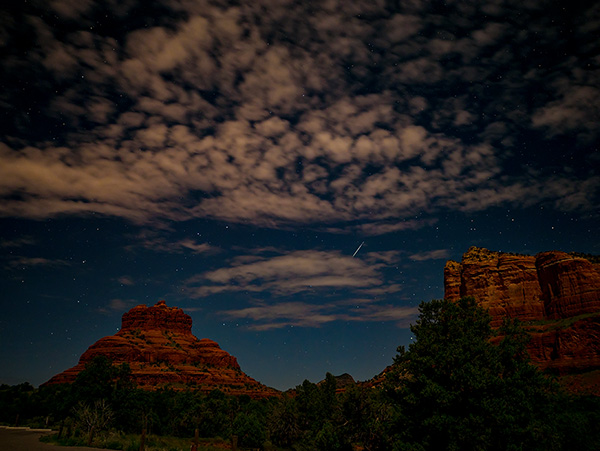
Out for the second night of trying to catch the Perseids Meteor Shower. The largest amount of visible streaks across the sky were scheduled for the early hours of Sunday morning.
Set the alarm for 12:05 AM. Wake up 11:58 PM. Check cloud cover. Looks OK. Dress. Hop in the car. Head to the pre-scouted location at Bell Rock Vista one of my favorite rock venues for photos in Sedona. (partly because it’s five minutes from my house.)
About one minute of time lapse from three cameras.
Note clouds and lightning to the south. Thankful there’s an open to the sky ‘window’ to the north.
Set up cameras. Yes, cameras plural. When photographing images for time-lapse video one thing you end up with is time. Once a camera is set, and recording do not touch, bump or adjust unless you would like to restart the sequence.
Camera one – Lumix GH5 with Leica 12mm Summilux f1.4 lens. This camera and lens combination ended up giving me the cleanest, sharpest files. I set the camera for RAW capture. Note that RAW files can chew up some real estate on your card. Make sure you have a large capacity. **
Camera two – Lumix GX85 with the Leica 15mm Summilux f1.7 lens. This set-up is a great go-to set up for night skies.
Here’s a single still image from the shoot. Processed in Photoshop
Camera three – The Lumix FZ2500 with a built-in 25-480 Leica DC Vario-Elmarit F2.8-4.5 lens. This is best shot at the 25mm setting to keep the f2.8 aperture. As you’ll note in the video, this is the only camera lens that showed condensation toward the end of the sequence. It was a VERY moist and humid night. This camera must generate a little bit of heat as time goes on. In less humid situations I wouldn’t see this as a problem.
A great resource for deciding what exposure settings to use including various camera and lens combinations may be found here. I highly recommend checking out the rest of Ian Norman’s blog Lonely Speck. Lots of helpful info there to set you on the right path. Remember the guide gives you a starting point. You still must experiment to get the most from your experience.
Yours in Creative Photography, Bob
Working on my settings for better quality imagery. Any lack of quality is purely operator error!
** The GH5 has two cards slots and can be set to behave in a variety of ways including to continue recording on the next card when one fills up. Very handy for lots of captures. When not gathering images for time-lapse the cards can be set to be an automatic back-up by writing to the cards simultaneously, RAW files to one card, jpegs to the other, videos to one card and stills to the other, etc. But I digress.
Getting good, solid lighting is the best thing you can do to highlight the features of products. Today’s post is how I set up to photograph some jewelry and a couple of my cameras. I will suggest you practice lighting techniques long before you need to use them. It allows you to refine the look rather than trying to tweak on set.
This set-up is relatively straightforward yet gives a compelling and professional look to your product photography.
Gear in use. Two Paul C Buff X3200 flash heads. One Paul C Buff Ultra Zap1600 flash head. Paul C Buff Octobox (35 inch) Snoot. Strobes are fired with Buff Trigger. A sheet of Non-glare glass. Scrims with diffusion material. Sekonic L478D light meter. Lumix GH5 camera with various lenses depending on the subject to be photographed. Light stands, one with Boom to suspend light over the set.
The power of the lights is not germane to lighting on set. If you work with lights at less power or varied, you will want to put the most powerful one above the set. It will be going through the snoot and the scrim both of which suck up some of your light. With this set, you have the ability to change the size of you lighting circle. If the light from the snoot is closer to the scrim, it will be tighter as shown in this view. If you move the snoot higher, you’ll see the light spread more and feather to a larger circle. The height of the scrim above the product will also have an effect on the light pattern.
The glass (make sure it is non-glare) is suspended above a sheet of black paper. Depending on how much light you pump into the scene and the direction of that light you can create a background for your product that can be gray or black.
You don’t necessarily need an Octobox as a modifier for your main light. I use it because it is quick to set up and break down and gives a solid direction of light. At the very least, you will need to have a softbox. If you use an umbrella, the light is harder to control on the set, and the bounce of light from the walls and ceiling can infect the set. Control is essential.
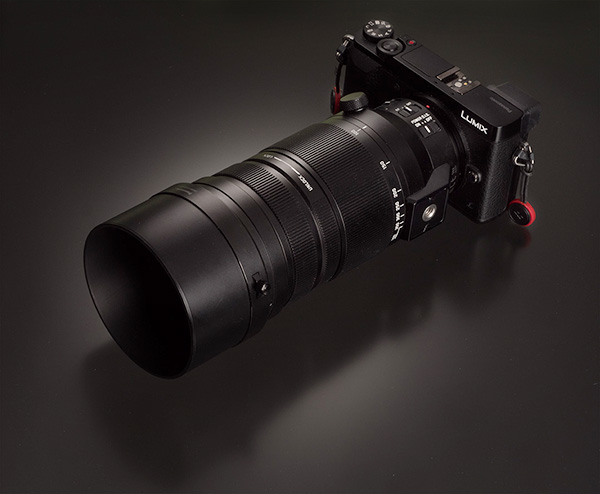
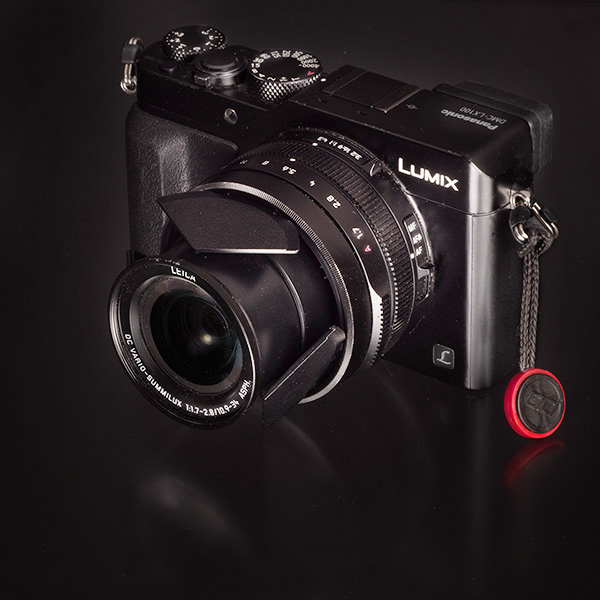
Let’s look at a couple of camera photos.Lumix LX100 camera. I call this the ‘professional’s point and shoot’. This is an example of going black with very little light from above. Solid but stark image. It will always depend on what look your client is trying to achieve.
Photo of Lumix GX85 with Leica DG Vario-Elmarit 100-400mm f4.0-6.3 lens made with the down light to give some more depth and dimension to the final image the gradient is made with the snoot and the scrim as shown above at the top of the page in the BTS shot but not as close to the scrim.
Let’s pause here until the next installment where the images will be of jewelry using the same set and adjusted accordingly. Part three of this will show before/afters and talk about post processing.
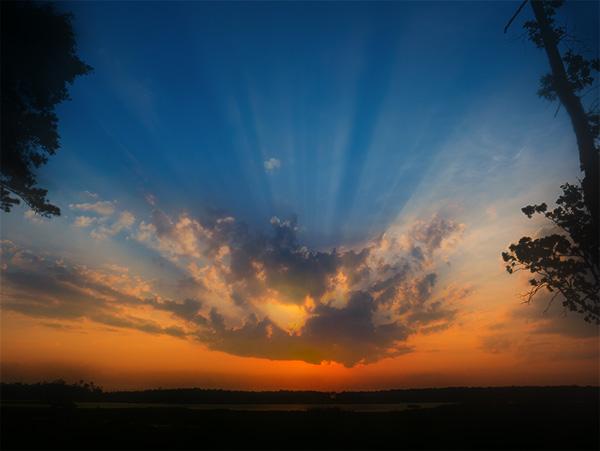
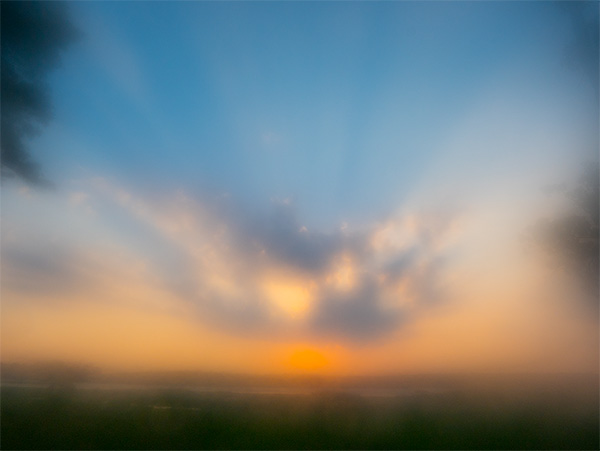
On a visit at my MIL’s on the marsh in Delaware last week I found myself up at dawn photographing the sunrise. It’s funny when you are on the road in a different place you tend to get up a little earlier. Sometimes when I am home, I’m pretty darn sure there will be some fun sunrise light, and I fail to get my butt out of bed to get out there and capture it. Luckily I’ve been traveling quite a bit, so I’ve been fortunate to see and capture some lovely images here and there.
Being from Sedona, Arizona I don’t give much thought to the effects of humidity and air-conditioning. This led to a pretty happy accident when I went to raise my camera to my eye to make this image. The lens was covered with condensation. I kinda like the result below.
Extra soft-focus due to all the moisture on the lens.
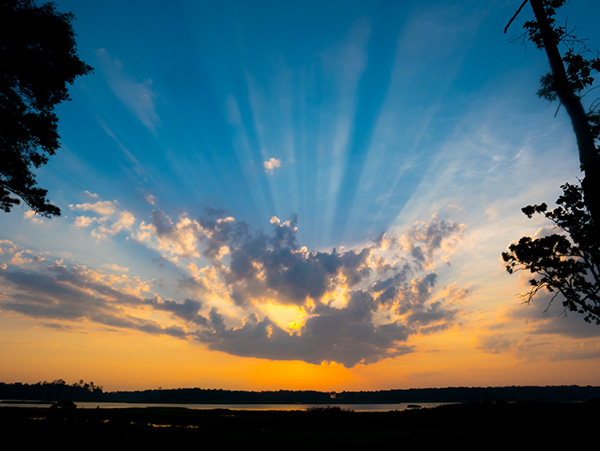
Luckily the clouds hung in there for a while which gave the lens time to shed its self-imposed filter. Below see the image Straight Out of Camera.
SOOC image which gives the RAW materials to help on to a creative image.
I’m a big believer in post processing to give an image all the impact it deserves. The scene shown above does not describe the scene as it was. There were more saturation and punch. We’ve all made images we thought were just like what we saw and been disappointed, especially back in film days, for those that remember that medium.
The image below is much more as the scene appeared, but I’ve also added just a bit of creativity by blending the two images together.
Two images above combined to give my interpretation of the scene.
The soft image was used as the bottom layer in the Photoshop file. The sharper image was dragged on top and the blend mode changed to Multiply. Multiply has the effect of darkening the image by one full stop of light. I wanted a bit more of the soft and moody photo to add to the photo and lowered the opacity just a bit to help it blend a bit more.
I like it. What are your thoughts??
Image captured with Lumix GX85 and the 12-60mm DG Vario-Elmarit f2.8-4.0 lens. These new lenses are pretty darn sweet although it moves away from the f2.8 setting early on the zoom process. They are well built. Focus smoothly. And a new feature, a locking lens hood.
For infrared conversion of my cameras I use LifePixel. Infrared allows you to put an older camera to use and opens up a new time time of day for productive image creation.
Learn Photoshop in a fun environment. Aaron Nace applies the right amount of fun with easy to understand and follow tutorials. Actions and brushes are included with lessons!
Best embroidery ever. Give Queensboro a try, get a $20 instant credit to get started by clicking on the logo! They specialize in great quality custom logo apparel and promotional products with the best customer service.
Platypod has become a great resource for being creative in getting your camera gear easily into unusual places. As an Platypod Pro I get to work/play with the gear even before it comes out. Head over to Platypod, subscribe to the newsletter and you will get special discounts reserved only for subscribers.