When you enter images into the Merit Image Review at Professional Photographers of America (PPA) to earn photography degrees there are 12 elements which are looked for. One of those 12 elements is presentation. Not adding a presentation is a presentation choice. A better idea is to give your work a finished look. Think about an image that you have printed. It takes on a new life when it is matted and framed. That is the same idea behind the digital presentation techniques I share in this video.
I shared the way I work putting my presentations together in this video. If you have any questions don’t hesitate to give me a shout!
I did a webinar for the Professional Photographers of California (PPC) last week. The subject was Photoshop including some ideas on creating art. Check out the Photoshop Party where I shared some ideas on Photoshop Selections, Blend Modes, Single image HDR with Aurora HDR 2019, creating cloud brushes and more…
For those that compete (or want to compete) at the International Photographic Competition (IPC) through the Professional Photographers of America (PPA) an important part of the process is presenting your image properly. There are twelve elements on which the images are judged. One of them is image presentation.
Think of it like this. Have you ever had an image that you thought was quite good? Then framed it and it looked even better? That is what you should try to make your image do when putting together your submissions.
Here is a video to give you one way to put together a presentation for a black and white image. This example is showing a double keystroke. The final image could be done with a single keystroke as well. As an artist it is your choice for the color (or tone) of your keystroke as well as the width. Coming soon, I’ll share some ideas on working with color images.
If you have any questions on PPA image competition, don’t hesitate to ask. I wish you the best in your competition journey.
Yours in Creative Photography, Bob
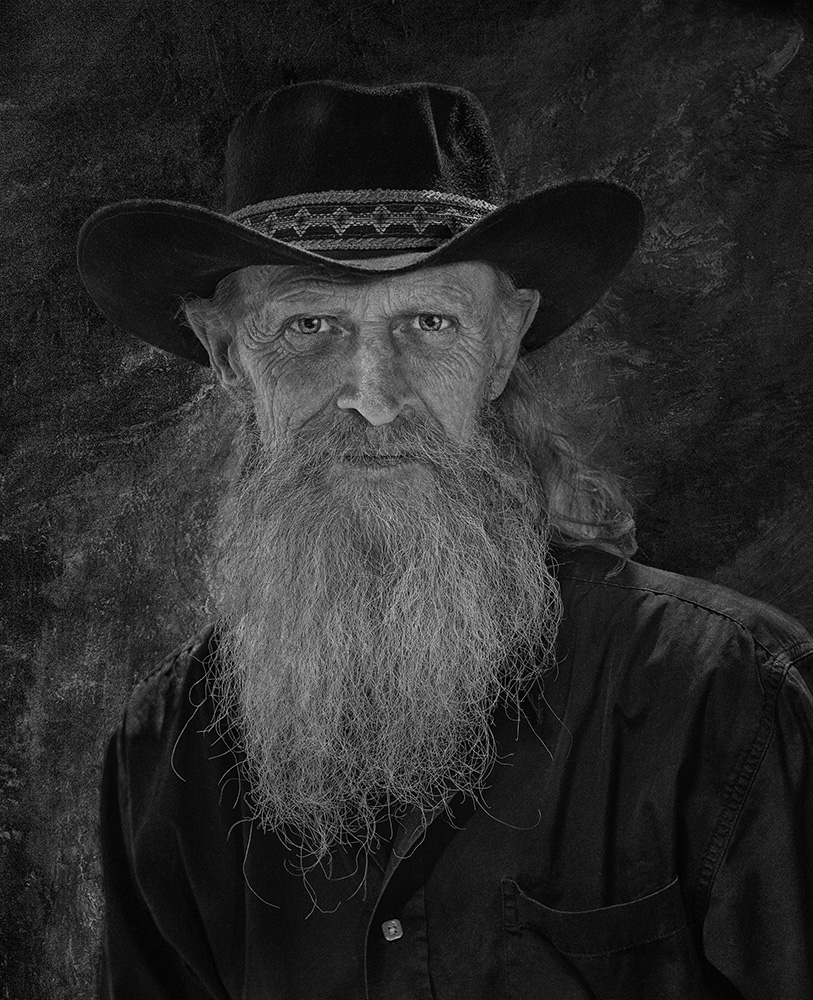
PS – The subject is Craig Christopherson a wood and metal sculptor. See some of Craig’s work here on Instagram. Image was made with the Lumix G9 and 42.5mm f1.2 Leica lens. You can see how I went from the original capture to the final post processed image in my blog on post processing with Adobe Photoshop and Skylum Luminar 4 software.
While out to dinner with my wife I was studying, as I always seem to do, the light as it played across the room. I also watch the shadows on faces as people step into different light situations. Ray, the waiter, was standing with the large light source of the front doors shaping his face. I was taken by the way the light split his face. I asked if he would mind stopping for just a moment so I could get a quick capture. He agreed.
While the light and shadow were looking good on him The area in which he was standing left a little something to be desired. In the quest for the best of both worlds I exracted Ray for the scene, he was in and using textures, layers, blend modes and more shadows I created a bit more artistic space for him. As part of this exercise I also placed Ray into a scene I captured near St. Marks Square in Venice, Italy. See the tutorial for more info.
This video was requested by someone who saw the finished product and wanted to know how to accomplish this in post-production.
The image was captured with a Panasonic Lumix LX100 which I call the professional photographer’s point and shoot. Adobe Photoshop was the obvious choice for the completion of the personal project. I am always assigning myself personal projects to experiment, expand my skillset and keep in practice. If you don’t practice your photography and post-production skills on a regular basis, it always seems to be a strain rather than a pleasure to do post-production. Remember that to keep in top form you need to practice regularly, or the rust starts to form quickly. Think about professional golfers coming in from a hard day out on the course and heading straight the putting green or practice range as soon as their round is finished.
I spent last week in Addison Texas attending Texas School. This was my first time at this week-long orgy of photography education. It is intense. You spend a week with a single instructor getting a deep dive into their techniques in creativity. It was a blast.
The class I choose to attend was with Richard Sturdivant. (Check out Richard’s work and his tool shop) Sturdevant brings an artist and graphic design background to create composite images that transcend photography. To say I learned a lot would be an understatement. Richard’s use of tools in Photoshop is an eye-opening experience. New tools. New techniques. New ways of looking at the world to enhance reality into fantasy with a hyper-realistic look.
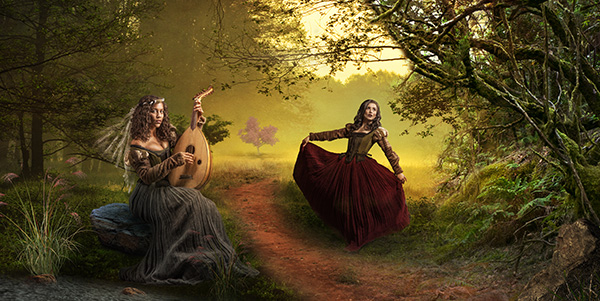
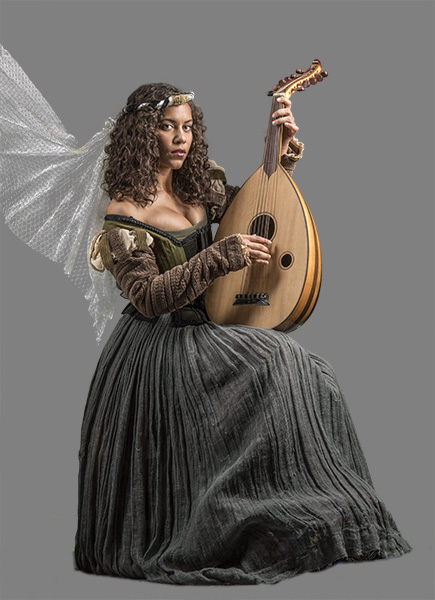
Here is an example of one of the projects which the class worked on.
My finished piece from the class project.
A photo session was shown using MoLights which can change the way you photograph subjects that have movement. A post will follow specifically about that. In the photo session, the model was asked to perform, and these lights fired as fast as the camera could fire. With my Lumix G9 that means twelve frames per second. NO misses!
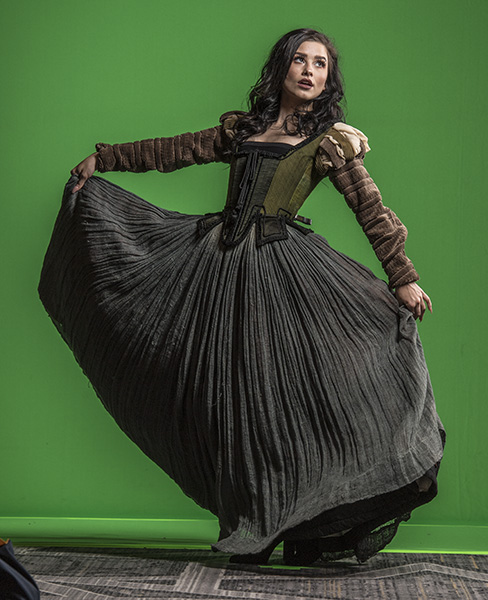
Photos were made of a couple of models in a period dress, and stock files were shared. Each student worked with the images with a base of instruction but each finished piece produced was different. It’s kinda like when you give ten photographers the same subject, and you’ll end up with ten different interpretations.
Below see some of the working pieces from the project. There were tons more, but you get the idea.
Look at the final image and see how many elements were added from the image directly above.
The light was fantastic. Scenery amazing. Time? Very short!
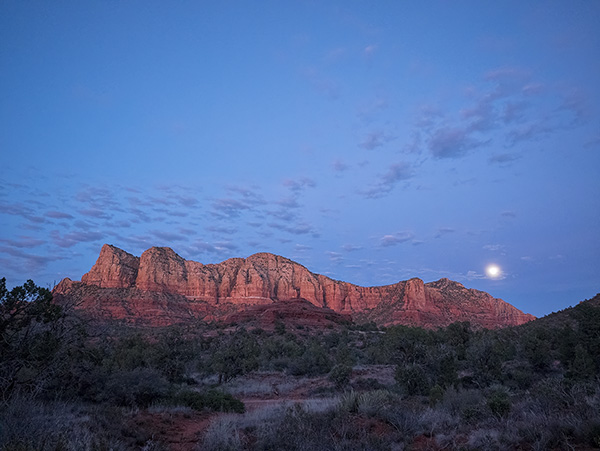
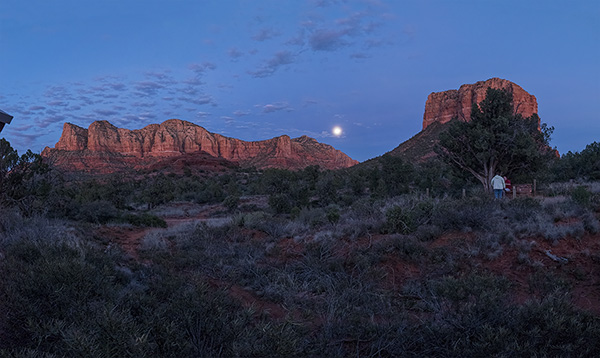
I was on my way to a photo shoot in the evening and saw the moon just starting to peek above the horizon as the light from the fading sun had already dropped below in the west. I grabbed the Lumix GX85 and the 7-14mm f4 lens to see what I might capture in the few minutes I had available. I don’t usually like to rush when a situation like this appears, but duty and a deadline called.
This was the first quick image to make sure I had something in the can.
I first quickly grabbed an overall scene-setting image. Then I tried a couple quick grab shots. I ran down the parking lot to get a better overall view. Having the wide angle lens gave me a lot of the scene but I knew I would need more to be happy.
Nine image panorama capture for further work in post. Note the images have already been adjusted a bit in Adobe Camera RAW
I set up and shot a nine image panorama with the camera in the vertical orientation to gather as much info as possible. Already the light was starting to fade and my job was calling.
Image output after using Photomerge in Photoshop.
I allowed the Adobe Photomerge tool to do a lot of the heavy lifting for me. I highlighted the images in Adobe Bridge selected Photomerge from the Tools drop-down menu Tools>Photoshop>Photomerge… Layout was set to Auto. The following text boxes were checked. Blend Images Together for obvious reasons. Vignette removal. This was checked because the lens had a bit of vignette and would have made for messy skies. A reason for not checking the vignette box would be if you had files that had no vignette because the files could process faster. Geometric Distortion Correction. You can try working without this but I have found in a scene like this the red rocks would have curved. Content Aware Fill Transparent Areas. When a handheld pano is made like this there is often areas that don’t completely fill the rectangle of the final image. Photoshop will look around and use it’s best guess to fill the areas. You can check on them quickly as it will also leave a selection around the areas it filled in case you need to make some adjustments. In this particular case, it did a great job. All setings are available for you to play with if you don’t get the exact results for which you are looking.
Post-production is a huge help in these instances to obtain quality images.
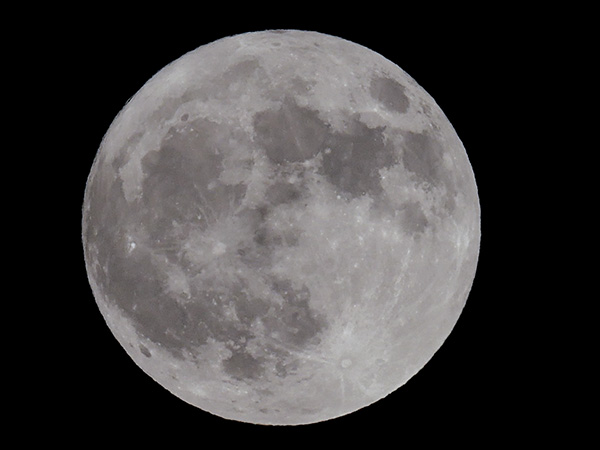
I pulled a full moon from my files as the moon area was blown out. Another case of the eye being better than the camera. If I had more time I would have bracketed exposures to get the detail I needed.
Here’s the final. The moon has detail. The image was cropped to bring attention where I wanted it and
a little judicious Cloning was used to remove the couple under the tree.
If you have any questions or comments give me a shout!
For infrared conversion of my cameras I use LifePixel. Infrared allows you to put an older camera to use and opens up a new time time of day for productive image creation.
Learn Photoshop in a fun environment. Aaron Nace applies the right amount of fun with easy to understand and follow tutorials. Actions and brushes are included with lessons!
Best embroidery ever. Give Queensboro a try, get a $20 instant credit to get started by clicking on the logo! They specialize in great quality custom logo apparel and promotional products with the best customer service.
Platypod has become a great resource for being creative in getting your camera gear easily into unusual places. As an Platypod Pro I get to work/play with the gear even before it comes out. Head over to Platypod, subscribe to the newsletter and you will get special discounts reserved only for subscribers.