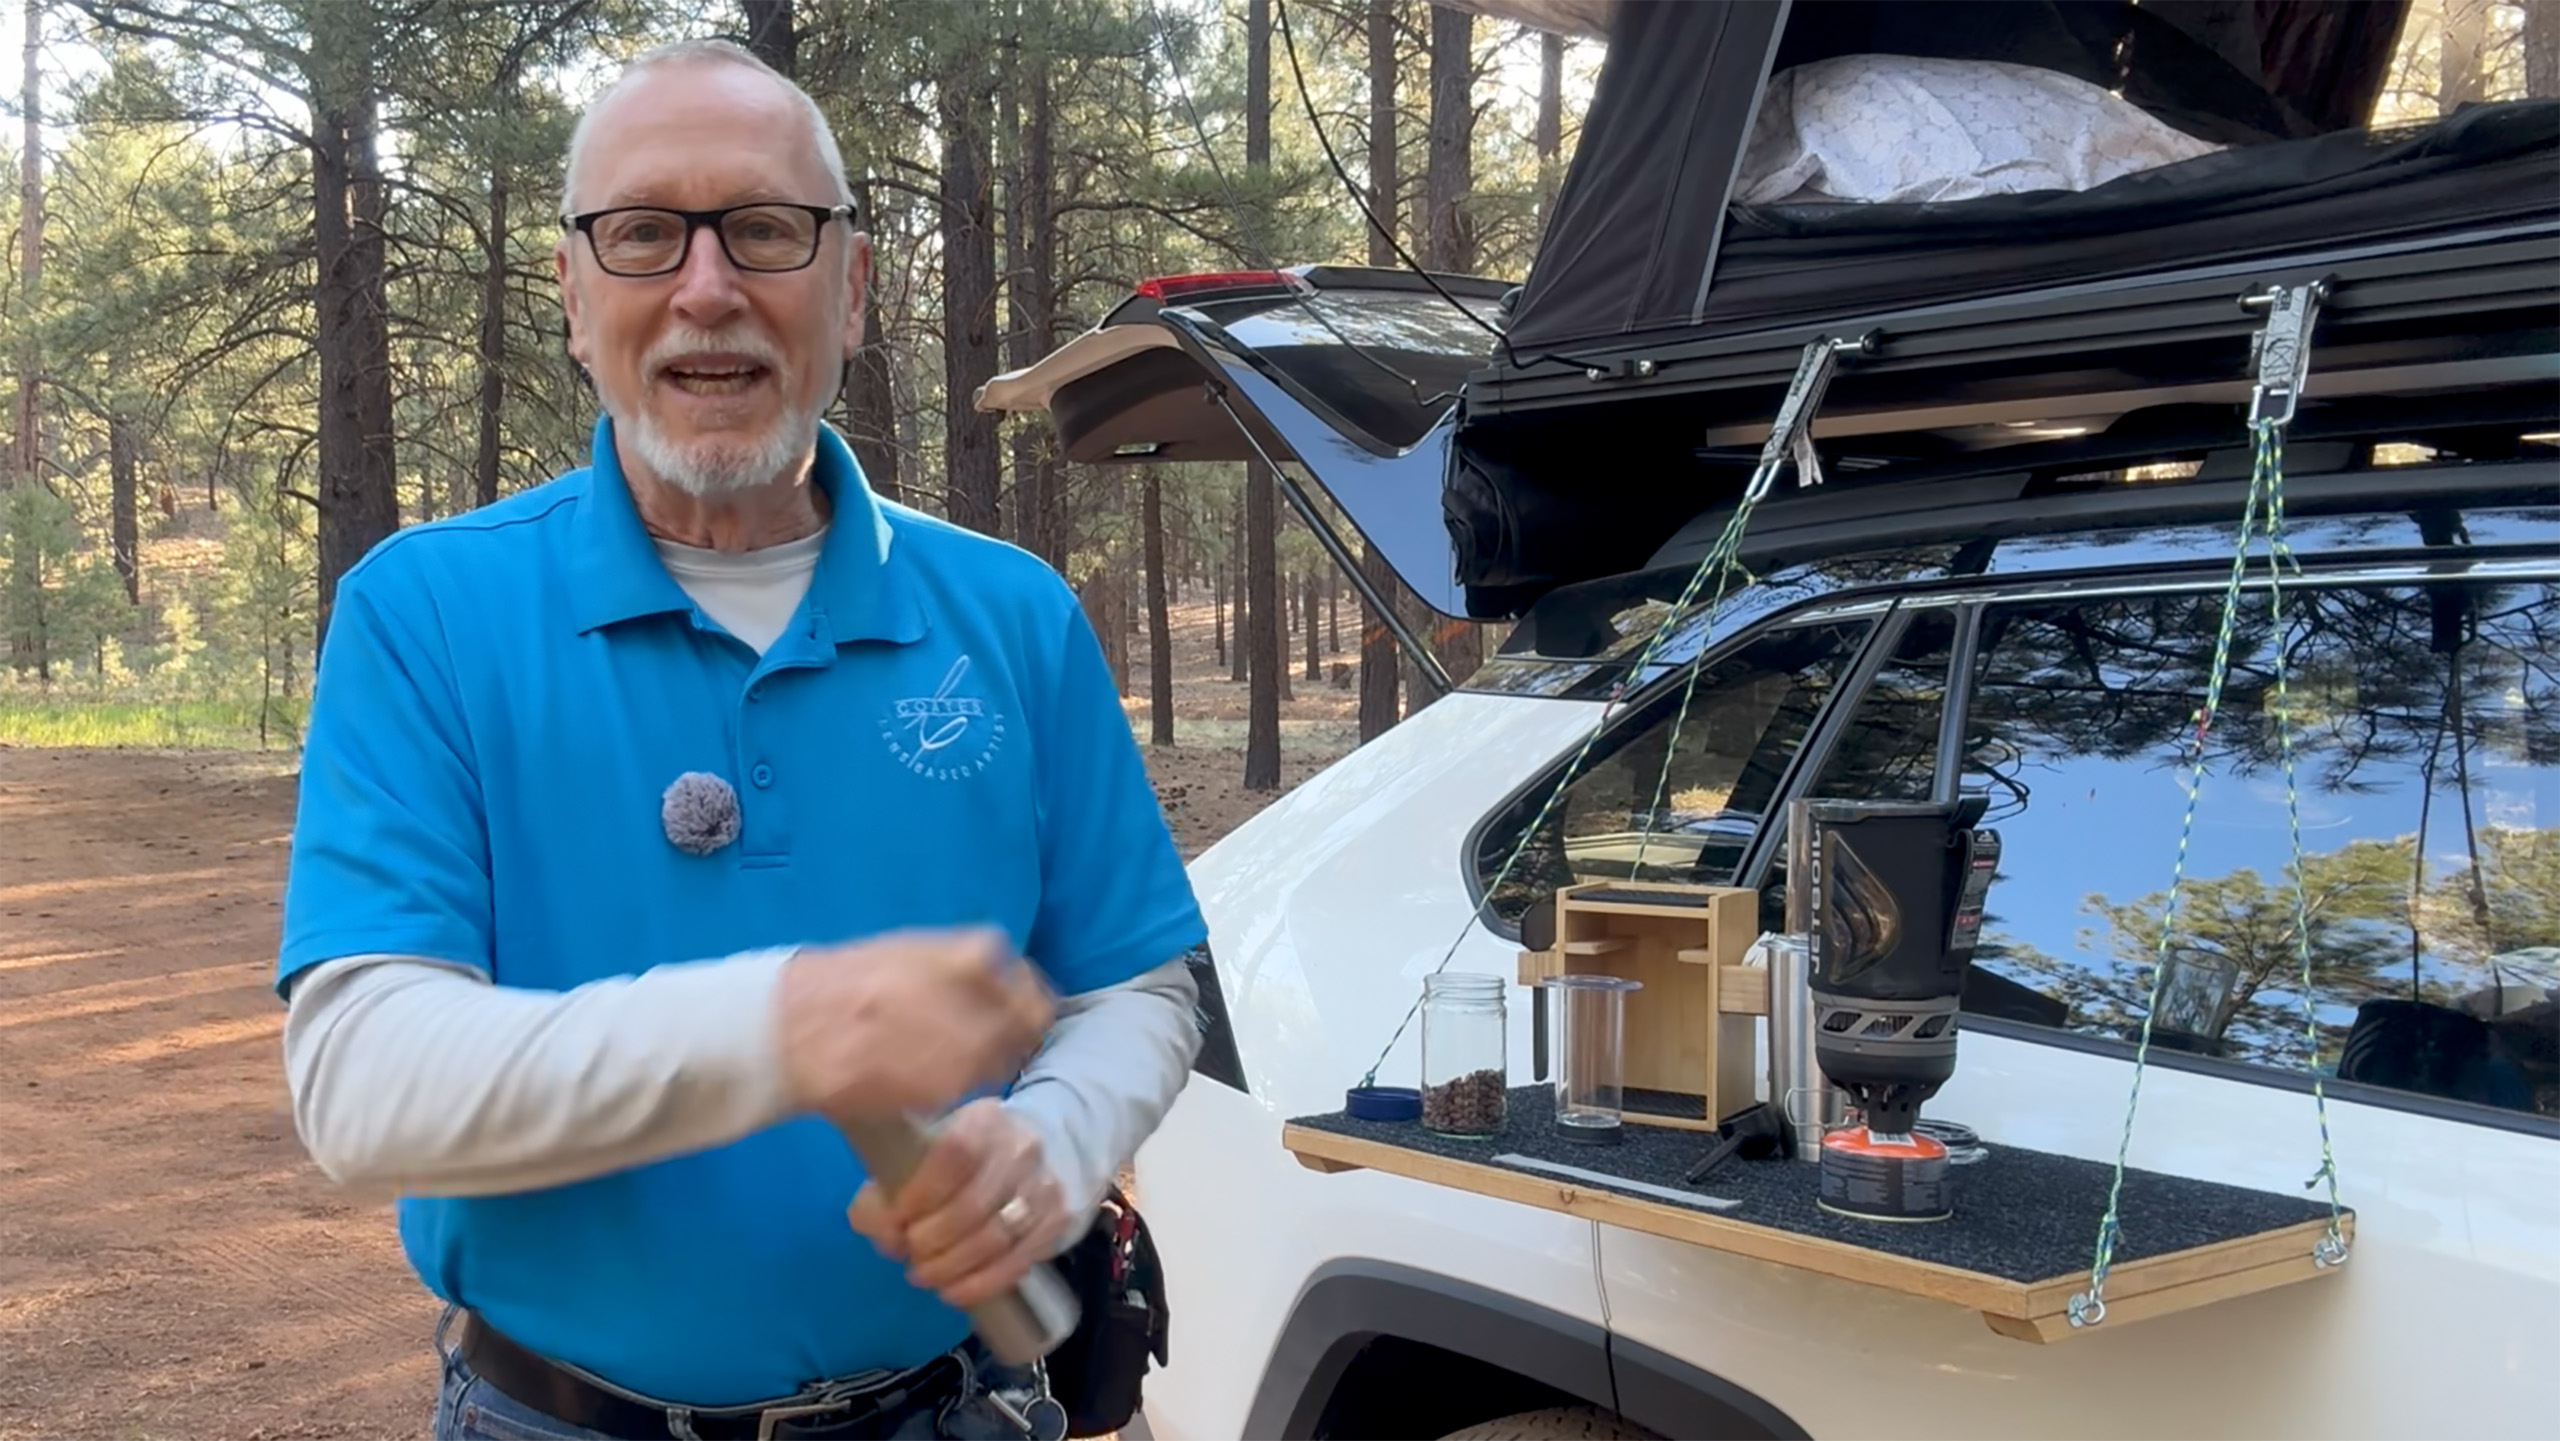
I am in the process of producing a video for PHOTOVISION Professional Photographer’s of America’s education website. My video is called Beyond the Horizon. It explores Boondocking, AKA Car Camping. Below are the plans for the most asked about build I put together. Having a table at a height which enables you to stand is a luxury in my opinion. If you agree and are a bit handy with some tools you can craft one inexpensively yourself.
In this article I’ll share my measurements and materials list to save you some time working it out for yourself.
Size Matters
Before you begin your gathering and construction you’ll want to look at how you will be using your table. I initially made mine to hold a two burner stove. Turns out that the table was just a wee bit too small for that. It was a squeeze after adding the propane cylinder which I failed to take into consideration. There turned out to be just a little less space for plates and bowls with the assembled stove aboard than I thought. Turns out that this is the perfect size for how I use it now. It’s not too big nor too small. Overall weight is a bit over three pounds.
My Table Uses
Preparing food is the main way I work with my set-up. There’s room for multiple plates and bowls. I currently use a Jet Boil unit to heat water for coffee and freeze dried meals when a want a hot meal. I find the freeze dried meals to be tasty enough and way less hassle than when I had the two burner propane stove. If you want to cook a bit more than I do you can make your measurements just a bit longer or use a single burner stove. The table is also helpful when working on various projects doing the day.
The Materials
If you have a circular saw or a table saw and a power drill you’ll be good to go for tools. If you are not quite so handy you can bring your measurements to the big box hardware store and they will cut your materials to size. Some include it as part of the service some may charge you a little for each cut.
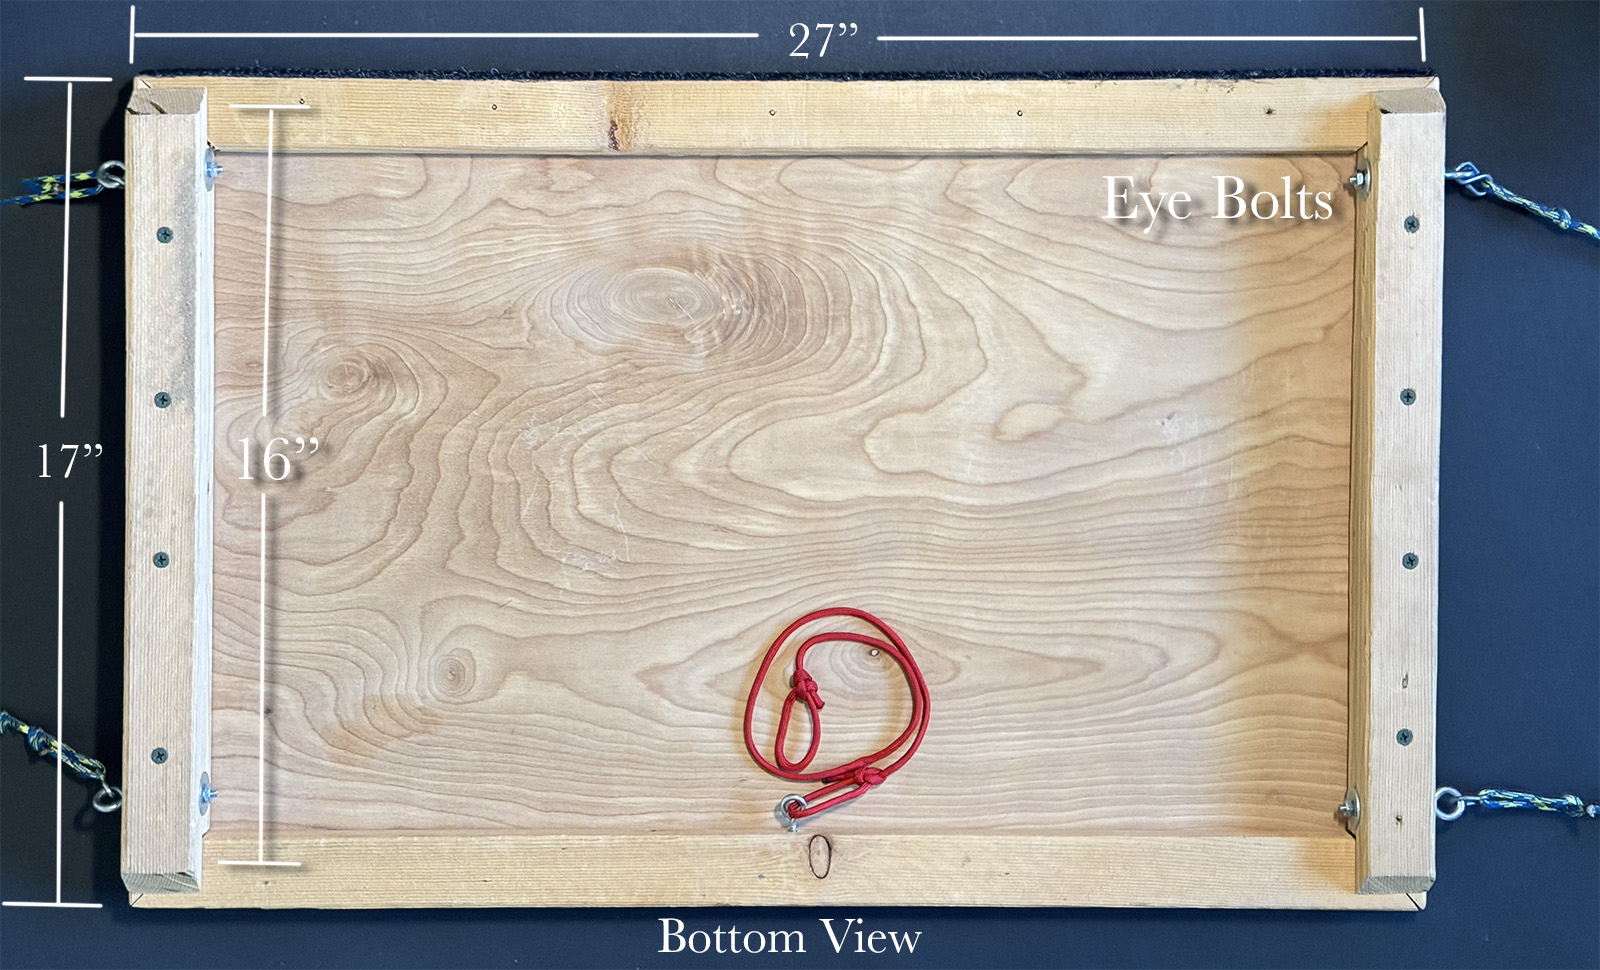
Bottom view. See text for instructions on size of screws and fasteners used in the project.
The top is 1/4 inch plywood, 17 X 27 inches. you can often check the scrap area and may be able to find a piece that fits your needs without having to buy a large sheet. Make sure you you get a quality piece of ply that is very flat. Oak Sanded Plywood in a 2 X 4 foot size can be purchased for around $25. To support and give the top strength I line the bottom with 1 X 2 inch Furring strip. Adding two more strips to the sides Get two 8 foot strips as they are under $2 a piece.
You’ll need 16 3/4 inch wood screw to secure the top. 8 1 1/2 inch screws for the side reinforcements. Four 2 1/2 inch by 1/8th inch eye bolts with nuts and eight washers. Four S hooks. Four Guyline tension hooks. 1 package of Guyline rope. (it’s good to have a lighter or match when you cut the lines to keep them from fraying) Two Velcro straps to attach to the roof rack. I found the Keeper Wrap-It-Up 1 inch X 6 inch Grey Bundling Strap at Ace Hardware.
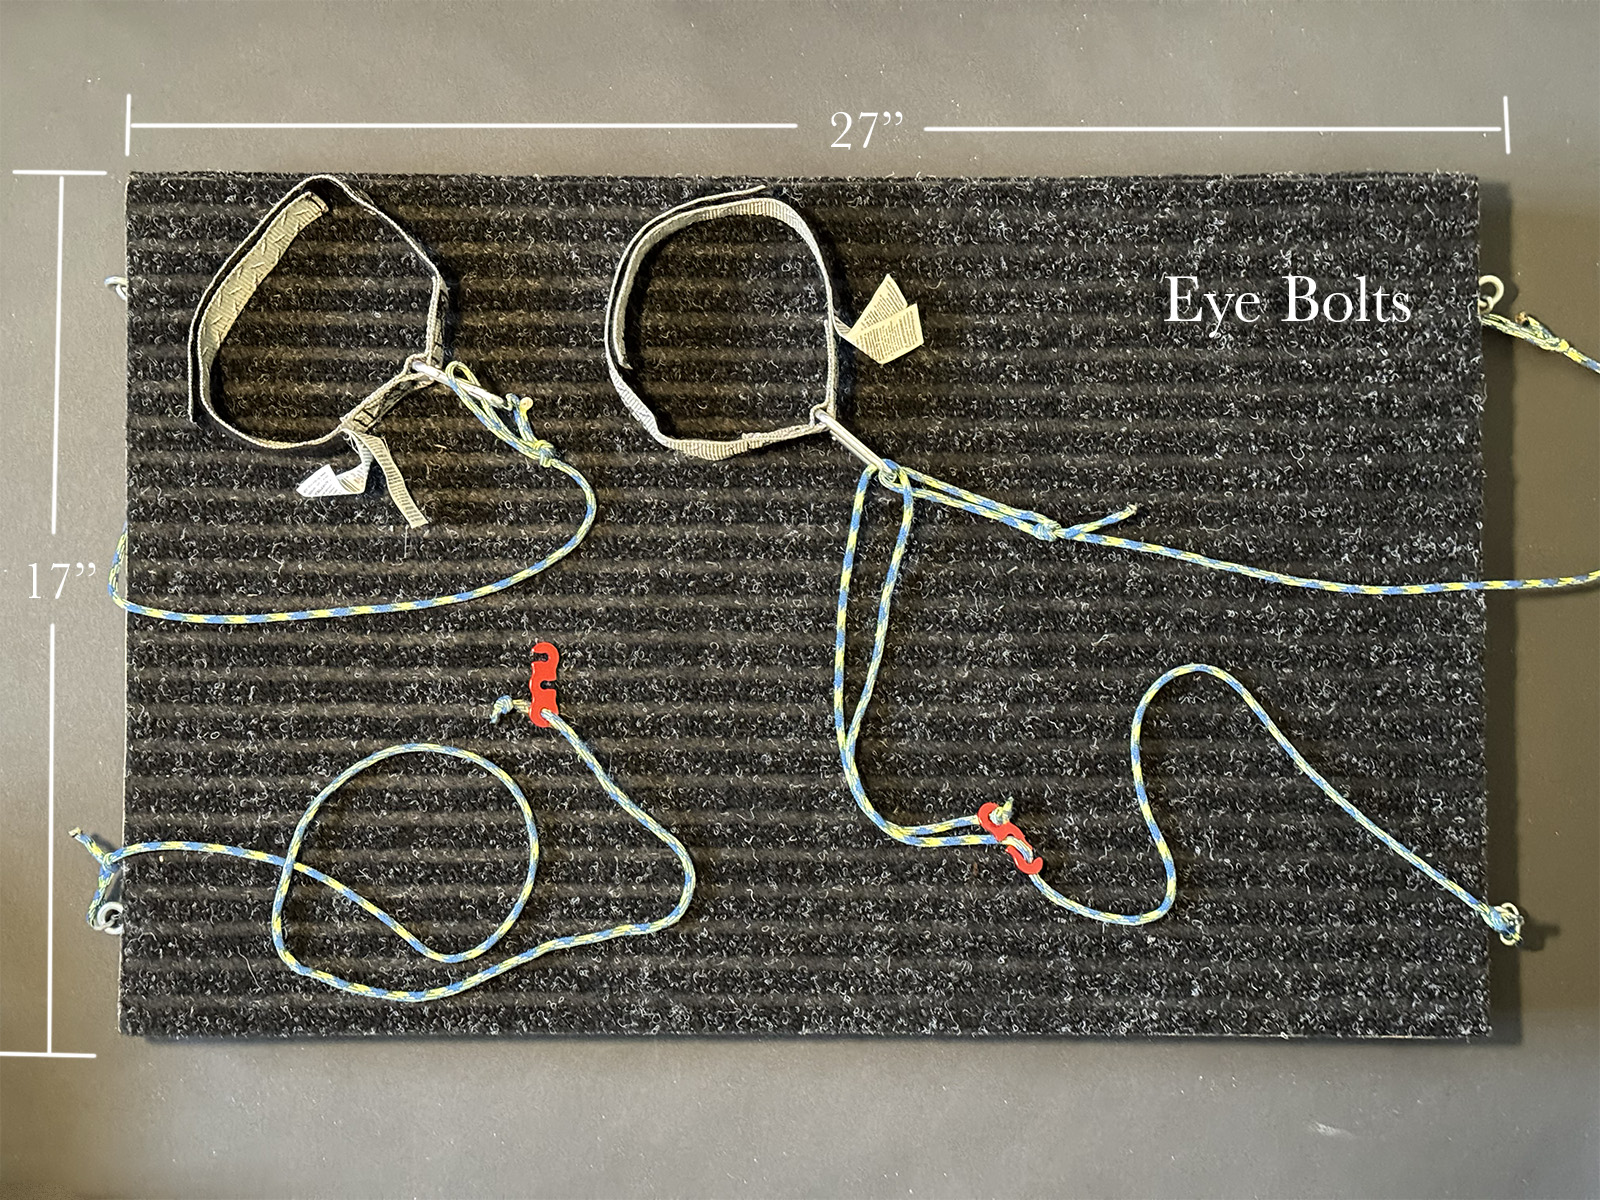
Final touch is layering with carpet. I use a black/gray utility mat. A 24 X 60 inch goes for about $20Big box hardware stores sell this by the foot. I staple a layer on top. Also a strip across the back of the table on the edge that rests on the car.
Top view with carpet stapled on place. There are four eye bolts to hold the lines. I use bowlines to attach the guylines. Strap have Velcro fasteners with a metal ring. The Velcro makes it easy to attach the table to the roof racks. The tension hooks allow you to adjust the table and keep it level.
This is a powerful LED light that’s solid for studio work and light enough to take on location. I appreciate the Color Rendering Index is a high 96 for clean color with no shifts. It produces lots of light 230 watts. It’s easier to show you how this light works than to write about it, so I invite you to check it out. See what I like, a lot, and a small issue or two to watch for…
Review LED Light – Godox LA200 Single color 5600k. Godox also makes a LA150 and bi-color versions.
If you have any comments or questions about this review let me know. BTW, I was able to keep this LED Light at no charge.
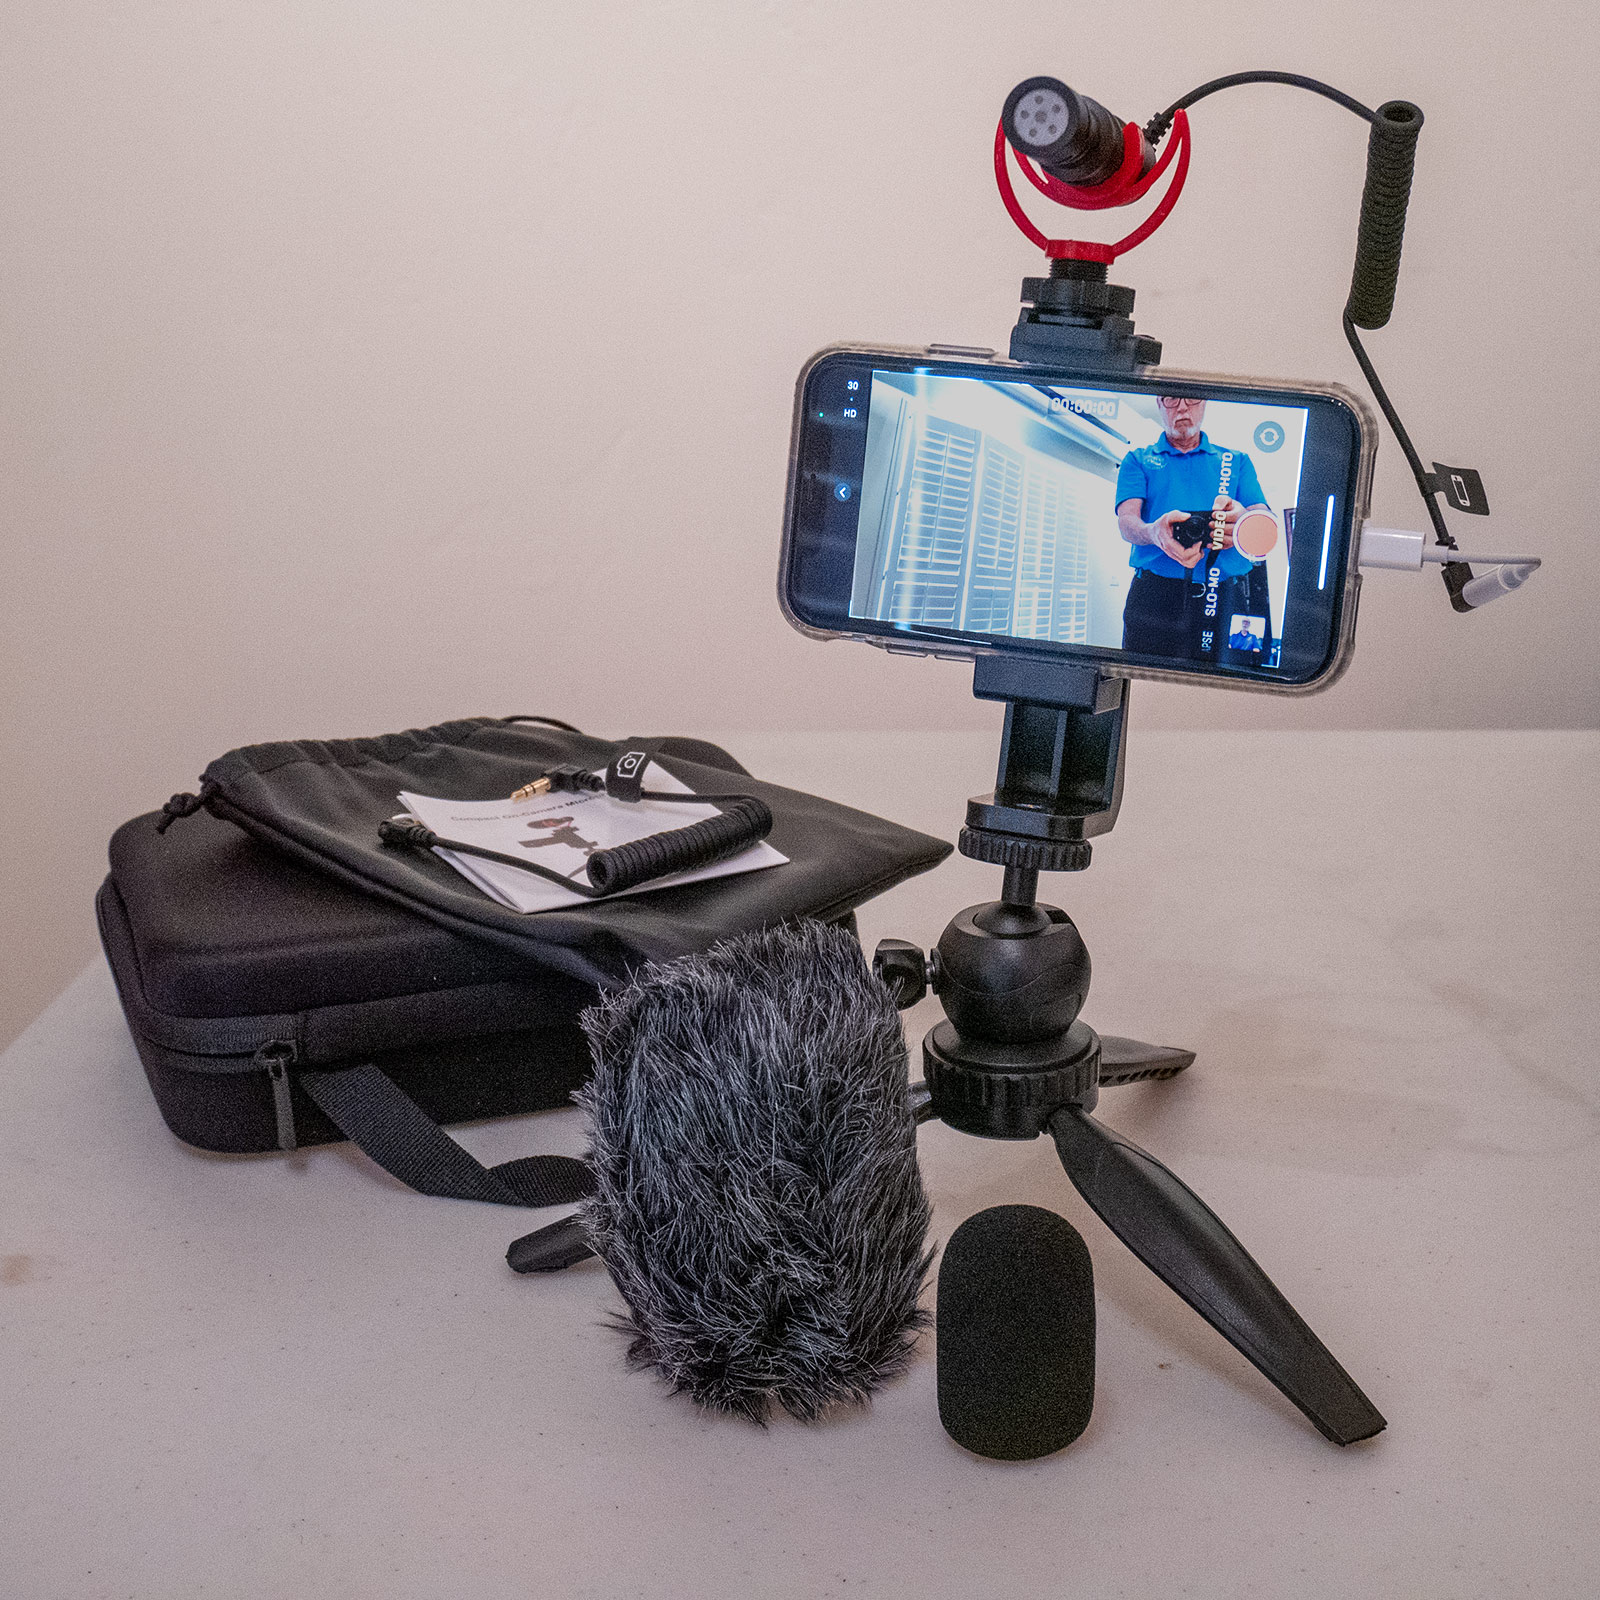
Here’s a pretty handy little kit for setting up your video station using your phone. Vitopal Universal Video Microphone Kit can be used with phones and cameras for vlogging. I got one of these to test.
Video Kit
For only 36 bucks you get a pretty darn good microphone, cables and lightweight stand.
The design of the stand is nice in that it can support the phone and microphone while sitting on a table. The legs also fold to be held comfortably while doing a walk and talk or using it to record others on the move.
Set up your phone or small camera using the stand make sure one leg is directly behind the weight. Especially important if you are tilting the ball head toward the rear.
All the gear in the kit. (iPhone NOT included) ; )>
The very directional mic can be shielded from the wind with the included foam or dead cat cover. It can be left uncovered if you will be a little distance from the mic indoors.
Heads-up
Cords are included for connection to phone or camera with 3.5mm ends. One little heads-up. If you have a newer model iPhone you’ll need a headphone adapter. Then you can plug in the included 3.5mm cord to the Lightning connection of your phone.
Traveling or storing the kit? It all packs conveniently into a compact case.
Yours in Creative Photography, Bob
Buying things through Amazon links helps support this website. Thank you.
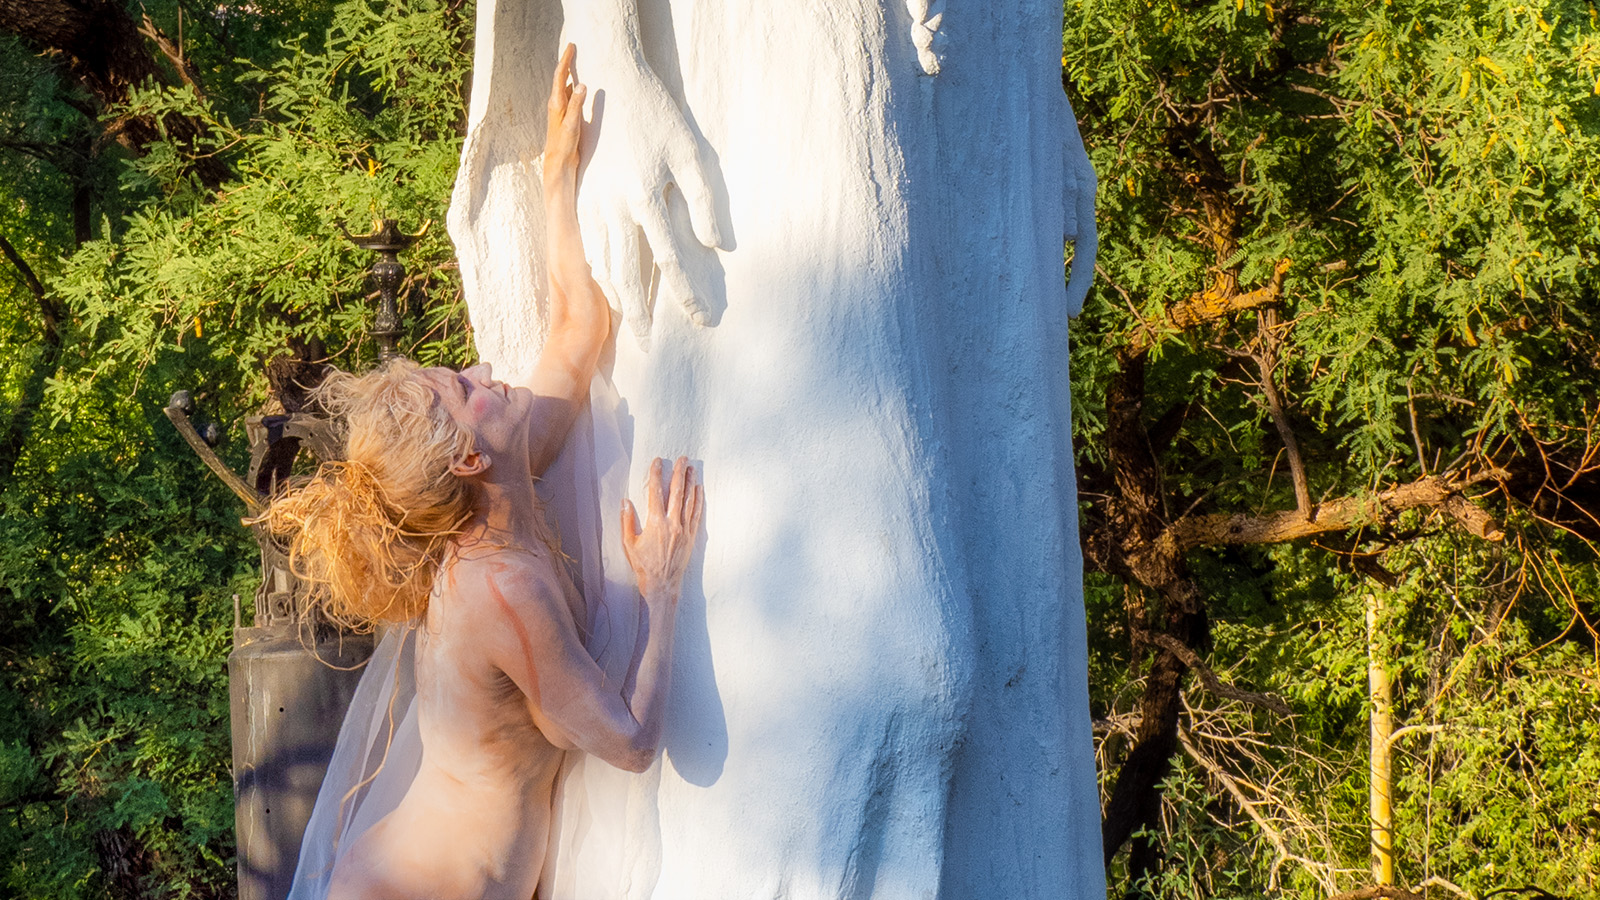
It’s been and interesting year and a half. No doubt about it. I’m watching people start to come out from their cocooned lives and make their way to interaction with others. For many it was as if they have been locked in a cage.
Dreamer – Escape from Confinement
I had the pleasure of working with my muse, Pash Galbavy, on a video project where using her many skills of dance, mask making and visual storytelling. I’ll let the video tell you the rest of the story….
You can find more work and information about Pash on her unmask it site. Her work is inspiring.
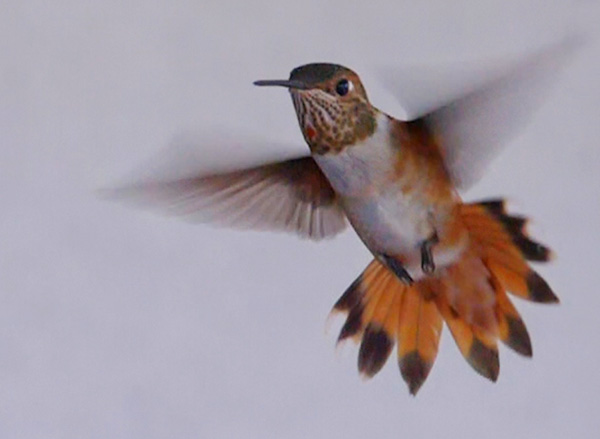
Testing out the slow motion in 4K Video with the Lumix GH5. Hummingbirds are a favorite of mine. They are fascinating to watch as they maneuver through the air. Here’s a short clip that tells so much about their feeding and territorial habits.
Slow Motion Hummingbirds (click on the video above to play
Here’s a still I grabbed from a very small section of the video frame
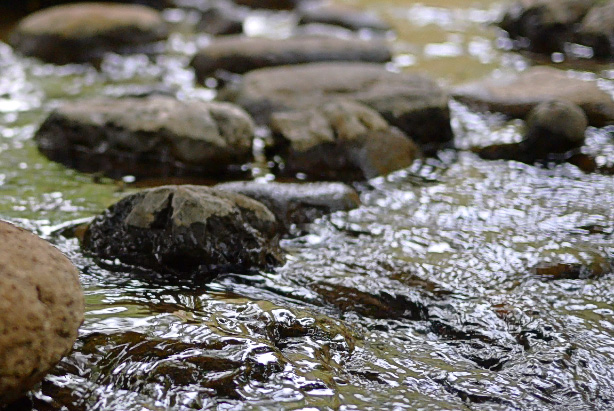
There’s something about water and the sound an motion of it that speaks to my soul. It calms. It relaxes. It stimulates deep and comfortable thoughts.
Still frame from the video at Beaver Creek. Look below for sound and motion.
I made a short video to share with you from a small little-known creek south of Sedona, Arizona. The place is called Beaver creek and while I often find it barren of people, it is also enjoyed by families, fellow creek water enthusiasts and my photographer friends enjoy an exploration along it’s banks.
Take less than a minute to enjoy the sound and some of the sights. Breath in. Breath out. Relax.
For infrared conversion of my cameras I use LifePixel. Infrared allows you to put an older camera to use and opens up a new time time of day for productive image creation.
Learn Photoshop in a fun environment. Aaron Nace applies the right amount of fun with easy to understand and follow tutorials. Actions and brushes are included with lessons!
Best embroidery ever. Give Queensboro a try, get a $20 instant credit to get started by clicking on the logo! They specialize in great quality custom logo apparel and promotional products with the best customer service.
Platypod has become a great resource for being creative in getting your camera gear easily into unusual places. As an Platypod Pro I get to work/play with the gear even before it comes out. Head over to Platypod, subscribe to the newsletter and you will get special discounts reserved only for subscribers.