
by successfulbob | Lumix Lounge, LumixGH5, people photography, photography gear
Photographing Sports and the Lumix GH5
First, let me start this post with the fact that I do not shoot sports on a regular basis. The best photography in any genre, especially fast-moving subjects, comes from practice. Knowing the game and anticipating where the peak action will occur makes a considerable difference in the quality of the images.
On with the post.
With that disclaimer out of the way, I felt that it would be an interesting exercise to photograph a football game under the lights. Karl Mullings (find Karl’s work here), a photographer friend from Flagstaff among others, had been asking me how the GH5 camera would do under the lights with fast-moving action. I only had experience with the camera in low light shooting wildlife so I couldn’t give him a qualified answer. He asked if I would bring the camera and photograph a football game with him.
Off to Flagstaff where there were a couple of surprises in store. Lighting was lower than I thought it would be Due to my inexperience there was a challenge in finding the action. During the first quarter, I found myself missing a lot of shots cutting off the players as they ran out of the frame. I started to get the hang of it a couple of quarters later and here are some results.
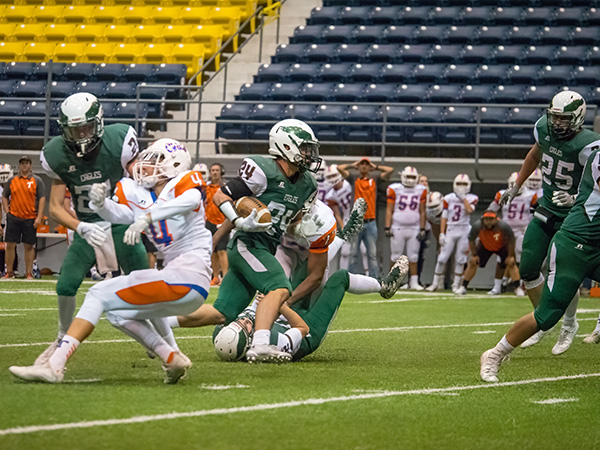 Image photographed at ISO 6400 Lumix GH5 with Lumix G Leica DG Vario-Elmarit 100-400mm lens (200-800mm 35mm full-frame equivalent)
I was surprised by the reach and handhold-ability of the camera and lens combination. The five-axis in body stabilization, plus the lens stabilization was pretty amazing in allowing a reasonably slow shutter speed while almost stopping action with no camera blur.
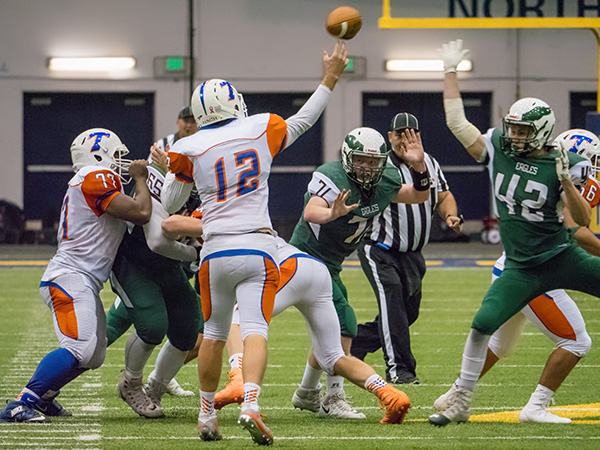 Image photographed at ISO 6400 Lumix GH5 with Lumix G Leica DG Vario-Elmarit 100-400mm lens
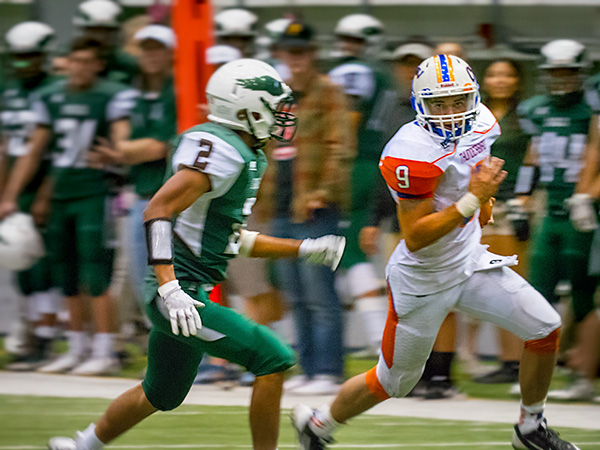 Image shot at ISO 6400 Lumix GH5 with Lumix G Leica DG Vario-Elmarit 100-400mm lens
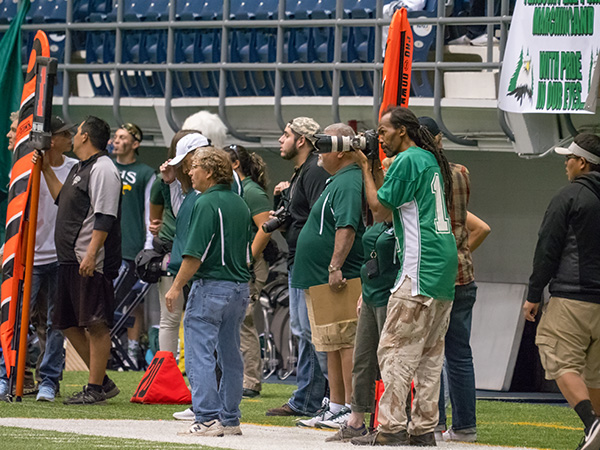 My buddy Karl, hard at work on the sidelines.
Tomorrow we’ll talk about freezing action even more using an ISO of 12,800 and post processing of images.
Yours in creative Photography, Bob

by successfulbob | LumixGH5, photography creativity, photography gear, wildlife photography
A Trip to the Zoo in Phoenix
The zoo can be a great place to begin to study animal behavior to help make you a better wildlife photographer.
When I photograph wildlife, I try to get behavior images that I believe have a bit more impact than capturing the animals while they are stock still. The secret to making that work is learning and knowing an animal’s micro-movements that occur just before they are about to do something different. Often you will see a small twitch. A turn of the head or some other indication they are about to move. The only way to see that is to watch intently over long periods of time and patterns will begin to emerge.
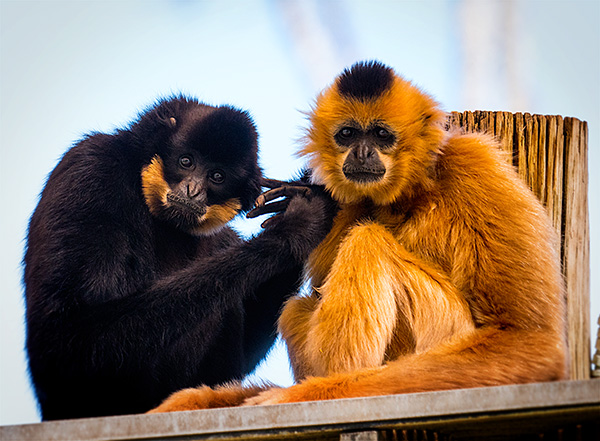 Primates in the Phoenix Zoo. I had to be exceptionally patient in waiting for eye contact with these Gibbon (buff cheeked?) monkeys.
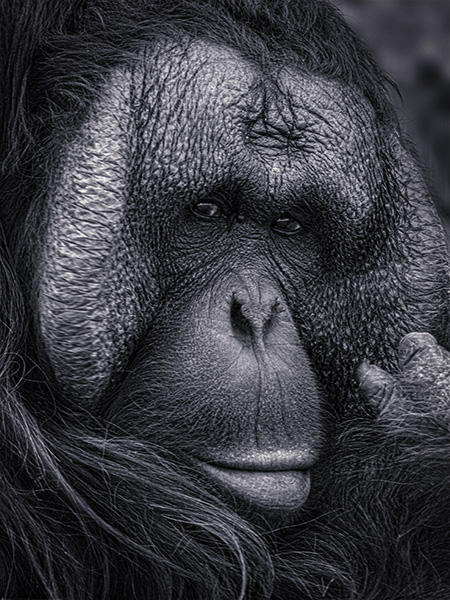 Again, I was waiting for eye position helped make this a more moving portrait of the orangutan. This image was captured at 1/30th of a second handheld with an 800mm equivalent lens. (see my camera notes below)
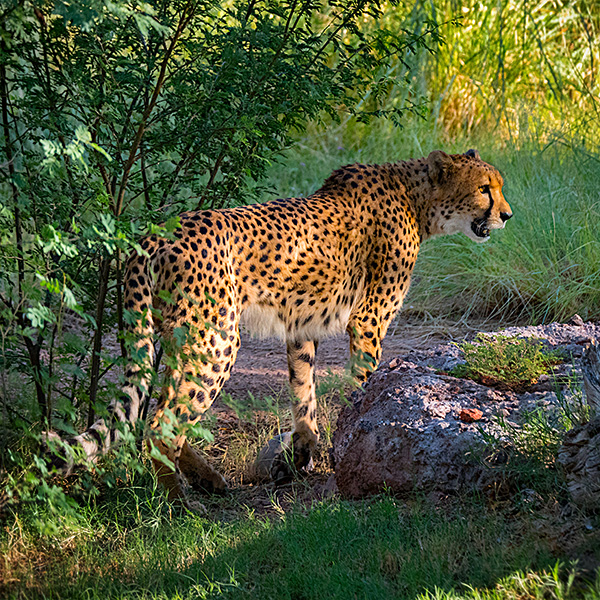 A beautiful animal, the jaguar, looks to another across the pen.
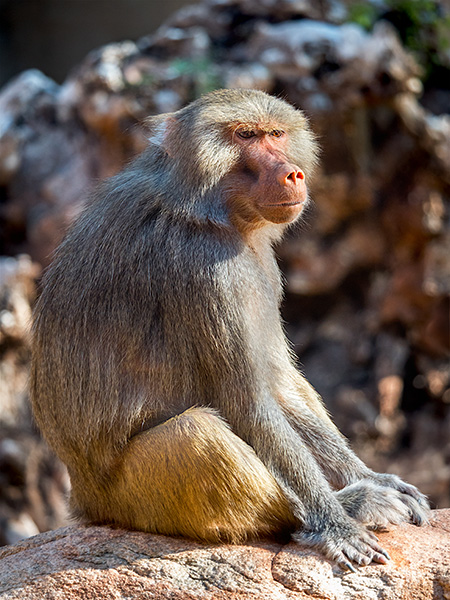 This baboon appears lost in thought. Primates being as close to human expression as you can get in the animal kingdom keep me interested for long periods of time.
One of the things I find extremely helpful in photographing wildlife is a lens with a long reach. This can allow you to fill the frame with your subject. All of these images were made with the Lumix GH5 and the Leica 100-400mm DG Vario-Elmar f4.0-6.3 lens. The five-axis image stabilization and the lens stabilizer working together allow for hand-holding and getting sharp images. The jaguar was at 1/800th of a second. The Gibbons were at 1/320th of a second. If an animal is still such as the baboon, the 1/160th of a second is no problem at all.
The tools we have at our beck and call are kinda amazing and allow us to capture photos that were virtually impossible only a few years ago.
Yours in creative Photography, Bob

by successfulbob | landscape photography, Lumix GX85, photography, star photography
Photographing the Night Sky – Capture Techniques
Night sky photography has its own little set of things to think about and prepare. I’ll try to share a few sources I came across in my research in trying to get night sky photos. (some issues covered here)
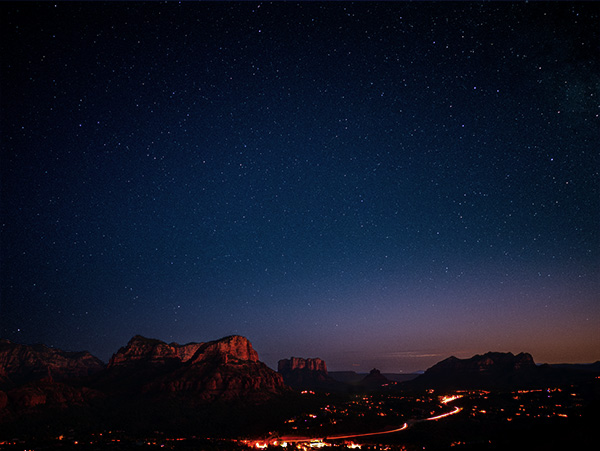 Landscape with stars over the Village of Oak Creek, Sedona Lumix GX85 with Leica DG Summilux15mm f1.7 lens
Lens choice is crucial. Faster glass means better images as they will allow more light to reach the sensor. Wider angle lenses can give you more time to let some of that light through. Look into the rule of 500. It will help you keep your stars as pinpoints as opposed to starting to streak.
According to the rule, the longest shutter speed you can use before your photo gets blurry is equal to 500 divided by your lens’ focal length. This formula has variables, but it is a good starting point. In my searches, I found this calculator on the Lonely Spec web site. There’s excellent info contained in the calendar that has been a great help to me! The calculator takes all variables into account. Sensor size, focal length, ISO, and aperture. If you are looking for more in-depth info, Ian Norman is rocking it over on his site.
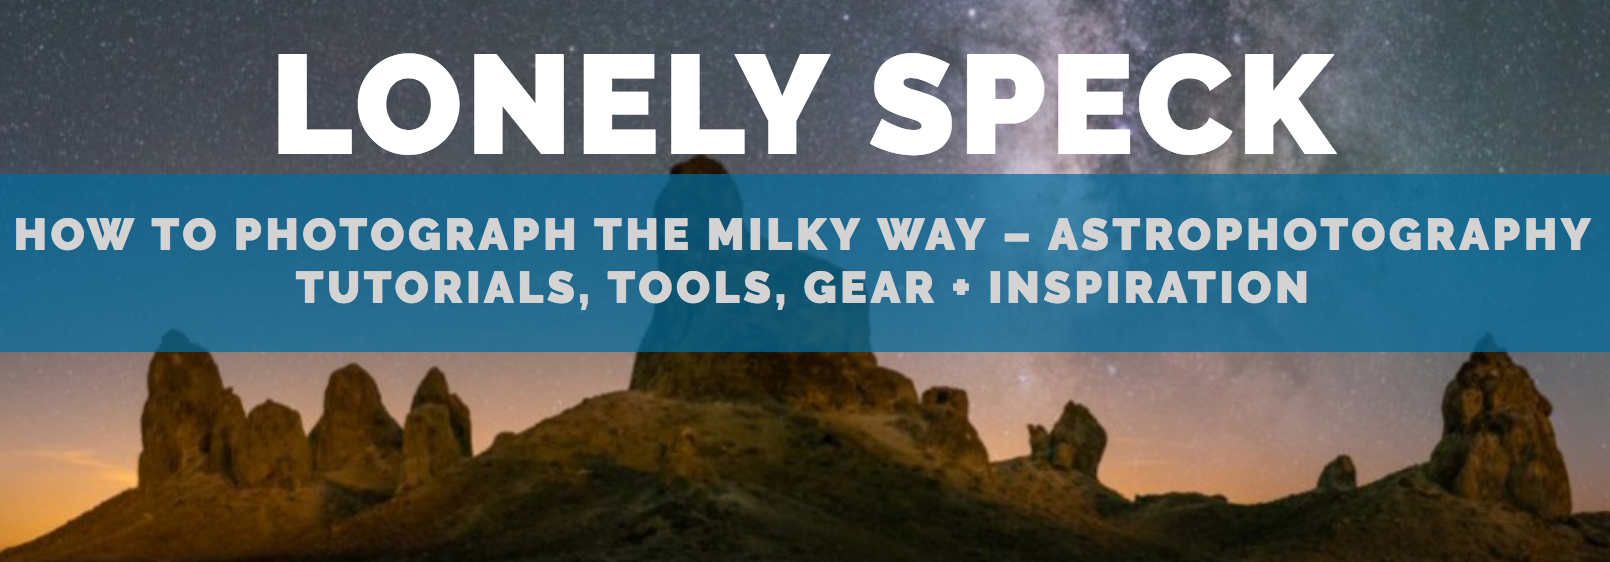 Great resource for night sky photography
Another important site is timeanddate.com. You can look up the sun or moon cycles, rise and set times along with the direction of appearance on the horizon on the charts. This is handy if you want to find out where the moon will be rising if you are trying to catch rock formations or building with the full moon. (next full moon should be a good one in October AKA Harvest moon)
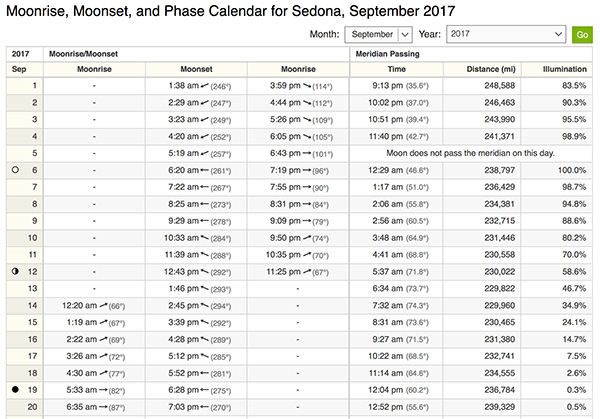 Above is a moon chart for Sedona, AZ. Go to the site and plug in your town/city name. Use the compass in your phone to see where the moon will come up. Note that if there are mountains and hills between you and the horizon the moon will be moving across the sky a bit and you’ll need to make adjustments.
Stardate is a great site. The more you know about your subject, the better your results will be. For example, if you are trying to photograph stars the darkest skies will be of help and know where, and when, the moon will be in the sky is important. Stardate can also keep you up-to-date with happenings in the heavens.
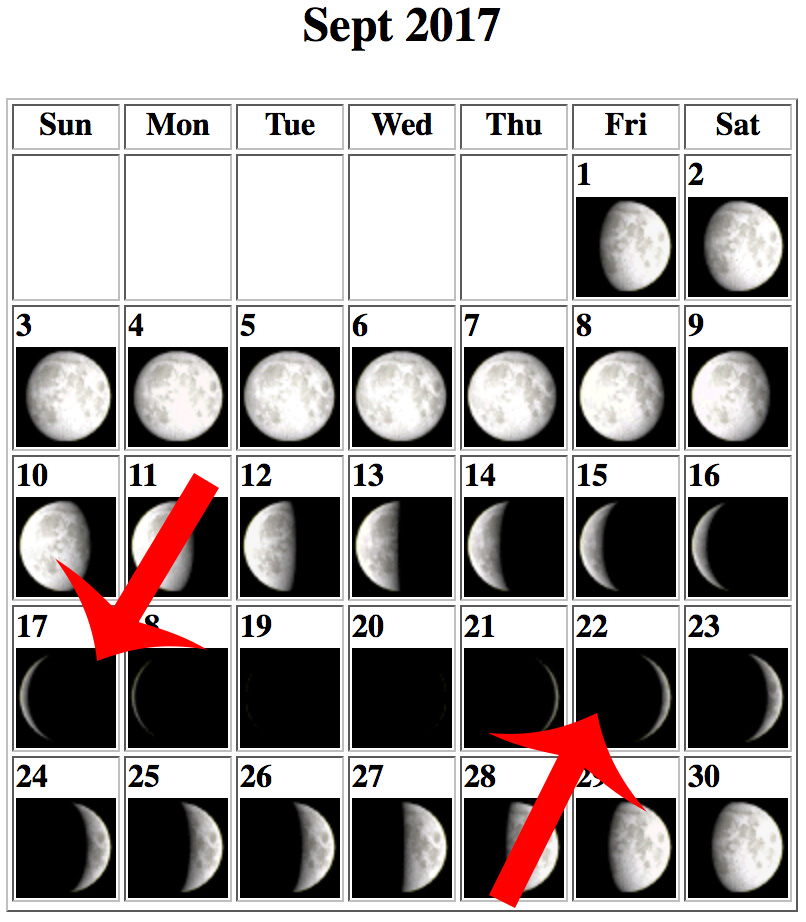 Moon chart with dates. Days around the New Moon are the best for dark skies and better rendition of your stars
The new moon is not the only time for photographing the night skies. A little bit of moon can help render the landscape visible for a different night photography look. Full moon and waxing and waning gibbous moons I tend to shoot for the landscape itself as the extra light tends to make the stars less visible.
Next post, I’ll look at processing the files once you are back at the computer.
Yours in Creative Photography, Bob

by successfulbob | landscape photography, LumixGH5, photography, photography gear, star photography
Photographing the Night Skies
I was always a little hesitant about photographing the sky after dark. Never could quite make it work out. Either the focus was off, or exposures were wrong, or both!
Then it came time for me to start working on those captures as I was jealous of those who were killing it in the night sky photography showing incredible renditions of the Milky Way.
If you have had the same problems let me share some of the things that have made a difference for me.
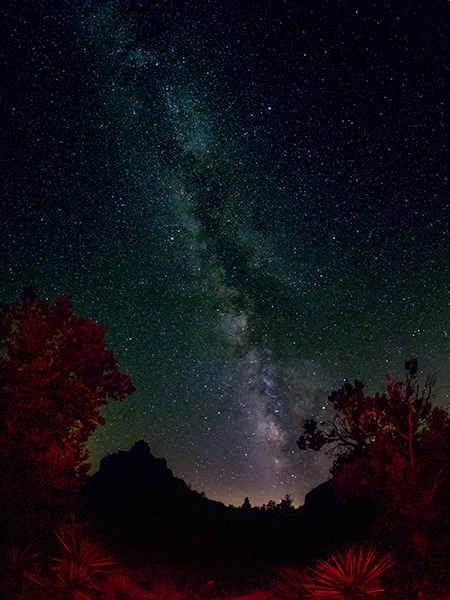 Milky Way photographed at Bell Rock, Sedona, AZ Lumix G 8MM Fisheye f 3.5 lens
The focus was often a problem for me. Couldn’t quite get the hang of not being able to see my subject in the dark. Either the foreground was out of focus, or the stars were less than stellar until I put in the time and did some serious testing. Using Panasonic’s Lumix cameras has given me a perfect way to set focus and know I am going to get solid detail throughout the image. It’s quite simple and no need to be on scene before dark to get focus. Yay! See the capture of the back of the camera below.
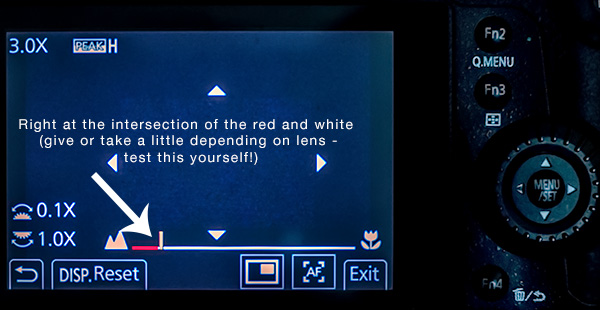 Camera back of the GH5 showing the Manual – Mode focus screen
To get this view set your camera or lens to manual focus mode and touch the focus ring. The assist will give a small 10X magnified view. You won’t need this. Bring your attention to the bar across the bottom. There is a white line that goes from macro to mountain. Just before it gets to the mountain you’ll see a red bar. That’s the sweet spot. Set your focus right in the notch between the red and white portions of the stripe. Done! Test this for yourself.
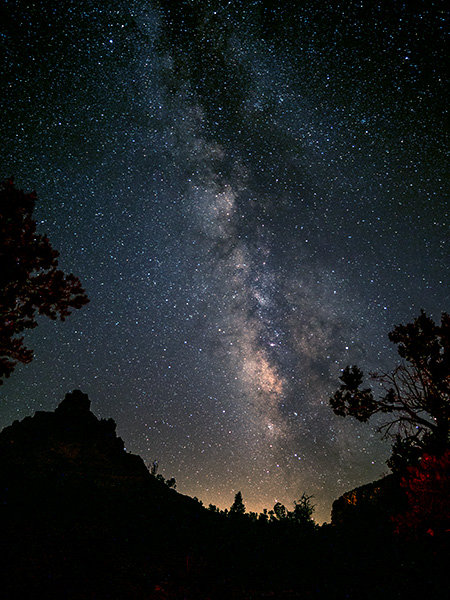
 Milky Way with Juniper, Sedona, AZ Lumix G 8MM Fisheye f 3.5 lens
The other important piece of the puzzle is to use the fastest lens available. Having a very wide aperture allows the sensor to be exposed to the most light allowing for lower ISO settings.
 Bell Rock in silhouette to the left with the Milky Way, Sedona, AZ with 12mm Leica DG Summilux f1.4 lens
Images were captured with the Lumix GH5 camera. Lenses listed above.
In another post I’ll share some ideas on post, processing using Adobe’s Photoshop to get the most out of your captures.
Yours in Creative Photography, Bob
by successfulbob | architectural photography, HDR photography, Lumix Lounge, LumixGH5, photography software
Density Range of the Lumix GH5
Mucking about in New Orleans while in town speaking at the Professional Photographers Association of Louisiana last week. I took my relatively new ** Lumix GH5 and the Leica 12-60mm f2.8-4.0 lens out for a solid workout, keeping my camera with me at all times recording lots of different situations. It was a real eye-opener seeing what the camera was capable of recording.
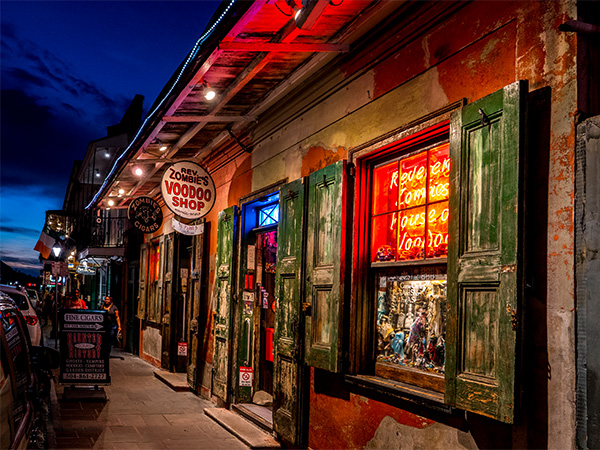
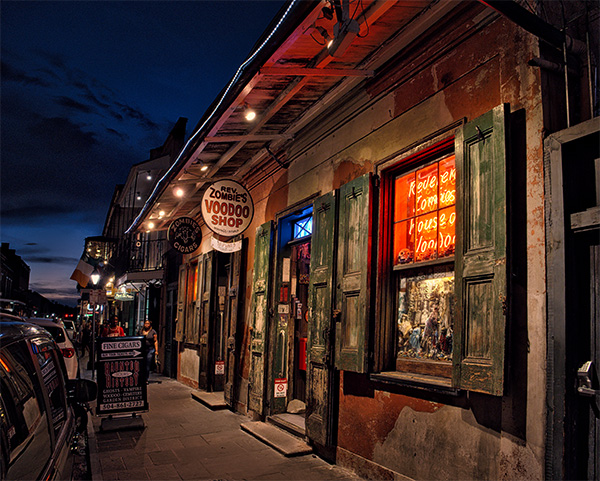
Here is a great example of what got me very excited. As I was prowling the French Quarter just about dark after the sun fell below the horizon I captured this image of the Rev Zombie’s Voodoo Shop.
 Photo made from one image. No HDR involved. Detail in shadows and detail in the neon sign.
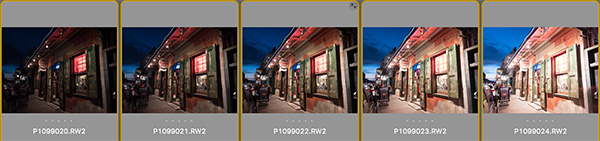 HDR sequence in the original capture. I used the middle exposure for the image processed above.
When out photographing random areas if I’m not certain that the camera can capture the entire dynamic range in a single image I’ll run a five stop bracket of the scene and then process the images in Aurora HDR software. I use Aurora because I’ve been able to achieve realistic results on a regular basis.
Just for fun I decided to forego the HDR software and see what I could pull from a single image just utilizing Adobe Camera RAW. There’s full detail in the brightest areas of the image and details in the shadows and the color is spot on for the scene.
Could I have made an even better image using the HDR software? Let’s see.
 I’ll leave the decision up to to you. I seem to have been able to pull some more shadow detail. Lots of options are available in making the image tell the story we want these days. An exciting time in photography indeed.
Yours in Creative Photography, Bob
** Smokin’ deal alert! Panasonic has bundled this camera lens combo for about $2600 saving 400 bucks from separate purchase.