I have a preference for ocean sounds after having lived in the Caribbean for 20 years but any water sounds are helpful with calming my mind. I spent about an hour on Oak Creek at Cathedral Rock capturing small moments of the creek experience. I took some time this morning editing the footage so that you can enjoy the experience as well.
The video is two minutes long and shows some of the different water patterns along this section of the creek.
I didn’t have myfull video kit with tripod and fluid head for proper zooming and panning. Did the best I could with a tiny little five-inch tripod that I keep with me in my shooting bag for just such an occasion. The occasion being I didn’t want to hike with the full tripod kit. With the light weight of Lumix gear, a small tripod can come in quite handy! The camera was Lumix G9 with the Leica DG Vario-ELMARIT Professional Lens, 12-60MM, F2.8-4.0 Lens. Sound was also recorded from the mic that is built in to the camera. Shot in 4K 24p mode.
I edited the footage with a screen capture program that is for MAC computers called ScreenFlow from TeleStream.
The video was captured in the middle of September when there is some monsoon water flow.
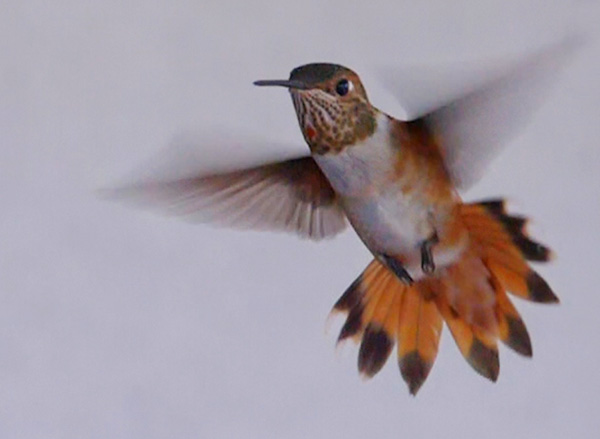
Testing out the slow motion in 4K Video with the Lumix GH5. Hummingbirds are a favorite of mine. They are fascinating to watch as they maneuver through the air. Here’s a short clip that tells so much about their feeding and territorial habits.
Slow Motion Hummingbirds (click on the video above to play
Here’s a still I grabbed from a very small section of the video frame
I’m always testing and trying to find out more about the tools that I use in photography and image making. This example is taking a bunch of still images and combining them into a video known as time-lapse.
Time-lapse of water flowing on Beaver Creek in Sedona, Arizona
I used to avoid creating time lapse videos because of all the steps that were involved. Making the images, which involved using an intervalometer and hard to follow calculations to gather the photos. Downloading the pictures. Processing the images. And, finally, combining the images through software into the final video.
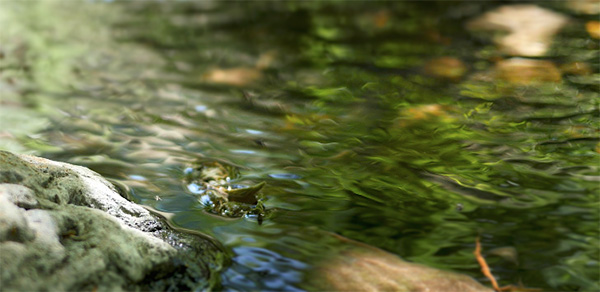
A crop from one of the stills from the spider play video below
There are two things that have gotten me more interested in time-lapse videos, and both have to do with the ease of getting to the final product.
One is the settings built into the Lumix line of cameras which makes it simple to calculate the frame rate and capture of images without additional gear. AND (this is the BIG on) the capability to process finished time-lapse videos in-camera with a variety of settings including speed of playback and quality. This is huge!
The other is a simple processing program called Time-Lapse Assembler. A very easy to use bit of software. Select your images. Set the playback frame rate. Set the quality. And Viola! Time-lapse video complete.
From the same location I set in a new place and in playing back the time-lapse I found the spiders dancing around the scene. You need to watch carefully as they are small critters. I enjoy the shapes and forms of the ripples as they combine and reshpe due to the combining of still frames verses straight video capture.
I got a bit more creative in putting these videos together using Adobe Premeire Pro. Because I was able to process the time-lapse into 4K video size that allowed me to move within the scene zooming in on the spider action. This also allowed for the sound of water to be added. You won’t get sound when making time-lapse video because you are combining still photos. I recorded some other video to get the water sound track.
Images were made with the Lumix GX8 with a LUMIX G II LENS, 20MM, F1.7 ASPH
This is Part two of a four-part series on a ‘day in the life on Oak Creek’ while photographing nature and wildlife. Check out the first installment here.
The second camera I brought on my nature adventure was the Lumix GX8 and 20mm 1.7 lens. (1.5 Pounds) This combination is for capturing time-lapse and/or video. Because the lens is a pancake style it fits in my Think Tank Mirrorless Mover 20 along with two additional lenses. On this day I ended up using the camera for video but I like to have the option of having the second camera body for taking time-lapse while photographing other subjects at the same time.
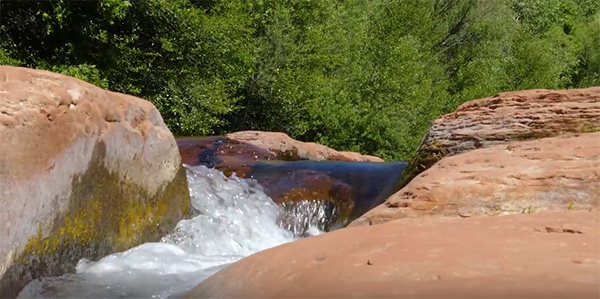
Here’s a still image screen capture from the video
Oak Creek and Cathedral Rock video. A little one and a half minute respite with flowing water and the spectacular rock formation that is probably one of the top ten most photographed places in the United Staes.
the video was captured in 4K quality. Shooting in 4K allows for creating additional camera movements like a Ken Burns movement in post production. A tiny tripod was used to steady the camera a bit but this was for fun and most of this was handheld. It tells the story of the day. The sound was recorded with the in-camera stereo microphones. The 20mm lens was a bit too static so I switched over to the Leica DG Vario-Elmarit 12-60mm f2.8-4.0 lens. This lens has a wonderful range from wide angle to medium distance zoom.
The next installment will be centered around another camera and lens combination. The Lumix G6 and the 14-140mm G Vario f4.0-5.8 lens. This camera has been converted to infrared by Lifepixel and has opened up the middle of the day for more creative imagery.
I enjoy the ability to create time-lapse video in the Lumix line of cameras. Built into the cameras are settings that many cameras need an add-on to complete the captures. One of these is an intervalometer which makes it possible to set the number of images to record and the timing in between each capture that is made. Even better is the in-camera processing to see your videos almost immediately without having to download images to a computer for processing.
In today’s post, I’m going to look at three versions of in-camera processing and then another version where the jpeg files were downloaded, processed through Adobe Camera RAW and then run through Time-Lapse Assembler for a different look. Time-Lapse Assembler is a free download.
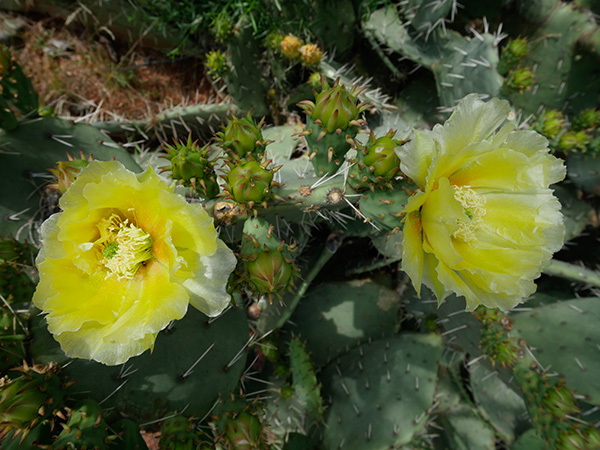
First, let’s take one of the original jpegs that I processed through Adobe Camera RAW and added a little zip and pizazz with the MacPhun Plugin from their Creative Suite called Focus CK.
Original SOOC (straight out of camera) capture
Cropped to 16×9 aspect ratio and added some clarity and saturation in Adobe Camera RAW. Then finished off with MacPhun’s Focus CK plugin to add a bit more snap and intensity.
Here are the three versions processed straight out of the Lumix GX8 camera sized to 4K. You can choose any number of settings for size along with the number of frames per second. I used 6 fps, 12 fps, and 24 fps. Because I made these in 4K I am able to add additional movement to the videos without loosing quality.
Images were resized to 16×9 aspect ratio and saturation along with clarity was added. They were then saved out to jpegs. The files were processed into a six-image fps and twenty-four image fps videos. These were not able to have panning and additional movement as they were processed to HD size.
Care and Feeding of Batteries for Digital Photography
There’s nothing worse than running out of battery power in the middle of a job or while out and about making images. I’ve come up with a fairly simple way to ensure that when I need more power for my cameras it is always at the ready. Check out the video.
Hope you find this helpful in keeping your batteries ready to go at all times.
This video was recorded with the Lumix GH5. Fiilex LED lighting with a softbox was used to supplement overhead room lighting. I set the camera for 4K Video and used the tracking mode for focus since I was using a tripod. The camera was triggered using the iPhone and the Panasonic Image APP to control settings, focus, and start/stop during the session.
For infrared conversion of my cameras I use LifePixel. Infrared allows you to put an older camera to use and opens up a new time time of day for productive image creation.
Learn Photoshop in a fun environment. Aaron Nace applies the right amount of fun with easy to understand and follow tutorials. Actions and brushes are included with lessons!
Best embroidery ever. Give Queensboro a try, get a $20 instant credit to get started by clicking on the logo! They specialize in great quality custom logo apparel and promotional products with the best customer service.
Platypod has become a great resource for being creative in getting your camera gear easily into unusual places. As an Platypod Pro I get to work/play with the gear even before it comes out. Head over to Platypod, subscribe to the newsletter and you will get special discounts reserved only for subscribers.