
by successfulbob | photography, photography gear, photography software
Lumix GH2 Camera Files from Panasonic
My first exposure to the Lumix line of cameras came when I was trying to find a smaller lightweight camera for travel. My wife was always giving me grief for hauling 35 plus pounds of full-frame DSLR gear with me on vacation. I said, “What are you worried about? you aren’t carrying it!” After that she replied, “You aren’t either, the gear often stays in the room ’cause it’s too heavy to lug around.” Don’t let her know this but I’ve found she’s right most of the time and I should listen more often, but I’m a guy. What can I say?

Made with the Lumix GH2 in Florida in 2012
Anyway, back to the story.
I tried three different ‘point and shoot cameras with no success because I finally listened! The reason they didn’t work for me? The files would fall apart when I tried to push them past anything larger than a 12-inch print or use the images in combination with other photos in my PhotoSynthesis process of creating my art.
And then… I found the Lumix GH2 and got a couple lenses. A wide angle and a 14-140mm zoom. (28-280mm FF equivalent) I added a small pouch for extra batteries, a tiny tripod and the other goodies you need for a two week trip to France. I had that camera on my shoulder with the 14-140mm lens and the pouch at my waist, and it never left my side for our entire trip. The best part?? When I returned I started working the files and ‘Viola!”, The files held up. I started running to all my photographer friends and telling them about this discovery. That led to my eventually becoming a Lumix Ambassador. That’s a story for another day.
I’m telling you all this because I decided to take a look at the GH2 files and give them a run through some of the newer software including Photoshop, Luminar 2018 and Aurora 2018. I amazed at how well the files do even today in 2018. These files are six years old, and there have been quite a few improvements in the subsequent iterations of the Lumix line. When the GH3 came out I started using it for my professional work and found that I could do about 85% of my jobs with it. In the beginning, I shot the camera side by side with my full frame DSLR for safety. Then I knew what tasks could be completed with the GH3 and the DSLR sat on the shelf more often. When the Lumix GH4 came out, I did a few more side by side comparisons before realizing I could do all my work with the micro 4/3rds camera. And all my DSLR gear went on the market, and I haven’t looked back since.
Until today. I thought I’d share some of the images from the GH2 circa 2012. Here are a couple more images.
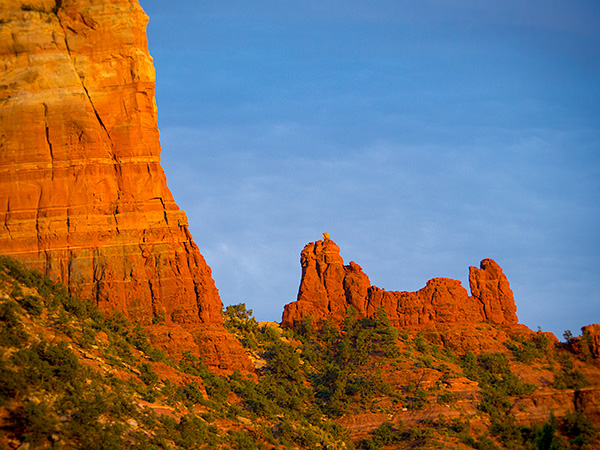
Snoopy Rock in Sedona, AZ Photographed with the Lumix GH2 and processed with Photoshop and ** Skylum Software.
Here’s an image using the PhotoSynthesis process that I use in layering textures and giving more of an art feel to an image. And below that the original capture.
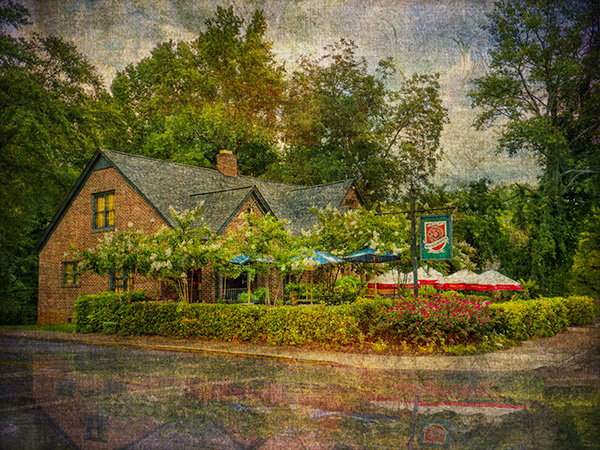
Manchester Arms Restaurant just outside Atlanta. GH2 again.
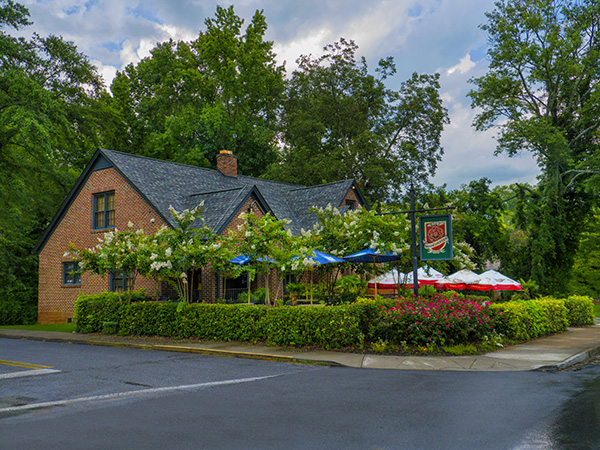
Original capture
In a couple of days, I’ll show you some images and the artwork created during my trip to France.
Yours in Creative Photography, Bob
** Skylum software includes Aurora HDR – Luminar – and CK Creative KIT. Special deal on Aurora HDR through July 4th. On any of the software add PROMO CODE – COATES to get an additional $10 off
PS – The latest flagship camera for stills (first one!) is the Lumix G9. This thing rocks!
I haven’t forgotten about the clouds from above post I said I get you…

by successfulbob | bird photography, Lumix G9, photography, photography creativity, photography software
Flight of the Blue Jay
I’m still a bit limited in getting out to photograph I’m trying to keep my camera reflexes in good shape. I continue looking for creative photo opportunities close to home. Anytime I can study the behavior of birds, no matter the type I find it adds to the storehouse of knowledge that will make ALL my avian photography better.
A case in point. I’ve been watching birds from my back porch and seeing what I can do to show behavior. I prefer to show movement vs. a still portrait in my work when possible. I have noticed that birds will tend to repeat patterns if they are hanging out in one area. IE a hummingbird will approach a feeder or flower a certain way almost every time returning to the same branch to rest. If a bird goes to the top of a tree, there is a good possibility that the bird will return to the same branch in a short period. I often share that you need to observe wildlife for a while before picking up your camera for the most exciting images.
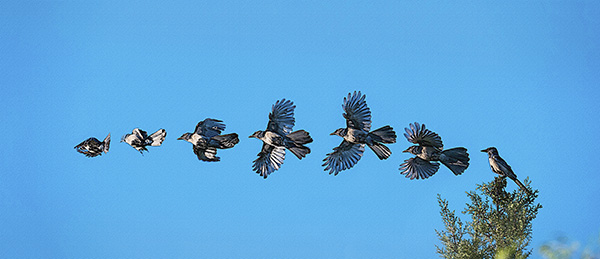
 Screen capture from Adobe Bridge of bluejay flight
Most birds will take off into the wind. The bluejay above was facing the sun and the wind direction. The Great Blue Heron along with many other birds will usually offload some poo just before taking off. If startled or they are feeling threatened they will tend to turn away from the perceived threat.
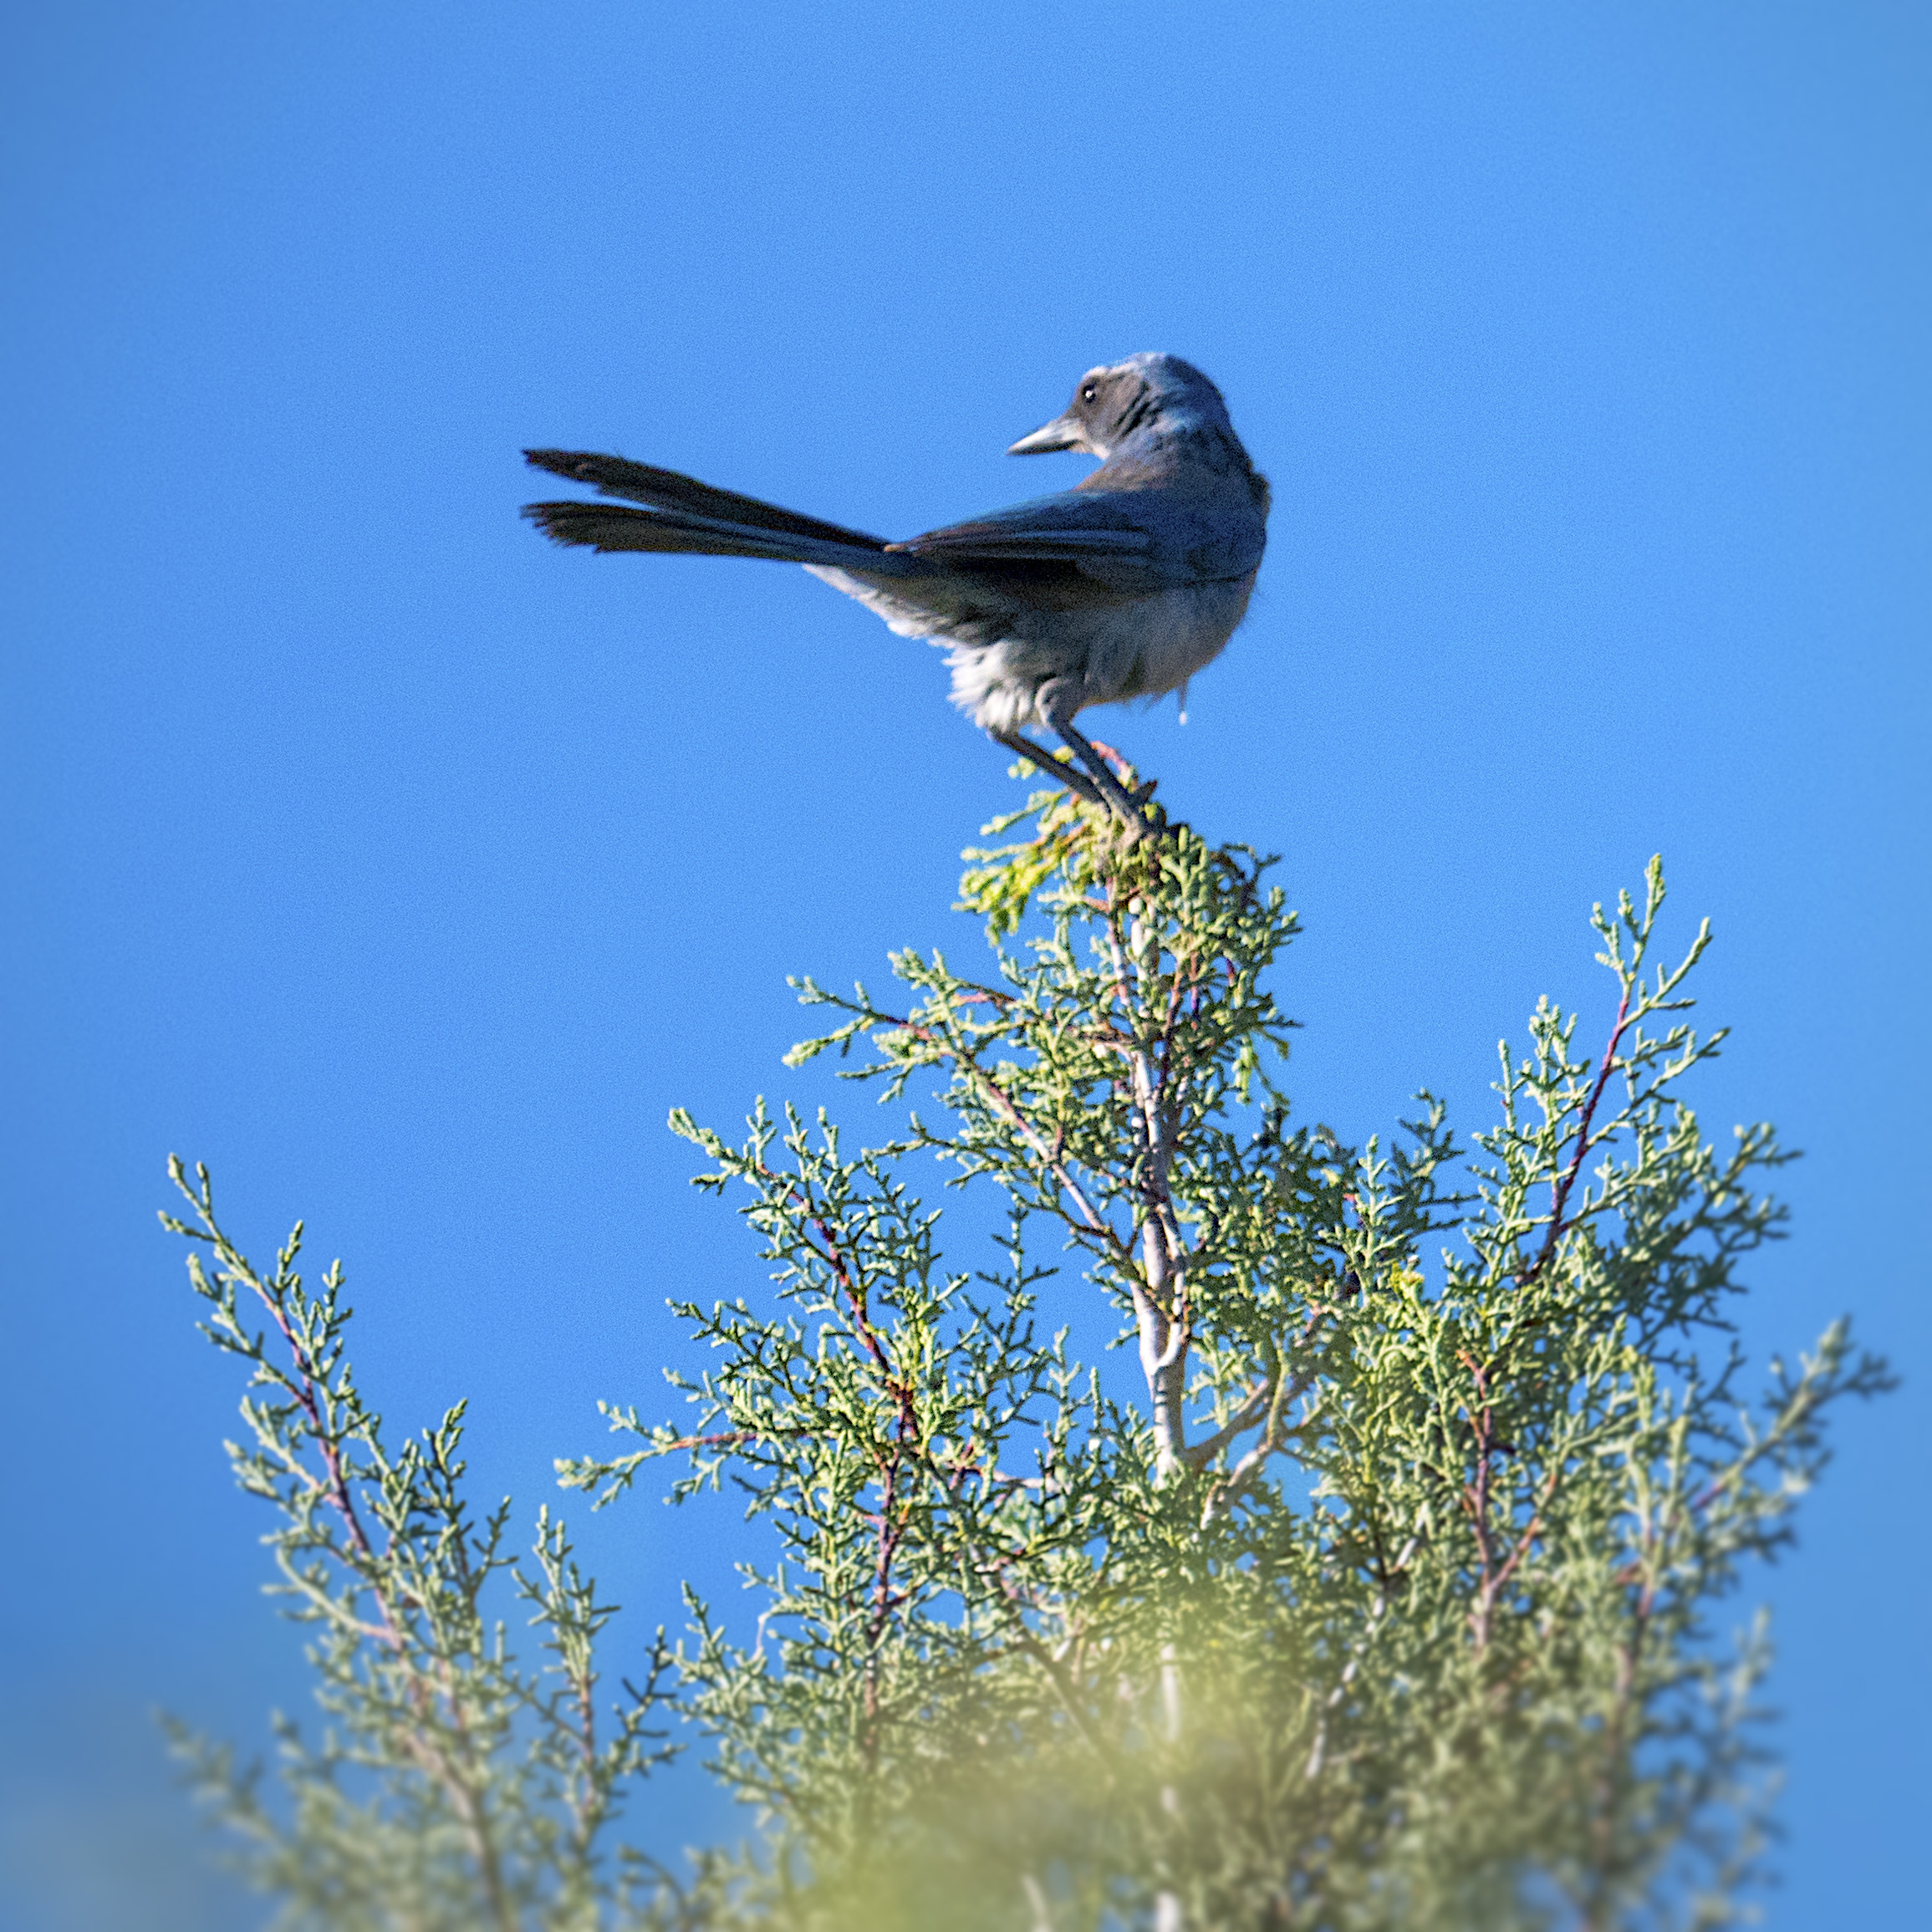 This bluejay landed in the top of the tree waving in the light breeze.
I watched as it left the tree and tried to memorize how it began its flight. Did it fly high and up or start to dive to create lift? How did the wings move? With that image in my mind, I set the Lumix G9 camera to SH which stands for Super High speed. It uses the electronic shutter to allow for twenty FPS. The Leica 100-400mm lens was used fully racked out to its 800MM equivalent
 Flight of the Bluejay with watercolor treatment
The image above was composited using Photoshop Layers and Masks. All relevant photos were selected in Adobe Bridge. Under the Tools Menu, I chose Load Files into Photoshop Layers which placed all files into a single PSD. Additional canvas size was added to the left side. Each image was offset and masked so that each image was not overlapping. Then a series of Photoshop Filters were applied to create a watercolor feel to the image.
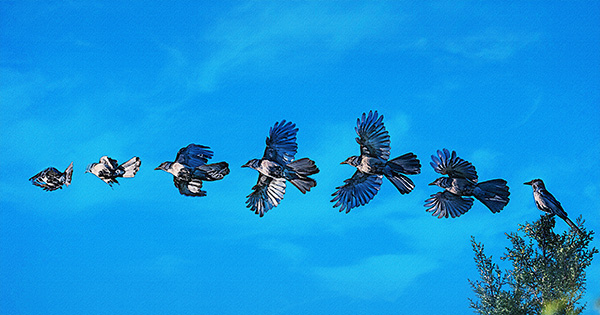 Because the sky was flat, I added a cloud image to the Photoshop File.
A cloud image was opened and dragged into the flight file. Blend Modes were experimented with until I found one that added subtle sky detail.
This one might call for a Photoshop tutorial to show the progression of this image build. Let me know if you would like to see me produce one.
Yours in Creative Photography, Bob

by successfulbob | Lumix LX100, people photography, photography, photography creativity, photography gear
Looking for Shadows
In photography, you will often hear people exhorting you to ‘Look for the Light’! I don’t know how many times I heard and read that during my learning process over the years. I believe that my photography leaped forward when I first heard ‘Look for the Shadows.’ When I started looking for and shooting into, the shadows I saw a marked difference in the depth and dimension of my photographs.
Look for the shadows has become my watchword. Shadows are what make or break an image. If you are walking along and you see harsh shadows being cast by the trees and shrubs and you decide to put your subject in that same light, you will get harsh shadows. Seeing little pockets of soft shadows and using these areas will make for less contrast in your images. To me, soft shadow edge transitions lend beauty and form to a subject being placed on a two-dimensional surface that you want to read as three dimensions.
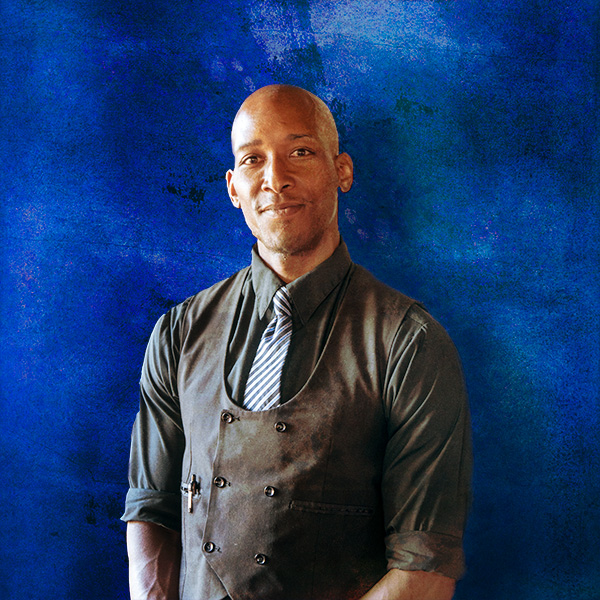
That being said I am always watching how the light and shadows interact which brings me to today’s post. We were out to dinner at my wife’s favorite restaurant J Wine Bistro in the VOC Sedona, AZ. I noticed the waiter Ray and saw the split light on his face from the light beside the front door of the restaurant. I asked Ray when he had a moment if he would strike a quick pose for me.
 Ray with split light.
While I enjoyed the light shaping Ray’s face, I wasn’t thrilled with the background as you might imagine. So let’s play! I extracted Ray from the environment and went to work.
 After extraction and some added texture and background.
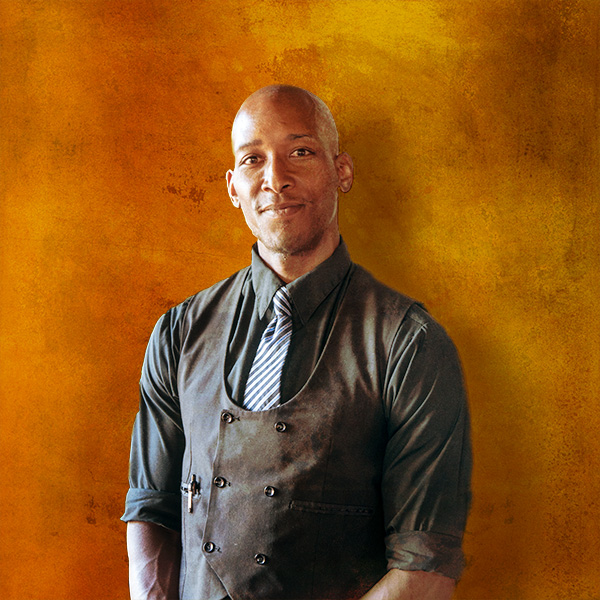 A slight change in layer positioning adds a whole new color palette and feel to the image.
 Last I thought I’d see how Ray liked being in Italy.
The original image was captured with what I call the professional photographer’s point and shoot. It’s the Lumix LX100. The LX100 is a nice handy camera that can fit in a large pocket. It has a fixed lens with fast f1.7-2.8 Leica glass and a decent zoom range of 24-72mm.
Yours in Creative Photography, Bob

by successfulbob | flower photography, inspiration, Lumix FZ2500, photography, photography creativity
Meet ‘Scoot’
and the visit to the Blooming Mesquite Tree
Here’s my new best friend ‘Scoot.’ Scoot makes it possible for me to move about as I work to rehab my Iliopsoas muscle. The scooter is there for a bit of support when the pain in my a** gets too intense. But mobility leads to some possibilities.
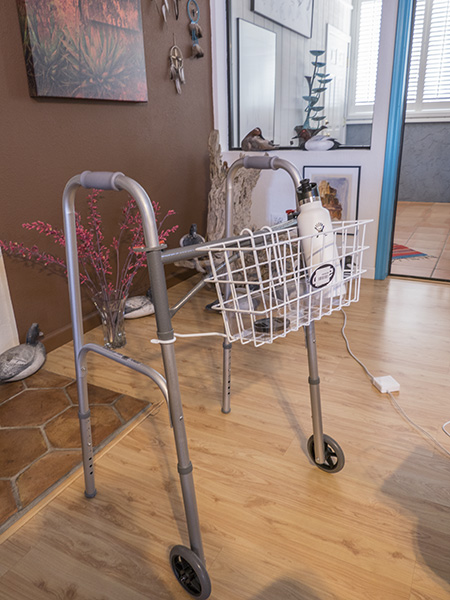 Meet ‘Scoot’ My new best friend for a while.
I broke out the Lumix FZ2500 because of its range and all in one 24-480mm f2.8-4.0 Leica DG Vario-Elmarit lens. This is the first time I’ll have a camera in my hands in over a week. Can you say withdrawal?? I had asked my wife Holly to bring a camera to the hospital to document some of the things going on around me. Too much pain, not enough sleep and worrying about the camera being in a hospital environment. My wife told me I was nuts to even think of doing that, once again proving that my wife is the smarter of the people in our marriage… and I was wrong again.
Onward to day’s walk to the end of the driveway. I made it under the mesquite tree and was pausing for a break. Lo and behold I was enjoying the soft fuzziness of the yellow blooms against the beautiful blue sky. Off the get the camera and an excuse for a bit more exercise.
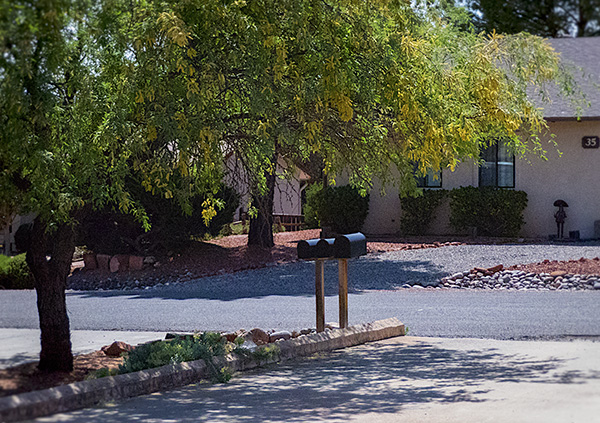 Goal. The shade under the mesquite tree at the end of the driveway.
Once underneath the blooms, I started looking for some interesting compositions.
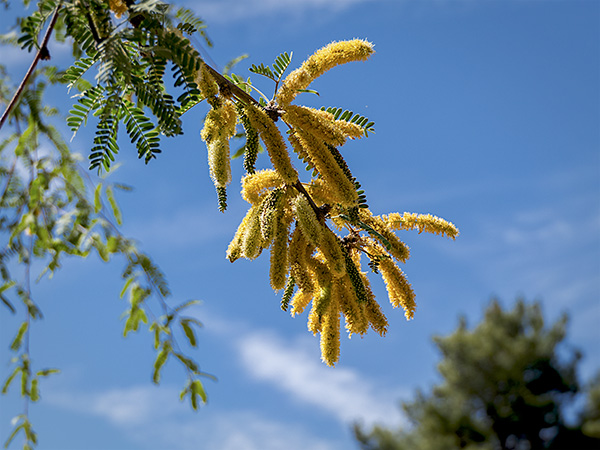 The sharp yet soft bloom of the mesquite against the Arizona blue sky.
 A pollinator visits the yellow bloom
I guess I’ll have to be creative find images within this 100-foot circle until I can begin to range further.
Yours in Creative Photography, Bob

by successfulbob | commercial photography, lighting, LumixGH5, photography lighting resources
Go Pet Friendly – Book Session
I don’t often share my commercial work on Successful-Photographer. I probably should.
So I will.
I received a call from a pleasant voice asking about a photography session for a book cover. Images needed would include an RV, two people, and two dogs. The owner of the friendly voice is named Amy Burkert. She and her husband Rod have been on the road for about six years traveling the country in an RV, looking for pet-friendly places and sharing their findings via their blog https://blog.gopetfriendly.com
The main photo Amy for which Amy was looking was her back cover author’s image. Especially for the book, she has written, the image should make her appear open, friendly, and inviting while telling a bit of her story. I always ask plenty of questions before coming up with a plan for the capture.
What is the layout of the book? Do you need a horizontal or vertical photo/ Have you considered your wardrobe? What background would you like to have, studio or environmental? What story do you wish to convey?
 Amy at the wheel of the thirty-seven foot Winnebago
After all the questions were answered, we ended up with Amy behind the wheel as she does most of the driving while they are on the road. There wasn’t a lot of room for supplemental lighting which made me reach into my bag for LED lighting bricks from Fiilex. With three of the bricks, I was able to add some fill light and get some background separation. These battery operated lights are color and brightness tunable and can be tucked into tiny spaces.
I choose a high angle from which to shoot to enhance Amy’s friendly and open feel. When the subject is looking up in an image it makes the viewer feel they are looking down on the person. It didn’t hurt that the camera likes Amy and she was entirely comfortable in front of the camera.
I supplied a horizontal and a square version of Amy’s portrait. Additional support images were made of the RV with Rod and the rest of the crew including the two dogs Ty and buster which I’ll share in a future post.
Images were made with the Lumix GH5 and the Leica 12-60mm f2.8-4.0 Lens
Yours in Creative Photography, Bob