Photoshop Tutorial Creating Photo Art
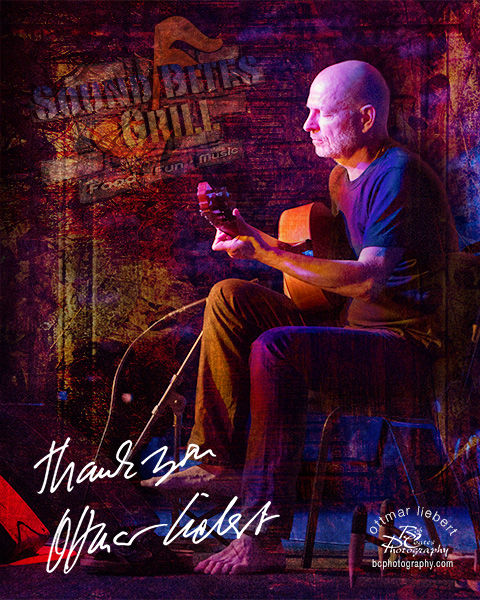
Let’s go into a little more detail on the creation of the photo art for the Sound Bites Grill ‘Wall of Fame’ with guitarist Ottmar Liebert as the subject.
The process is one I’ve dubbed Photo-Synthesis taking multiple images and using Blend Modes, Layers, Masks, Fx, Adjustment Layers and more to create the final piece. First here is the final piece as it now hangs at Sound Bites…
Finished ‘Wall of Fame’ image featuring Ottmar Liebert
Raw materials for the final photo art.
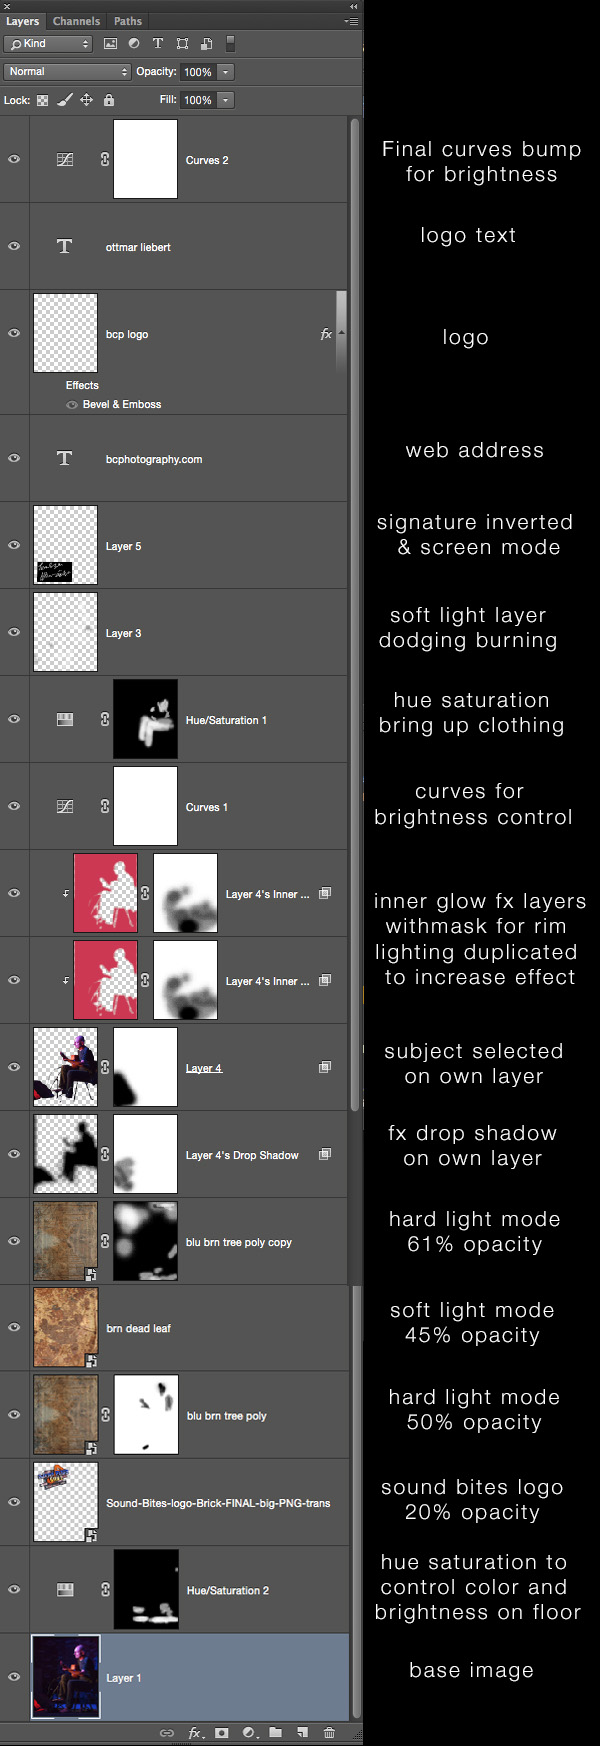
Here’s the Layers Palette with Layer Modes and Opacity Levels indicated. I recommend reading from the bottom to the top to get a better feel of my process.
I usually start with the base Layer and add a texture I feel will blend well. Then I experiment with different Blend Modes and Opacities to get the effect for which I am looking. On the MAC if the Move Tool is highlighted then holding the Shift key and hitting the + & – keys you can scroll through the various Blend Modes seeing their effects in real time.
This should give you an idea how I work with Adobe Photoshop in creating photo art projects.
Have any questions?? Let me know.
Yours in Creative Photography, Bob
PS – Textures are available everywhere. Even from fellow photographers. I have a large library of different kinds of texture but for some reason I found myself attracted to two textures from one of the people who inspire me, Thom Rouse. That’s a link to some amazingly fantastic images. Thanks Thom!! BTW if you ever get the oppourtunity to see Thom speak don’t miss it. It’s a fabulous walk through the art world


