Set-up for Studio Photography – Product
Getting good, solid lighting is the best thing you can do to highlight the features of products. Today’s post is how I set up to photograph some jewelry and a couple of my cameras. I will suggest you practice lighting techniques long before you need to use them. It allows you to refine the look rather than trying to tweak on set.
This set-up is relatively straightforward yet gives a compelling and professional look to your product photography.
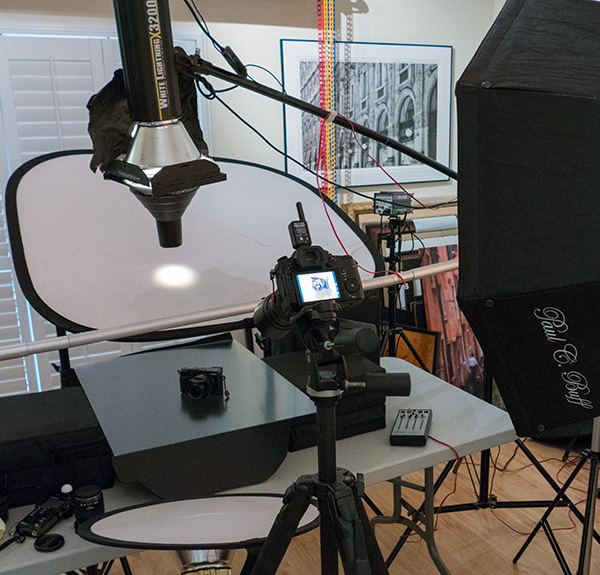
 Gear in use. Two Paul C Buff X3200 flash heads. One Paul C Buff Ultra Zap1600 flash head. Paul C Buff Octobox (35 inch) Snoot. Strobes are fired with Buff Trigger. A sheet of Non-glare glass. Scrims with diffusion material. Sekonic L478D light meter. Lumix GH5 camera with various lenses depending on the subject to be photographed. Light stands, one with Boom to suspend light over the set.
The power of the lights is not germane to lighting on set. If you work with lights at less power or varied, you will want to put the most powerful one above the set. It will be going through the snoot and the scrim both of which suck up some of your light. With this set, you have the ability to change the size of you lighting circle. If the light from the snoot is closer to the scrim, it will be tighter as shown in this view. If you move the snoot higher, you’ll see the light spread more and feather to a larger circle. The height of the scrim above the product will also have an effect on the light pattern.
The glass (make sure it is non-glare) is suspended above a sheet of black paper. Depending on how much light you pump into the scene and the direction of that light you can create a background for your product that can be gray or black.
You don’t necessarily need an Octobox as a modifier for your main light. I use it because it is quick to set up and break down and gives a solid direction of light. At the very least, you will need to have a softbox. If you use an umbrella, the light is harder to control on the set, and the bounce of light from the walls and ceiling can infect the set. Control is essential.
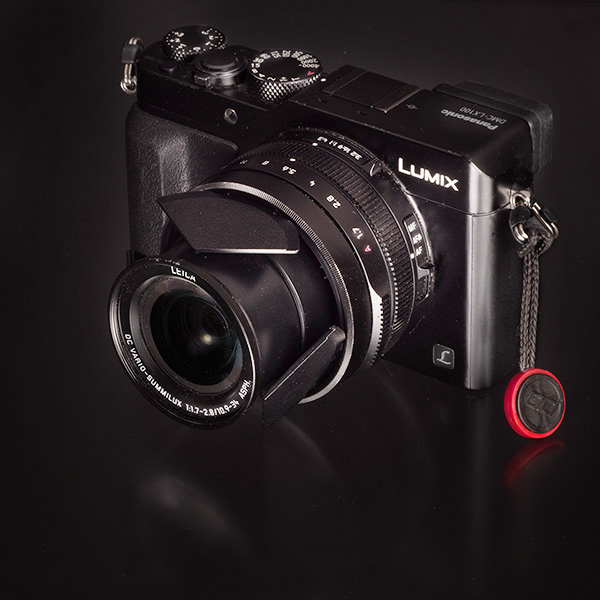
Let’s look at a couple of camera photos. Lumix LX100 camera. I call this the ‘professional’s point and shoot’. This is an example of going black with very little light from above. Solid but stark image. It will always depend on what look your client is trying to achieve.
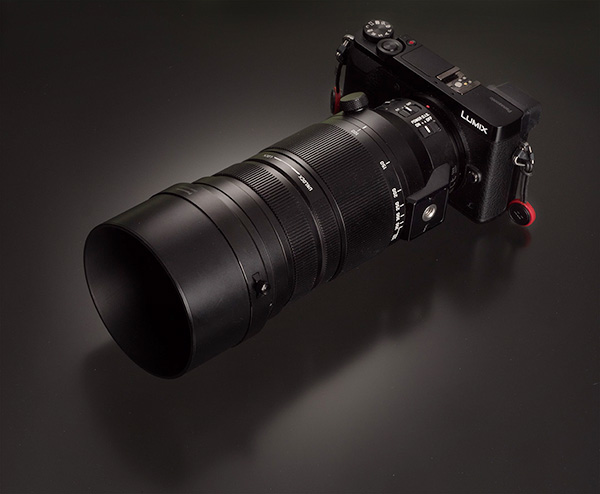
 Photo of Lumix GX85 with Leica DG Vario-Elmarit 100-400mm f4.0-6.3 lens made with the down light to give some more depth and dimension to the final image the gradient is made with the snoot and the scrim as shown above at the top of the page in the BTS shot but not as close to the scrim.
Let’s pause here until the next installment where the images will be of jewelry using the same set and adjusted accordingly. Part three of this will show before/afters and talk about post processing.
Yours in creative Photography, Bob


