In a previous post I showed you a finished time lapse video captured from the parking lot of Mariposa Restaurant in Sedona overlooking the red rocks after having lunch there last Sunday afternoon. While having a great lunch we were watching the clouds clear after a bit of weather. And you guessed it, I had to run home and grab my gear. Today I’d like to share some ideas on what settings to look at when thinking about creating your own time lapses.
Depending on your scene and how long you would like to cover it you should decide the space between your image captures. Math comes in handy here and you will start to have an idea of your settings almost by instinct. For example, depending upon the speed of moving clouds I’ve found the interval that works for me is between three & five seconds. The rate that the images should be played back is between 12-24 frames per second. The time lapse in the previous post covered a period of about 40 minutes with 3 second intervals and 24 fps. This translated into a video that was about 35 seconds long. Now not being a fan of that much math here is a calculator that will help you figure things out including how much memory you will need to have in your camera to complete your session.
Time Lapse Calculator
Time Lapse Calculator from PhotoPills. You can download your own for your web site or get the App to calculate while on site. Try it right here you’ll like it!
Lumix Time Lapse Processing Features
A great feature in the Lumix cameras like the GX8 used to capture this time lapse is the ability to process the video in camera choosing from a large number of settings in quality and frame rate. When calculating how much memory you need to have on your card remember you’ll need room to process and store the final video as well. I processed out the video using the 4K setting. 4K is four times bigger than HD video which means you can place it in an HD timeline then have room to pan and zoom which adds a lot to the final product. There are many programs you can use but I used Adobe Premiere Pro CC.
Screen Capture of still files in Adobe Bridge.
I shoot in RAW so I can process the original files for stills or for color tweaking if necessary. Then process out the files into jpegs and use a free program such as Time Lapse Assembler to put your video together. (link for MAC for link for PC. There are plenty of free or freeware programs to choose from. Find the one you like.
Time Lapse Assembler window. I like it because it’s pretty simple and straightforward!
Shoot longer than you think is necessary. The first couple times out my time lapses were only seven seconds which was a little disappointing. Use the calculator above to save yourself some heartache.
Had another Tech Talk Show with Mike Tabback on KAZM Radio here in Sedona. We talked about the newest capabilities of the the Panasonic Lumix cameras to choose the focus of an image after you have made the exposure. (previous post here) In addition to choosing your Depth of Field after the fact you can create more Depth of Field using Adobe Photoshop to Layer Stack for hyper-focus.
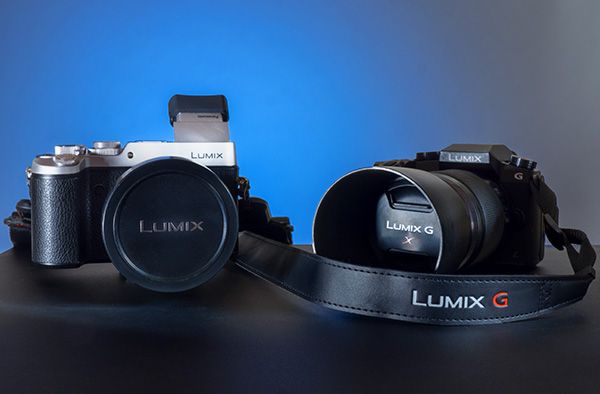
The Post focus feature is available on the Lumix cameras – GX8, G7 and FZ300 (not pictured) cameras.
The photography world is changing around you as I write this post! At least it feels that way as new cameras and features are introduced in short order. I’ve never been on the front edge of technology before and it’s fun trying to figure uses for features as they come out. A lot of the new capabilities is driven by possibilities not available before 4K mirrorless cameras came on the scene.
This is a very interesting new feature called Post Focus.
This is for stable non-moving subjects where you might not be sure of the focus point you want and would like to have options to choose later for a totally different look and feel to a subject of a scene.
Here’s how it works. The camera makes a quick video of a scene while moving the focus point throughout the frame. Because the camera is automatically set for Photo Mode each still frame can be extracted from the video as an eight MP file. At the end of processing after a few seconds you can see the individual frames on the back of the camera and choose any that you would like to save out as individual jpeg photos.
Want to be able to choose later? Not a problem. Download the video file and take it in an editing program like Adobe Premiere, Final Cut Pro, or Lightroom. There you can step through each frame and choose at your leisure on a large screen and save out your file.
I decided to see if I could use the system to help with the capture of Macro images and the process of focus stacking to get deep detail in an image.
And guess what ?? It works!
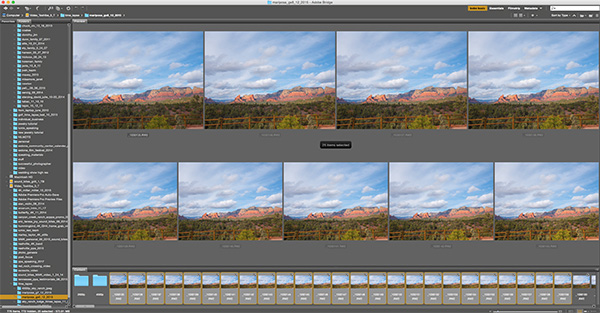
I Imported the MP4 file into Adobe Premiere and used the right arrow to move through each individual frame. Selected the ones I wanted to work with and pushed the save as an image (camera icon) and saved the images out as a TIFF. Then it’s off to Adobe Bridge.
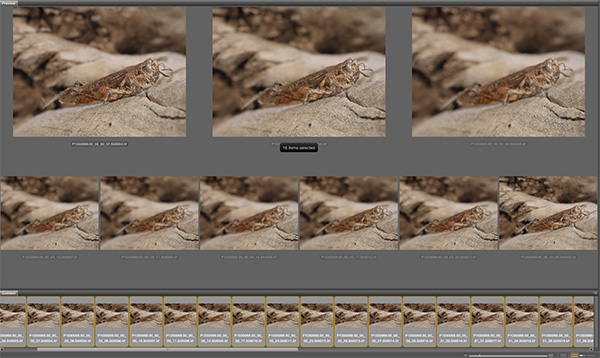
Screen capture of Bridge selections with all 28 files selected with the still captures pulled from the video.
With files selected the next move is Tools > Photoshop > Load Images into Layers
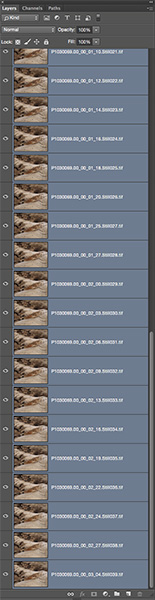
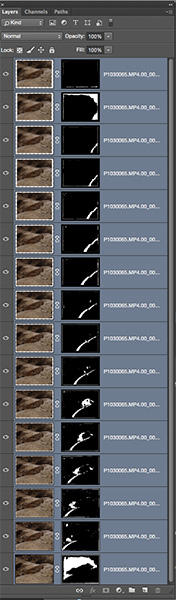
Layers Palette with all layers selected in preparation for Photoshop magic.
Once all layers are selected they need to be put in registration because a change in focus changes the size of the image. Menu Edit > Auto-Align Layers.
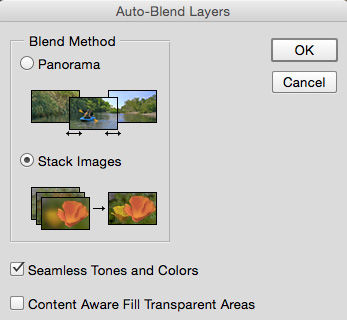
Once layers are aligned Menu Edit > Auto-Blend Layers with the Stack Images and Seemless Tones and Colors checked. Depending on the number and size of your files the the RAM horsepower of your computer this could take a little while but it’s doing all the work you see below masking in all the sharp portions of the images.
Palette window with proper selections for picking and masking in all the sharp bits it can find in the images. Making all of these masks would be super time intensive. Sometimes the individual masks may need a little tweaking if you didn’t get enough detail or colors and tones are very close.
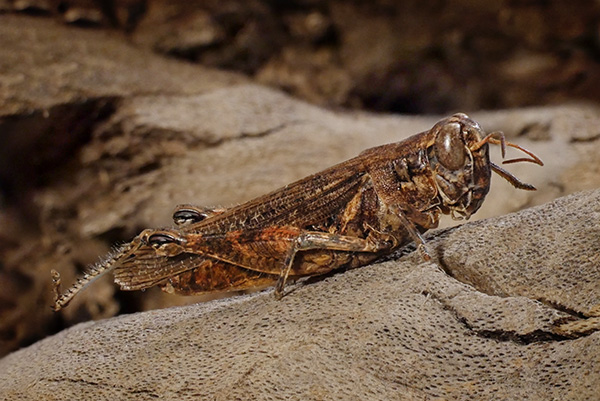
Grasshopper with detail and depth of field exactly where I want it.
The image was captured with the Lumix GX8 and the 45mm f2.8 Macro lens set at f9 in Post Focus Mode. “Why f9 and not f22 and be done with it Bob?” When photographing close-up Macro subjects the DOF is very shallow even at f22. In addition as the aperture gets smaller diffraction is introduced starting to blur details. (learn more about diffraction and check out your camera lens combo to find the sweet spot here)
Yours in Creative Photography, Bob
PS – No grasshoppers were harmed in the making of this tutorial. The grasshopper was already mummified when I found it on my porch.
As any who know me can attest I’m not too much of a sports fan. I like to see a good football game no matter who is playing. I’ll root for my home team but I’m not rabid about it at all. Basketball I wanna see a well played game. If it weren’t for the fights I’d be a hockey fan. But baseball? Not so much.
But I was in a local elbow bending establishment and ‘lo and behold’ the World Series was on. And just show I’m not totally prejudiced I gave the game a passing nod.
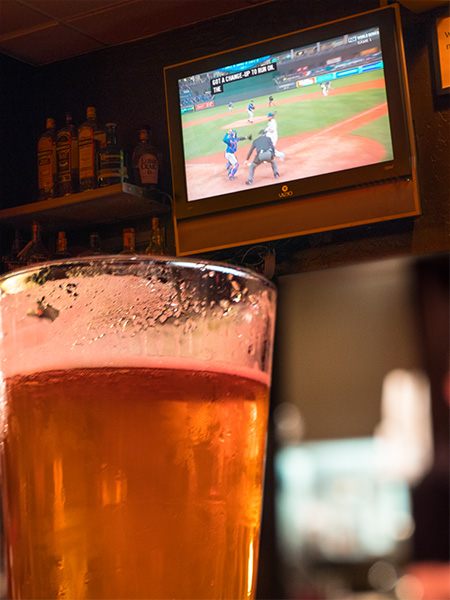
I even gave it one of my highest complements. I took a picture.
OK maybe I was taking a picture of my beer and the TV happened to be in the background. But that counts right?
Just a reminder that the Lumix G7 camera has 4KPHOTO Mode so you’ll never miss World Series type moments in your photo capture!
To all the true baseball fans I wish you the best and I hope your team wins!
Yours in Creative Photography, Bob
PS – All right. I confess. I had to make two images and combine them or you would never have known that was baseball on the tube in the background.
Times are changing in image capture. In the latest cameras put out by Panasonic it’s easier than ever to capture action. 4K photo mode allows you to capture up to 30 frames per second video that allows you to pull 8 MP stills. There’s even one mode that allows you to capture 1 second of action, 30 frames, abefore you press the shutter. So you can see something start to happen and still get the moment! Lumix GX8 and Lumix G7. Check out this quick video for details…
For infrared conversion of my cameras I use LifePixel. Infrared allows you to put an older camera to use and opens up a new time time of day for productive image creation.
Learn Photoshop in a fun environment. Aaron Nace applies the right amount of fun with easy to understand and follow tutorials. Actions and brushes are included with lessons!
Best embroidery ever. Give Queensboro a try, get a $20 instant credit to get started by clicking on the logo! They specialize in great quality custom logo apparel and promotional products with the best customer service.
Platypod has become a great resource for being creative in getting your camera gear easily into unusual places. As an Platypod Pro I get to work/play with the gear even before it comes out. Head over to Platypod, subscribe to the newsletter and you will get special discounts reserved only for subscribers.
 Screen Capture of still files in Adobe Bridge.
 Time Lapse Assembler window. I like it because it’s pretty simple and straightforward!