by successfulbob | cloud photography, infrared photography, landscape photography, Lumix G6, Lumix Lounge, photography, photography creativity, photography education
Live, learn and practice some more.
This is the continuing story of learning to see and capture infrared images with my newly refurbished Lumix G6 camera from LifePixel where I added a straight IR filter to the camera… (see Part One or Part Two)
Photographing with a camera that has had it’s sensor replaced by with an infrared filter makes IR photography MUCH easier than the olden days of film when fogging a roll was easy and focusing not so much. But as with all things photography making it easier doesn’t necessarily lead to stellar results. You still need to learn to ‘see’ in infrared. A helpful tool is the use of photographing in RAW +jpeg. You can set the camera capture mode to black and white The capture is in color AND black and white. If you have what you need and are happy with the ‘natural’ in-camera capture in black and white you are ready to go…
So far I am not.
RAW file to the rescue. As you saw in part two there are multiple ways of addressing the final IR image and many ways to get to the final image you have in your brain. We still have the words of Ansel Adams to fall back on to create a more artistic rendition of a scene. Paraphrasing for today’s world here, ‘The RAW capture is the score, the processing and final print the performance.’ Just as a conductor can get more out of his orchestra but pulling exhorting his individual musicians to do their best we can manipulate each pixel in each color space to give us the tones we desire.
Some of the things I’ve dabbled with…
Two or three different processing pulls from the RAW files for different areas of the image.
NIK Silver FX Pro 2. to convert to black and white and tweak ‘colors’ into the tones I was looking for.
Channel Mixer Adjustment Layer after the file was open in Photoshop.
Black and White Adjustment Layer.
Hue Saturation Adjustment Layers.
And mixing and matching all of the above techniques to taste…
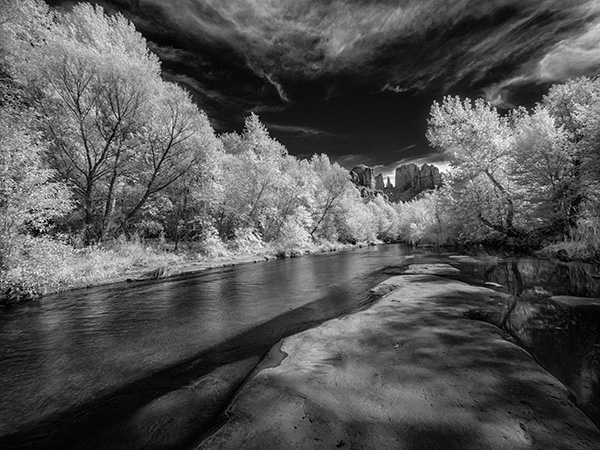
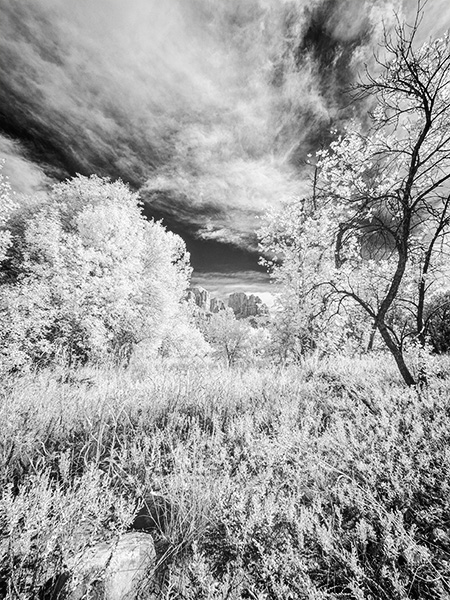
We don’t have a lot of deciduous trees in Sedona, but the banks of Oak Creek lead a parade of trees down from Flagstaff. Having the color information available in the file and Layers and Masks in Photoshop allowed me to create the contrast and tones I was looking for…
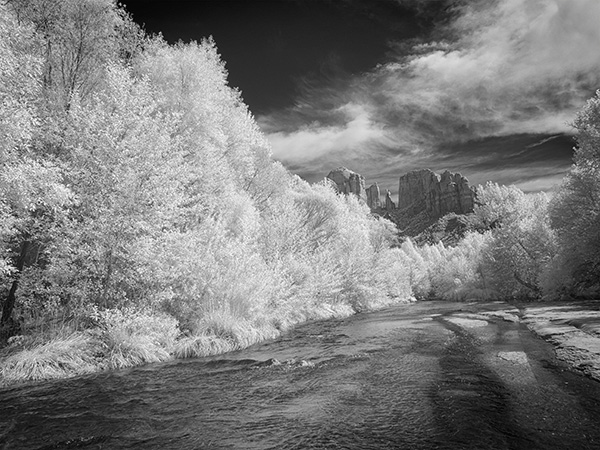
Same scene from a slightly different angle and different processing lead to an image, while still BW IR has a totally different feel than the one above.
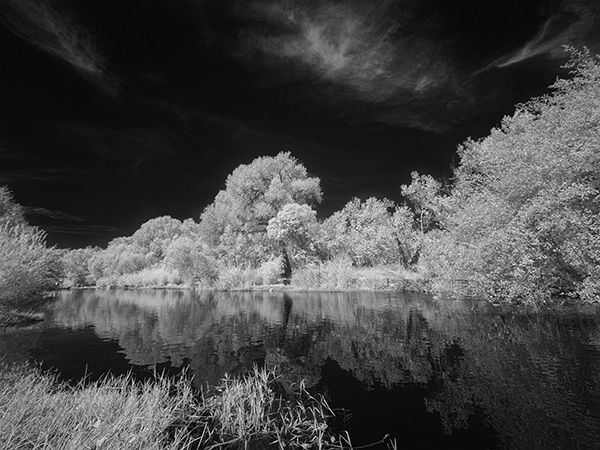
As always don’t forget to turn around… Many times there is an enticing image waiting behind you.
Moving off the creek banks led to this….
I see IR as a great new tool in my quiver. Makes photographing at mid-day very interesting. Can’t wait until I start to learn more about new capture and processing ideas to really push the look.
Yours in Creative Photography, Bob
by successfulbob | black & white, infrared photography, landscape photography, Lumix G6, Lumix Lounge, photography education, photoshop tutorial
OK. I went back to the same file I worked on yesterday and reprocessed using a couple different techniques. Here is the new version captured with the Lumix G6 and the 7-14mm f4 lens.
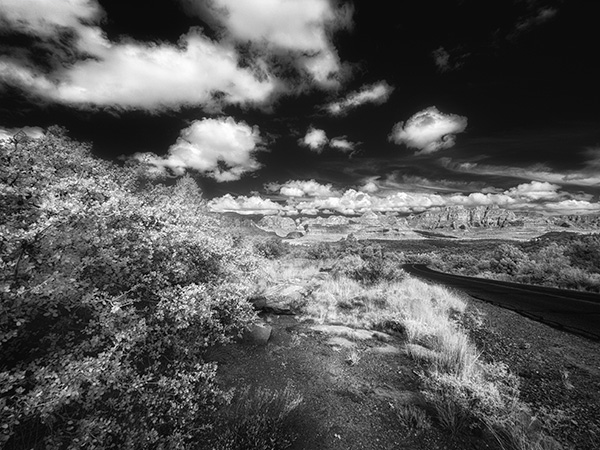
Different processing led to a cleaner more detailed IR image.
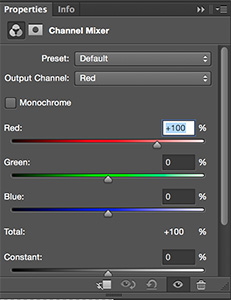
First I used Adobe Camera RAW to process the file twice. Once for the foreground which was in shadow and again for the background which was in full sun. Using a Layer Mask I blended the two files together. Then using the Channel Mixer I swapped the Red and Blue Channel information as this file is still comprised of RGB information. When you first open the Channel Mixer adjustment Layer you’ll see the Output Channel set to Red at 100%. Change this to 0%. Go to the Blue color and change it to 100%. Then change the Output Channel to Blue and make the Red color 100% and the Blue color 0%. This is to give a ‘blue sky effect’. I didn’t like that effect so I kept going.

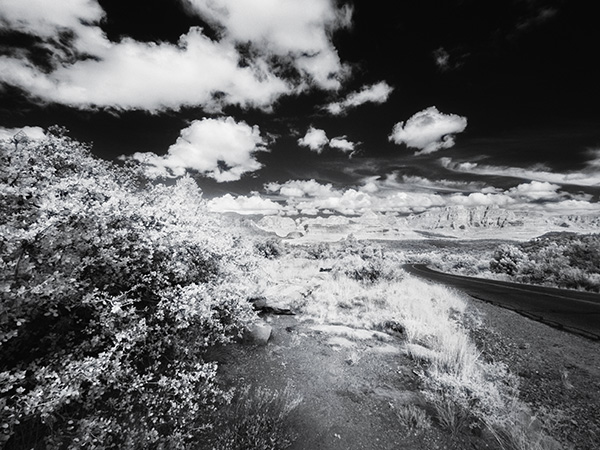
Swapping the Channels gave me a better image ultimately so I will keep this as part of my IR processing in the future.
Next using NIK Silver FX Pro 2 I converted to Black and White adding some mid-tone structure and fine structure. in NIK Color FX Pro 4 I added a bit of Glamour Glow with neutral color. This helped increase the IR look. A little goes a long way before you blow out some highlights so be careful here. Final bit of tweaking is a blank Layer set to Soft Light Mode using the Brush Tool with Black or White color to dodge and burn the image just a bit to control where the eye travels throughout the photograph.
Looking forward to working in IR more often. Gives a great look to noon-day sun images when you would normally refrain from making image captures.
Yours in Creative Photography, Bob
by successfulbob | black & white, infrared photography, landscape photography, Lumix G6, Lumix Lounge, photography, photography creativity, photography education
It’s a bit of a different world when you move into infrared imaging.
This is photography with a totally different look.
It used to be very difficult to capture infrared as the filters used to allow the non-visible light spectrum through were extremely dark making it difficult to see and frame your subject. The film was extremely sensitive and was quite susceptible to fogging ruining exposures before you even got them into the developer. In addition there was the need for focus adjustment as visible light focused on a different plane than the invisible spectrum which would often lead to out of focus images. And finally there was lots of grain in many of the captures.
Fast forward to today… I just received my Lumix G6 back from LifePixel after a conversion to allow the camera to capture infrared. It’s still not quite a piece of cake to create an infrared image but the capture sure got easy!
First infrared image from newly converted Lumix G6.
In this image the foreground area was in shadow so it wasn’t receiving the full infrared effect but the clouds, sky and rocks in the distance showed well. To combat this the image was triple processed. Once for the top half, and twice for the bottom to carry the infrared look through the image. Black and White conversion was made with NIK Silver FX Pro 2. Masks were applied to make the changes

With the filter switched to a straight infrared filter you end up with a reddish sepia-tone image straight out of camera.
In order to have a better idea of what I was capturing as far as a final image of Black & White infrared I shot with a camera setting for Black & White. I then set the camera to capture RAW + Jpeg so I would have all the information presented to the camera but also have a quick BW in the jpeg.
There is another way to process the images (well probably as many ways as there are photographers) which I’ll share in another post using Photoshop Channels.
Yours in Creative Photography, Bob
Here are some links to my follow-up IR posts
https://chd.lzi.mybluehost.me/infrared-imaging-part-2/
https://chd.lzi.mybluehost.me/infrared-photography-part-three/
https://chd.lzi.mybluehost.me/gila-wilderness-infrared-photos/
by successfulbob | Lumix G6, Lumix Lounge, photography, photography gear
Taking a couple weeks off for vacation slows you down a bit when it comes to staying up with regular posts… I’ll add in the Holidays to take the blame but enough excuses! I’m back on the horse!
Santa dropped off a package using the local Fed Ex driver… OK it wasn’t Santa but it sure feels like a present. The Lumix G6K is in my hot little hands and I gotta tell ya things just get better and better as each camera comes out. This is a Pro-sumer camera that has all the features. Great video with a fully articulating screen. Touch screen focus. A great chip and processing engine. Almost all the features of the Pro camera Lumix GH3 plus a few more. Yep it’s got the in-camera panoramic feature that I really enjoy. (just ask my fellow Luminaries!) The only thing that keeps this out of the full on pro realm is the fact it’s not built on the magnesium frame. But wait that makes it even lighter if you want to have a camera with you all the time. With a 2.8 12-33mm lens (35-70mm 35mm equivalent) this camera weighs well under 2 pounds! It’s on Amazon for just under 500 bucks with a 14-42mm lens. Freakin’ amazing!