Outdoor Photography – Walking Oak Creek Part Three
This is a four-part series. Here are the links to previous posts. Part one. Part two.
When out photographing for the day the camera that is converted to infrared makes shooting under the sun high in the sky quite interesting. Non-visible light can be captured with an IR converted camera. Lumix G6 (link to newer camera G7) with 14-140mm Lumix Lens. I used LifePixel for my conversion to a 720nm filter. There is quite an array of information on their website to help you decide what kind of IR filter to have installed on your camera. Many people put their older camera models back into service this way.
Usually, mid-day is not an ideal time for making images due to the high contrast of the light. This is exactly what makes creating images with an IR camera work the best. There’s high contrast, but it renders as dramatic with blue skies trending toward black and clouds picking up this iridescent glow. Green vegetation will provide white tones. This complete change in the way we view a scene creates excitement.
Green trees render white. Blue skies turn black with white puffy clouds. Infrared photo made with Lumix G6 converted to IR.
The benefits to creating IR images in the digital realm is that what you see on the live viewfinder is what you get. To make this happen, I set the camera to monochrome and shoot RAW plus jpeg. The resulting image on the back of the camera makes it easier to judge what the final will be. The RAW files will come into the camera in a magenta color and need processing. The jpeg file will be just as you see them and still need a little post production work but don’t have as much information in the file. The RAW plus jpeg is the best of both worlds.
This photo is a detail of the center of Cathedral Rock. The 14-140mm zoomed for in-camera cropping.
I enjoy the light and airy feeling of deciduous trees when rendered with infrared.
Taken with side light a bit later than ‘normal’ time of day for IR imagery and with side-light leads to very contrasty image rendering. I like it because it’s a wee bit different. Always looking to experiment.
Yours in Creative Photography, Bob
PS – if you have a question don’t hesitate to give me a shout by leaving a comment!
This is Part two of a four-part series on a ‘day in the life on Oak Creek’ while photographing nature and wildlife. Check out the first installment here.
The second camera I brought on my nature adventure was the Lumix GX8 and 20mm 1.7 lens. (1.5 Pounds) This combination is for capturing time-lapse and/or video. Because the lens is a pancake style it fits in my Think Tank Mirrorless Mover 20 along with two additional lenses. On this day I ended up using the camera for video but I like to have the option of having the second camera body for taking time-lapse while photographing other subjects at the same time.
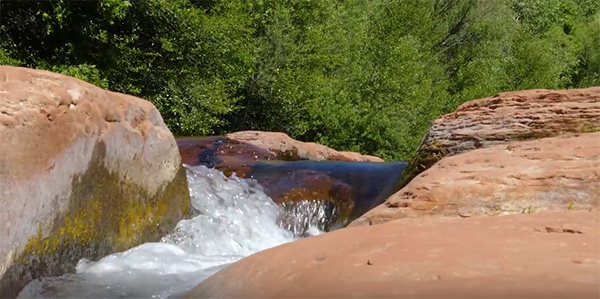
Here’s a still image screen capture from the video
Oak Creek and Cathedral Rock video. A little one and a half minute respite with flowing water and the spectacular rock formation that is probably one of the top ten most photographed places in the United Staes.
the video was captured in 4K quality. Shooting in 4K allows for creating additional camera movements like a Ken Burns movement in post production. A tiny tripod was used to steady the camera a bit but this was for fun and most of this was handheld. It tells the story of the day. The sound was recorded with the in-camera stereo microphones. The 20mm lens was a bit too static so I switched over to the Leica DG Vario-Elmarit 12-60mm f2.8-4.0 lens. This lens has a wonderful range from wide angle to medium distance zoom.
The next installment will be centered around another camera and lens combination. The Lumix G6 and the 14-140mm G Vario f4.0-5.8 lens. This camera has been converted to infrared by Lifepixel and has opened up the middle of the day for more creative imagery.
Getting out into the open air in among the Vortexes of Sedona, Arizona is a great pick me up from being behind the screen of the electronic world in which we spend a fair amount of time as photographers. I chose to spend the afternoon on the banks of Oak Creek near Cathedral Rock and thought I’d share some ideas on the gear I assembled for my trek through the woods.
Since I was out for the afternoon, I took a lot of gear to have many options for various shooting situations. Included in that day’s kit were three cameras, five lenses and two tripods. The reason I was able to pack so many alternatives is that of the light weight of Pansonic’s micro 4/3rds camera system. I’ll share a video on the gear and my day over the next couple days but for now, read on about the first camera. Subsequent cameras and their use will follow.
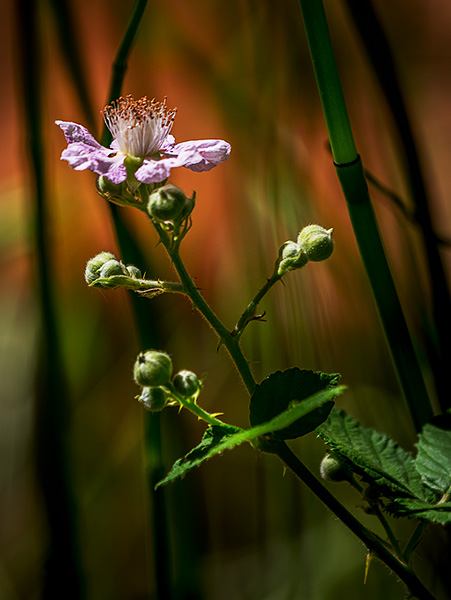
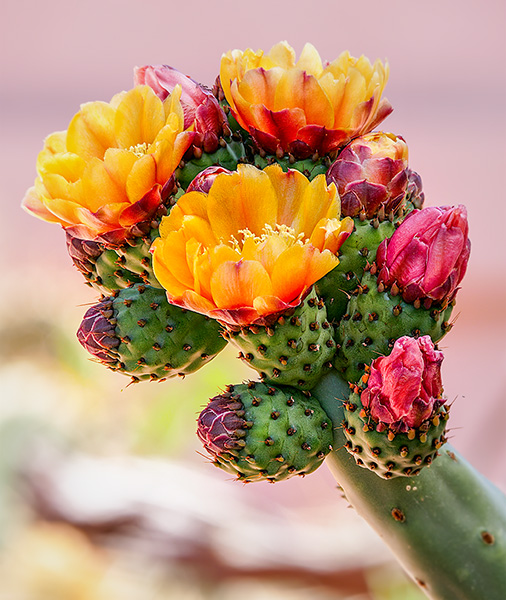
This flower is about the size of my thumbnail. The 100-400mm lens almost works as a macro lens isolating details against a soft background. It’s all about the light.
Lumix GX85 with the Leica 100-400mm lens – Fast becoming one of my favorite combinations for wildlife and art photography. One of the reasons is the five-axis image stabilization plus two. This combination allows for an extra five stops of handhold-ability, negating the need for a tripod in almost any situation that does not involve multiple exposures for the creation of a single image. Weight 4 pounds.
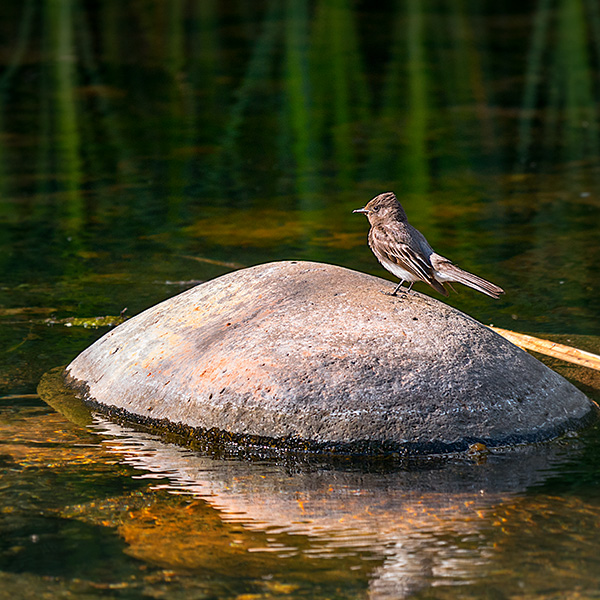
Of course, reaching across the creek for small wildlife and getting plenty of detail is evident. The 100-400mm lens is the equivalent of a 200-800mm and with the stabilization makes for sharp images.
Another feature that helps in obtaining sharp images is the removal of the anti-alias filter. The filter was placed in front of sensors in the past to help prevent moire patterns. That is now being handled by the processing engine. The filter blurred detail. The noise patterns showed the adverse effects of this filter. Now I’m getting a film grain-like noise which is allowing me to push up ISO if necessary with no ill effects.
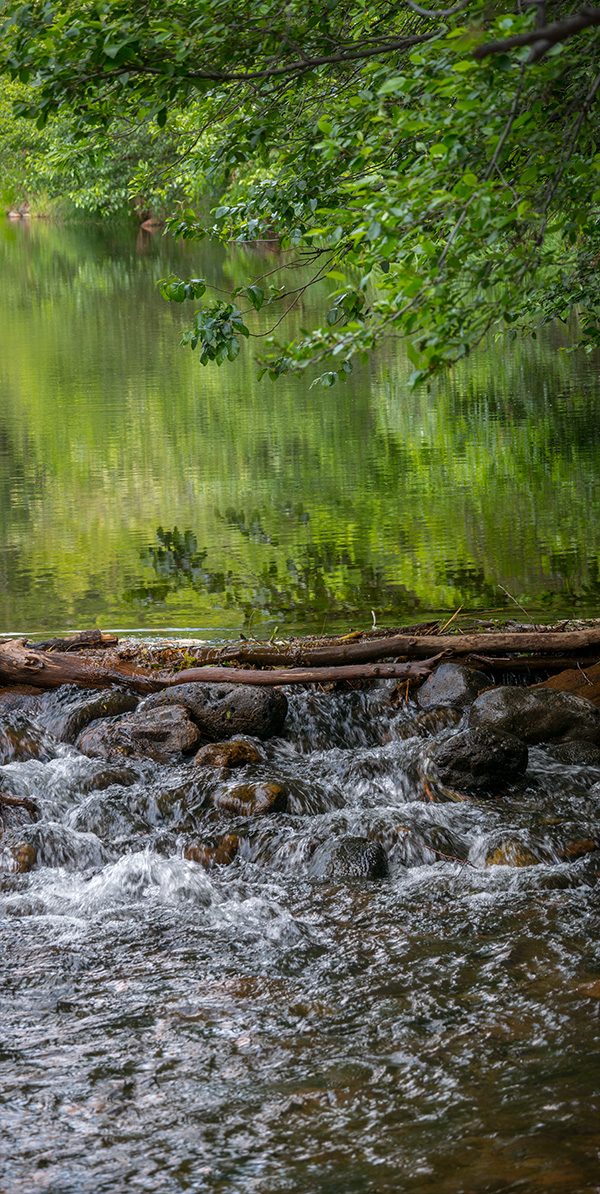
I generally don’t bisect an image, but I stitched two images together to complete the scene. When I go to use this, I can crop to make the images more about the pond or more about the falling water.
These were just a few images from this camera/lens combo. Next post I’ll share why I bring the Lumix GX8 and 20mm 1.7 lens. (along with a couple of others)
Let’s look at some more examples of using the Post Focus Photo Mode (see part one here).
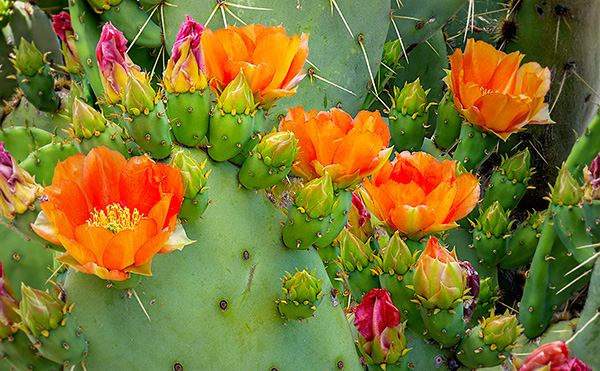
The focus is all throughout the image. Detail works in this case.
With the post focus mode used to capture this image there is still a soft bokeh even though the camera used every focus point in the processing. But because the background is so far in the distance the background stays very soft and all the flowers are super sharp.
I’ve been testing the Lumix GH5 and the Post Focus Mode in which the camera leverages a 6K Photo Mode wherein the camera creates a short video clip using all two-hundred and twenty-five focus points. Any one of these points can be pulled as an eighteen MegaPixel file. Or a range of images choosing a set of focus points. Or even better, it will combine all of the focus points into a fully focus stacked final image. This is an amazing technology to secure a look that is not possible in a regular capture with a camera. I love leveraging this tech to create artistic images.
Post Focus is a handy mode to have in your toolkit. It makes it possible to create a hyper focus image with depth of field that rocks the house. Here’s an example I made when I was recording the Tech Talk Radio show with Mike Tabback at KAZM Radio in Sedona.
Here’s the Tech Talk Show which aired on May 10, 2017. We chat about the new technology in the Lumix GH5 including an almost endless focus available in using the Post Focus Mode. Find the demo capture and final image below.
KAZM – Tech Talk Show with Mike Tabback and Bob Coates Photography
First, here’s the video clip created with Six K Photo Mode. The recorded clip is less than two seconds. I have extended it to about six seconds in order you to see the camera making its way through the 225 focus points.
Above is the image fully merged using the in-camera settings of show host Mike Tabback.
Sharp front to back! And everywhere in between
Creates an almost image size of almost 5000 pixels.
There would have been no way to have the KAZM logo on the microphone in focus as well as Mike further into the scene no matter what f-stop was used in a single capture. When a lens gets stopped down to the smallest aperture diffraction and diffusion get introduced to the image which can hurt image quality.
Image was made with the Lumix GH5 camera with the 12-60mm f2.8-4.0 Leica DG Vario-Elmarit Lens
Yours in Creative Photography, Bob
PS – If you have questions about using this technique or any ideas for future blog posts don’t hesitate to give me a shout. As a Lumix Luminary, I get the opportunity to work with a lot of the new technology including the GH5 Camera and some of the newer lenses that have been released. Leave a comment on this post or email bob@bcphotography.com
Care and Feeding of Batteries for Digital Photography
There’s nothing worse than running out of battery power in the middle of a job or while out and about making images. I’ve come up with a fairly simple way to ensure that when I need more power for my cameras it is always at the ready. Check out the video.
Hope you find this helpful in keeping your batteries ready to go at all times.
This video was recorded with the Lumix GH5. Fiilex LED lighting with a softbox was used to supplement overhead room lighting. I set the camera for 4K Video and used the tracking mode for focus since I was using a tripod. The camera was triggered using the iPhone and the Panasonic Image APP to control settings, focus, and start/stop during the session.
For infrared conversion of my cameras I use LifePixel. Infrared allows you to put an older camera to use and opens up a new time time of day for productive image creation.
Learn Photoshop in a fun environment. Aaron Nace applies the right amount of fun with easy to understand and follow tutorials. Actions and brushes are included with lessons!
Best embroidery ever. Give Queensboro a try, get a $20 instant credit to get started by clicking on the logo! They specialize in great quality custom logo apparel and promotional products with the best customer service.
Platypod has become a great resource for being creative in getting your camera gear easily into unusual places. As an Platypod Pro I get to work/play with the gear even before it comes out. Head over to Platypod, subscribe to the newsletter and you will get special discounts reserved only for subscribers.

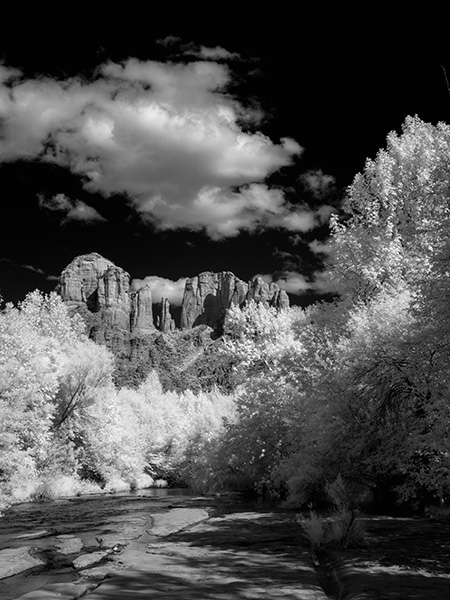 Green trees render white. Blue skies turn black with white puffy clouds. Infrared photo made with Lumix G6 converted to IR.
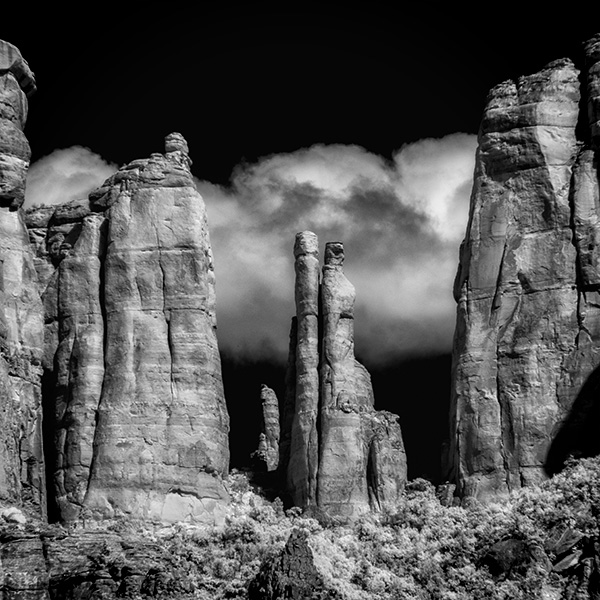 This photo is a detail of the center of Cathedral Rock. The 14-140mm zoomed for in-camera cropping.
 I enjoy the light and airy feeling of deciduous trees when rendered with infrared.
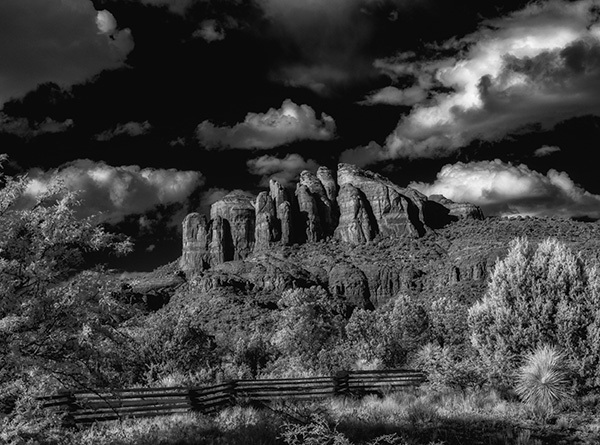 Taken with side light a bit later than ‘normal’ time of day for IR imagery and with side-light leads to very contrasty image rendering. I like it because it’s a wee bit different. Always looking to experiment.