Arizona PPA convention awards. (I made Arizona PPA Top Ten for the 16th time in 17 years) Pushing the envelope of creativity. Infrared imagery. Basics of photography exposure. How image judging works. Bob Coates Photography new web site. Lumix luminary & some new camera gear features.
Down in Scottsdale yesterday to meet up with some photographers and deliver a family portrait. I stopped by the Scottsdale Museum of Contemporary Art and was reminded of how powerful art can be. I had no idea what was on display but just thought I’d get a quick lift.
Wow! A different experience awaited me within those walls.
Betye Sarr has been creating art about the black experience in the United States for over 60 years. And it was a poignant reminder of how terrible we were as a people. Even to having a constant ‘put in your place’ language that started with children. One piece especially moved me deep to the core.
It was very simple.
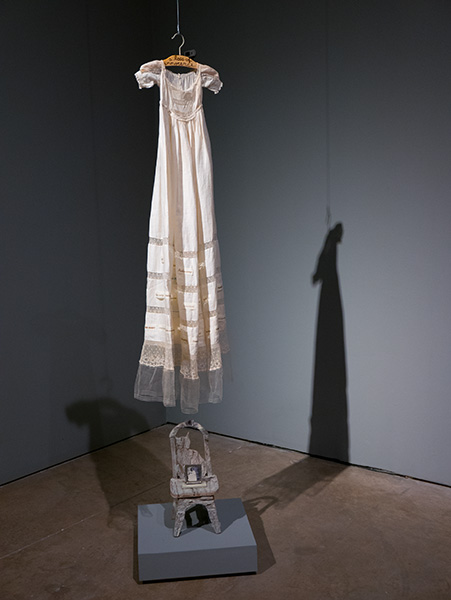
A dress hanging from the ceiling.
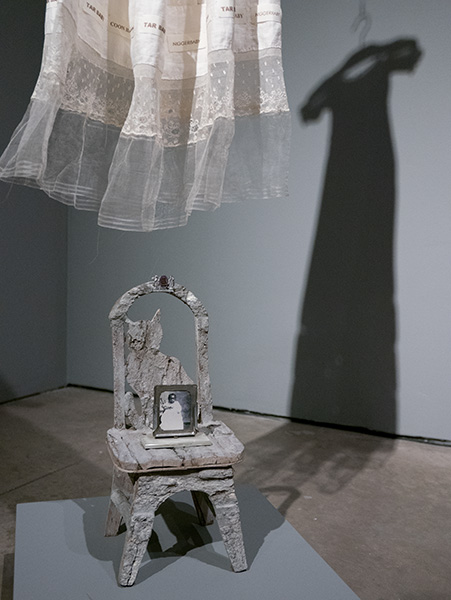
Hemmed with offending words suspended above a small child’s chair with a small framed portrait of a black child.
Two spotlights.
A corner.
‘A loss of innocence.’
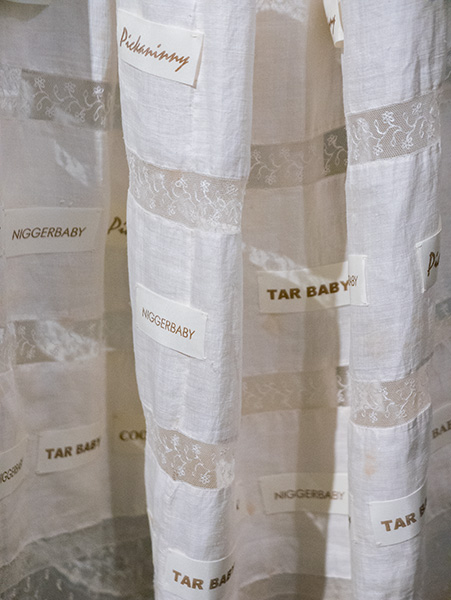
Detail
From ‘Loss of Innocence’ Dress detail showing the repetitive words hemmed into the dress – Tar Baby, Niggerbaby and Pickaninny.
I was moved.
From the SMOCA Description of Betye’s Show
There is a touch of alchemy to Betye Saar’s artwork: transforming the simple and mundane into powerful art. Since the 1960s, her compelling, astute and expressive works reflect on African- American identity, spirituality and the inter-connectedness between different cultures. This timely retrospective brings together recent work as well as historical pieces created over her six decade long career… more
I wonder if I will ever be able to create art that moves people as much as this installation moved me.I think we as photographers can find inspiration from many different places..
How about you? Where do you find inspiration??
Yours in Creative Photography, Bob
PS – images were captured with the Lumix LX100. I call this sweet little camera the ‘Pro’s point & shoot’. Solid magnesium body, all necessary exposure controls available on the outside on click stop dials. 24-75mm f1.7-f2.8 Leica lens.
The Imaging USA trade show put on by Professional Photographers of America is always a popular part of attending the annual convention, especially the first day…
This was captured hand held with the Lumix GH4 and the 7-14mm Lumix Vario f4 lens at the bottom of the escalator in the Georgia World Congress Convention Center. Time lapse was processed in camera. Then it was downloaded to Adobe Premiere Pro for some massaging. Video was smoothed out. A little color correction was applied due to the extreme lighting conditions. Titles, slides and music finished off the video.
Thanks to Eric Miller for the use of the music!
Time Lapse Video captured at Imaging USA in Atlanta, Georgia January 2016
Time Lapse can be a great way to tell a story ’cause that’s a pile of people!! Approximately 560 images, with a frame fired every 3 seconds, were captured and combined. Output at 12 frames per second in 4K video.
Yours in Creative Photography, Bob
PS – See you at Imaging USA in San Antonio next year??
When making a time lapse (view time lapse video here) image you can leverage a thing I often do to create a solid look of a scene by using images captured over a time period to get the best of all worlds. As our eye can change the size of the pupil in any scene when looking into the shadow or highlight area we sometimes need to arrest time and blend it into a single image to represent what the eye would actually see. I call this an advanced form of HDR imagery as the images are not captured in one go but with the camera on a tripod blend images that were made while the sun was up, as it was going down, and long after it had crept below the horizon.
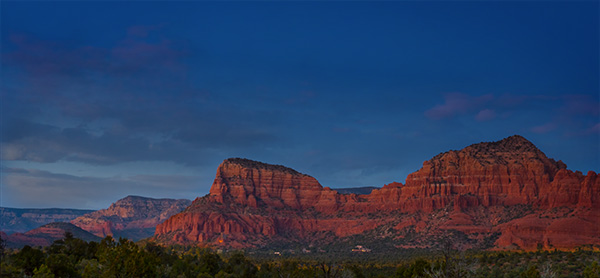
Here’s the final image.
Here are the images combined and used to create the final. The photo on the left was used for the treeline across the bottom. Next image was used for the cloud formations. The third image was used for the red rocks. and the final image was blended for the deep colbalt-blue sky.
Why use Multiple Images?
I went back and selected images based on the subject matter that was exposed exactly for the area of the scene and using masks blended them together for the final look.
The use of images captured over time verses capturing all the images in a single HDR capture is the quality of the information in the highlight areas and shadow areas as they are captured exactly as they should. This will give you less noise in shadows and cleaner highlights, allow the glow of light in a scene and more.
Gear
A Lumix GH4 was mounted on a tripod with the 7-14mm f4 Vario lens. Images were captured every three seconds over a long time period for the time lapse video. If I was using this for the ultimate capture of a scene verses also for a time lapse I would set the interval for more like an image every five minutes or so.
Yours in Creative Photography, Bob
PS – this technique can also lead to multiple iterations and mood of a scene… Try it you’ll like it!
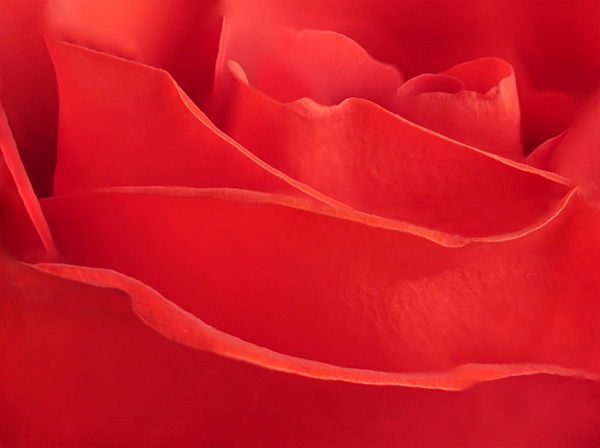
It’s a feature I wasn’t sure I had a reason for but again in the studio I used the Post Focus Setting on the Lumix-G7 to focus stack to get a different look from my 45mm Macro lens. This image started with a seven second video clip with the focus point being moved by the camera as the camera searched through all of it’s focus points. I’ve found the camera to capture as little as one second of video to as much as ten seconds depending on subject matter and how deep the focus goes through the scene.
This is my favorite rendition of the rose.
Create the Image from the Video
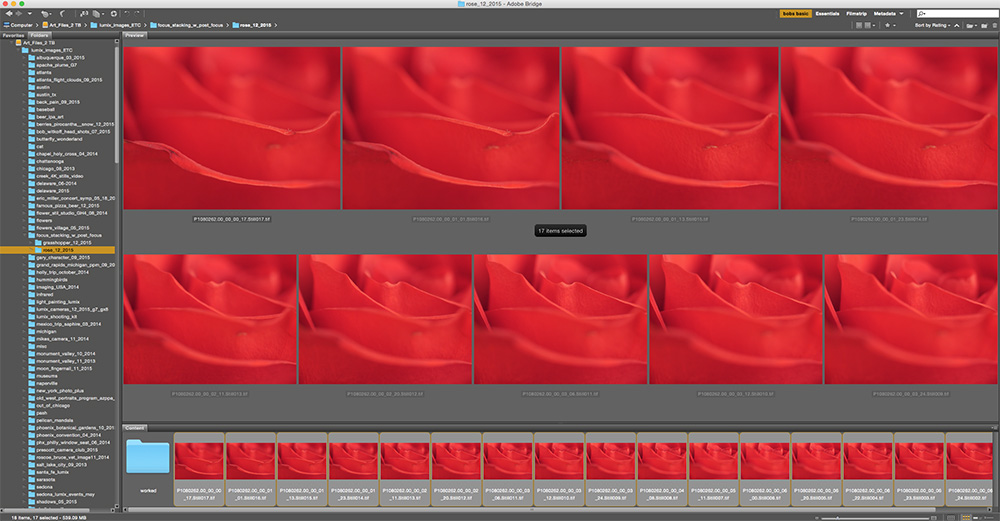
The steps I used were to download the video. Open it in Adobe Premiere Pro and select the still frames I wanted to work with and saved them as TIFF images. I wanted a soft and sharp movement through the final image. All 17 selected images were loaded into a single Photoshop document by using the Adobe Bridge command Tools>Photoshop> Load Files into Photoshop Layers after selecting all the images. Once the images are in Photoshop all layers were selected and under the Edit menu the Auto-Align setting was applied. Then under the Edit menu Auto Blend Layers was selected with the settings Stack Images with the Seamless Tones & Colors checked. This will take all the ‘Sharp Bits’ Of the image and mask them in.
The set of images saved out to individual files for the Post Focus video capture.
Layers Palette after adding images to file, aligning images and blending. Photoshop automatically created the masks.
Rose photograph after blending and cleaning up imperfections in the flower. Used Photoshop Tools then moved in to NIK Color EFX Pro 4 for further modification.
Talking Photography Tools
The tools we have to work with like Photoshop & NIK Color EFX Pro 4 can take images to an entirely new level and I keep trying to push to see what I can do. I hope this has been a help to you and at the very least given you some inspiration to think about image making in a new light.
Yours in Creative Photography, Bob
PS – The Google NIK entire collection of software plugins is only $149. Great suite of tools!
For infrared conversion of my cameras I use LifePixel. Infrared allows you to put an older camera to use and opens up a new time time of day for productive image creation.
Learn Photoshop in a fun environment. Aaron Nace applies the right amount of fun with easy to understand and follow tutorials. Actions and brushes are included with lessons!
Best embroidery ever. Give Queensboro a try, get a $20 instant credit to get started by clicking on the logo! They specialize in great quality custom logo apparel and promotional products with the best customer service.
Platypod has become a great resource for being creative in getting your camera gear easily into unusual places. As an Platypod Pro I get to work/play with the gear even before it comes out. Head over to Platypod, subscribe to the newsletter and you will get special discounts reserved only for subscribers.