I’ve been enjoying the cooler air at night photographing Nightscapes and Starscapes. Today’s high was 107 here in Sedona, Arizona. Decided to lay low during the day!
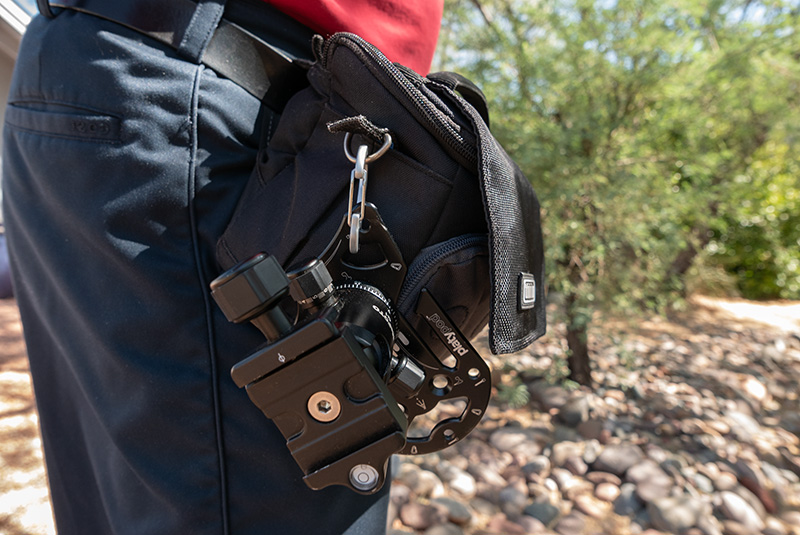
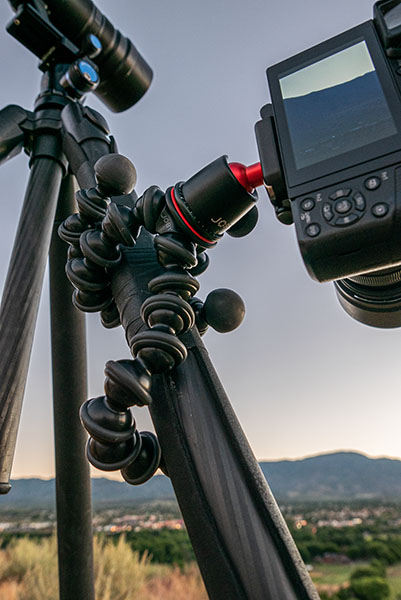
Platypod tripod
I’ve been playing with the Platypod Ultra making some time-lapse videos for them. I bought the Platypod about a year and a half ago and wasn’t using it very much. But when they asked me to work it a little more I’ve been finding more and more uses. In addition, it now hangs off my small Think Tank Mirrorless – 20 camera pouch when I go hiking. I’m finding it gives me a stable platform while adding very little weight to my kit.
I spent a couple nights car camping, AKA boondocking, in my RAV 4 during the last full moon. Here’s a time-lapse I made of the moon for Platypod getting up off the horizon. See more of the boondocking story here.
Yours in Creative Photography, Bob
For those who are viewing this in the Successful-Photographer email notification here’s a link.
https://youtu.be/eDZ22rnivdk
•• The reason I use the Think Tank MM 20 is that it is small but robust. I’ve been using this bag for about five years and it is only starting to show some wear. Know that I am a mirrorless shooter with Lumix and Olympus gear so It’s just the right size. They make larger models such as the MM 30 for larger camera gear
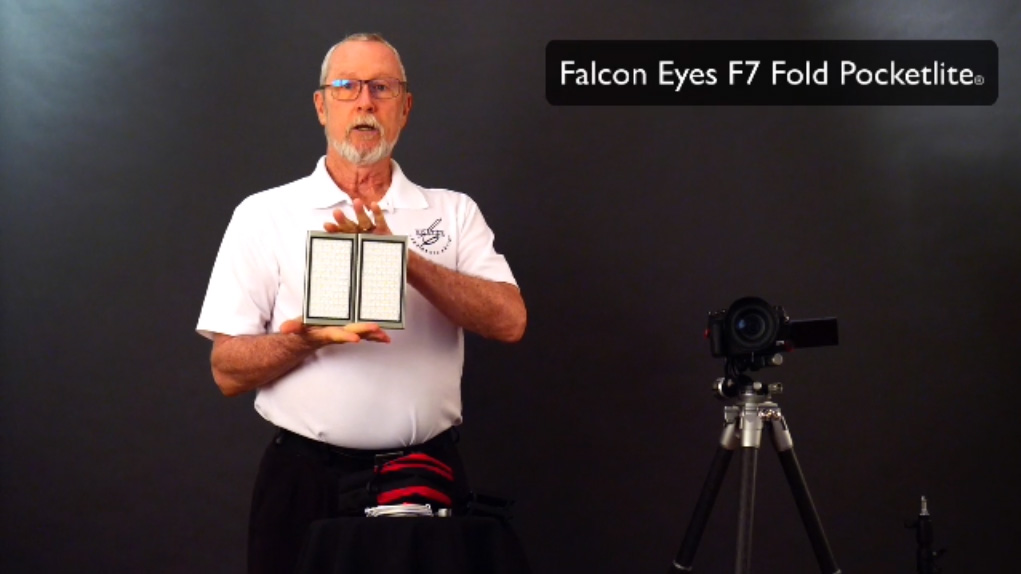
Got a chance to play with a new LED light called the PocketLite Fold. I had the previous model F7 PocketLite and here’s a review from last year. I like them both. But, I like the Fold more than twice as much. It has twice the light and a built in control from the phone APP DeSal Lite which you can download to control your lights at no additional charge.
Having a small, powerful light is a good thing to have in your kit. This will work super as a fill light, a special effects color light and creative tool. If you are not at a far distance it will even serve as a main light. I measured 1/30th of a second at f/2.8 ISO 200 at four feet. The beauty of working with LED lights is WYSIWYG. What you see is what you get.
The Olympus cameras now have a feature called LIVECOMP. This is short for live composite. You set a base exposure and then the camera repeats that exposure but only allows new light to be added. You get to view this as it is happening live, hence the name, which allows you to stop the exposure when you have gathered all the information you need.
Most current Olympus cameras have the feature. You’ll find Live Composite Mode in OM-D, PEN and TOUGH cameras.
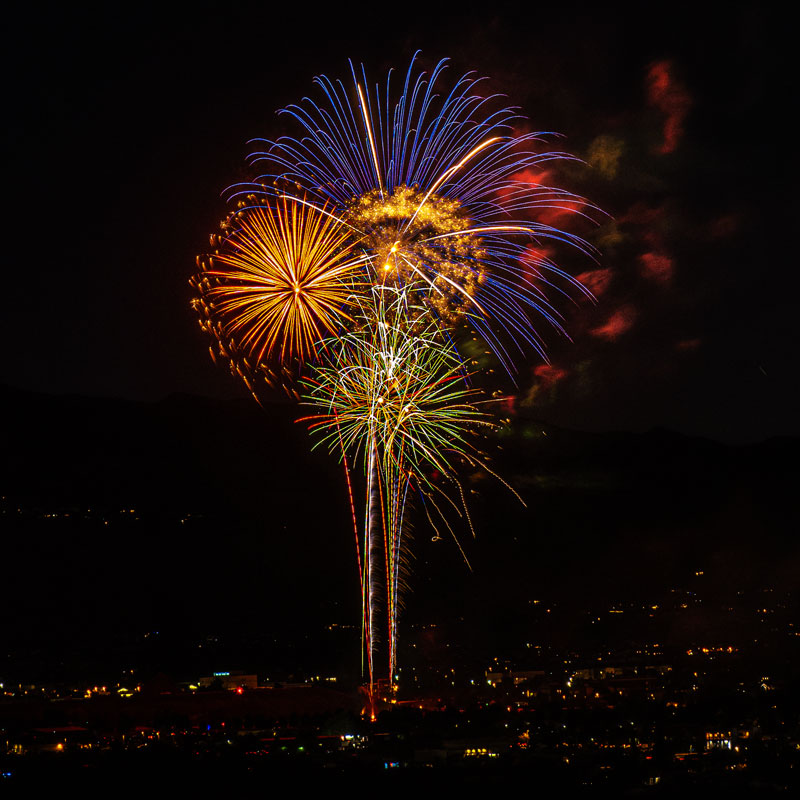
If you need more time to capture the light effects of your scene and were to increase your exposure time the dark areas of your image would begin to become muddy and over exposed. It is definitely a specialty feature, but one that has some great uses. For example, keeping your frame exposed to catch lightning, car trails, carnival rides and fireworks. I’ll let you imagine the others but I’m going to share some settings and images made during the fireworks from the fourth of July.
Fireworks
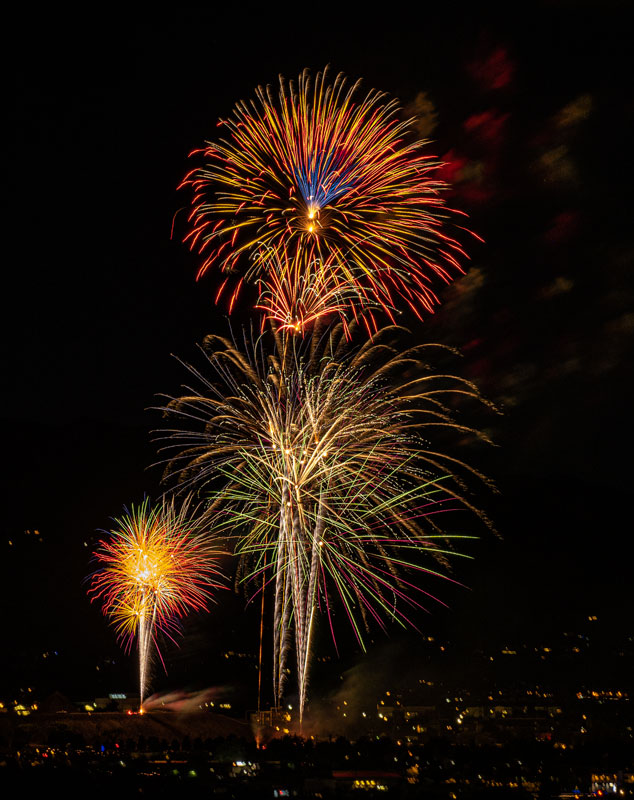
F/14 4 SEC ISO 100
With the camera firmly mounted on a Fotopro Eagle E6L tripod I found the base exposure. I was looking to render the building lights and allow the fireworks to be against a dark sky. Knowing from past experience the fireworks would have time to streak in the sky showing the burst if they had about three to eight seconds ISO 100 @ f/8. I choose four seconds for my base exposure. Once I started seeing results on the camera back I made adjustments to the aperture to allow the fireworks to record just a bit more color and changing to f/11 then f/14.
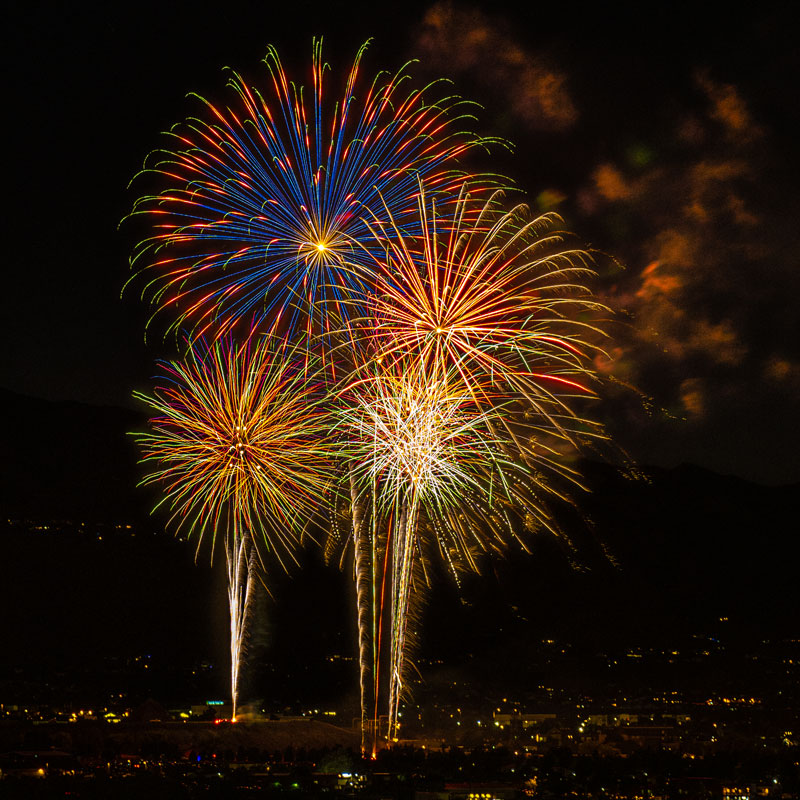
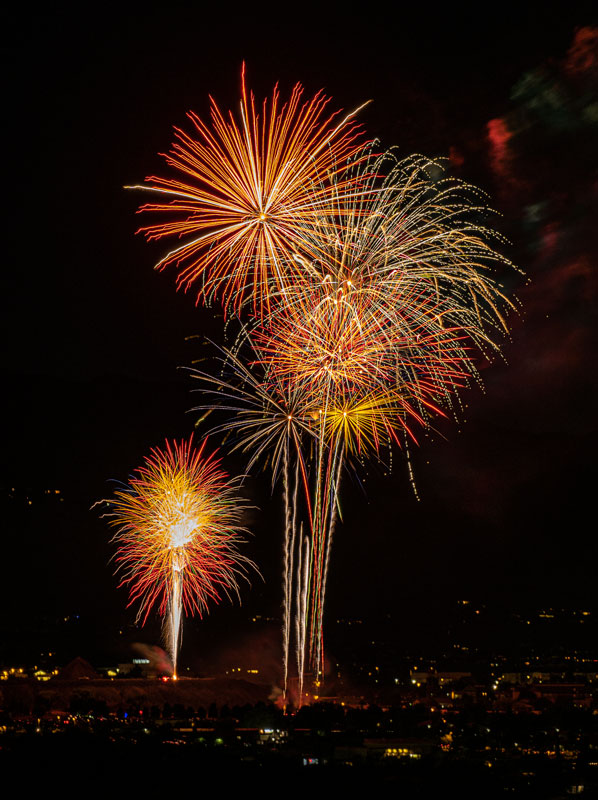
Single frame capture
F/14 4 SEC ISO 100
Normally, to get multiple bursts in a single frame I combine images in post-production. With the LIVECOMP in play each image you see here was done in camera. The shutter was opened and recorded a four second exposure with the shutter still open additional four second exposures were recorded adding only the new bursts of light. When I saw enough bursts were captured I ended the exposure.
Next time
In the next fireworks post I’ll share settings for automatic recording of captures using the time-lapse mode of the Lumix G9.
My writing for the Successful-Photographer blog has been lagging a bit. I’ve been writing for many different publications including Photofocus.com and photography magazines. I’m sort of reminded of the story about the cobblers children having no shoes. Or, on an even more personal note, my dad was a TV repair man always off to help other folks get their sets tuned correctly when I didn’t know that other people in the world didn’t have a green cast. Kidding aside I want to get my home base back to work.
Start off with fireworks
And, what better way to get things going than to set this first new post off with some fireworks??
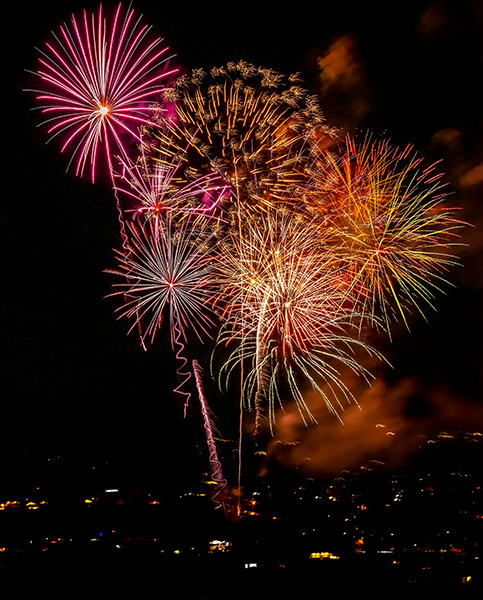
Four images combined in post production. Captured with Lumix GX85 and the G Vario 100-300mm f3.5-5.6 lens at 100mm. Exposure f/8 four sec at ISO 200
On July 4th Cottonwood, AZ, the next town over from Sedona had a fireworks display. And, in honor of the state of Covid-19 they used all aerial shells so people could spread out to enjoy the night of colors streaking across the sky.
It worked it very well. I’ll share some ideas on capturing your fireworks for next year with some new things I learned. (you may want to bookmark this page) I’ll share my set-up for using three cameras on this post. The next two posts will be on the Olympus LIVECOMP setting and making a time-lapse.
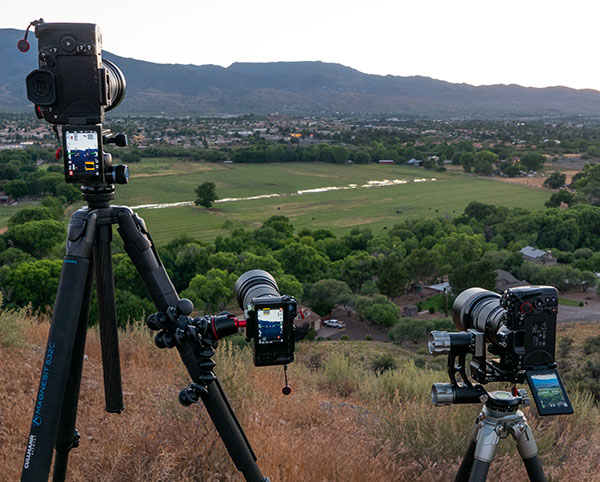
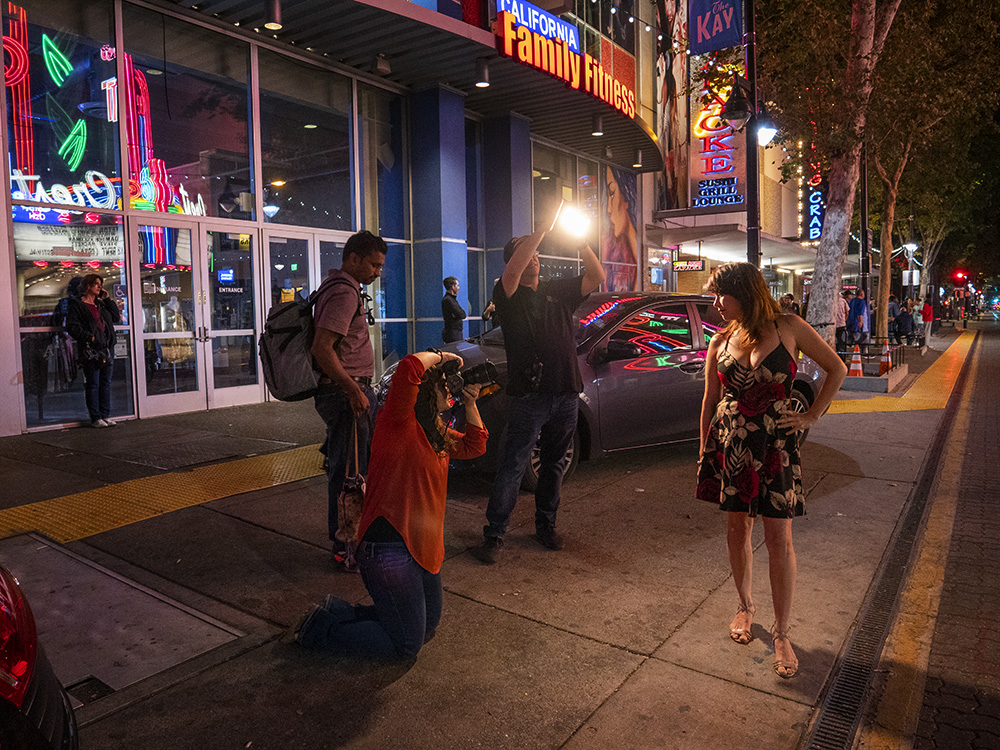
Three tripods
Three tripods set close together allows for different looks.
On to the set-up with three cameras mounted on tripods. Two were standard and I added a Joby Gorillapod with legs wrapped around one of the taller tripod legs.
Joby Gorilla tripod holds the Lumix GX85 camera
Two of the cameras were set for capturing five second exposures with a one second delay using the time lapse mode. Somehow one of the cameras got off its time-lapse mode and I ended up firing it by hand. The third camera was the Olympus E-M1 Mark III which was set to LIVECOMP mode which I’ll detail in the next post.
I had the opportunity to get my hands on an LED light from FALCONEYES. It’s the F7 Pocketlite. You can see my thoughts below but the short answer is I like it. 97 Color Rendering Index and a good size and power as a fill or main light in a pinch.
I’ve often heard the expression the best images are made with the camera that you have with you. This light is small enough to have with you all the time.
Panasonic is working toward serving the professional photography market in an exceptional way. As you probably know they have come out with two full frame mirrorless cameras (shipping in April) adding to their micro 4/3rds line. If you pre-order a full frame camera from Hunt’s Photo Video before April 4th you’ll get an extra battery and battery grip at no extra charge. (tell ’em I sent you if you would be so kind)
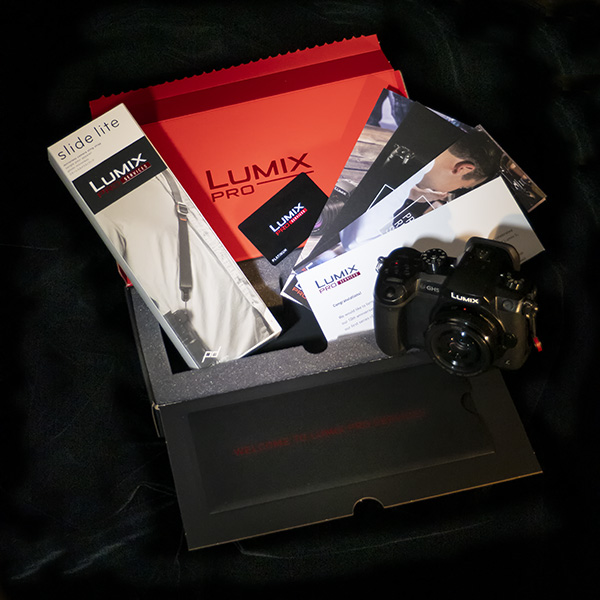
Just received my Lumix Pro Services welcome packet. It includes all the deals, contact information and membership card. They started this program last year and I used it for the first time myself just this week.
Service was as advertised. I received a Fed-Ex label for overnight shipping. Contact immediately when they received the camera and verified the problem. (the rubber from the SD card door was coming up) They again contacted me right away to let me know it was a warranty repair. The door was replaced and the camera was returned via Fed-Ex overnight.
Wahoo!
Lumix Pro Services Welcome Packet * Note does not come with GH5 camera!
Here’s most of the skinny on what’s included:
• 2 day turn-around on repairs
• Free next day shipping both ways
• Twenty percent discount on Out-of-Warranty Repairs
• Online order tracking
• Loaner gear
• Free clean and check for two bodies and lenses per year
• As a bonus in the welcome packet, here’s my favorite, a Lumix pro camera strap. One of the reasons the camera strap is my favorite is because Panasonic has partnered with Peak Design. Peak Design makes straps that have a quick release that is extremely handy. I’ll do another post on my Peak Design straps as I could be considered a fan-boy for their product. The post will show you why
There’s more but I’ll let you go dig that out from the Lumix Pro Services site.
Yours in Creative Photography, Bob
PS – Remember to pre-order to get the extra battery and battery grip from Hunt’s Photo Video before April fourth
For infrared conversion of my cameras I use LifePixel. Infrared allows you to put an older camera to use and opens up a new time time of day for productive image creation.
Learn Photoshop in a fun environment. Aaron Nace applies the right amount of fun with easy to understand and follow tutorials. Actions and brushes are included with lessons!
Best embroidery ever. Give Queensboro a try, get a $20 instant credit to get started by clicking on the logo! They specialize in great quality custom logo apparel and promotional products with the best customer service.
Platypod has become a great resource for being creative in getting your camera gear easily into unusual places. As an Platypod Pro I get to work/play with the gear even before it comes out. Head over to Platypod, subscribe to the newsletter and you will get special discounts reserved only for subscribers.