We all use social media to promote our photography business. But, I ask how do you show up? Do your have a professional portrait that shows that you value professional photography? Or, have you posted a snapshot, or worse, a cellphone selfie?
I’ve made many self portraits with the camera mounted on a a tripod and triggering the camera with a remote or worse yet using the timer and running back to get the photo. It takes lots of effort. And, while it has a professional look I haven’t always ended up with the ideal expression.
I have an idea for you. Get together with a fellow professional photographer and take each others head shot. I guarantee you’ll have a good time, learn something new, (‘cuase we all lend to light a bit different) and end up with a portrait you’ll be proud to use for the next year…*
This was photographed using a wide open garage door as the light source. A black fill was used camera right to add some dimension. Captured with the Lumix GH4 and the 35-100mm Lumix Vario f 2.8 lens
Here’s a different look clothing and pose same lighting.
And here’s one that has a totally different lighting scheme. This was done with three Pro Photo B1 lights ** and a white reflector. The main light was camera left and encased with a 36 inch Octobox. The fill light was an umbrella bounced into the white ceiling of the 8 foot garage. A third light was used to add a background light. You can see when you craft the light you can get lots more depth to the photo.
* Notice I said next year, not the rest of your life. If there’s one thing that’s worse than a crappy selfie it would be one that is out of date…
** The Pro Photo B1 lights were pretty sweet to work with. Very powerful and versatile. They are battery powered heads meaning no cords to be tripping over and these were matched to the TTL of the canon camera that Silvio uses.
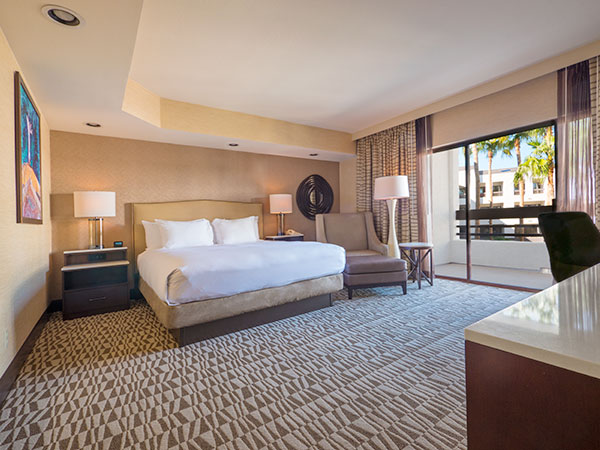
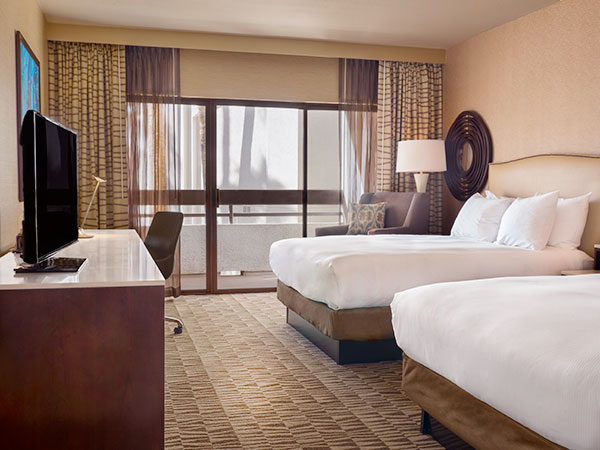
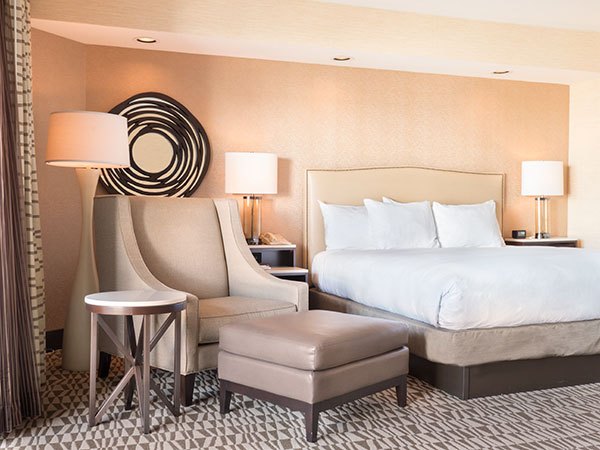
Had a full day shoot for the Phoenix Airport Hilton. They are going through an $8M renovation with a complete redo of all the rooms and an update on all the common areas in the hotel. They have asked me to photograph the changes. This is the second shoot and we are planning another two day shoot once the lobby and and a few other areas of renovation are completed.
Here are a few from the shoot…
Arizona King room photo at Hilton Phoenix Airport Hotel
Double Queen Room
Junior Suite Room
Images were captured with the Lumix GH4 using multiple exposures to capture the full range of tones from the deepest shadows to the view outside the windows. A handy tool is the on-board WIFI which allowed me to control the camera from the Panasonic App. Not touching the camera makes layering the multiple exposures more accurate because even when your camera is locked down on a tripod any touch of the camera can cause the images to not be in perfect registration.
When photographing for Hilton properties they have guidelines that include no curtains being closed in the room photos. I use a variety of techniques adding some light to the original capture and blending the various exposures using masks in Adobe Photoshop. For those who haven’t already made the upgrade to Photoshop CC 2014 here is a link to $9.99 per month Photoshop and Lightroom)
Sometimes you just want to add a little kick off light to a small area to bring out some detail and the small Fiilex P100 LED light comes in handy. It has the ability to adjust color temperature which is important in mixed lighting situations when working in rooms with natural light coming through the windows and the light from the light fixtures. (order fiilex light here)
Here’s a tip to save you some time in post production. Replace lights in lamps and ceiling fixtures with 15 watt bulbs. This will allow the lamps to read as lit but not give you blown out areas in your captures. It makes a huge difference in the amount of time in post.
Had the opportunity to test out the Fiilex LED light kit model FLX302 which includes three P360EX lights, stands and barn doors in a watertight rolling case. I used this kit on a real estate shoot a couple weeks ago You can see some of those results here.
I thought I’d give these bad boys a workout in the studio with a still life project. Again the ability to see the lighting exactly as it will appear in camera allows me to get a bunch of different looks in a very short period of time. Having the ability to change brightness and the white balance of the lights from the golden tungsten color temp of xxx to the brighter blue of xxxx adds to the creativity.
Here’s a quick animated GIF to show many different looks using just the three lights, a shoot through umbrella and a piece white of foam core as a reflector.
Many different lighting versions using the Fiilex LED’s
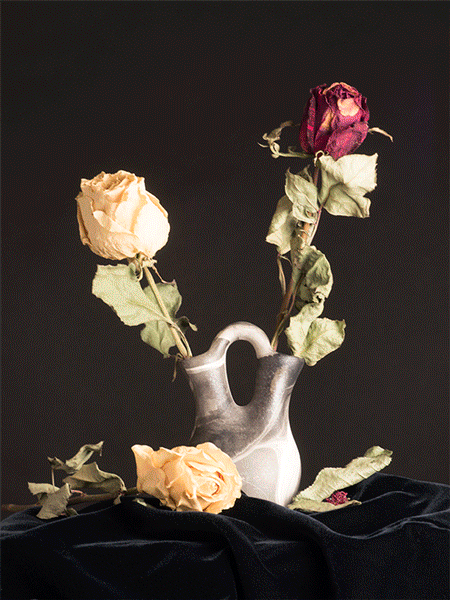
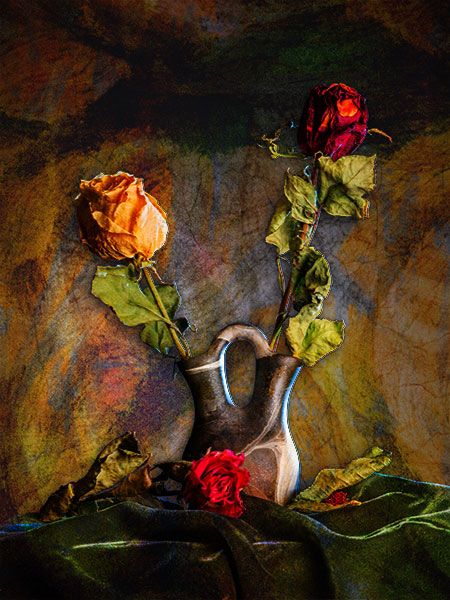
Once I have the initial image captured in studio it’s time to put Photoshop to work. Using multiple images of tectures, layer masks and blend modes I take the image to my artistic place. Here are a few versions…
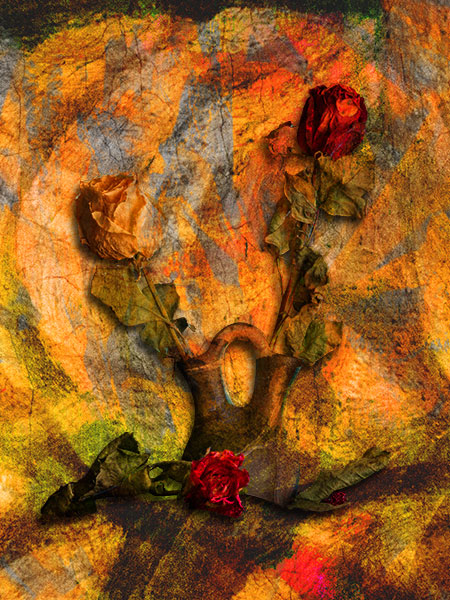
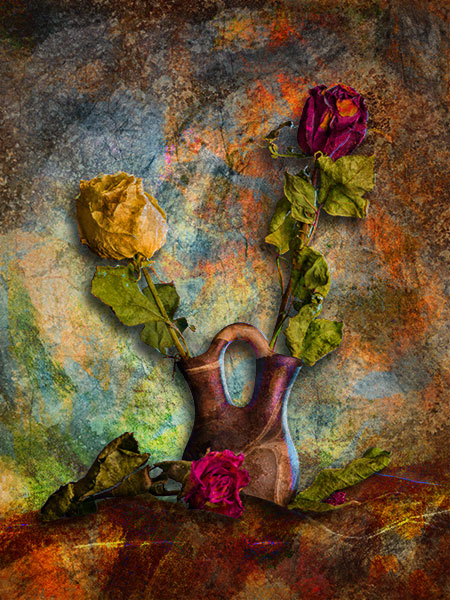
From the initial image captures above it’s time to experiment with various textures and color palettes.
I’ve found many people like warm golden tones.
As they say variety is the spice of life. So more colors! More texture. Play! Experiment!
Images were photographed with the Lumix GH4 and the 35-100 f2.8 Lumix Vario Lens ISO 200 1/6 sec @ f4.5
Yours in Creative Photography, Bob
PS – Making purchases at Amazon through the links on this site help support the information. Like what you read? Click a link! Thanks!
We get to make a bunch of them and I’m still playing with ideas as I explore the photographic world in which I have chosen to immerse myself. How about you?
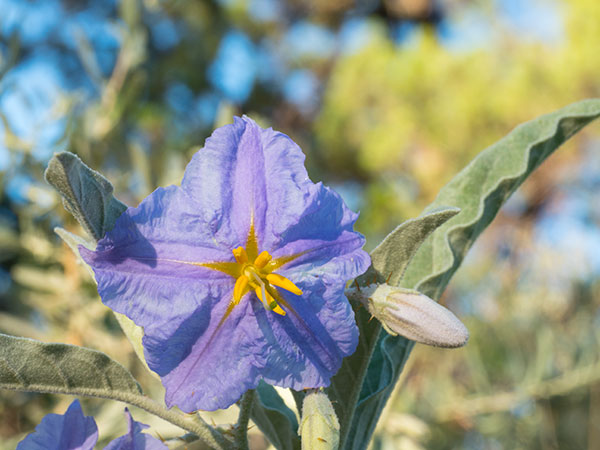
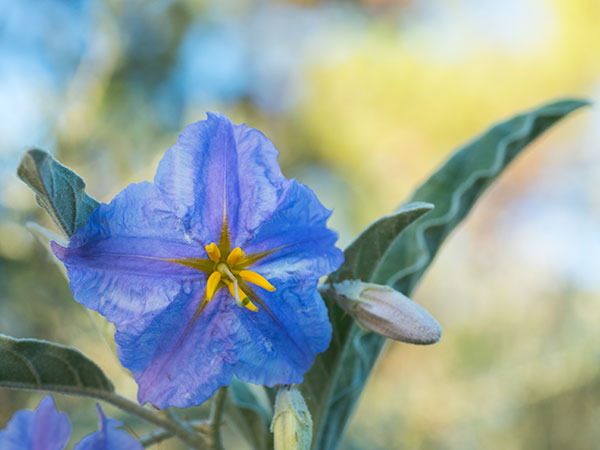
What kind of decisions can we make to change the look of a single scene? Here’s an example of three images made with a Macro lens of a flower that is about the size of my thumbnail.
First capture of the White Horsenettle. Full sun. Looks a bit harsh. (why do they call it White Horenettle when it’s lavender??)
Placed a 20 inch scrim from a Westcott 5 in 1 to increase the size of and soften the light.
This has the effect of softening the shadow edge transitions and, to my eye, renders the flower in a more pleasing fashion.
Same capture with lighting as above but changing to a wider aperture softening the background allowing the flower to stand out more.
These are very similar images with subtle, and not so subtle, variations. Could there have been more choices made in this capture? You betcha! Could have taken a higher angle and not included the sky area. Could have changed the composition. Changed the lens. Changed the camera distance to subject. Could have added flash. Could have moved the scrim to the shadow side and reflected light into the shadows. You get the idea…
Point is when you have a subject explore the many possibilities and variations because it’s not unusual to improve on your images as you ‘work the scene’.
Capture information – Camera: Lumix GH4 Lens: Leica DG Macro-Elamarit 45mm f2.8 Aspherical Extension tube: Vello 10mm
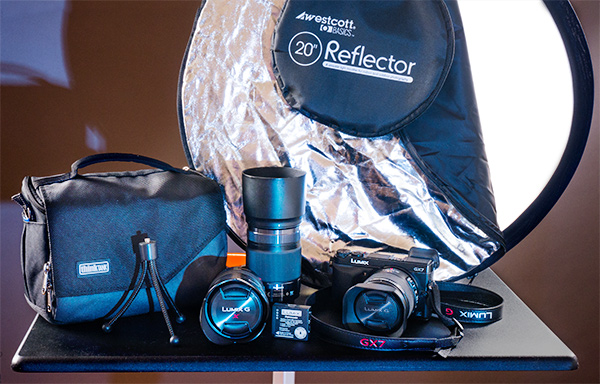
Thought I’d share what my shooting kit is these days for a couple different scenarios. Panasonic Lumix has made me lean and mean these days. My favorite camera for travel and for hiking is the Lumix GX7. It has all the features I like and has an extremely low profile. The screen tilts up and down for low angles or overhead shooting. The screen is quite viewable even in bright sunshine but just in case there is a 90 degree moveable viewfinder. The camera is capable of in-camera HDR or up to a seven stop auto-bracket, in-camera Panorama, and a host of other specialty settings I’ve been enjoying putting through its paces.
Let’s start with the hiking kit as you see pictured above. 45mm Leica DG Macro-Element f2.8 Aspherical lens for going after those close up details like flowers. Added to that the Lumix Vario 12-35mm f2.8 for the medium to wide angle scenic landscapes and the Lumix Vario 35-100mm f2.8 to help compress longer distance scenes or trying to reach a bit further. Note the mini-tripod. I tend to hike more often traveling light which means no full size tripod but with the mini I can place on or lean against a rock, tree, car or fencepost to help steady the camera. Very handy indeed. Of course, a fully charged spare battery is always in the kit. The Westcott twenty inch Five in onewhich folds to a very manageable 8 &1/2 inches rounds out the equipment list. So I’m covered from 24mm to 200mm – 35mm DSLR equivalent along with a MACRO and it weighs less than four and a half pounds.
Conversely, my DSLR weighs four and a half pounds with a single lens.
Wildflowers captured with the 45mm Macro
For travel I swap out the 45mm Macro for the 7-14mm f4 Asperical lens which covers me from 14-200mm 35mm DSLR equivalent and I the kit is still well under five pounds.
Both kits are supported by the Tenba Mirrorless Mover 20 bag which fits comfortably on my belt and holds all the lenses and gear including spare cards, cleaning cloth, etc.
Shadow edge transition. Origin and source of light. Specular highlights. Split light. Rembrandt light. Harsh light. Soft light. Nummy light (that’s one of my own!). Inverse Square Law. Fall off. Lighting ratios.
When I started to study auxilliary lighting for my photography I found that seeing the light and working with the light became easier when I learned the language of light. The brain seems to need more ways of expressing what you see in words in order to expand possibilities.
The reason this comes up is because I am reviewing information to share with a couple of Pre-Convention classes I am teaching at ImagingUSA in Phoenix. This led to looking for other people to study from and some book selections that would be a good addition to anyone’s library.
Names to watch for when looking for photography lighting – Dean Collins who is only available through videos captured while he was touring. Some are online available via searching or you can order his complete set of Finelight Videos from Software Cinema Joe McNally, John Hartman, Tony Corbell, Scott Kelby, Mike Fulton, Fuzzy Duenkel and more…
For infrared conversion of my cameras I use LifePixel. Infrared allows you to put an older camera to use and opens up a new time time of day for productive image creation.
Learn Photoshop in a fun environment. Aaron Nace applies the right amount of fun with easy to understand and follow tutorials. Actions and brushes are included with lessons!
Best embroidery ever. Give Queensboro a try, get a $20 instant credit to get started by clicking on the logo! They specialize in great quality custom logo apparel and promotional products with the best customer service.
Platypod has become a great resource for being creative in getting your camera gear easily into unusual places. As an Platypod Pro I get to work/play with the gear even before it comes out. Head over to Platypod, subscribe to the newsletter and you will get special discounts reserved only for subscribers.