Pre-visualization.
And, the anatomy of post production of an image to meet the pre-visualization. That’s what we’re talking about today. I saw the final image in my head before I even made the photo. (if I could only get there in time) Here’s the story…
Esteban is an extremely gifted artist with the guitar and I have been fortunate to photograph him on numerous occasions. This last time (see post here) I made images of him for marketing and promotion I was gifted with seeing a lighting situation during a live performance that I knew would be wonderful in color. And, then especially in black and white. If only I could get to the right position, with the right lens, before the dynamics of the situation changed.
Moved quickly across the room while changing lenses. Dropped to the floor and fired off about 8 frames before he came out of the position and the lighting changed.
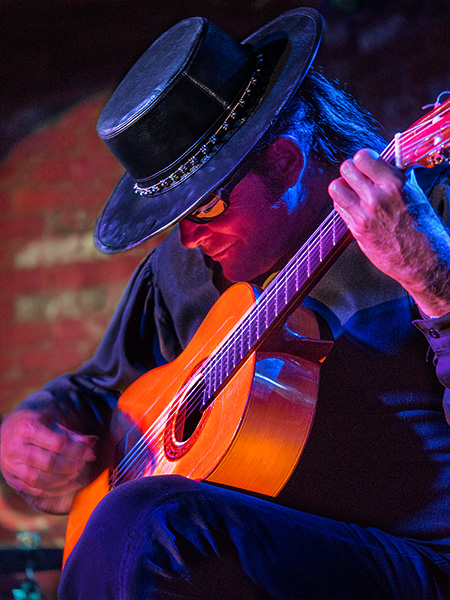
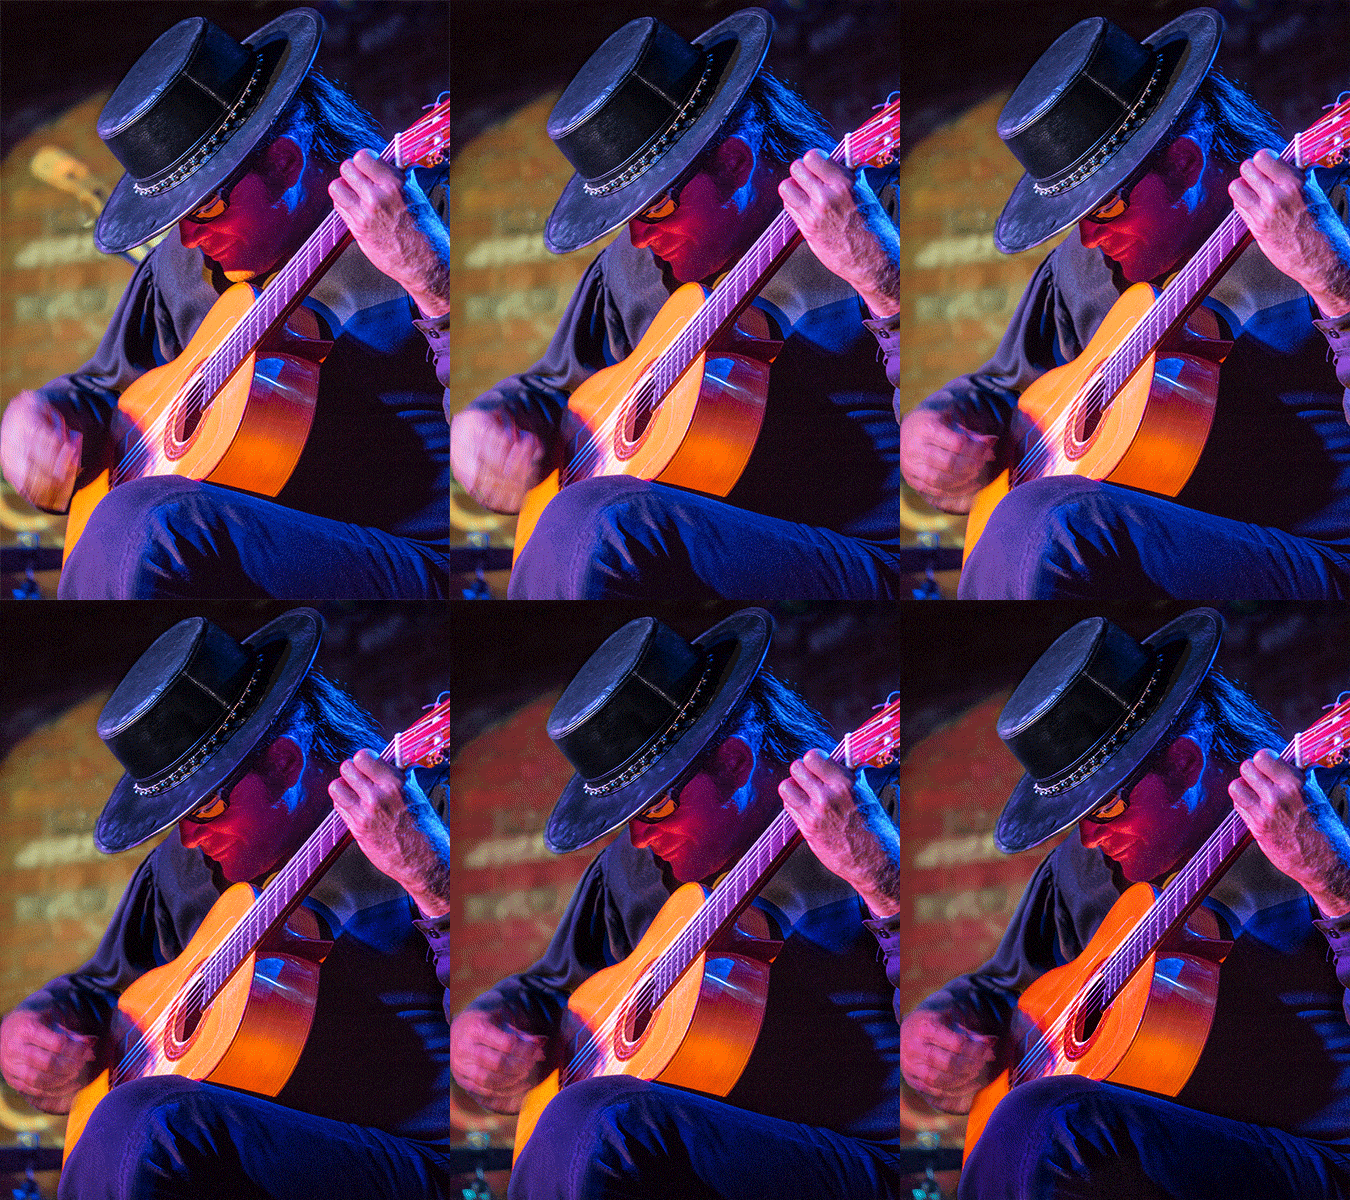
Here’s the color version followed by an Animated Gif showing the steps of post production…
Esteban playing guitar after post production. See the animated .gif below for most of the steps used.
Straight out of camera. Remove background distraction. Add a Tonal Contrast and Glamour Glow with NIK filters. Bring back some detail in strumming fingers from another capture. Burn some highlights. Tone down clothing to shift focus. Tone down background. Tone down guitar.
Toning was done with a variety of techniques including Curves Adjustment Layers and Soft Light burn layers. You see how we can drive the focus to where we would like the viewer to look first. The eye goes to the area of highest contrast. Then the viewer is invited to look around in the image by the use of diagonal lines in the composition.
Tomorrow this will be taken to another level when the image is converted to black and white followed by more adjustments.
Yours in Creative Photography, Bob
PS – Original image was captured with the Lumix GH4 with the 35-100mm f2.8 Vario Lens under stage lighting conditions during a live performance.


