Morning hikes in Sedona are a great excuse to test out some of the features of the Panasonic Lumix GX7.
Yesterday’s test involved one of my favorite features in the camera – in panoramic stitching. The images below are of Courthouse Butte on the loop trail from Bell Rock Vista trail-head in the Village of Oak Creek. Both images were captured from the exact same place with the exact same settings. The camera was set to capture vertical panos to give a bit taller image. Exposure compensation was at minus 1/3 of a stop to increase saturation just a bit. The camera must be set to capture in jpeg because the file is being processed in the camera. RAW doesn’t cut it in this situation. If you wanted the value of RAW capture you would have to make multiple exposures and the process the files in Photoshop or another stitching program a much more labor intensive deal.
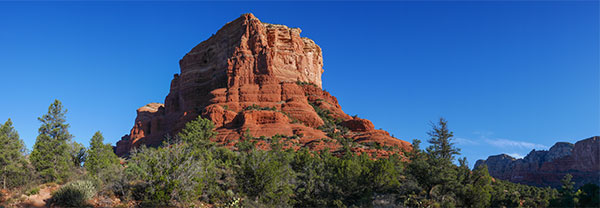 Panorama of Courthouse Butte in Sedona, Arizona panned at a fast rate of speed. Image was 54MB when opened
“Wait a minute Bob! You said these were both shot with everything the same on the camera but they are very different…” Yep they are and that’s the point of today’s post. The technique you use when making the capture is important. On the bottom image I moved very slowly so more on the frames were overlapped. In this case I felt I wanted a more “panoramic photo” aspect ratio so I did it again at a faster rate of speed starting further to the left and was able to capture a lot more of the landscape. Regardless of how fast you pan good technique is key to getting a good pano. Hold the camera tight to your forehead with elbows down. Point your feet toward the end direction of the image. Then coil your waist back to the starting point. Begin shooting while keeping the camera level. Use stomach muscles to rotate through the end of the pan. Check your results by reviewing the image on the camera. Happy with the result. Move on. Not sure? Try again at a different speed of rotation.
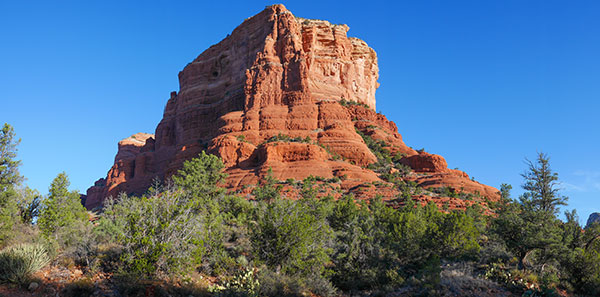 Panorama of Courthouse Butte in Sedona, Arizona panned at a slower rate of speed during capture. Image was 38MB when opened.
Just because you are shooting in jpeg doesn’t mean you can’t use Adobe Camera RAW to help process and tweak the image. From Adobe Bridge highlight the image(s) you would like to process and hit Cmd ‘R’ on MAC or Crtl ‘R’ on the PC and you can work on the images. In this case I used the Shadows Slider to open up the shadows just a bit to reveal some more detail and gave the Saturation a little bump.
If you have any questions about this technique or any other you’ve read about on Successful-Photographer don’t hesitate to ask. Interested in attending a workshop in Sediona? Let me know. I’m starting to gather ideas for an intimate workshop with 1-4 people that would include hiking trails, & Photoshop concepts and art ideas…
Yours in Photography, Bob