Photographer Muse – Part Two (or Deux if you prefer)
I shared how much I enjoy working with Pash. I can’t give her enough credit for coming up with concepts she would like to pursue that lead me to new imagery. She knows how to move, and hold a pose, when necessary. Both are equally powerful skills. See my original post about my muse here.
Learn more about Pash and her work with modeling, mask making, performance and more here.
And now to the images.
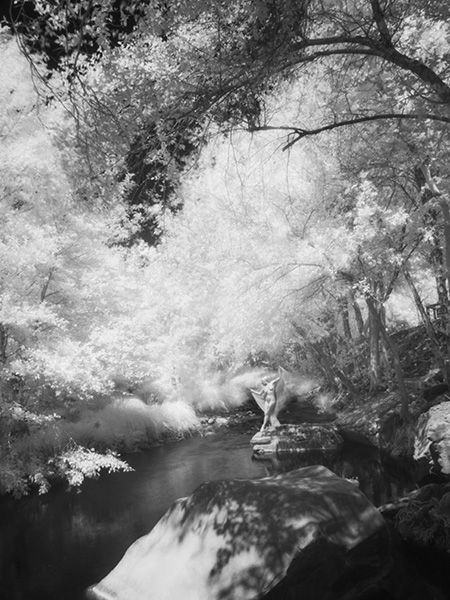
 This image is pushed to high exposure.
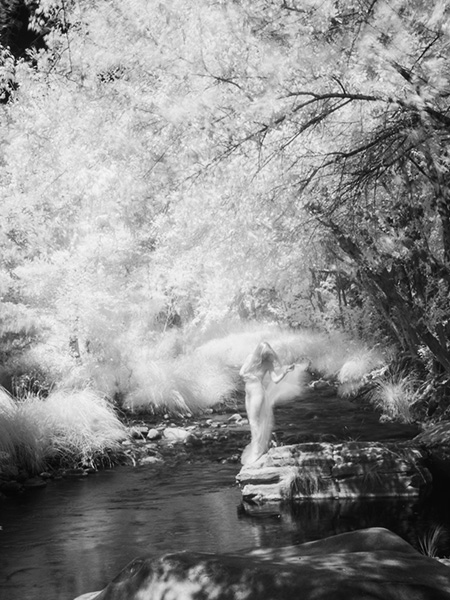
Going very high key with the exposure of the image with the ND filters in place allow the wind to play a part giving an even more ethereal feel to the image as the leaves and cloth wrap blow gently.
ND filters are by Tiffen. It’s the Pro100 package which includes the holder, a 1.2, and a 1.2 graduated filter. For this shoot, I had a 3.0 and the graduated filters. You can buy much less expensive filters but in ND you get that for which you pay. These are very thick optically pure glass filters.
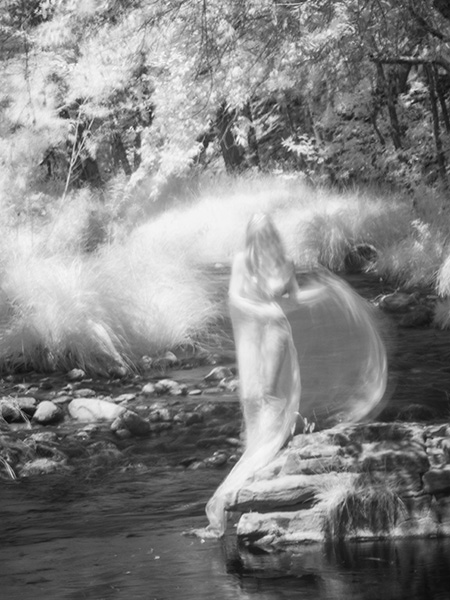 This one turned out a bit spooky!
 All the images were photographed in the same space, but all have a different feel.
A different view of the creek and the amount of space my model Pash takes up within the frame makes for a very different look for all the photos. Let me know which one is your favorite and why. It would be interesting to see the various responses.
All images were created in Infrared made with Lumix G6 converted by LifePixel.
A 14-140mm (28-280mm 35mm equivilent) lens was used. This allowed for the significant changes in framing without spending time swapping out lenses. Files were processed with Adobe Photoshop and Skylum’s Luminar 2018.** Some images were givin a little extra glow. I set up a preset in Luminar to get the image close to where I wanted then tweaked from there.
If you haven’t captured photos in infrared with a digital camera here is what a file looks like when downloaded in RAW to the computer.
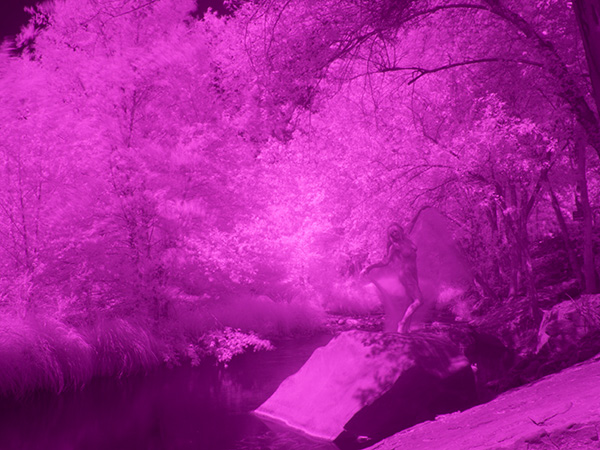 SOOC Infrared RAW file.
The files captured in the IR spectrum need some work as you can see. The nice part of using the Panasonic camera with live view set to monochrome allows you to get a better idea of what the final image will look like. If you shoot RAW plus jpeg, you will end up with a magenta version as above and a black and white version. Can be very handy when you first start shooting IR.
Yours in creative Photography, Bob
PS – Save $10 on Luminar 2018 by using the Promo Code COATES