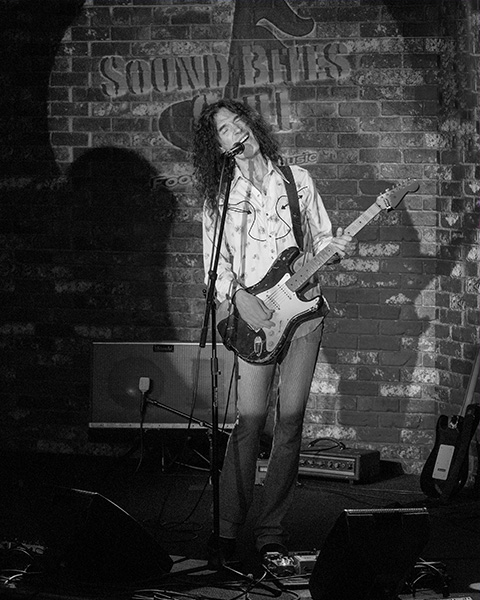
Last Saturday night I was on hand to photograph not one but two wonderful artists at Sound Bites Grill in Sedona, Arizona.
Part of my job there is to capture the musicians live on stage and create artwork for the Sound Bites Grill ‘Wall of Fame’. The other part of my gig is to create ‘straight’ photography images to help in promotion and things like press releases for when the artist returns for a future performance.
Here’s a description from his web site where you can check out his music. (I particularly like ‘Everlasting Desire’!) “Propulsive, melodic rock guitar in the hands of Grant Ferguson is a powerful reminder of the instrument’s glory days. Influenced by some of the great axe masters: Jeff Beck, Gary Moore, The Edge and others, Ferguson is pushing his all-instrumental sound toward a new rock vision.”
Grant Ferguson makin’ some beautiful sounds flow from his guitar. – Camera Lumix GX8
Live on stage at Sound Bites – Camera Lumix GH4
Grant captured with the new Lumix GX8. All images used the Lumix 35-100mm f2.8 lens
Following Grant’s set there was a break and we heard from Blues guitarist Leroy Miller.
A little about Leroy from his web site. Check his music (Try Over You from the self titled album) “Los Angeles blues sensation Leroy Miller has worked on countless recordings for music’s brightest stars like John Mayer, Macy Gray and Smash Mouth. Leroy has toured all over the world as a supporting act for bands such as Aerosmith and the Dave Mathews Band.”
Leroy Miller got the crowd up and dancing with his high energy rock guitar. Camera GX8
Leroy Miller – Camera Lumix GH4
Leroy Miller wailin’ it! Camera GH4
In putting the images together I make conversions to black and white for all of the press images. This guarantees the best look when printed on a press. If someone just converts a color image to grayscale the reproduction of the detail can get lost especially in newspaper reproduction. I often use Google’s NIK Silver FX Pro 2 for making the conversions. It gives me lots of options to make the Black & White have tones from light to dark without getting muddy or flat.
On this shoot I tried out the new Lumix GX8 for the first time under LED stage lights to see how it held up to the dark shadow areas and the lack of full spectrum in the stage lighting. I was impressed. While I would replace my GH4 camera with the GX8 I wouldn’t hesitate to use it as a back-up or grab it in a pinch. The quality of the images wouldn’t suffer one bit.
Yours in Creative Photography, Bob
PS – I’ll show the Grant and Leroy’s ‘Wall of Fame’ images in a couple days.
** ** I am not a health professional. I do not play one on TV and I didn’t even stay at a Holiday Inn Express. Please consult your doctor or health professional before adding exercise routines to your lifestyle.
Starting in part two I share things that can help after you’ve sustained a back injury. Of course seeing your doctor, chiropractor or physical therapist should be your first stop to get diagnosed and begin the healing process. I’ve worked with all of the above health professionals at one time or another. It wasn’t until I worked with my physical therapist that I began receiving instructions on proper exercise techniques and exercises for proper stretching and care of that marvelous mechanism called the spine. (see here for part one)
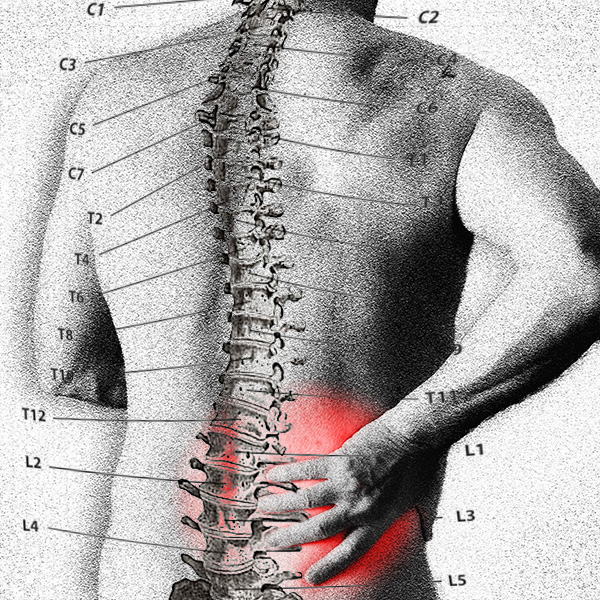
When it hurts it can be excruciating…
So how do we help it to stop hurting?
Proper exercises to align all those bitty pieces back into the space they were meant to be. One system that I found to be extremely helpful was from Pete Egoscue. There are clinics around to help you with this but I found his books and careful application and paying strict attention to the instructions to be quite helpful. This book was recommended by a massage therapist. Pain Free – A Revolutionary Method for Stopping Chronic Pain
Egoscue and his writing partner Roger Gittines share very specific exercises and body position to get you re-aligned and I’ve found them to be extremely helpful. They are so sure of themselves the obligatory message like you see at the top of this page with a legal disclaimer about seeing a doctor etc… is omitted. He urges readers, “who feel they need the disclaimers protection and counsel to close these covers and leave the pages unread. My working principle as an author and exercise therapist is that the most important consultation is the one a person has with him- or herself. Any disclaimer that suggests otherwise does a great disservice.”
IN the introduction They go on and share a philosophy I believe in, “Being pain free takes personal effort and commitment. It doesn’t come from a pill bottle, a sugeon’s knife, a brace or in specially designed mattresses, chairs and tools…. The following pages show you the way. It does not involve high-tech medicine or elaborate physical therapy routines.”
He shares his views on how the body operates and gives you simple directions on how to get it back to your optimum condition.
A More Advanced Option
Another book by the same authors take you to another level of conditioning and exercises to support specific sports. The book is fulll of common sense advice. There’s a little over twenty easy, effective exercises that help to strengthen, stretch and relax your body which gets you back into proper alignment and form. I have used this book also and find it effective in prevention of injury. Here’s the link… The Egoscue Method of Health Through Motion
Final Thoughts for This Post
It’s not magic. It takes some time, thought and attention to not end up with pain from working as a photographer. I hope you’ll look into the prevention of injury. But if you get injured I hope you will look into ideas that allow you to do most of the work and healing yourself with the guides I’m sharing with you in these posts. The next installment of Photographers Health Back share another way to help yourself heal in the quickest way possible with as little outside intervention as possible.
** ** I am not a health professional. I do not play one on TV and I didn’t even stay at a Holiday Inn Express. Please consult your doctor or health professional before adding exercise routines to your lifestyle.
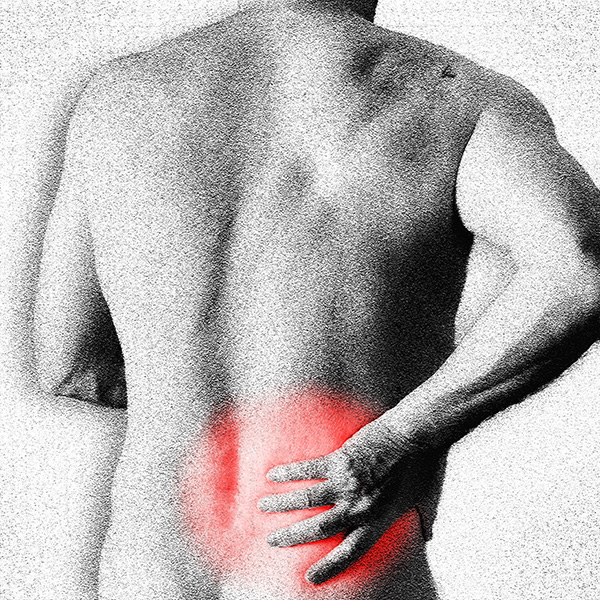
Arrrggghhh!!
I have made this exclamation on more that one occasion (OK maybe there were a few choice words of the not so nice variety thrown in for good measure, but this is a relatively G rated blog) when I felt a disc slip or back go way out leading to excruciating and sometime debilitating pain.
This happens because of improper care and feeding (and use of) your body.
We as photographers tend to use and abuse ourselves without even realizing it. We carry heavy gear. We support weights in unusual positions. We hold uncomfortable positions for long periods of time waiting for ‘The Moment’.
Back pain can strike at any time…. Less often if we prepare properly!
Some Back and Lifting Basics
OK let’s stop the wrong behavior and get things into prime working order. First let’s review how to lift and carry loads properly. Here’s a link to a slide show from the Mayo Clinic on proper lifting techniques. Essentially you want to plan your attack. Where are you going to put what you are picking up. Bend from one knee or squat using your legs to do the lifting, not bend from the waist. Engage your core. tighten those stomach and core muscles to steady your back. If an object is too heavy for you don’t ‘Superman’ it – find someone to help or lighten the load and make more trips. Trust me it’s worth making more trips that you think will take you too much time now than to tweak your back and end up in pain for days or weeks and possibly loosing lots of work time!
After a long day shooting how do you feel? Would it surprise you to know that you should feel fine? If you are using proper photography techniques you should not feel back pain even after a long day at a wedding or chasing toddlers around your studio. When I was having consistent visits with my Chiropractor he suggested I might be hurting myself while photographing and I poo-pooed the idea until he suggested I have someone video me while I worked. Upon review of the video I was shocked! I found myself in unneeded bent up and twisted positions. Instead of moving my feet to keep my body aligned and supported properly I was consistently leaning and twisting to get the camera into position putting unneeded stress on the back and spine.
Tip – Have someone video you while you work. Review then build new habits for proper body positioning for less hassle with your back health.
Prevention!
A great way to avoid severe pain is to prevent it in the first place. The tips above can help with that but to really protect yourself getting in shape and building stronger body muscles is key. Please work with a professional especially when you first start out in any exercise program. Doing exercises improperly can cause damage or create pain that will keep you from coming back to the exercise floor.
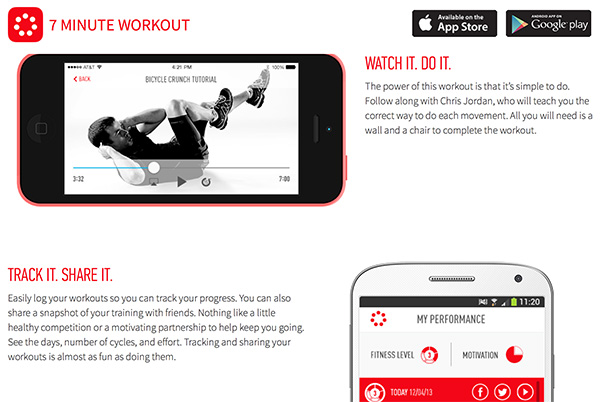
Here’s a solid, simple (with video instructions) exercise program with which to start. It’s the Johnson & Johnson Seven Minute Workout. Based on HIT – High Intensity Training techniques. Don’t let those words scare you! Basically it means you perform an exercise for 30 seconds followed by 10 seconds of recovery followed by the next exercise. The J&J team do a great job of instruction and keeping the workouts fresh. The nice part is it’s a free APP to download to your Smart devices like phone or tablet. In spite of the solid instruction in the videos I still recommend you get a trainer to coach you through the exercises the first time around to be sure your have good form.
There’s more but, this is a good start in protecting your back. Stay tuned for Parts two & three of ‘photographers health – back’ in future posts on Successful-Photographer.
Yours in Creative photography, Bob
** I am not a health professional. I do not play one on TV and I didn’t even stay at a Holiday Inn Express. Please consult your doctor or health professional before adding exercise routines.
Playing some more with the in-camera panorama stitching on the Lumix GX8 again… This time in the Village of Oak Creek with Bell Rock and Courthouse Butte as the stars of the show. I used the 20mm f1.7. This combo worked very well when keeping the lens pointed straight ahead. If you tilt the camera up there will be a bit of bending of the horizon.
Here’s the original capture SOOC with a minus 2/3rds of a stop exposure adjustment to bring down the sky to a deeper blue. One of the benefits of being able to see what you camera is capturing I could tell that it was going to be a bit overexposed before shooting.
Here’s the finished image with a bit of post production. Darkened the road. Removed a couple vehicles. Increased saturation a little. Added some contrast with Google’s NIK Detail Enhancer. The only place I ran into a stitching evidence was after applying the Detail Enhancer the blue portions of the sky showed the beginnings of unwanted lines. Using a Layer Mask took care of that problem.
This image could easily print to 14 X 42 inches and probably larger if I wanted to work at it a bit and depending on what material I was printing on.
The gift of Professional Family Portraiture to a family that is losing a child at birth… Is priceless.
It’s recruitment month at Now I Lay Me Down To Sleep and I encourage you to consider becoming an affiliated photographer. There is a tremendous need. When I first heard about the organization and it’s mission I thought, “There’s NO WAY I could ever do that!” Eventually after attending a seminar put on by Sandy Puc I decided to try. Over the years I’ve been with the organization in many roles, as a photographer, trainer, board member & image reviewer as I see this is an amazing way to give back to the community.
You can do it.
Is it easy? Nope
Is it rewarding? Yep
“Now I Lay Me Down to Sleep is one of those ways that I enjoy serving my community as a photographer. When a Now I Lay Me Down to Sleep call comes in, I remember why I love photography.”– Mike Fulton, NILMDTS Area Coordinator and Affiliated Photograph
Learn more from the videos below and the NILMDTS web site.
Last night I was at my local and the Lumix GX8 with a 20mm f1.7 lens was in my hand. Played with some presets. Shot RAW and jpeg.
And, since I wasn’t really thinking I never moved away from the 1.7 f stop. But, it’s pretty amazing what you can do in post to save an image. Just to make it a little tougher I used one of the saved jpegs with a deep BW setting to work with.
The first image is straight out of camera.
This is SOOC with a deep contrast BW setting from the camera
I opened the above jpeg in Adobe Camera Raw by highlighting the image in Adobe Bridge and pushing CMD R MAC, (CTRL R PC) This gives you all the controls or ACR although it doesn’t give you access to the RAW info of the file it allows you to use the adjustment tools.
In this case I added a good dose of clarity to add a bit of tooth to the image, opened up the shadows, knocked down the highlights and opened up the shadows just a bit with a curves bump. Both have an interesting feel but I feel the second one with just a touch more punch worked better.
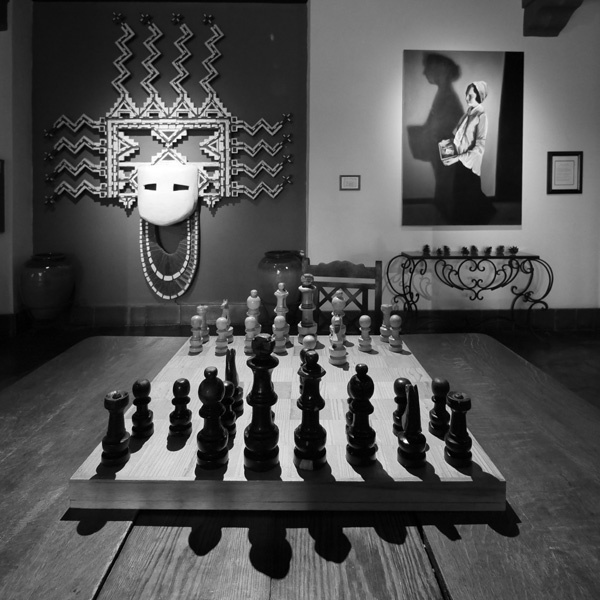
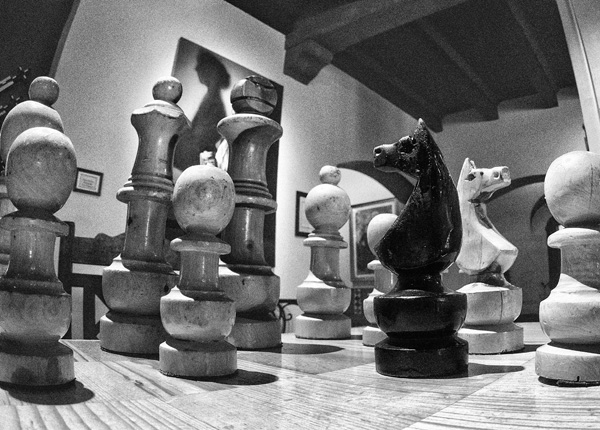
I believe you need to look around before you can see. And, you need to spend time seeing before you can create a vision with your photography. This is a post about an exercise I did and ask people to do to expand their vision. There are many variations on forcing yourself to study an area until you’ve come close to exhausting the photographic possibilities. In this case the ‘assignment’ was to photograph this subject without moving more than 5 feet in any direction for a minimum of 30 minutes to an hour.
Having a capable camera with you at all times helps to define your vision. The low profile and light weight of the micro 4/3rds system makes it easy for me to be more creative. In this case various Lumix lenses and the Lumix GX8 were used in the capture…
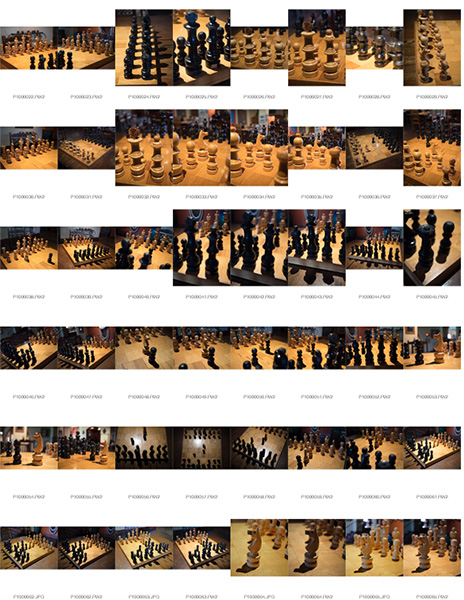
Here are contact sheets from the shoot followed by some of my favorites from the shoot…
Contact sheet one images are SOOC (straight out of Camera)
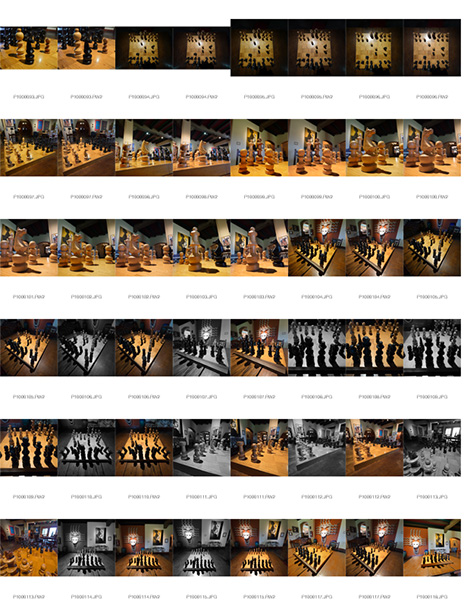
Contact sheet 2
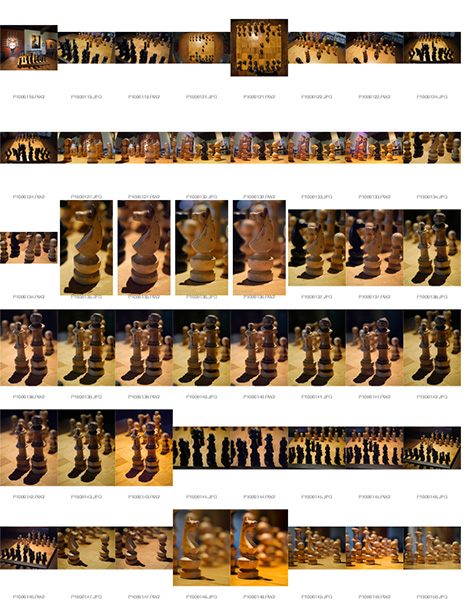
Contact sheet 3… There were about 4 plus contact sheets all together but you get the idea!
Below were a few of the images I worked up from the session followed by a Time-Lapse of the shoot.
Black and white turned this into a very graphic feel and tells the story of ‘Place’
Aerial view with fish eye lens
Mood piece with some NIK Color Pro 4 FX. Dreamy…
Then it was on to the story of the Knights.
Many other images were captured during the ‘assignment’ but these were the ones I thought I’d share.
Time-lapse showing the shoot shot with Lumix FZ1000 mounted on tripod capturing an image every three seconds. Processed in camera to MP4. Very cool feature!
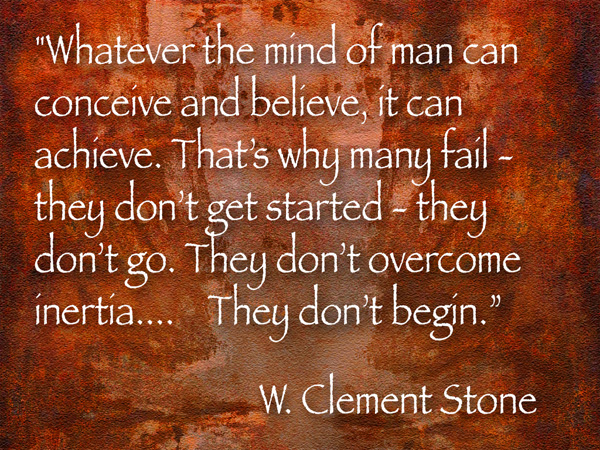
W. Clement Stone added to the quote by Napoleon Hill to add in the information that essentially is Newton’s Law of Motion, and I believe, effects each of us every day. If we are not aware of the forces of our mind and nature we suffer the consequences.
“Whatever the mind of man can conceive and believe, it can achieve. That’s why many fail – they don’t get started – they don’t go. They don’t overcome inertia… They don’t begin.” W. Clement Stone (Napoleon Hill)
After Napoleon Hill’s book Think and Grow Rich he teamed up with W. Clement Stone to write Success Through a Positive Mental Attitude and added these words to the well known phrase, “That’s why many fail – they don’t get started – they don’t go. They don’t overcome inertia… They don’t begin.”
And there is the crux of the problem leading to success. They don’t get started. If you have an idea, act upon it. Get going. Apply Newton’s Law in Physics. Newton’s first law of motion is, “An object at rest stays at rest and an object in motion stays in motion with the same speed and in the same direction unless acted upon by an unbalanced force.” We human beings are the same way. Once we start on a project it is fairly easy to keep going. Getting started can be the hard part, excuses abound.
Get in motion.
If you have trouble with that get Hill’s Think and Grow Rich and read a chapter a night. Put the book up for a month and then read a chapter a night with a highlighter and note the passages that will help you. Put the book up for a month. Repeat with a different colored highlighter passages you didn’t note before but for which you are now ready. Now the book is ready to be reviewed on a regular basis and can be gone through in a very short period of time. We need reminders when we get off track and I’ve found this to be very handy (matter of fact, it’s time to break out my well worn copy…where did I put that??)
You ask, “Bob what does all this have to do with photography??” Personal photography projects are one of the best ways to refresh you. To change your business in the direction you want to go. But we often don’t get started on them because we “don’t have time.” I disagree and I think you’ll find the motivation you need following some of the ideas above.
During the rainy season here in Arizona it pays to keep a camera nearby and one eye peeled for the ever-changing weather conditions. I was at dinner and noticed a rain shower passing by and thought I’d better go scope it out. I had the Lumix FZ1000 with me when I checked outside to find this rainbow (trying to double-up) from the deck at Sound Bites Grill.
Working on a double rainbow over the red rocks of Sedona
I used the Panorama Mode to capture the entire rainbow. With the FZ1000 I had to make a few passes for this scene because there was nt a lot of detail in the sky for the software to see and stitch. I was wishing for the Lumix GX8 or the G7 as they have new stitching that does a better job in situations like this. The FZ1000 has so many easy options it’s hard not to make it your carry around camera. Next time I’ll grab one of the others and my small Think Tank Mirrorless Mover 20 bag with a couple lenses to add a few more options…
I should also have captured a series of RAW images for later stitching in Photoshop or Autopano Pro. Next time.
For infrared conversion of my cameras I use LifePixel. Infrared allows you to put an older camera to use and opens up a new time time of day for productive image creation.
Learn Photoshop in a fun environment. Aaron Nace applies the right amount of fun with easy to understand and follow tutorials. Actions and brushes are included with lessons!
Best embroidery ever. Give Queensboro a try, get a $20 instant credit to get started by clicking on the logo! They specialize in great quality custom logo apparel and promotional products with the best customer service.
Platypod has become a great resource for being creative in getting your camera gear easily into unusual places. As an Platypod Pro I get to work/play with the gear even before it comes out. Head over to Platypod, subscribe to the newsletter and you will get special discounts reserved only for subscribers.