
by successfulbob | Guest Post, Marketing Monday, photography
Portrait Pricing Guidelines – Part Two – Marketing Monday
with Steve Bedell
See Part One here
This article is from EPhoto Newsletter, a free bi-weekly newsletter for professional photographers. To subscribe for more great info contact Steve at smbedell@gmail.com.
Mistake number 4: NOT doing in person sales!
First, you have to remember I’ve been doing this since the mid 70’s. How else could we sell except for in person? I’m continually baffled by newbies who have been doing shoot-and-burn are afraid to do IPS.
To me, it makes no sense to do it any other way. If you want to make very little money from each session and not have your client get the beautiful products that they deserve with your professional guidance, post photos online. Then they can see all the photos, send links to every person they know, and not need to purchase a single thing. You just cut your knees off. Go do 10 more jobs for each one you could have done doing IPS.
IPS takes skill. There are many courses and ways available to you, go pick one; that is beyond the scope of this. It requires you to guide your client to choose the best images, discuss retouching, framing and artwork and also choose products that they will enjoy. This is critical if you want with income you deserve for your hard work and skill.

Mistake number 5: Retouching preview prints.
I see photographers online constantly bemoaning the fact that all they do is retouch and they live in front of the computer. Part of it is because they spend time ‘pre-touching’ prints because they don’t believe the client can visualize the final prints. Give them more credit and stop fixing 40 images when they may only buy 3-5. See how much time that saves you.
There may be some instances where the finished print is a composite or has things added for some reason but for routine portraits, you’re wasting a LOT of time.
Mistake number 6: Justifying your price
We’ve all seen the posts that go into great detail about how much it cost to be in business and produce prints. You have overhead, you have insurance, taxes, blah, blah, blah. And when photographers see these posts they all get on the bandwagon and love the post and use it to explain why their 8×10 cost $76.38.
Enough!
When you walk into a Mercedes showroom does the salesman there go through a laundry list of items like new factory they just built, how much health care is costing them, etc? Of course not! It’s a freakin’ Mercedes; you know it cost more because they have BRANDED their products.
Do you ask the jeweler why the Rolex cost more than the Timex? Of course not, they do not address the same market. So stop it!
OWN your pricing! Be proud of it instead of making lame attempts to justify it. Set yourself apart from the mass of bottom feeders who make a mockery of those who choose to excel in this wonderful business that is a mysterious combination of art and science.
I probably wandered off topic, got a little personal and didn’t tighten things up as much as I should have. Maybe I even turned this into a bit of a rant.
But that’s OK, I ain’t no stinkin’ journalism major, I’m a photographer who sees many struggling or moving down the wrong path and with all the help available out there, I’m a photographer who sees many struggling or moving down the wrong path and with all the help available out there, there is just no need for it!
I think it was Charles Lewis who once said ‘Only seek advice from those who are where you want to be.’ So stop asking your brother what he thinks of your pricing or asking your mother what she thinks of your packages. That also goes for asking the photographer who has been in the trenches for six months for their advice.
So just STOP IT. Learn from those who are where you want to be.
Next issue I’ll discuss how your price list should be laid out to get the sales you want. There are some pretty specific guidelines that help your bottom line tremendously.
Steve Bedell has been a professional photographer for over 35 years. He has done weddings, portrait and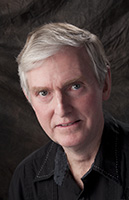 commercial work but now restricts his business to portraits only.
Steve holds the Master of Photography and Photographic Craftsman degrees from the Professional Photographers of America and is a PPA Approved Print Juror.
He has been named the New Hampshire Photographer of the Year a record 8 times and in 2011 was awarded the New England Photographer of the Year title. His specialty is natural light portraiture.
He has written hundreds of articles for photo publications, taught classes and workshops nationwide and produced several lighting DVDs. His private newsletter, EPhoto, reaches over 2000 photographers. Steve was a regular contributor to Shutterbug magazine.
by successfulbob | Guest Post, Lumix G9, travel photography
China Through the Eyes of Ken MacAdams – Part Two
We continue Ken’s story from last Friday. Check out Part One here.
Forbidden City
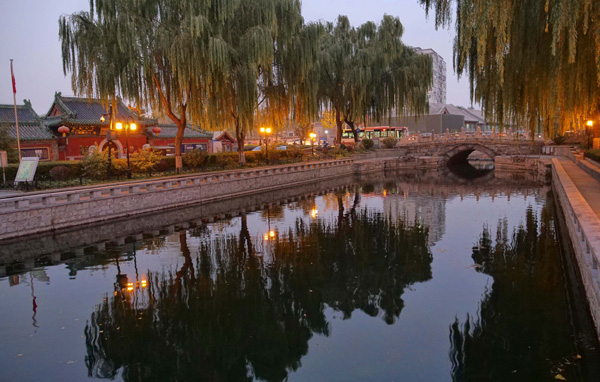
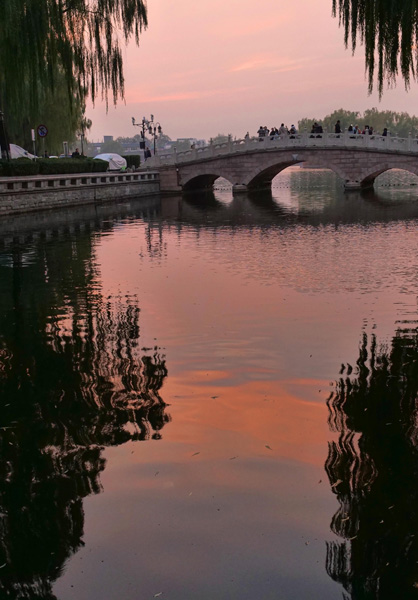 This lake is in a barrio outside the Forbidden City. The smog aids in coloration at sunset by diffusing the light. Many walk the pathways by the lake.
 All Photos in this post © Ken MacAdams 2018 All Rights Reserved
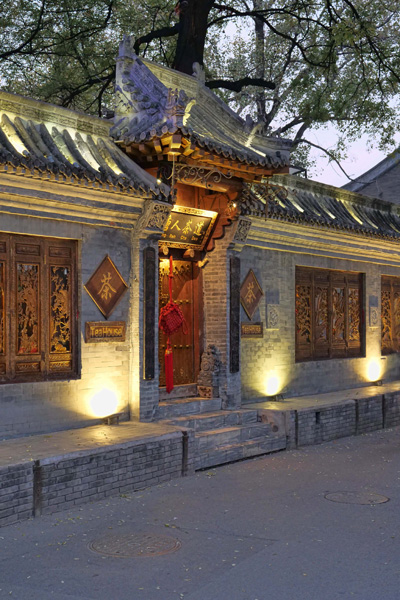 The Chinese take their tea seriously – and to be invited to a tea ceremony is a wonderful experience!
 When we returned to Beijing, we walked down to the Forbidden City. Once the residence of the Emperor, and strictly off limits to the public, this treasure has been opened up to the public in recent years. It’s a walled city within itself, complete with a moat surrounding it. Within the walls, the Emperor, his wives, concubines, and children all had their appointed places. Only dignitaries or men on official business would be allowed into the great hall just inside the gate, where they could transact business with the Emperor. To facilitate trade from without the city, the Emperor had a canal dug, of which part is still accessible today.
 The Grand Canal and ancient bridge dating back to 1154 A.D.
 A little Beijing Info
About 1100 A.D. Beijing became the new capital of China, and has remained so until today. The original city wall and gate, along with many other old historic landmarks were destroyed during Chairman Mao’s Cultural Revolution. Today, the city’s population approaches the 30 million mark, and high-rise business and apartment buildings stretch as far as the eye can see. Smog presents an issue here as the government struggles to clean up the old smokestack industries. The mass of automobiles often overpowers the capacities of the highway system and long traffic jams are the norm at morning and evening rush hour. Public buses, taxi’s, and subways do their part to move the masses, and many resort to electric bicycles and scooters as a means of short haul commuting.
Even though we’d been busy hitting the streets, the effects of jet-lag was beginning to set in. We welcomed the quiet of our hotel room as the door clicked closed behind us. A good rest would help us move on to our next destination, the the adventures ahead.
Ken has always loved to travel, so when he made a common connection with the fact that either a long day pounding the streets of some foreign city, or shooting the last dance at a wedding, a good part of his physical

weariness came from lugging around his big heavy DSLR. That’s when he started looking at alternatives – and ended up selecting Panasonic Lumix Micro Four Thirds gear.
Ken is rarely without a camera, and the next great photo travel experience – whether local or abroad – is always in the back of his mind! A longtime resident of the Four Corners, and when he’s not out on the road, he enjoys some of the great outdoor opportunities found there – mountain biking, hiking, and Jeeping.
by successfulbob | photography, photography software
Luminar Software Update and Deal
Luminar 3
Some nice things are happening in the Skylum software camp. A new version of Luminar is being polished up for release that includes a Library Module for keeping track of your images. Also, new ‘Looks’ (formerly called presets) are being developed and made available. Here’s the deal. This software is not quite ready for primetime. They are cleaning up bugs and finishing off new features as happens with all new software. But you can get in on the ground floor with a bunch of bonuses (including an extra $10 off if you use the code COATES) This deal will be available through December 19th. You can download Luminar 2018 immediately. I would wait a little bit downloading the Luminar 3 for a little while, but this will get you in on the ground floor pricing.

Here’s the skinny.
Luminar 2018 and Luminar three software Gets you to the full info page.
You’ll be able to download Luminar 2018 immediately and start using it. I use it as a plug-in in Adobe Photoshop It adds the capability of 53 filters. Think NIK filters that have even more control than ever. The details enhancer is terrific. Utilizing Artificial Intelligence in things such as enhancing skies, vegetation or just an overall filter I have subtitled “Just make this image look good quick!”
SPECIAL OFFER: Luminar 2018 AI Sky Enhancer + FREE Luminar 3 with Libraries
It’s your double win! Get Luminar 2018 with the all-new AI Sky Enhancer now and update to
Luminar 3 with Libraries for FREE. Plus, you get a bunch of exclusive extras worth US$222!
1) ViewBug: 3-Month Pro Membership (US$42 value)
Join the ultimate photo community for a shot to win prizes, create own challenges, get unlimited
photo uploads, sell your images, enjoy a new website, and much more!
2) KelbyOne: 2-Month Pro Membership (US$40 value)
Supercharging your knowledge with KelbyOne Pro is as easy as pressing the shutter button.
Enjoy free access to weekly courses, private webcasts, creative toolkits, and other freebies!
3) Rocky Nook: Choice of ANY e-book (US$40 value)
Hurry to get your hands on a free eBook by Rocky Nook! Master your techniques, find
inspiration, and hone your craft to create best-looking images!
4) Daniel Kordan: Awesome Landscapes Tutorial (US$80 value)
Need to brush up your skills? We’ve got you covered. Watch extensive tutorials by Daniel
Kordan and create truly jaw-dropping landscape images!
5) Manfrotto, Gitzo, Joby or Lowepro: US$20 Gift card with US$120 purchase (US$20 Value) Looking for extreme savings on your favorite gear? Save US$20 on any purchase over
US$120 from our friends at the Vitec Group.
6) US $300 OFF Iceland Photo Tours (US $300 Value)
Save US$300 on any multi-day (3+ day) Iceland Photo Tours workshop.

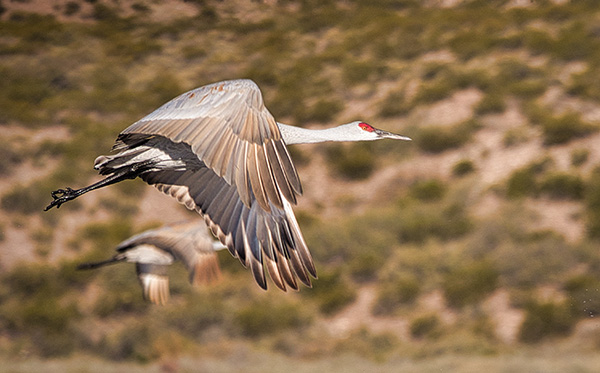
Here’s an image processed very quickly in Luminar 2018. AI, Details Enhancer and Crop. It makes the feathers sing.
Yours in Creative Photography, Bob
PS – here’s the link again. Luminar 2018 and Luminar 3 software
Don’t forget the code COATES for the extra 10 bucks off
by successfulbob | bird photography, black & white, Lumix G9, photography, photography education, photography gear, wildlife photography
Creating Good Animal Photos from a Captive Environment – Part Two
Last zoo post I was sharing some ideas on learning wildlife photography skills while photographing captive animals. See Part One here
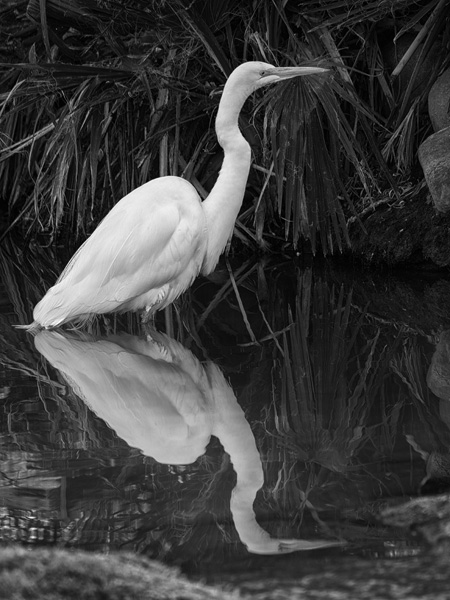 I followed this Great White Egret until the reflection was completed from beak to tail. The black and white treatment brings the bird to the highest contrast attention
One of the essential skills is to learn to queue on behavior. This means learning to see when the behavior will change. What will happen when you look at the feathers shaking in a certain way or excrement fall from a bird. These are indicators that signal flight or a change of wing position and either of those can lead to a more interesting photograph.
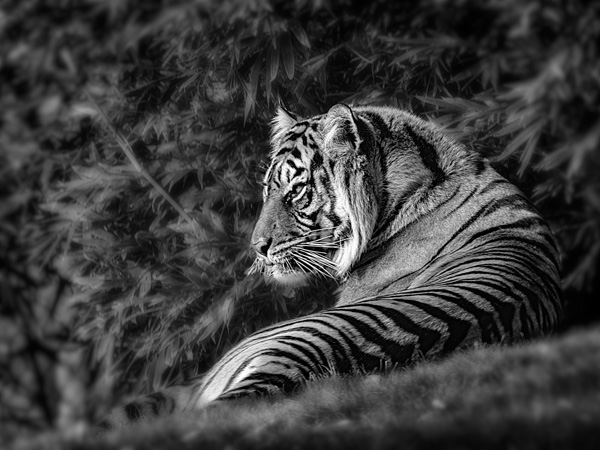
 Processed this image to BW also. Slight sharpening of the tiger using Skylum software as an Adobe Photoshop plug-in. I also softened the foreground and background with a gaussian blur as well as a darkening Curves layer Significant help for me that increased my ‘keepers’ in photographing images of animals in zoos, parks and in the wild was a lens that has a long reach. The micro 4/3rds Panasonic Lumix system has been an enormous help. Being able to handhold an 800mm equivalent lens makes a huge difference because of the mobility and distance from the animals. The less you disturb your prey and having the ability to still fill the frame is golden.
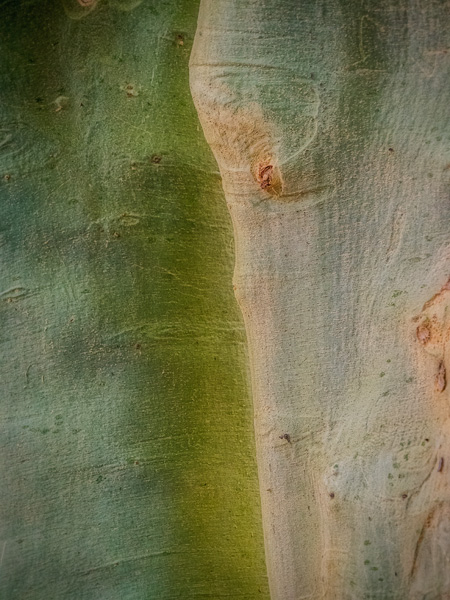 Don’t lose sight of other opportunities when photographing wildlife. This split tree trunk was good for an abstract look of colors and tones.
My main camera these days is the Lumix G9. The stabilization system gives an extra six and one-half to seven stops of hand-holdability. This means that hand holding a lens of 800mm equivalent at 1/60th of a second is very possible with sharp results. My favorite lens is a zoom lens – Leica 100-400mm f4.0-6.3
Yours in Creative Photography, Bob

by successfulbob | Guest Post, Marketing Monday, photography
Portrait Pricing Guidelines – Marketing Monday
with Steve Bedell
This article is from EPhoto Newsletter, a free bi-weekly newsletter for professional photographers. To subscribe for more great info contact Steve at smbedell@gmail.com.
Pricing
If you’re like me, you belong to more than a couple of Facebook photography groups. At the end I’ll even list some that I feel are the most valuable.
Reading the posts in these groups is both an education and a frustration. The same questions posted over and over, and then 68 responses from people who may or may not be qualified, but they’re going to chime in anyway.
With that in mind, that brings us to part one: what should your prices be?
I find it hard to believe that people just go on these groups and ask prices like, ‘Hey, how much should I be charging for an 8×10?’ More surprisingly, people will answer something like ‘I charge $45’ or ‘I charge $195’. Wrong answer.
But perhaps my favorite is ‘First, you need to figure your Cost of Doing Business (CODB).’ It used to be that no one took the time to do a few tedious calculations to figure that out and while I can applaud the fact that more people are aware that you actually have to have some kind of idea of what your numbers need to be?
I find it hard to believe that people just go on these groups and ask prices like, ‘Hey, how much should I be charging for an 8×10?’ More surprisingly, people will answer something like ‘I charge $45’ or ‘I charge $195’. Wrong answer.
But perhaps my favorite is ‘First, you need to figure your Cost of Doing Business (CODB).’ It used to be that no one took the time to do a few tedious calculations to figure that out and while I can applaud the fact that more people are aware that you actually have to have some kind of idea of what your numbers need to be in order for you to generate the income you desire, that is NOT the FIRST question you should be asking yourself.

Mistake one: The first question should be ‘Where do I want to position myself in the market?’
You see, all that other stuff is fine but how can you set prices until you define your market and your brand. Do you want to sell unique 30×40 painted portraits for $20,000? Do you want to do school photos for $25 a unit? Do you want to sell prints or files or both? Are you seeing why it makes no sense to figure out COGS and CODB until you define your niche in the market?
You see, all that other stuff is fine but how can you set prices until you define your market and your brand. Do you want to sell unique 30×40 painted portraits for $20,000? Do you want to do school photos for $25 a unit? Do you want to sell prints or files or both? Are you seeing why it makes no sense to figure out COGS and CODB until you define your niche in the market?
With that taken care of, let’s go ahead and address some other pricing issues that make my head boil every time I see them.
Mistake number 2: Starting out at a low price to get business and raising it later.
Big mistake. Later won’t ever come unless you move to another city and start with new clients because you’ve already branded yourself at a certain price level. Work for FREE until you feel your work commands the price you want and then start charging. It’s far harder to dig out of a hole than to start out where you want to be. If you need to do another job or earn income some other way, do it.
Mistake number 3: Selling files, or selling files and prints.
OK, I expect some will disagree with me here but hear me out. I know MANY successful photographers who make a great living selling wall prints and other print products. While there are probably some, I don’t know any who make a great living selling files.
Here is the part I don’t understand. If we sell artwork, we can command a decent price for it. And we can sell many copies of it. I had a client a couple of years ago for an extended family portrait session. She bought $4500 worth of 5×7’s! And I ran into her at the beach one night while I was doing a family portrait and she was there with some family members in beach clothes and she asked if I could take photos of them when I was done with my family. I said sure. She ordered another $2200 worth of 5×7’s from those super casual beach photos!
That’s almost $7000 worth of 5×7’s from 2 files. Imagine if I sold that file for $300. I’d have $600 instead of $6700. How much more work would I have to do to sell files to make that amount? What if I gave them the file with each print they ordered, like some photographers do? I’d still be WAY under!
More from Steve next Monday!
Steve Bedell has been a professional photographer for over 35 years. He has done weddings, portrait and commercial work but now restricts his business to portraits only.
Steve holds the Master of Photography and Photographic Craftsman degrees from the Professional Photographers of America and is a PPA Approved Print Juror.
He has been named the New Hampshire Photographer of the Year a record 8 times and in 2011 was awarded the New England Photographer of the Year title. His specialty is natural light portraiture.
He has written hundreds of articles for photo publications, taught classes and workshops nationwide and produced several lighting DVDs. His private newsletter, EPhoto, reaches over 2000 photographers. Steve was a regular contributor to Shutterbug magazine.
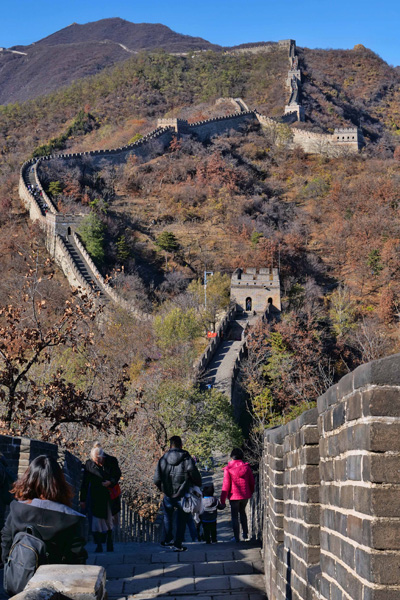
by successfulbob | architectural photography, Guest Post, Lumix G9, travel photography
China through the Eyes of Ken MacAdams – Part One
Ken is currently wending his way through China and shares news and images from his travels here on Succssful-Photographer.
The 12 + hour flight to China will tweek your psychological time clock, not matter how you cut it. We welcomed deplaning in Beijing, and getting our feet back on the ground. Flying from the USA, we’d crossed the International Date Line, so lost a day. After breezing through immigration, we stepped out into the terminal, into the face of new smells and sights. Like the reality of the time difference, once you step off the gateway, you know you’re not in Kansas.
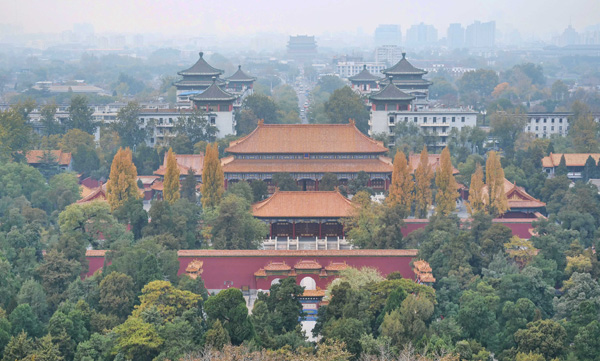
Forbidden City gate with the modern city in the background. Smog is often present – and many people wear face masks when walking about. All Images in this post © Ken MacAdams 2018 All Rights Reserved
Personal Photography Project
This marks my 5th sojourn in China, and each visit is an enriching experience. My visits now are part of a personal photography project, in which I’m documenting the tremendous changes going on in this vast land. China has often been ‘off limits’ to foreigners, and in recent times it wasn’t until the late 1980’s that foreigners could obtain visas to travel here. My first visit was in 2000. Already changes were happening as the ‘New China’ came out from under the repression of the Cultural Revolution – an era that almost put China back into the Dark Ages.
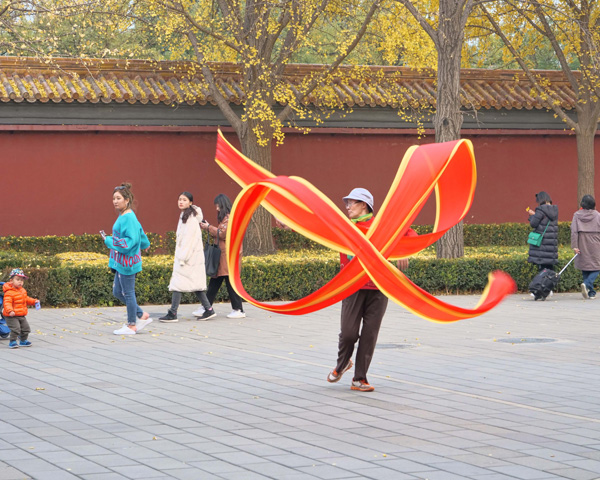 Woman dancing to music with a banner flag in one of the many parks.
We’d planned only a short sojourn in Beijing, but wanted to experience a different section of the Great Wall, and see some of the changes around the city since our first visit here. A teacher I’d met last year picked us up at the airport and shuttled us to a motel near his apartment. Foreigners must stay only at State approved hotels, as Big Brother keeps a close eye on affairs here. I’m not intimidated by it, just aware that as I travel about, my every move is documented and tracked. My wife is with me, and we’re here on 10 year multiple entry tourist visas, with a maximum stay of 60 days per visit.
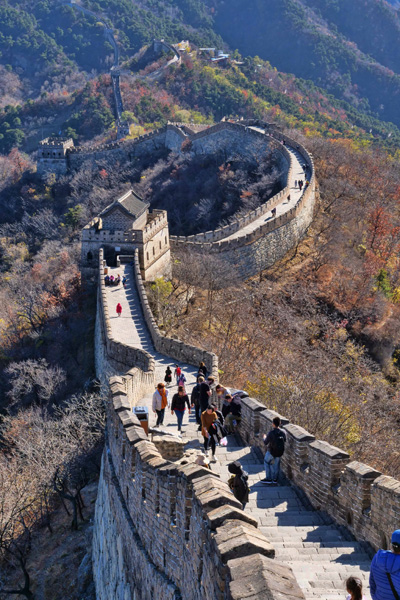 Hiking on the Great Wall from one watchtower looking back down the mountainside.
 This view of the Wall gives you a perspective of just how much hiking you have ahead of you!!
 The Great Wall
Our friend had arranged for a driver to shuttle us out to the Matianyu section of the Wall. Luck presented us with one of the sunniest days I’ve ever experienced in this area, with brilliant blue cloudless skies. This section of the Wall climbs over 3,400 ft. as it clings to the spine of the rugged mountains. A modern gondola whisked us part way up the mountainside, and then it was time to hike! We logged over 3 miles of semi-strenuous hiking during our visit, poking around watchtowers, savoring the grand vistas, and marveling at the thought of those who labored so hard to build this Wonder of the World. Originally constructed to prevent fierce raiding tribesmen from the north from plundering the city states to the south, the wall stretches from the Pacific Ocean to the east, several thousand miles inland.
Ken has always loved to travel, so when he made a common connection with the fact that either a long day pounding the streets of some foreign city, or shooting the last dance at a wedding, a good part of his physical

weariness came from lugging around his big heavy DSLR. That’s when he started looking at alternatives – and ended up selecting Panasonic Lumix Micro Four Thirds gear.
Ken is rarely without a camera, and the next great photo travel experience – whether local or abroad – is always in the back of his mind! A longtime resident of the Four Corners, and when he’s not out on the road, he enjoys some of the great outdoor opportunities found there – mountain biking, hiking, and Jeeping.
by successfulbob | inspiration, photo walkabout, wildlife photography
Creating Good Animal Photos from a Captive Environment
I practice my wildlife photography by spending time at the zoo. There are a few reasons for this, and I’ll share them here to hopefully help you in your image creation and get feedback from you on my thoughts. You can always reach me through my email bob@bcphotography.com
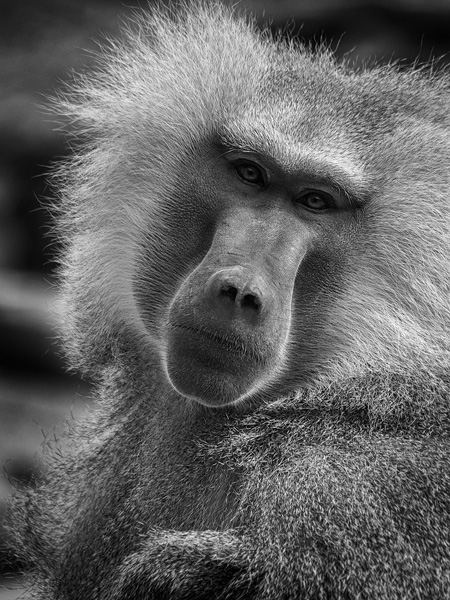 A baboon named One at the Phoenix Zoo. I spent a bit over an hour waiting to get this portrait with eye contact in decent light. Black and white allow for concentration on his expression.
One benefit of photographing in a structured environment is that you can find animals. I know that it sounds simple at its most basic but you need the practice to become a good wildlife photographer. Exercise may be had at the zoo. Part of the training is to learn to focus quickly and in the right place. You may think this can be easy, but until you have tried it, I think you’ll be surprised how difficult it can be to acquire arresting and exciting photos.
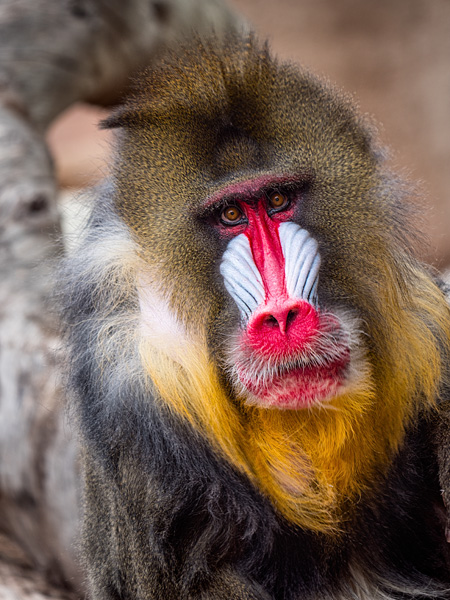
 This Mandrill was sleeping for quite a while, but I hung around until he started foraging around in his enclosure. Expression and eye contact are paramount in making this a success. (the color of his features don’t hurt either!)
Just because the animals are captive does not mean that they will pose for you. Things such as eye contact and behavior can make or break an image. One of the items on which you are practicing is to see how an animal moves. How to stop that movement (or accentuate it for something more artistic).
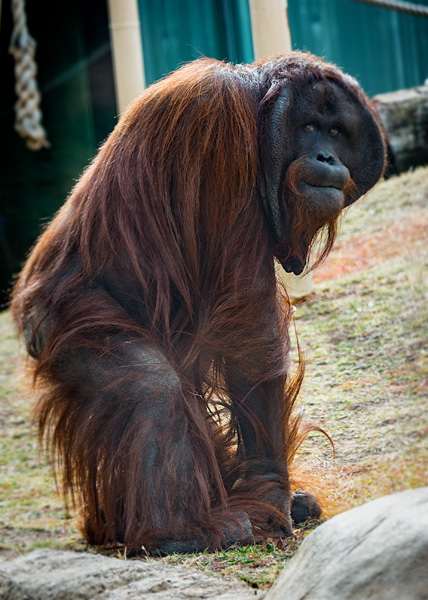 This Orangutan was walking away, and I mentally willed her to look at me over her shoulder. I will often ask mentally for my wildlife to change position and it’s pretty cool how often it works.
If I can suggest one thing that you will learn that you can take with you into nature is patience. Even though you are in a target rich area, you still need to spend time, and lots of it, to get images with eye contact. If you run from enclosure to enclosure thinking you will get more varied photos you will be correct. But I suggest that the pictures will be less than stellar than if you spend more time with fewer animals.
More from the Phoenix Zoo in the next couple of days. Including the gear I use for making my images.
Yours in Creative Photography, Bob
by successfulbob | bird photography, Lumix G9, travel photography, wildlife photography
Festival of the Cranes
Bosque del Apache National Wildlife Refuge – Part Three
I enjoy spending time with wildlife.
Watching. Waiting. Learning.
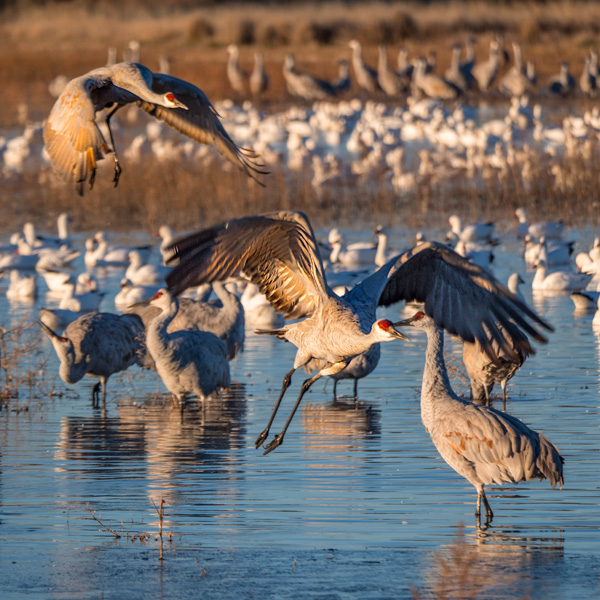
To get the best wildlife images it is important to study the behavior patterns of your prey. Especially in avian photography. Learning when a bird is about to make a move leads to obtaining more than a portrait. Portraits are cool, but my favorite images are highlighting behavior. A mating dance. A flight. A landing. Feeding or grooming all lend more to the captured image in my opinion.
These images are from the Festival of the Cranes in Socorro, New Mexico just a bit south of Albuquerque. I shared pictures from the event, but the previous ones were of Snow Geese. These are the stars of the show, Sandhill Cranes.
Let me know what you think!
 In for a landing during first light at the first pond – Bosque del Apache NWR
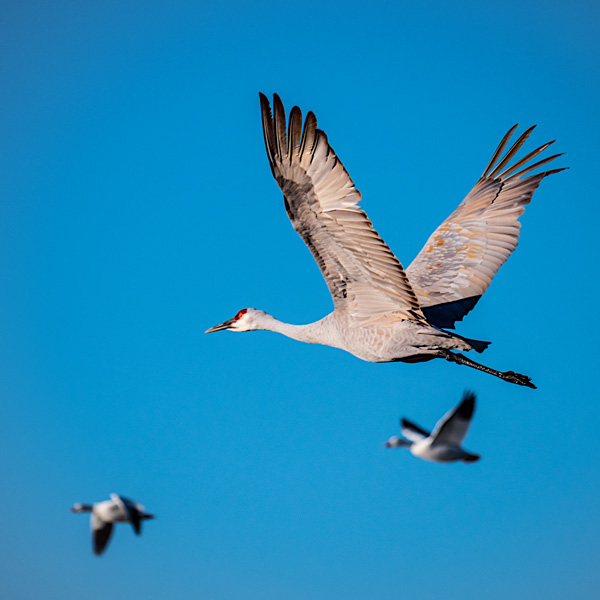 Sandhill Crane in flight (with a couple of snow geese interlopers in the background)
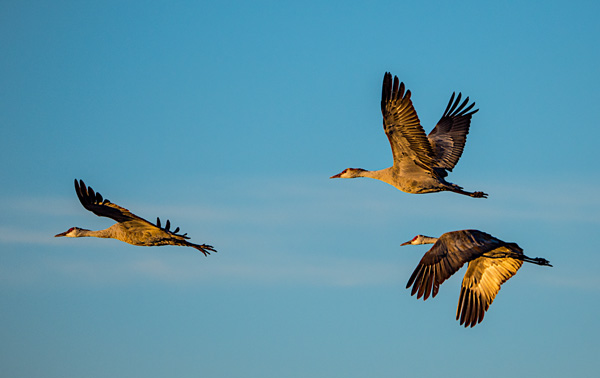 In the warm glow of sunrise here’s the classic capture of three Sandhills with the three wing positions
More Sandhills in the next day or so. For more from the Bosque NWR see these posts with the Snow Geese.
Bosque Part One
Bosque Part Two
The previous posts have the information on the camera gear and links to find it.
Yours in Creative Photography, Bob
by successfulbob | bird photography, Lumix G9, LumixGH5, photography, photography gear, travel photography, wildlife photography
Bosque Del Apache National Wildlife Refuge
Snow Geese Part Two
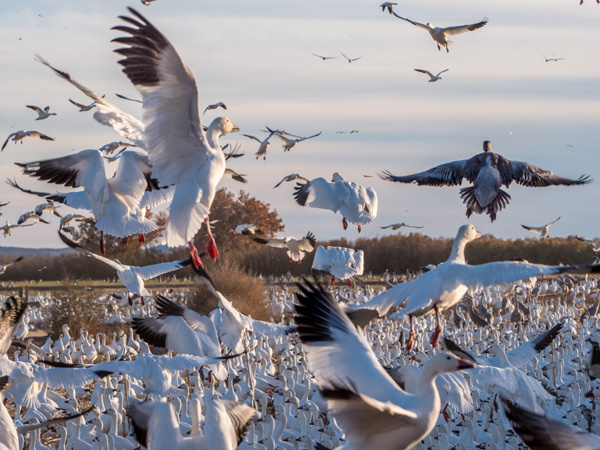
With twenty-thousand plus snow geese winging their way around the Bosque Del Apache National Wildlife Refuge it was a fantastic couple of days of sights and sounds. Sometimes it was quite overwhelming. On several occasions I had to put the cameras down to just experience nature in its pure form.
I’ve found there is a layer of distance that appears much larger than the six to eight physical inches when I put my face behind a camera — a certain detachment. This distance enables other photographers and me to do things like cover disasters, wars or record infant demises through organizations such as **Now I Lay Me Down To Sleep. This is an important feature, but it can occasionally interfere with the enjoyment of the moment that is unfolding in front of us.
More Snow Geese photos to share…
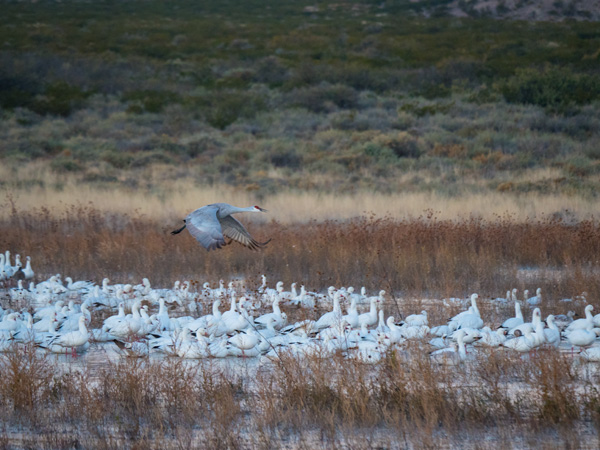 A solitary Sandhill Crane glides in over a pond of snow geese
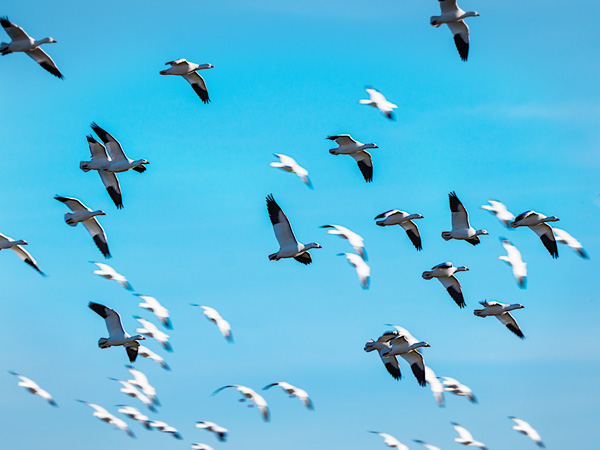 Snow geese in flight
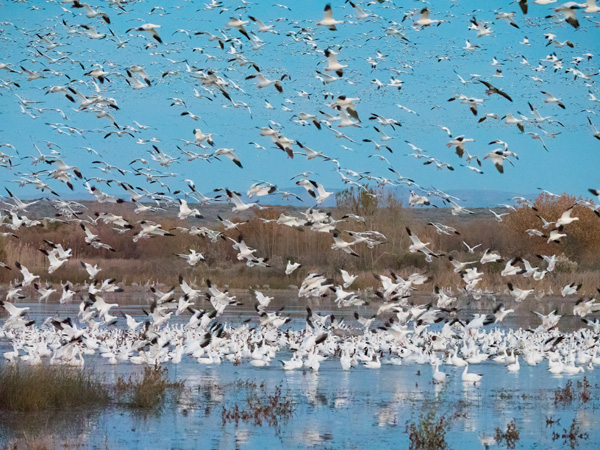 Take off!
 Kinda reminds me of that famous movie from Alfred Hitchcock!
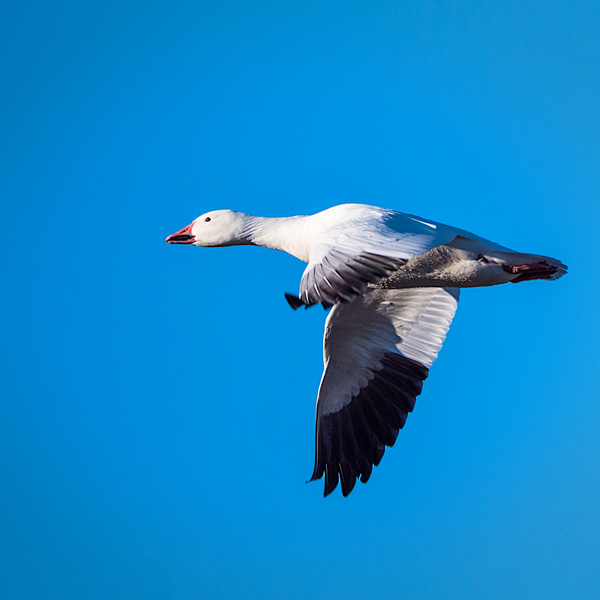
To make successful wildlife photographs, I would suggest that you spend a fair amount of time studying their behavior long before you pick up your camera to try and capture images. I’m a big fan of bird behavior vs. a straight portrait, although portraits have their place. Being able to predict when a bird will fly, open its wings or display for another will make your photographs come to life. Having a lens with a long reach works to help you fill the frame without disturbing the natural behavior. See my gear below which gives me an 800mm equivalent which is handholdable for capture.
Images were made with Panasonic cameras. Most often the LUMIX G Leica DG Vario-Elmar Professional Lens, 100-400MM, F4.0-6.3 ASPH mounted on the Lumix G9 and the Lumix GH5 for a second body. I had the chance to try out the Leica DG Vario-Elamarit 50-200mm 2.8-40 lens I am working toward getting this lens.
Next up the Sandhill Cranes!!
Yours in Creative Photography, Bob
** If you want to give back to your community think about photographing for NILMDTS. It is a very rewarding, if difficult mission.
by successfulbob | photography software
It’s Deal Time with Luminar Software
If you haven’t given Skylum’s Luminar a chance as yet it might be time. It sells for $69 (or if you use coupon code COATES $59) It works as a stand-alone program or as a plug-in on MAC and PCs. This software can be a great time-saver and/or artistic tool. Lot of goods stuff including… Ah, I don’t need to ‘splain it to you. Check out the link it’s all there and worth a look!
 Click here or the image above
Happy Thanksgiving!
Yours in Creative Photography, Bob
PS – This Black Friday deal comes with other goodies too!

 commercial work but now restricts his business to portraits only.
Steve holds the Master of Photography and Photographic Craftsman degrees from the Professional Photographers of America and is a PPA Approved Print Juror.


