Post Processing on the Portrait of Ernst
One of the great pleasures of traveling to speak to photography groups is the fellowship with photographers. I met Ernst Ulrich Schafer while at the PPW Conference in Yakima, Washington. Ernst and I went out on an adventure and had a blast getting to know each other.
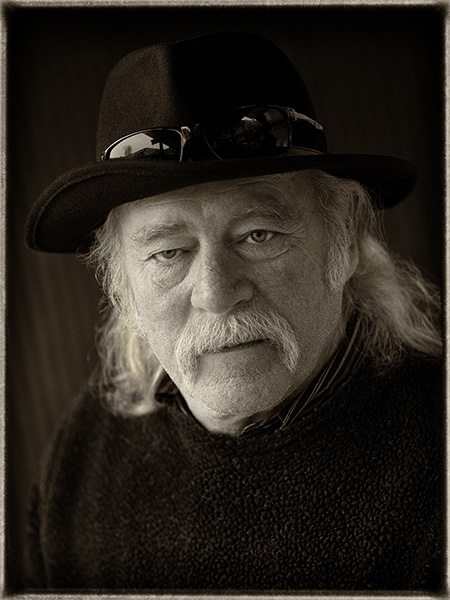
I asked Ernst to take a moment to pose for me to make a portrait. Found a decent spot for a nice lighting pattern on his face but the final portrait was completed in post-production. Here is the story of ‘The Making of Ernst”.
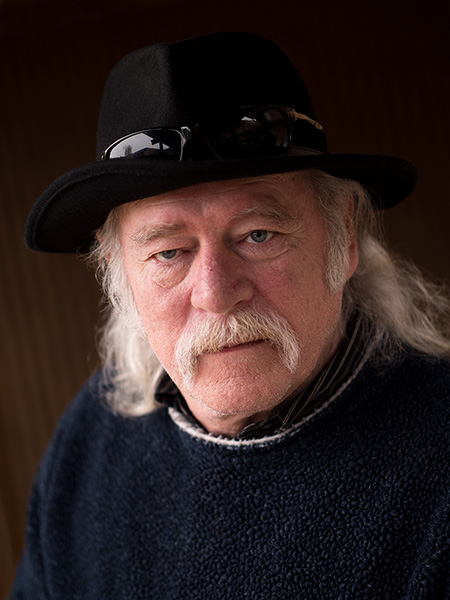
 Original capture. Looking for a soft split light pattern.
I looked for a background that had a little bit of a gradient and a soft shadow transition from light to dark. Accomplished but finding an overhead light block with two open sides. I placed Ernst closer to the left-hand side to make the short side of his face the lighted portion. The light coming from the other side worked as fill. If aI wanted a sharper contrast I would have moved him further left. Less contrast further right. Since we can’t move the lights in a situation like this moving the subject is the only way to go.
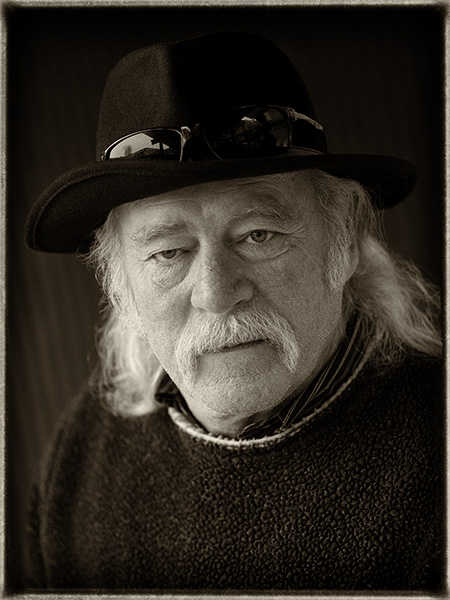
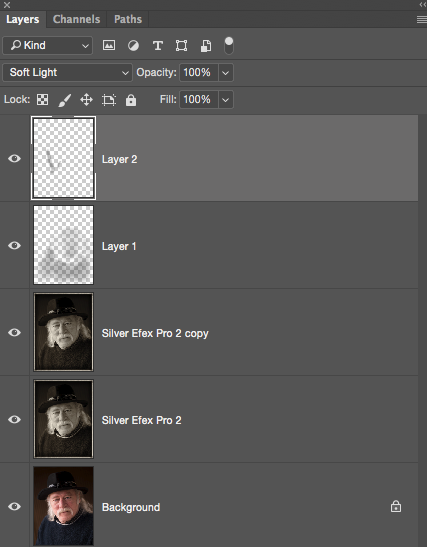
 Process in NIK Silver FX Pro 2 with Sepia Tone. Note the difference between this image and the final at the top of the page. The white rim on the collar was removed as it was a distraction. Additional dodging and burning was done to lightly increase contrast and control some of the highlights. Check out the Layers Palette Screen Capture for more details.
If you don’t already have NIK filters be aware that they are a free download from Google. There is a great variety of filter effects available in the Suite. I often use Silver FX Pro 2 for my black and white and sepia tone conversions.
Background is the original capture. Silver Efex Pro 2 is the Sepia Tone conversion. The copy Layer shows some retouching with the removal of the white collar. Layer 1 is a Soft Light Layer to burn in the sweater and add contrast to the shadow side of the face. Layer 2 is another Soft Light Layer to control some highlights and add a little sparkle to the eyes. I use the Soft Light Layer Mode to dodge and burn my images.
As you can see Adobe Photoshop with a pit stop in Adobe Camera Raw is a large part of my workflow.
Image made with the new Lumix GH5 and the 42.5mm f1.2 Nocticron lens @f1.2 1/320th sec ISO 200
Yours In Creative Photography, Bob


