by successfulbob | architectural photography, commercial photography, Lumix GH4, Lumix Lounge, photography, photoshop tutorial
Trying to add just that little bit extra…
Been photographing the Phoenix Airport Hilton lately after their eight million dollar remodel. There are some photos it can be a little more difficult to make sexy but lighting and awareness can make them stand out.
Take, for example, a boardroom photo. Here’s a utilitarian room with office chairs around a large table. We looked at a number of angles and one of the things I thought set the room apart was the fact that A – it had a window and B – there were palm trees outside the window. The wonderful thing about collaboration is that some of my best ideas come from other people!.
Mike Manginelli has been heading up the photography project from the hotel side. We discuss each photo, the use, how they want to present it to potential clients then we set up the shot. Mike said, “Hey what if the photo was taken from here?” As soon as I set the camera in place I was all over it. Once that decision is made…
Then it’s time to make the room shine from a lighting standpoint. I work with multiple images for different exposures of different areas. Inside in shadow. Inside room lighting. Outside daylight needs a totally different exposure from indoors. And then some additional accent lighting which adds that ‘certain something’…

Here’s the base exposure. Curtains are closed so I can control the glare on the tabletop to allow the wood and grain to show and not be blown out from the reflection.
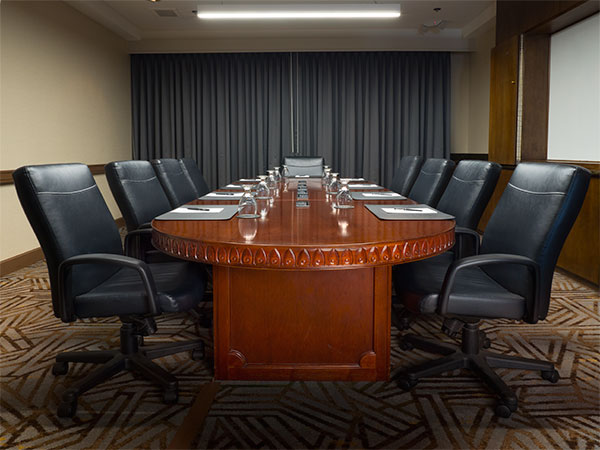
Added a flash exposure to highlight detail and throw some light into the shadow area under the table.
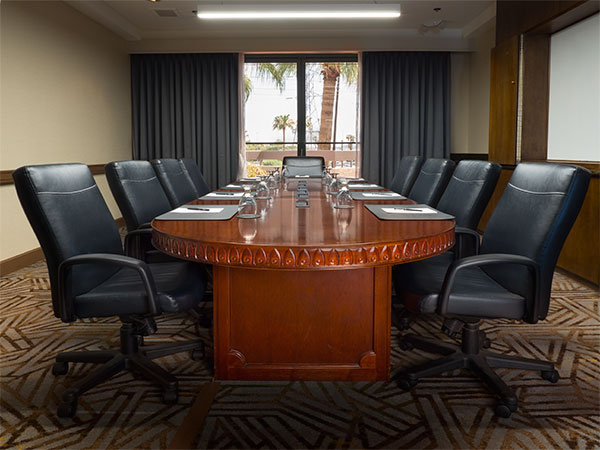
Curtains were opened to obtain exterior view. Flash added to curtains to not have trouble blending inside/outside from flair around window. A little of the reflection was allowed on the tabletop.
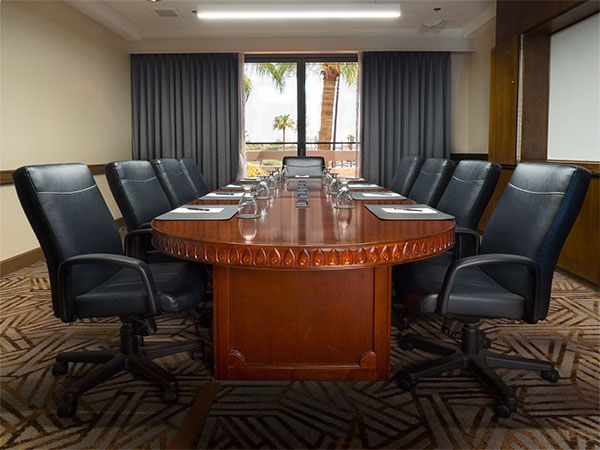
Final boardroom image with a Curves Layer to open up shadows just a bit.
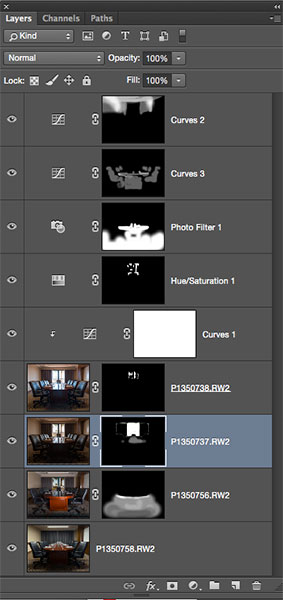
Layers Palette from boardroom photo showing various Layers and how the Masks were applied.
A handy feature on my Lumix GH4 is the built in WIFI that talks to my Ipad (or Iphone or Android) via ‘Image App’ (free download from Panasonic) so I can control the camera without touching it. All controls including shutter release and bracketing are available on the phone or tablet. When shooting multiple exposures, making adjustments to the camera, like exposure changes, firing the shutter, etc. makes it much easier to blend the images together in post production when the camera is mounted on a tripod. I used the 7-14mm f4.0 lens for this. There is no distortion in the lines on this lens. It’s one of my favorites for architecture work requiring a wide angle view.
Questions? Let me know…
Yours in Creative Photography, Bob
by successfulbob | architectural photography, commercial photography, Lumix GH4, Lumix Lounge, photography
Had another shoot at the Phoenix Airport Hilton Hotel. This time the lobby, Rimrock Bar and Grill, the executive lounge and a few other images for marketing the property were the targets. They just had an eight million dollar makeover and it really brought the property up to snuff. rooms are updated along with lobby. A very clean look with new colors and an open look.
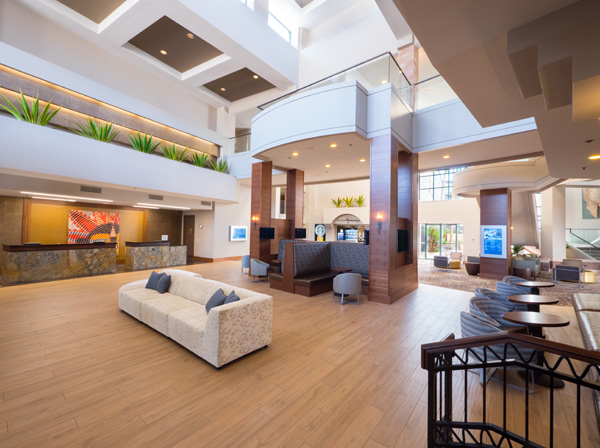
The lobby has a new wide open look.
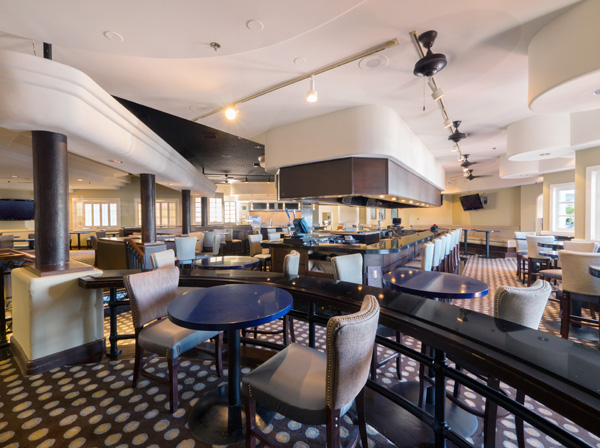
Here is the new look of Rimrock Bar and Grill.
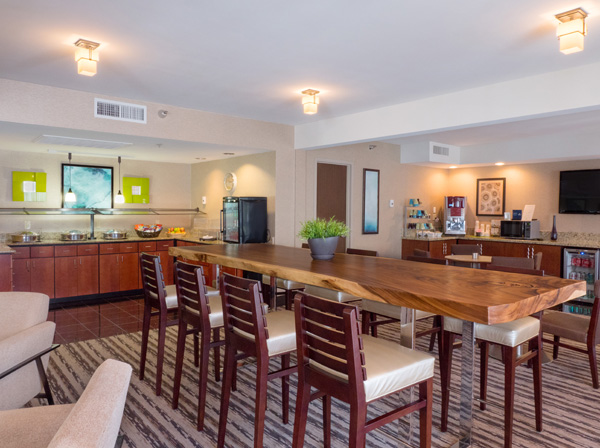
The Executive Lounge received a redo as well. Love this table the wood is beautiful!
Having the ability to bracket exposures by up to seven stops with the Lumix GH4 with one setting on the camera makes getting the lighting for the various areas of the rooms to be harmonious as we are usually working with lighting from windows, added lighting from flash and then taking more images to blend together to control reflections on reflective surfaces. One of my favorite lenses for architectural work is the 7-14mm f4 Lumix Vario lens. Wide field of view and no barrel distortion.
Yours in Creative Photography, Bob
PS – Using links to Amazon through this site help support the education provided. TIA
by successfulbob | architectural photography, fine art photography, graphic design, Lumix FZ 1000, Lumix Lounge, photography, photography education, photography seminar
Exercise.
Makes you stronger.
Exercise makes you better.
Exercise doesn’t have to physical to be helpful to you.
As part of a workshop I conducted for the Photographic Society in Chattanooga, Tennessee we all went down to the aquarium and waterfront area downtown to begin the day. I shared ideas I have about gathering textures for the ‘Photo-Synthsis’ technique I teach. The exercise was to gather textures and subject matter to work with later in the day. There was one mandatory subject, the Market Street Bridge. After heading to our computers we all were tasked with creating an image of the bridge. It proves once again that you can give multiple photographers the same subject to work with and come out with a variety of finished images. Here’s a few the class shared with me.
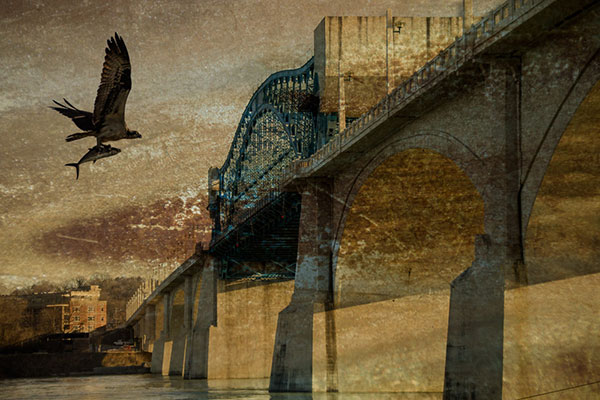
This was by Mickey Rountree. If you would like to see more of Mickey’s work which contains, as he says, lots of HDR and pin up art. (I saw some of Mickey’s work and it’s definitely worth a look. Some very stylized interesting techniques) Go here. © 2015 Mickey Rountree
“Bob, I thoroughly enjoyed both days (of instruction) and have enough new ideas that it will take weeks to play around with and learn the techniques well. You are a great teacher; knowledgeable, enthusiastic, and yet easy going and approachable. Hope you enjoyed your time in Chattanooga.” Mickey
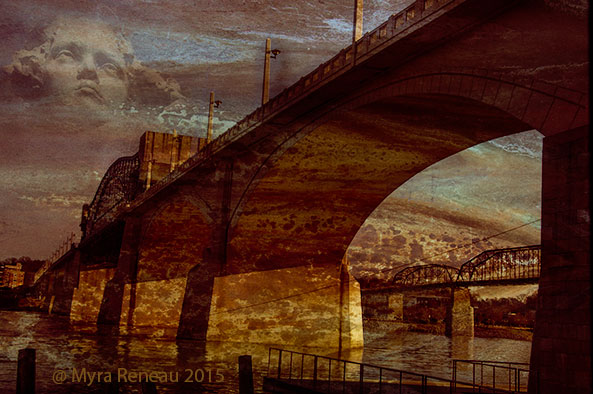
This one is by Myra Reneau. © 2015 Myra Reneau
“Thanks Bob for a great workshop both days this weekend. I especially liked today. Thanks for your help in working on my selections (as well as well as everything else). Anyway, safe travels! I am looking forward to learning more. Thanks again,” Myra Reneau
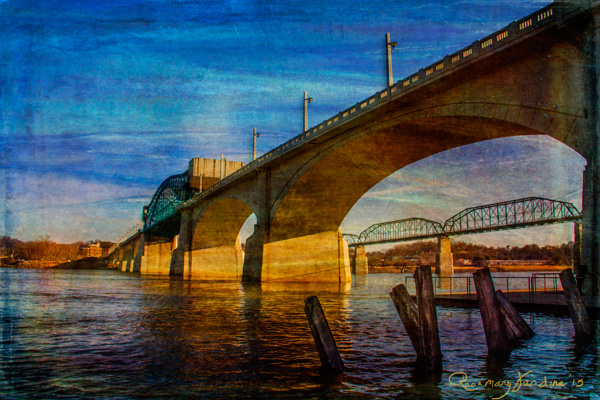
By Rosemary Jardine. In addition to using the textures and techniques we talked about in the class I enjoyed Rosemary’s
composition and framing of the secondary bridge. © 2015 Rosemary Jardine
“Thanks for the compliment using my work on your blog! I shared the link on my facebook page. Here is my finished project from the workshop yesterday. I finished this up with a layer that I painted some highlights on the water canons as well as a warming mask. Thank you once again for coming to our area and sharing your knowledge with us. most of my current skill came from the internet, tutorials and so forth. It was a blessing to have the personal training. You have given me the desire and skills needed to proceed forward with my passion for fine art photography. I can hope to one day produce they quality of work you, yourself are doing. That is if I have enough years left in my life, although I do consider myself a fast learner. I also want to let you know your slide show is perfect, the music suits it so well!” Sincerely, Rosemary Jardine
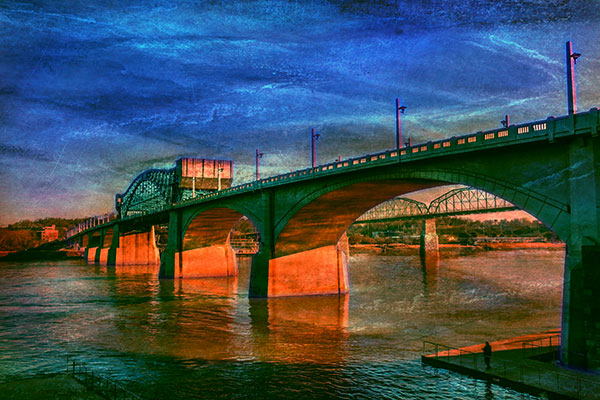
© 2015 Bob Coates
I used the Lumix FZ 1000 to have a complete zoom range to vary my captures. Able to go wide for scenes and also able to get close-ups of various textures. A handy camera to work with indeed! Here is my Market Street Bridge rendition…
Four photographers. Four images with a totally different feel. Have I told you lately that I love photography!
Yours in Creative Photography, Bob
by successfulbob | architectural photography, commercial photography, Lumix GH4, Lumix Lounge, photography, photography gear, photography lighting resources
Had a full day shoot for the Phoenix Airport Hilton. They are going through an $8M renovation with a complete redo of all the rooms and an update on all the common areas in the hotel. They have asked me to photograph the changes. This is the second shoot and we are planning another two day shoot once the lobby and and a few other areas of renovation are completed.
Here are a few from the shoot…
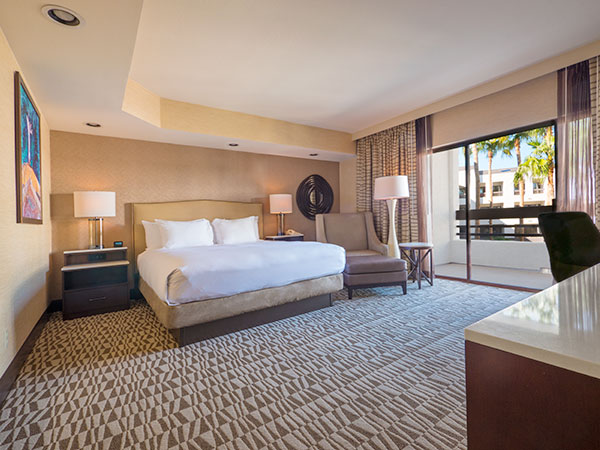
Arizona King room photo at Hilton Phoenix Airport Hotel
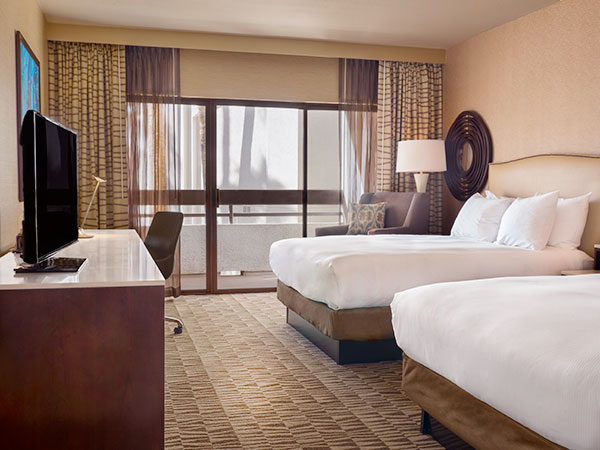
Double Queen Room
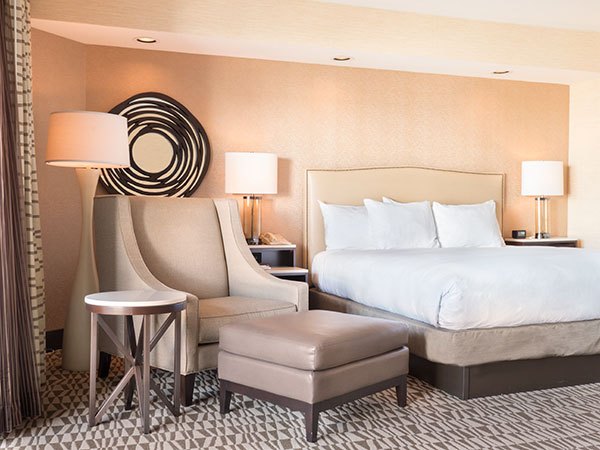
Junior Suite Room
Images were captured with the Lumix GH4 using multiple exposures to capture the full range of tones from the deepest shadows to the view outside the windows. A handy tool is the on-board WIFI which allowed me to control the camera from the Panasonic App. Not touching the camera makes layering the multiple exposures more accurate because even when your camera is locked down on a tripod any touch of the camera can cause the images to not be in perfect registration.
When photographing for Hilton properties they have guidelines that include no curtains being closed in the room photos. I use a variety of techniques adding some light to the original capture and blending the various exposures using masks in Adobe Photoshop. For those who haven’t already made the upgrade to Photoshop CC 2014 here is a link to $9.99 per month Photoshop and Lightroom)
Sometimes you just want to add a little kick off light to a small area to bring out some detail and the small Fiilex P100 LED light comes in handy. It has the ability to adjust color temperature which is important in mixed lighting situations when working in rooms with natural light coming through the windows and the light from the light fixtures. (order fiilex light here)
Here’s a tip to save you some time in post production. Replace lights in lamps and ceiling fixtures with 15 watt bulbs. This will allow the lamps to read as lit but not give you blown out areas in your captures. It makes a huge difference in the amount of time in post.
Yours in Creative Photography, Bob
by successfulbob | architectural photography, black & white, fine art photography, Lumix GX7, photography, photography education
Camera presets.
Never used them with any success before getting into the micro 4/3rds system with Panasonic Lumix cameras. I’m out on holiday in Santa Fe, New Mexico and putting the Lumix GX7 through it’s paces. One of my favorite presets is Illustrative Art. But, with a tweak. Turning it to black and white. It leads to a high contrast image with a bit of a glow on the highest contrast areas. Here take a look at these images…
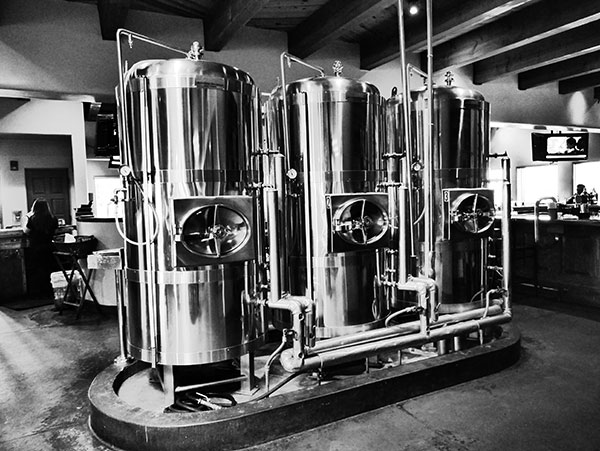
Copper tanks at the Blue Corn Cafe & Brewery Restaurant in Santa Fe, New Mexico
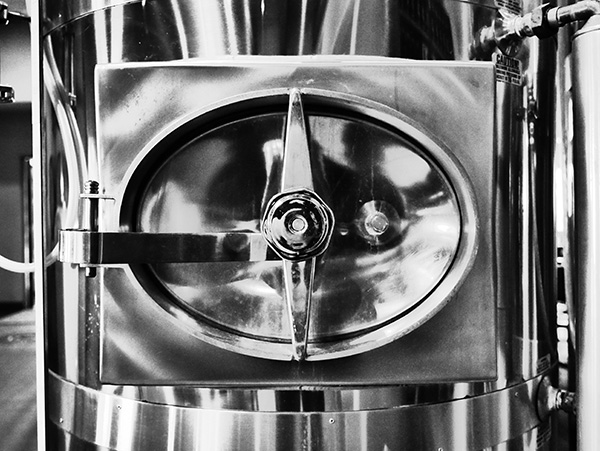
Copper tank handle detail. Love the shape and form that comes forward using this technique.
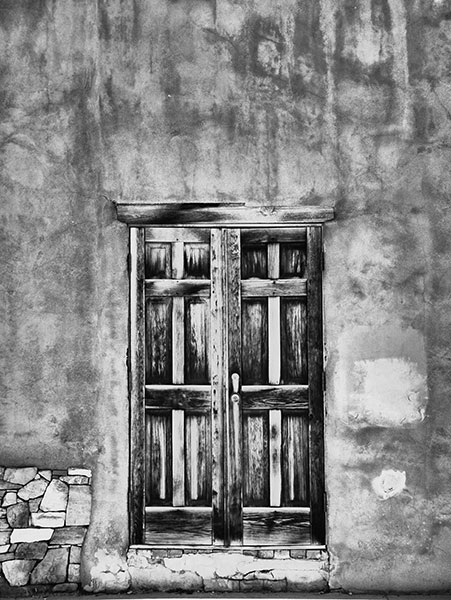
Downtown Santa Fe door and wall with wall. Textures galore!
One thing to remember when using in-camera presets is to save images as a jpeg. I usually shoot in RAW plus jpeg so I can have the best of both worlds. If you only save in RAW you will see the processed black and white image on the back of your camera and upon download momentarily on your computer as the viewing jpeg info is stripped away leaving you only the RAW information.
Travel is a great way to get the creative juices flowing… When and where is your next road trip?
Yours in Creative Photography, Bob


