by successfulbob | black & white, cloud photography, infrared photography, landscape photography, Lumix G6, Lumix Lounge
Stud Horse Point Infrared Photography – Page Arizona
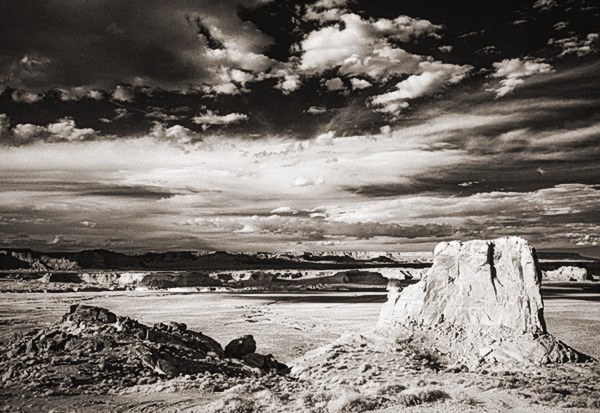
Infrared imaging can add interest to a scene that otherwise would be OK but rather mundane. I have a Lumix G6 that I had converted to IR by LifePixel. It’s great to take an older camera that isn’t getting much use and have it converted to Infrared. Or if you don’t have an older candidate that will work you can but up a used camera and have it repurposed.
But why is it good Bob?
Some times of day are just not conducive to solid imagery. Usually, midday is less than ideal for making photos and that is when IR photography can shine especially when there are clouds and or trees in the scene. Here was an example where I wasn’t thrilled witht the lighting. We were hoping for great color in the sunset. You know how that goes. All looks good then falls flat. Rather than come home empty handed I kinda like the outcome of these.
 Outside Page, Arizona – Stud Horse Point
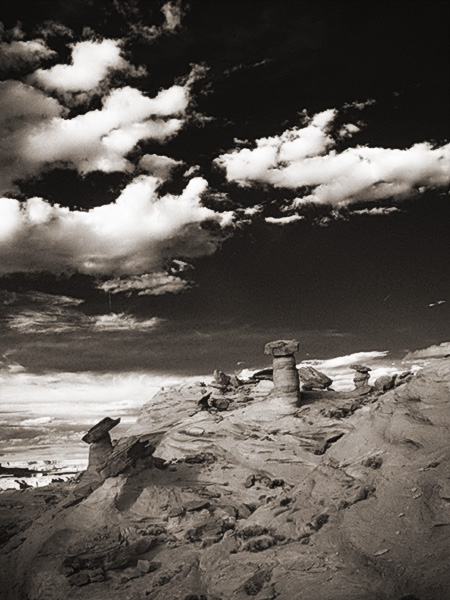 Hoodoos at Stud Horse Point
When capturing IR photos I tend to shoot in RAW + jpeg with the camera set to black and white. The black and white allows me to get a better sense of how the scene will render as the RAW image will come in with a magenta cast. I also bracket exposures as the camera’s meter and histogram are still ‘thinking’ in full spectrum color mode.
I picked the RAW images I wanted to process. Then output them to Photoshop and added some dodging and burning. Then took the image to NIK ColorFX Pro 4 to add some Glamour Glow and a little grain to emulate the look of film IR. As a final step, I evened out the overall color and added a light sepia tone over the image using a Hue/Saturation action.
Yours in Creative Photography, Bob
by successfulbob | Lumix GH4, Lumix Lounge, photography, photography education, photography lighting resources
Lessons from a Personal Photo Project – Strawberry Lesson
“You can’t always get what you want, But if you try sometimes, you get what you need!” Rolling Stones
I am always trying new things for art, for practice or just to see if I can do it to add to my photo skill set. Yesterday I found (what I thought was) a beautiful looking strawberry and decided to see if I could create some art with it.
I was not successful in creating art.
I learned several things, so I consider the shoot a success!
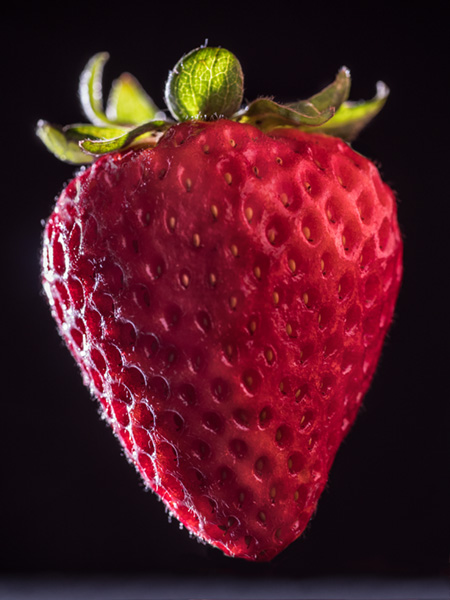
 Strawberry image after a little play in Adobe Photoshop to clean up some of the bruises that presented themselves as the shoot progressed.
Image created with Lumix GH4 and the 45mm Macro Elmerit Lens
I placed the light behind and camera left which created the highlight. The camera right side of the strawberry was lit with a reflection of my hand curved into a cup to wrap the light around the top of the fruit. (note the slightly warmer color because of the skin tone)
• When photographing food with a macro lens any, and I mean any imperfections will be revealed. Lesson learned for future – when photographing food, especially perishables examination of the object should be carried out with a magnifying glass. Even if you think you have the hero make sure there is plenty of other possibilities cause as the set heats up with lights the fruit will reveal more and more imperfections from picking, packaging and handling.
• In a low light situation, I learned that my hand could be used as a shaped reflector.
• Playing with the white balance on the camera and the Fiilex P100 (AKA the Brick) color adjustable LED light can lead to some very interesting different rendering of the subject.
I now have more information about photographing food in case that comes my way.
Yours in Creative Photography, Bob
PS – As I was writing this post I think I may have found a way to process this strawberry into some art… Back to Photoshop for some more PLAY!
by successfulbob | Lumix GH4, Lumix Lounge, people photography, photography, photography education, photography lighting resources
Find Solid Lighting for Your Photography Portraits
To find a beautiful natural light for your portrait subjects I recommend looking for shadows. Shadows are the hallmark of depth and dimension in two-dimensional renditions of our subject.
First, look for porches or overhangs that will remove the overhead light. Ideally, you’ll have a bright surface like concrete or sand or bright building reflecting the overhead light into the shadowed area. This situation works well because the larger the light source, the softer the shadow edge transitions will be. There is a magical place just under the portico that will yield very flattering light patterns. One way to discover the right spot is to hold up and examine the back of your hand and examine the shadows as you move your hand through the scene. This method allows you to see how the shadow-edge transitions will play out. If you have beautiful smooth hands with no ridges and alternative is to bend the middle finger down and watch the shadow as it falls on your palm.
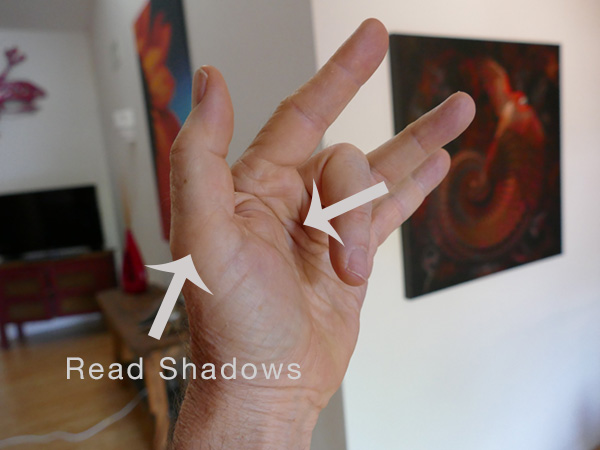 Fondly referred to as the reverse salute, the middle finger can show you how the shadows will look.
Once you have decided on the proper place for your subject, you then have the opportunity to set the lighting pattern by changing her angle to the light. By rotating your subject you have the ability to create the most flattering light whether that be broad light, split light or short light. Most times I will opt for short lighting as I feel that adds the most depth and interest to a portrait.
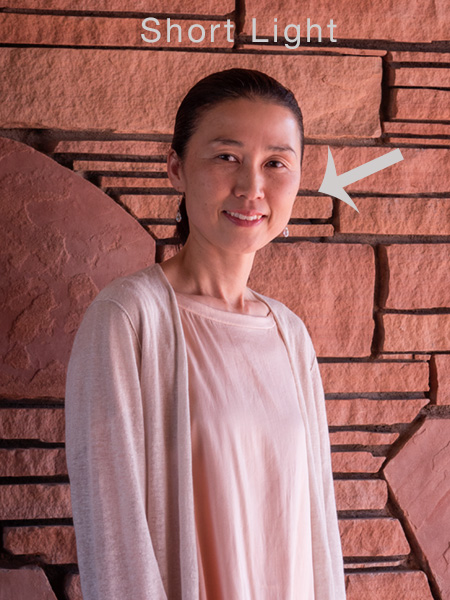 Note The light on camera right side is less wide than the shadow camera left
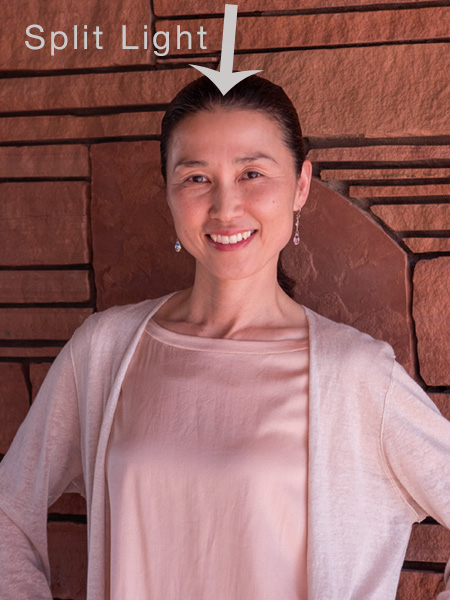 Note the light and shadow are just about even in this image
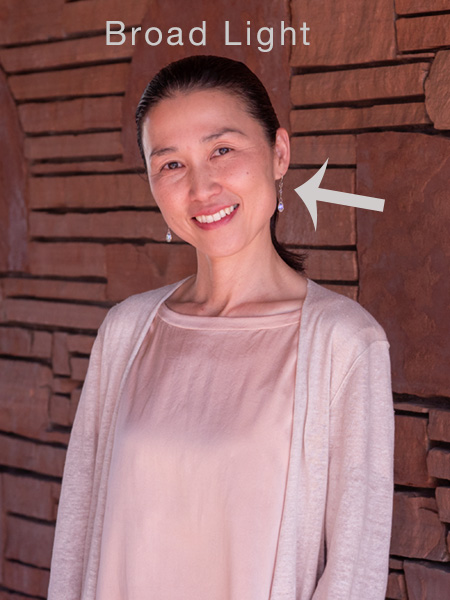 In this image, most of the mask of the face is lit with just a soft shadow camera left. Note the slight ‘kicker light’ on her face on the camera left side.
This particular space was a bonus in that it was more of a tunnel with an opening on the other side which added a subtle separation light which adds more dimension to the photograph.
I was photographing this session as part of a job for the Sedona Meditation Center, which is now under the guidance of Ichibuko Todd (my fabulous model!) who has relocated here from Hawaii.
Images captured with the Lumix GH4 with 35-100mm f2.8 Vario Lens. Settings ISO 200 1/400th sec. f3.5 47mm (94mm in 35mm)
Yours in Creative Photography, Bob
PS – If you want to have higher contrast with harder shadow edge transitions move your subject further away from the main light source.
by successfulbob | landscape photography, Lumix GX8, Lumix Lounge, panorama, photography gear
Photography in the Marsh in Delaware
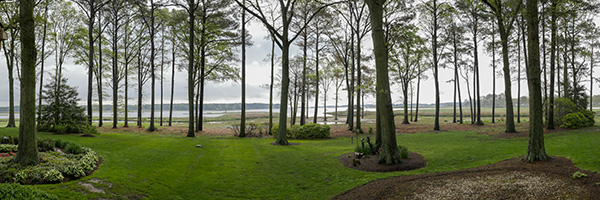
While the weather during the time I was on a family visit was less than stellar I thought I’d give you an overview of the scene from my mother-in-laws backyard. Photos of some of the wildlife from another post.
These two panoramic photos were captured with the Lumix GX8 and the Vario 12-35mm f2.8 lens. Very lucky to have this area as a playground when visiting.
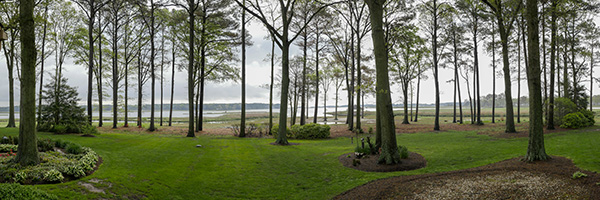 View from the front. Panoramic Mode with the camera oriented vertically. Settings 1/1000 sec f4.0 ISO 800 18mm (36mm in 35mm equivalent)
 View from one side. There’s a similar view on the other side with even less evidence of man in the view. Settings 1/2000 sec f4.0 ISO 800 35mm (70mm in 35mm equivalent)
The in-camera stitching on the GX8 is pretty amazing. In straightforward situations it makes a great pano. If you have highly complex subject matter like trees and/or patterns you might want to take two or three passes and check the details before moving on. If it is something very important I will make the in-camera panoramic and the I will also shoot the individual images in RAW for later stitching if I want super high quality. Many times I’ve been pleasantly surprised that I didn’t need to use the RAWs but I always like to back myself up.
Yours in Creative Photography, Bob
by successfulbob | bird photography, black & white, Lumix GX8, Lumix Lounge, photography, wildlife photography
Shooting the Birds – Delaware
My wife says the great blue herons all run for the hills when they see our car pull up as I have been stalking them on this property for years. I love those big birds.
Was visiting my mother-in-law this past week with my wife on our annual visit the family trip. It’s a great time to work on my wildlife skills. I thought I’d try pairing the Lumix GX8 with the 100-300mm Lumix Vario G f4.0-5.6 lens and boy I was happy. The GX8 has a fast capture rate which was great for sequences. I enjoy capturing birds with different behavior rather than just beauty portraits. As my MIL’s home is on the point with surrounding marsh there’s lots of wildlife on display for my camera.
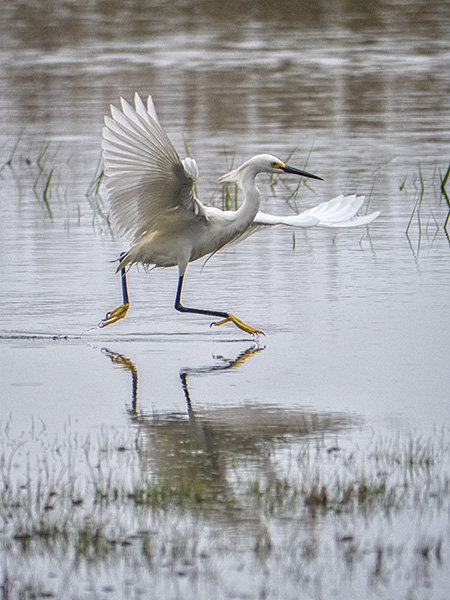
The birds that gave me the most opportunity to study during this trip were snowy egrets. Most of the time it was raining and blustery winds coming from the northeast.
 I enjoy how this egret appears to be dancing in this image. ISO 800 1/3200 sec. +1 exposure compensation Aperture Proiity f5.6 300mm (600mm 35mm equivalent)
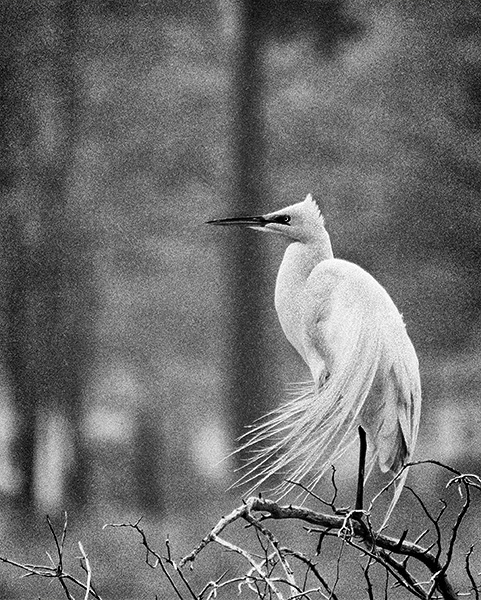 This combination of lens, ISO and camera lend itself to a slightly grainy (aka noise) look. Because this is a small piece of the overall image I’ve pushed it here to emulate tri-x push process. The processors have given the noise in an image more of a film grain feel. ISO 800 1/1600 sec. Aperture Priority f5.6 300mm (600mm 35mm equivalent) Processed in NIK Silver FX Pro 2 (which you can now download fro free if you hadn’t heard the news!)
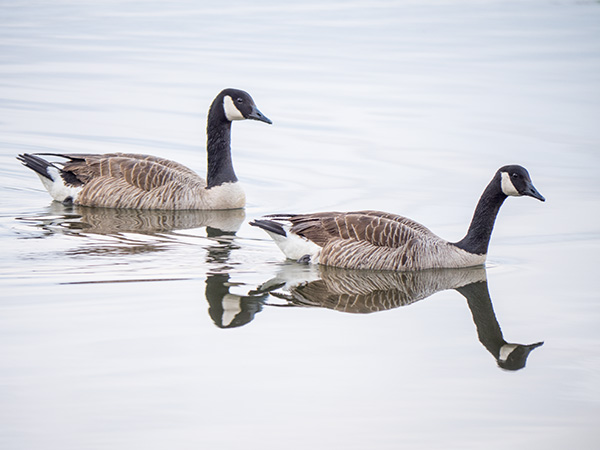 Geese are another ever-present bird on the marsh. ISO 800 1/3200 sec. +1 exposure compensation Aperture Priority f5.6 246mm (492mm 35mm equivalent)
Yours in Creative Photography, Bob
PS – You’ll notice that there are no great blue herons among my captures. That has nothing to do with me but a hawk family moved into the neighborhood and chased all the nesting herons from the area a couple weeks before my arrival.

 Outside Page, Arizona – Stud Horse Point


