Had a chance to visit with Tom Taback (sitting in for Mike) on my monthly Tech Talk appearance at KAZM Radio station in Sedona, Arizona.
Taback & Coates recording Tech Talk – Photo by Josh using the Lumix FZ2500
Tom and I chat about new Lumix cameras and some of the features that help get well exposed images. We also chat about advanced features, creating art and where I’ll be traveling to share info on photography and the Lumix line of cameras.
Yours in Creative Photography, Bob
PS – In the program I refer to the Lumix FZ1000 (which is a fine camera too!) as the camera I have with me. It is actually the newer model Lumix FZ2500
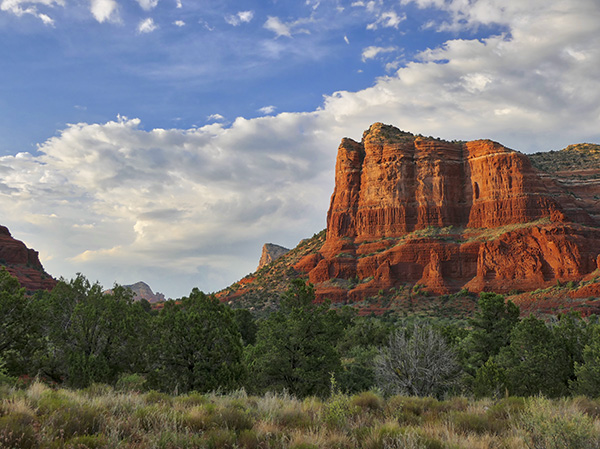
A couple of days ago I shared some ideas on working a scene to yield more and/or better images from a landscape photography shoot. See that Post here. The post was getting a little long, so I decided to continue sharing a few images and some more ideas.
I talked about using technology to improve upon a capture along with changing the view of the scene and not getting locked into the first composition you feel works. I did lock down my Lumix GH5 on a tripod on what I felt was the best image with lots of depth and dimension to layer passages of time into the final process. That’s why I also carry an additional camera to capture other areas and things which grab my attention.
This image was processed in *Macphun’s Luminar Neptune used as a plug-in in Adobe Photoshop. Luminar can also be used as a stand-alone program to process your files. As shown below and I wasn’t able to pull the details and color the way I wished.
This was the original process using Aurora HDR 2017 and four of the five one-stop exposures I made of the scene. I wasn’t able to pull the details and color the way I wished. Then I moved to Luminar for the finishing. (see the top image in the post)
So a different angle and a different ‘feel’ give me more from the shoot.
Let’s keep going with a couple more examples.
Zooming into the scene has a more intimate feel. The lighting shown here was a situation the appeared and disappeared quickly. Able to capture it with the FZ2500.
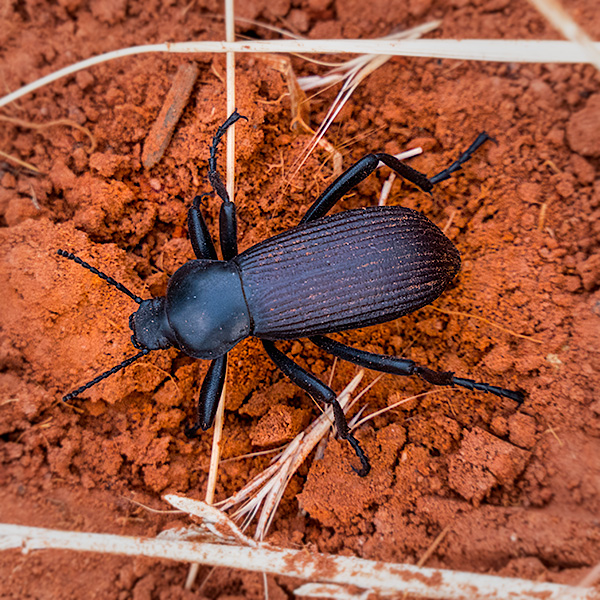
When I posted this little guy on Instagram, https://instagram.com/bob_coates I received a few EWWW’s, but I feel a bit of real nature’s beauty here. He’s kind of cool!
Yours in Creative Photography, Bob
PS – * Luminar is in Beta for Windows machines. Check it out here.
There is one error that I see repeated in photographers work that come to me for some feedback.
Know what it is?
It’s getting to a beautiful scene and not working it to see how many different ways the scene can be photographed. There are many options for creating different looks on location. Here are a few ideas for expanding the number of bonafide keepers for your photo collection.
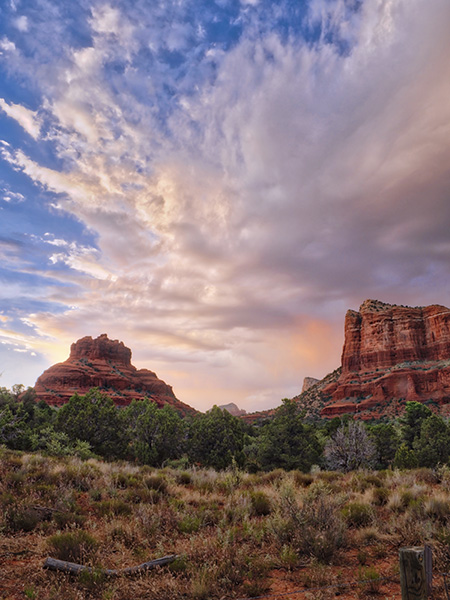
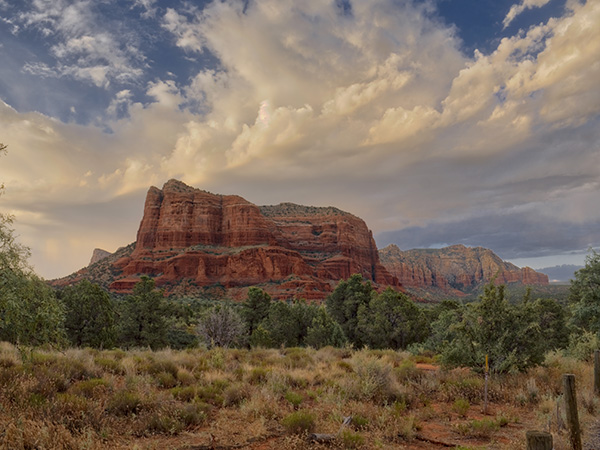
First image of the evening. Photographed with the Lumix FZ2500 bracketed exposures due to foreground being in shadow. Processed in Aurora HDR 2017. I like Aurora because I can pull realistic HDR images without the “HDR!!” look.
You can see when the detail in the clouds is good that the foreground is almost totally blocked up. I usually photograph a sequence of five exposures one stop apart. When processing I’ll sometimes use all five exposures. In this case I used these three.
• Number One on my list is – Wait for different light.
Can’t tell you how many times a beautiful subject or scene is presented but the light was lacking or lack-luster. It’s all about the light people! I have witnessed some pretty terrible photographs of Cathedral Rock in Sedona, which is one of the top ten photographed places in Arizona if not the country. And, I’ve seen an exquisite photograph of a pepper. The difference is the light. When you get the chance spend more time on location waiting for the sun to change or do your best to return when weather,sunrise or sunset can add more interest to the beautful vista.
I know I said one error but as I was writing this post a couple more jumped into my head.
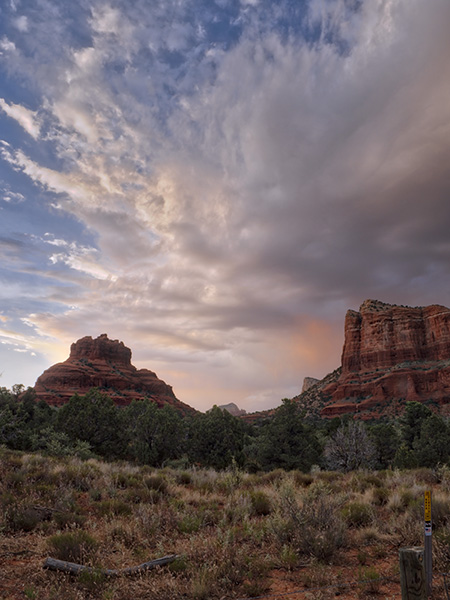
Different view of the same scene a little while later. Made with the Lumix GH5 and the 12-60mm f2.8-4.0 lens
• Number Two – Change your view
There are a veritable plethora of possibilites to accomplish this. Walk closer. Walk farther. Zoom in. Zoom out. Change lenses. Get your camera higher, or lower. Of course, this is in addition to working the light if at all possible.
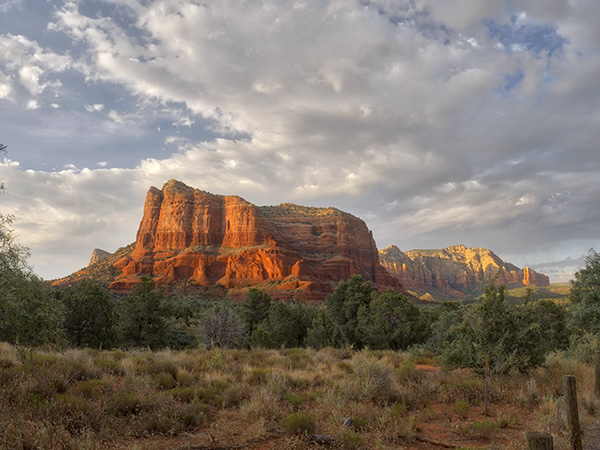
Here was another exposure made at a slightly later time when the clouds parted. I made all the exposures from a locked down tripod in order to be able to mix and match different moments in time.
Differnt exposures allow for different processing options to give make it possible to show a photograph of the scene as you saw it.
• Number Three – Utilize available technology
When capturing images think about the scene. (we’re back to the light here) Is the enough dynamic range in your camera chip to capture all the detail you need in highlights AND shadows? If not, then please grab a few extra frames and process the images in HDR. I’m not necessarily telling you to go for the oveerprocessed, highly garish HDR techniques we have seen over the years. But with the correct technique you will have much better detail in the highlights and the shadows if you process properly without going over the top.
Getting good, solid lighting is the best thing you can do to highlight the features of products. Today’s post is how I set up to photograph some jewelry and a couple of my cameras. I will suggest you practice lighting techniques long before you need to use them. It allows you to refine the look rather than trying to tweak on set.
This set-up is relatively straightforward yet gives a compelling and professional look to your product photography.
Gear in use. Two Paul C Buff X3200 flash heads. One Paul C Buff Ultra Zap1600 flash head. Paul C Buff Octobox (35 inch) Snoot. Strobes are fired with Buff Trigger. A sheet of Non-glare glass. Scrims with diffusion material. Sekonic L478D light meter. Lumix GH5 camera with various lenses depending on the subject to be photographed. Light stands, one with Boom to suspend light over the set.
The power of the lights is not germane to lighting on set. If you work with lights at less power or varied, you will want to put the most powerful one above the set. It will be going through the snoot and the scrim both of which suck up some of your light. With this set, you have the ability to change the size of you lighting circle. If the light from the snoot is closer to the scrim, it will be tighter as shown in this view. If you move the snoot higher, you’ll see the light spread more and feather to a larger circle. The height of the scrim above the product will also have an effect on the light pattern.
The glass (make sure it is non-glare) is suspended above a sheet of black paper. Depending on how much light you pump into the scene and the direction of that light you can create a background for your product that can be gray or black.
You don’t necessarily need an Octobox as a modifier for your main light. I use it because it is quick to set up and break down and gives a solid direction of light. At the very least, you will need to have a softbox. If you use an umbrella, the light is harder to control on the set, and the bounce of light from the walls and ceiling can infect the set. Control is essential.
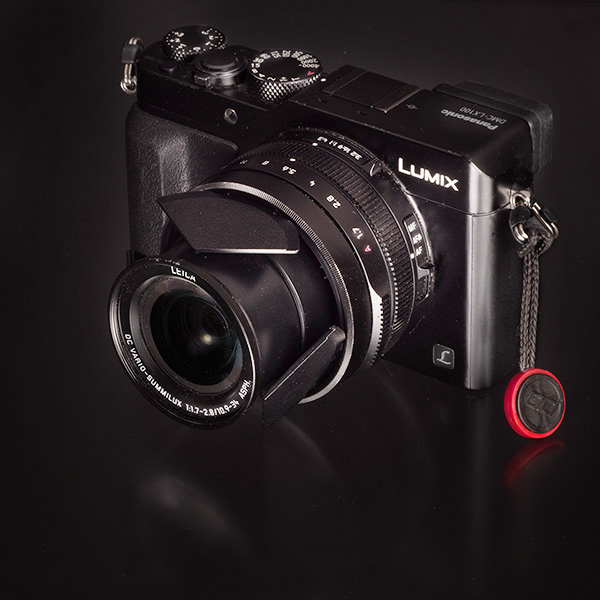
Let’s look at a couple of camera photos.Lumix LX100 camera. I call this the ‘professional’s point and shoot’. This is an example of going black with very little light from above. Solid but stark image. It will always depend on what look your client is trying to achieve.
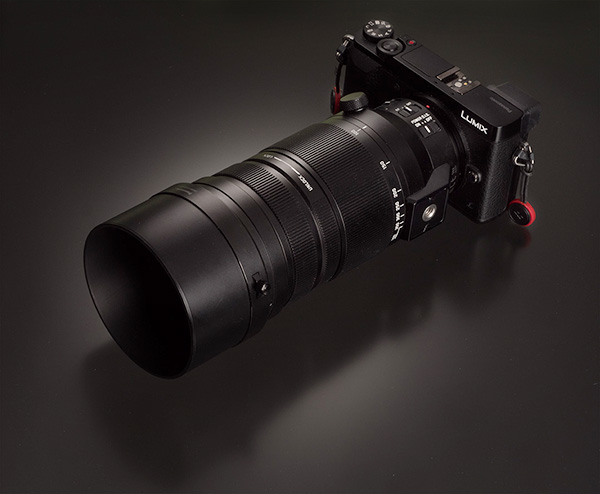
Photo of Lumix GX85 with Leica DG Vario-Elmarit 100-400mm f4.0-6.3 lens made with the down light to give some more depth and dimension to the final image the gradient is made with the snoot and the scrim as shown above at the top of the page in the BTS shot but not as close to the scrim.
Let’s pause here until the next installment where the images will be of jewelry using the same set and adjusted accordingly. Part three of this will show before/afters and talk about post processing.
In part Four of this series on outdoor photography, I talk more about the why’s of the gear I carried on this occasion. You can see results from the shoot by checking out part three and working back to the previous posts.
Take a look at the video below for an in-depth look at my photo kit for a full day hike.
Total weight – just less than 15 pounds. If I knew I wasn’t going to be photographing any focus brackets or exposure brackets I could leave the MeFoto Tripod behind. But, you never know. Rather be safe than sorry!
For infrared conversion of my cameras I use LifePixel. Infrared allows you to put an older camera to use and opens up a new time time of day for productive image creation.
Learn Photoshop in a fun environment. Aaron Nace applies the right amount of fun with easy to understand and follow tutorials. Actions and brushes are included with lessons!
Best embroidery ever. Give Queensboro a try, get a $20 instant credit to get started by clicking on the logo! They specialize in great quality custom logo apparel and promotional products with the best customer service.
Platypod has become a great resource for being creative in getting your camera gear easily into unusual places. As an Platypod Pro I get to work/play with the gear even before it comes out. Head over to Platypod, subscribe to the newsletter and you will get special discounts reserved only for subscribers.
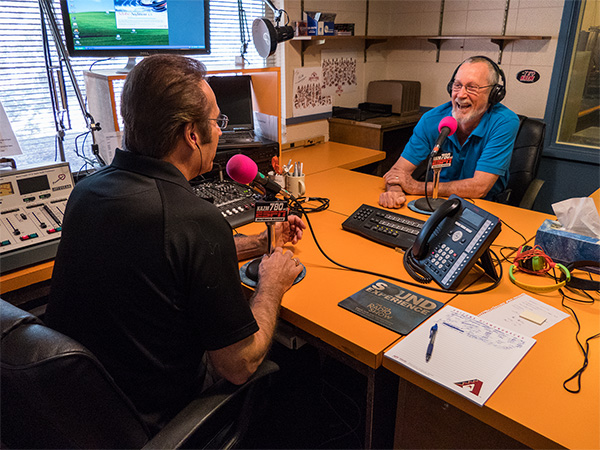
 Taback & Coates recording Tech Talk – Photo by Josh using the Lumix FZ2500