by successfulbob | 4K photo mode, Lumix GX8, macro, photography, photography education, photography software, photoshop tutorial, wildlife photography
Choose your focus later.
The photography world is changing around you as I write this post! At least it feels that way as new cameras and features are introduced in short order. I’ve never been on the front edge of technology before and it’s fun trying to figure uses for features as they come out. A lot of the new capabilities is driven by possibilities not available before 4K mirrorless cameras came on the scene.
This is a very interesting new feature called Post Focus.
This is for stable non-moving subjects where you might not be sure of the focus point you want and would like to have options to choose later for a totally different look and feel to a subject of a scene.
Here’s how it works. The camera makes a quick video of a scene while moving the focus point throughout the frame. Because the camera is automatically set for Photo Mode each still frame can be extracted from the video as an eight MP file. At the end of processing after a few seconds you can see the individual frames on the back of the camera and choose any that you would like to save out as individual jpeg photos.
Want to be able to choose later? Not a problem. Download the video file and take it in an editing program like Adobe Premiere, Final Cut Pro, or Lightroom. There you can step through each frame and choose at your leisure on a large screen and save out your file.
I decided to see if I could use the system to help with the capture of Macro images and the process of focus stacking to get deep detail in an image.
And guess what ?? It works!
I Imported the MP4 file into Adobe Premiere and used the right arrow to move through each individual frame. Selected the ones I wanted to work with and pushed the save as an image (camera icon) and saved the images out as a TIFF. Then it’s off to Adobe Bridge.
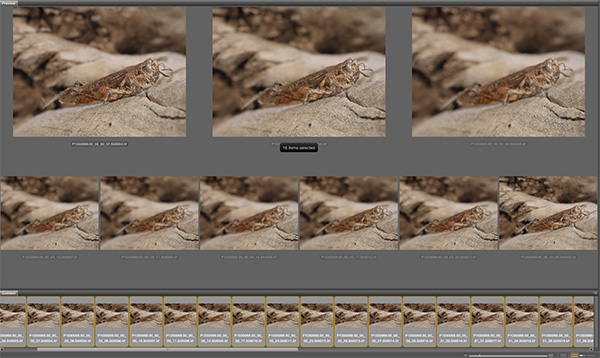
Screen capture of Bridge selections with all 28 files selected with the still captures pulled from the video.
With files selected the next move is Tools > Photoshop > Load Images into Layers
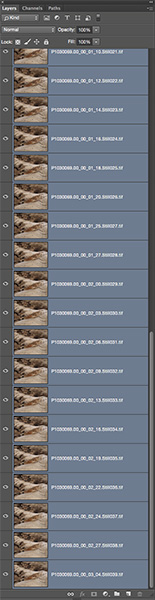
Layers Palette with all layers selected in preparation for Photoshop magic.
Once all layers are selected they need to be put in registration because a change in focus changes the size of the image. Menu Edit > Auto-Align Layers.
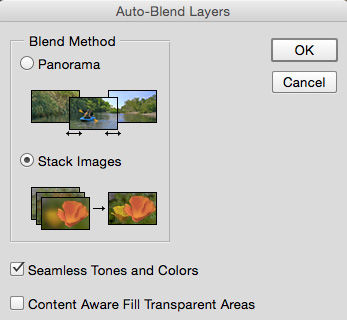
Once layers are aligned Menu Edit > Auto-Blend Layers with the Stack Images and Seemless Tones and Colors checked. Depending on the number and size of your files the the RAM horsepower of your computer this could take a little while but it’s doing all the work you see below masking in all the sharp portions of the images.
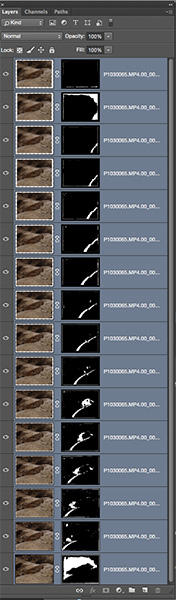
Palette window with proper selections for picking and masking in all the sharp bits it can find in the images. Making all of these masks would be super time intensive. Sometimes the individual masks may need a little tweaking if you didn’t get enough detail or colors and tones are very close.
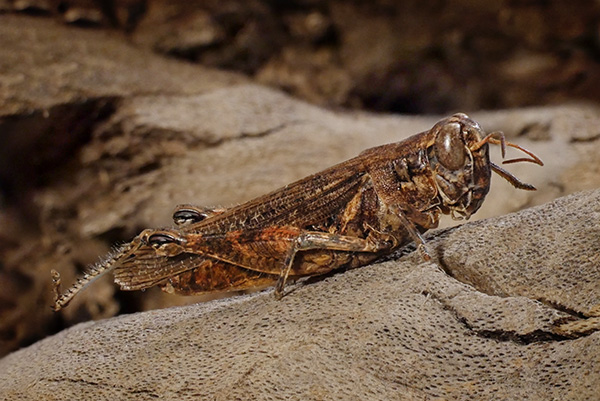
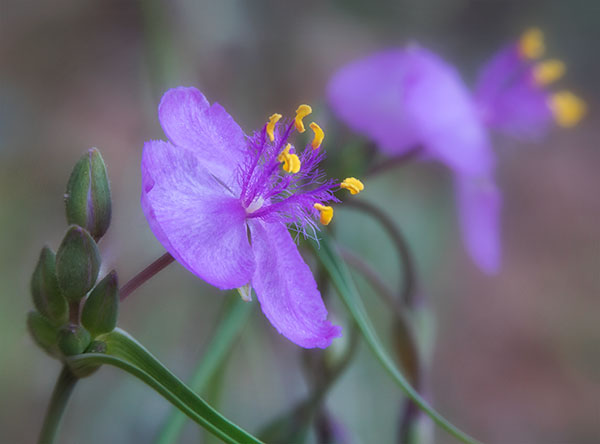
Grasshopper with detail and depth of field exactly where I want it.
The image was captured with the Lumix GX8 and the 45mm f2.8 Macro lens set at f9 in Post Focus Mode. “Why f9 and not f22 and be done with it Bob?” When photographing close-up Macro subjects the DOF is very shallow even at f22. In addition as the aperture gets smaller diffraction is introduced starting to blur details. (learn more about diffraction and check out your camera lens combo to find the sweet spot here)
Yours in Creative Photography, Bob
PS – No grasshoppers were harmed in the making of this tutorial. The grasshopper was already mummified when I found it on my porch.
by successfulbob | Lumix GH4, Lumix Lounge, macro, photography education, photography gear
“When you take a flower in your hand and really look at it, it’s your world for the moment. I want to give that world to someone else. Most people in the city rush around so, they have no time to look at a flower. I want them to see it whether they want to or not.” Georgia O’Keeffe
In the desert southwest the smallest of flowers dot the landscape at certain times of year. I agree with Georgia that sharing the world that many pass by is a cool thing… These particular flowers can easily go by unnoticed because of tiny size. These flowers are about the size of my thumbnail.
Tiny desert flower bloom
To capture a flower this size takes a little thought and manipulation. This was captured with the Lumix GH4 and 35-100mm 2.8 Vario lens with 26 mm of extension tubes from Neewer Technologies (get two sets they are very inexpensive and you can magnify even more using the technique below). When you have that much extension Depth of Field is extremely shallow. In order to get the buds and the first flower in total focus to share the miniscule detail I added a tripod and the technique of focus stacking. I focused on the bud in the foreground and made an exposure, changed focus to the bud a little further into the image followed by multiple captures across the surface of the flower. These exposures were taken into Adobe Photoshop and blended together using Photo Merge. When this process is used Photoshop will stack the images and blend together the sharpest parts of the image giving an increased DOF.
Yours in Creative Photography, Bob
by successfulbob | fine art photography, graphic design, Lumix GX7, Lumix Lounge, macro, photography education, photography gear
The flower garden at the B&B at which I’m staying has some beautiful blooms… So I’m playing and experimenting with the Lumix GX7, 35-100mm f2.8 and and Vello extension tubes.
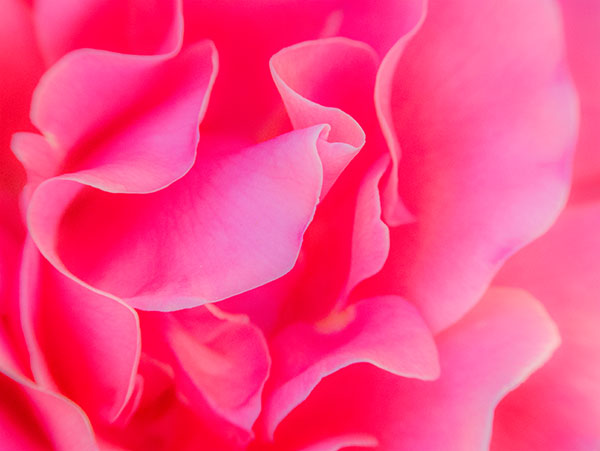
Rose petals close-up with extension tubes. Opening up the shadows and lowering the highlights with the GX7’s in camera curves setting.
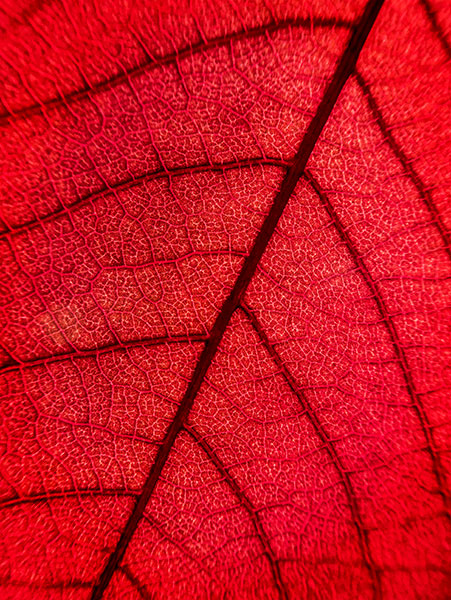
I always enjoy details revealed when photographing flora with back lighting.
Have you played lately??
Yours in Creative Photography, bob
by successfulbob | Lumix GH4, Lumix Lounge, macro, photography, photography education
No I didn’t stutter in naming this photo blog post it just seems that way…
Macro macro was exactly what I was trying to say. I thought I’d take the macro photography to another place and see what happens. I used the Leica DG Macro-Elmarit 45mm f2.8 Aspherical mounted on the Lumix GH4 with a set of Vello Extension tubes (10mm + 16mm stacked) to see what would happen. Since I was trying to keep Weight down on the trail I used a MeFoto Backpaker Travel Tripod.
Some serious detail comes forward with this setup. I photographed this Yellow Desert Flower bud and love the detail I was able to bring to the image. Almost looks hyper-real.

I’d love to be able to tell you the specific name of this desert flower in the photo but there are so many varieties that look similar to each other… Ah what the heck let’s go with Yellow desert daisy bud.
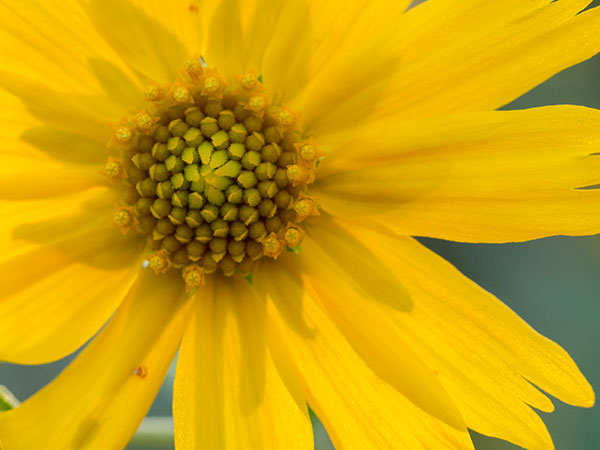
Here is what our bud will turn into short of being eaten by wildlife or beaten into submission by rainy weather.
On the first image I added some sharpening using NIK Silver FX Pro2 and adding Structure and Fine Structure to the preset #4 High Contrast (smooth). Then I changed the Photoshop Layer Mode to Luminosity. Since I was shooting at a very high ISO 3200 because of the low light the sharpening also sharpened the overall noise in the image so I added a Layer Mask to allow the background to be soft while the flower bud was sharp.
Mix and match your photo tools, add a little post production to see what happens…
Yours in Creative Photography, Bob
PS – Please remember using links to products from this page helps support the information being presented and shared
by successfulbob | Lumix GH4, Lumix Lounge, macro, photography, photography education, photography lighting resources
Choices!
We get to make a bunch of them and I’m still playing with ideas as I explore the photographic world in which I have chosen to immerse myself. How about you?
What kind of decisions can we make to change the look of a single scene? Here’s an example of three images made with a Macro lens of a flower that is about the size of my thumbnail.
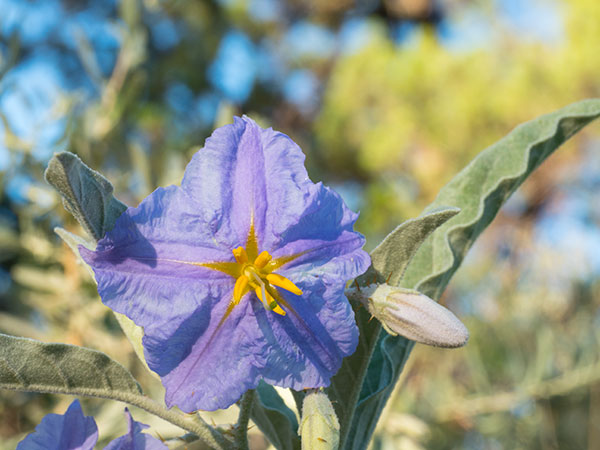
First capture of the White Horsenettle. Full sun. Looks a bit harsh. (why do they call it White Horenettle when it’s lavender??)

Placed a 20 inch scrim from a Westcott 5 in 1 to increase the size of and soften the light.
This has the effect of softening the shadow edge transitions and, to my eye, renders the flower in a more pleasing fashion.
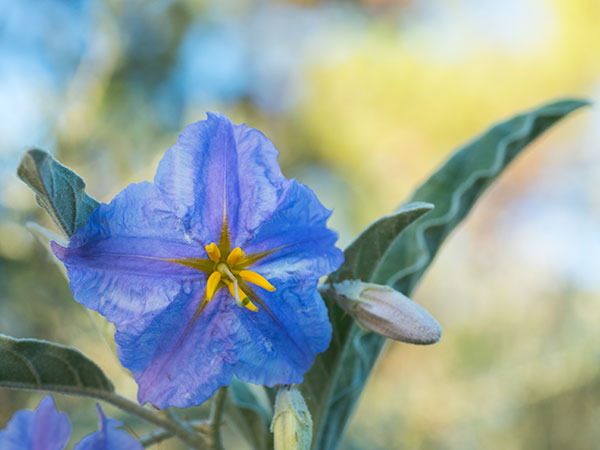
Same capture with lighting as above but changing to a wider aperture softening the background allowing the flower to stand out more.
These are very similar images with subtle, and not so subtle, variations. Could there have been more choices made in this capture? You betcha! Could have taken a higher angle and not included the sky area. Could have changed the composition. Changed the lens. Changed the camera distance to subject. Could have added flash. Could have moved the scrim to the shadow side and reflected light into the shadows. You get the idea…
Point is when you have a subject explore the many possibilities and variations because it’s not unusual to improve on your images as you ‘work the scene’.
Capture information – Camera: Lumix GH4 Lens: Leica DG Macro-Elamarit 45mm f2.8 Aspherical Extension tube: Vello 10mm
Explore. Play. Practice.
Yours in Creative Photography, Bob