by successfulbob | cloud photography, infrared photography, landscape photography, Lumix G6, Lumix Lounge, photography, photography creativity, photography education
Live, learn and practice some more.
This is the continuing story of learning to see and capture infrared images with my newly refurbished Lumix G6 camera from LifePixel where I added a straight IR filter to the camera… (see Part One or Part Two)
Photographing with a camera that has had it’s sensor replaced by with an infrared filter makes IR photography MUCH easier than the olden days of film when fogging a roll was easy and focusing not so much. But as with all things photography making it easier doesn’t necessarily lead to stellar results. You still need to learn to ‘see’ in infrared. A helpful tool is the use of photographing in RAW +jpeg. You can set the camera capture mode to black and white The capture is in color AND black and white. If you have what you need and are happy with the ‘natural’ in-camera capture in black and white you are ready to go…
So far I am not.
RAW file to the rescue. As you saw in part two there are multiple ways of addressing the final IR image and many ways to get to the final image you have in your brain. We still have the words of Ansel Adams to fall back on to create a more artistic rendition of a scene. Paraphrasing for today’s world here, ‘The RAW capture is the score, the processing and final print the performance.’ Just as a conductor can get more out of his orchestra but pulling exhorting his individual musicians to do their best we can manipulate each pixel in each color space to give us the tones we desire.
Some of the things I’ve dabbled with…
Two or three different processing pulls from the RAW files for different areas of the image.
NIK Silver FX Pro 2. to convert to black and white and tweak ‘colors’ into the tones I was looking for.
Channel Mixer Adjustment Layer after the file was open in Photoshop.
Black and White Adjustment Layer.
Hue Saturation Adjustment Layers.
And mixing and matching all of the above techniques to taste…
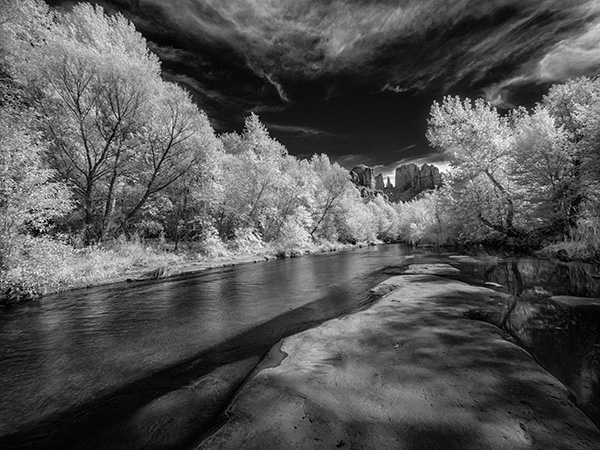
We don’t have a lot of deciduous trees in Sedona, but the banks of Oak Creek lead a parade of trees down from Flagstaff. Having the color information available in the file and Layers and Masks in Photoshop allowed me to create the contrast and tones I was looking for…
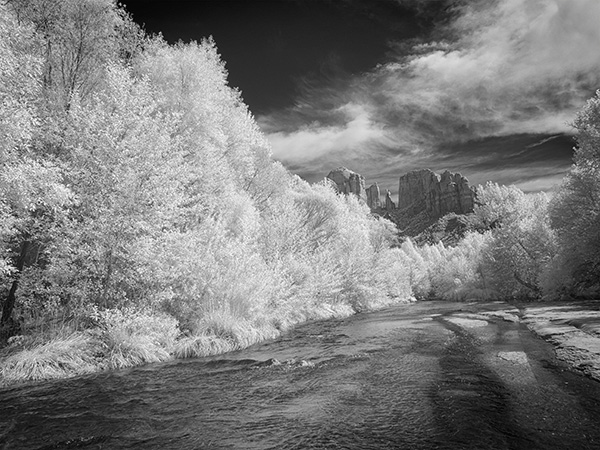
Same scene from a slightly different angle and different processing lead to an image, while still BW IR has a totally different feel than the one above.
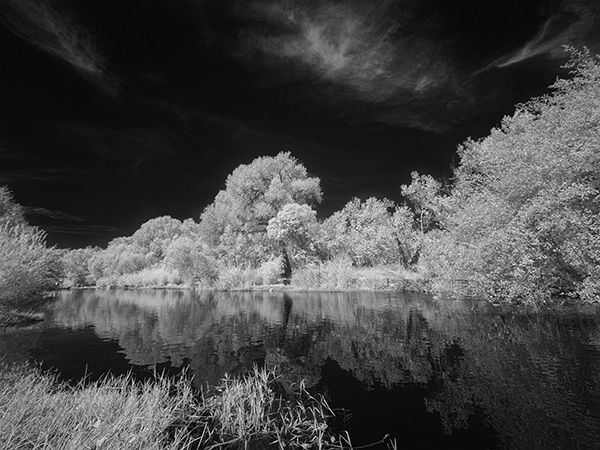
As always don’t forget to turn around… Many times there is an enticing image waiting behind you.
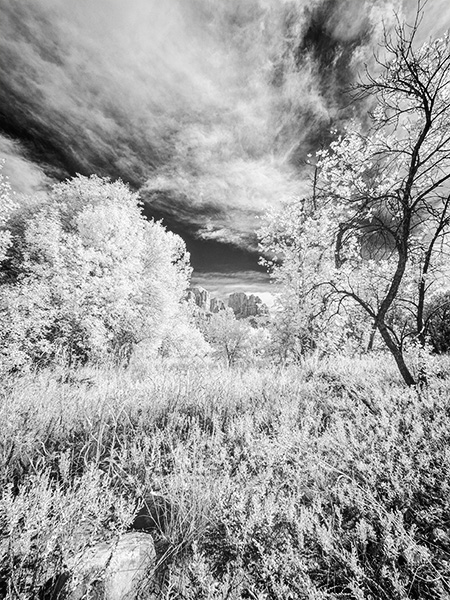
Moving off the creek banks led to this….
I see IR as a great new tool in my quiver. Makes photographing at mid-day very interesting. Can’t wait until I start to learn more about new capture and processing ideas to really push the look.
Yours in Creative Photography, Bob
by successfulbob | cloud photography, Lumix Lounge, Lumix LX100, photography, photography education, photography gear
Yesterday I shared a few images from the window seat and today here are a few more. As a Panasonic Lumix Luminary (check out the Lumix Lounge) I get to work with a lot of different pro and advanced amateur camera gear. On this trip it was going to be very quick run to Atlanta, and back to Sedona, through Phoenix within 72 hours so I wanted to travel light. Camera-wise I couldn’t get much more compact than the camera I’ve dubbed the ‘Pro’s Point & Shoot’ the Lumix LX100. Lot’s of powerful features in a solid, easy to use piece of machinery. All images were captured with the LX100.

You need to change the exposure compensation quite a bit to make this sunset image work. Easy to do as the Exposure compensation is on a metal knurled dial right by your thumb. Up to three stops under or over.
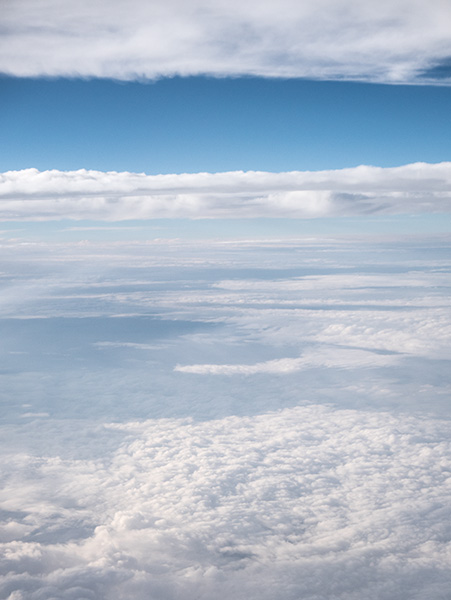
I like this view of clouds from above. The layers feel like it might be some kind of lunar landscape. And who knows? It just might turn into one in an art piece…

Working the wing to silhouette over a cloud back with flare from the sun.
Sometimes you just need to push yourself by limiting yourself to find the capabilities of a camera. I hadn’t spent any quality time with this camera before this trip cause I had some other favorites always at hand. Because of this if you have any questions about which Lumix camera might be the best for your needs get in touch and I can share some ideas. bob@bcphotography.com
Yours in Creative Photography, Bob
by successfulbob | cloud photography, Lumix Lounge, Lumix LX100, photography, photography books, photography creativity, photography gear
Love looking out from the window seat at 33,000 feet. The views and cloud formations can change at a moments notice! I am inspired now that I am flying quite a bit to capture images. Main inspiration comes from Julianne Kost and her book Window Seat – The Art of Digital Photography and Creative Thinking
On this quick trip to Professional Photographers of America headquarters in Atlanta for a committee meeting I was able to grab some pretty interesting images. Some can stand alone but I have a feeling that most will enter my files as textures and forms and vistas for my art creations.
Here’s a few of the captures…

Sun rays over clouds

Jet wing over clouds
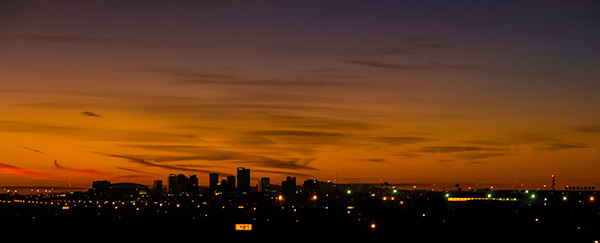
Phoenix skyline from airport at sunset
I used the Lumix LX100 which I have dubbed the “Professionals Point & Shoot” camera. It has fast glass opening to f1.7-2.8. 25-75mm Leica DC Lens. Full video capability including 4K Photo capture. I really enjoy that all camera controls are ‘Old School’ in addition to the menu capabilities. All settings are available via dials on the exterior of the camera including aspect ratio, exposure compensation, focus settings, aperture and more. It’s a rugged little camera that is almost pocket size.
The LX100 was the only camera I brought with me on the trip and I wasn’t disappointed with what I was able to capture. It’s a sweet little machine.
Yours in Creative Photography, Bob
by successfulbob | Lumix GH4, Lumix GX8, Lumix Lounge, musician photography, people photography, photography education, photography gear
Here are the ‘Wall of fame’ images for Sound Bites Grill from last Saturday night.
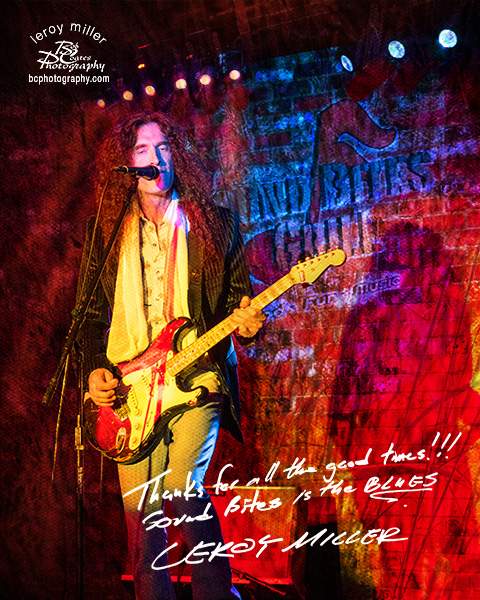
Leroy Miller Blues rocker

Grant Ferguson Blues guitar.
All files were captured with approximately the same settings on two different cameras with the Lumix 35-100mm f2.8 lens. Even though I worked with the Lumix GH4 for most of the captures I had brought the new Lumix GX8 to test in these lighting conditions and both of these were captured with the GX8… HMMMM food for thought.
Camera settings. 1/80th to 1/100th sec. f2.8 ISO 3200 Aperture Priority – 2/3 stop Exposure Compensation. Files then opened in Adobe Camera RAW and shadows opened a bit and highlights pulled down just a bit. The art effect was created using multiple texture images, Blend Modes and Layer Masks in Photoshop a process I call Photo-Synthesis.
Yours in Creative Photography, Bob
by successfulbob | Lumix GX8, Lumix Lounge, musician photography, people photography, photography, photography gear, photography software
Went to Sound Bites Grill, my favorite restaurant, to see some of my favorite musicians play and was not disappointed on either case. Food was great and the entertainment of Miller, Martin and Ki was stellar as usual.
And also as usual, even though I wasn’t working I brought my Lumix GX8 with the 20mm f1.7 lens to the party to try to push some features. The table I was at had a very tough view of the stage as far as the camera goes. Deep shadows in the corner and Sunlit rocks out the window behind. I thought I’d try the HDR setting to see how it would do. There are menu choices of bracketing by one, two or three stops but there’s also an automatic setting. Now there’s an additional part of this challenge we have moving people. I made a number of exposures with a few distorting features until I realized I needed to bump up the ISO to get faster shutter times and watch for moments ‘between the movements’ of the performers.
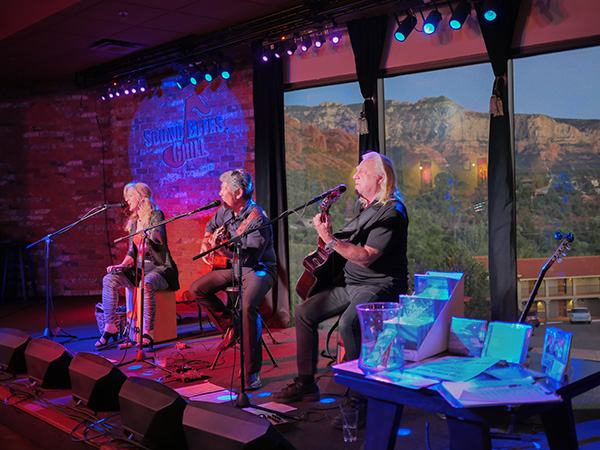
Finished image. But, what I’d like you to do is compare the two images below to see the difference.
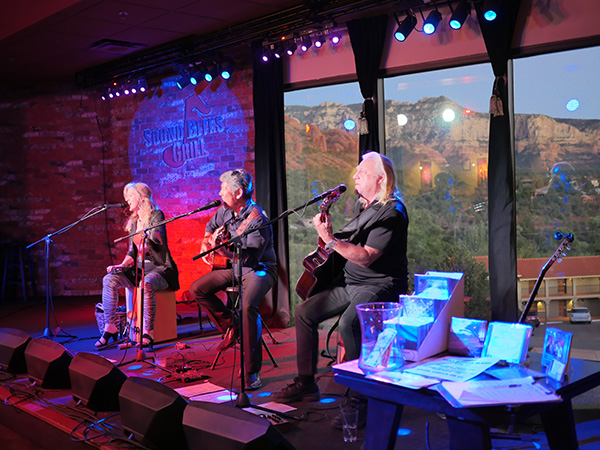
Straight out of Camera – 20mm @1.7 ISO 1600 Aperture Priority with auto setting for HDR capture
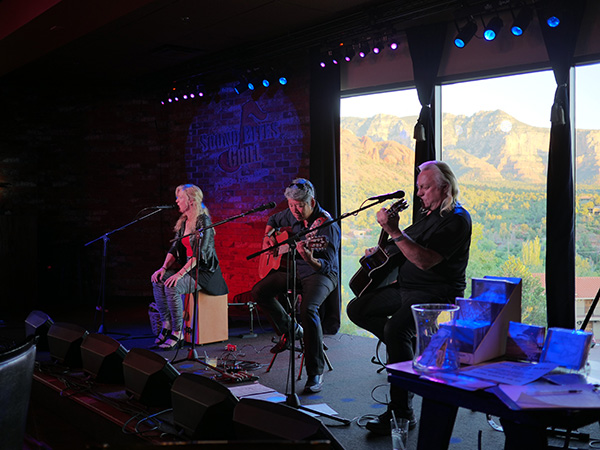
SOOC – 20mm @ f1.8 400 ISO Aperture Priority
Call for some more experimentation but I think the camera HDR setting handled a very difficult scene extremely well. A little additional processing in Adobe Camera Raw and Photoshop could tweak the HDR image to be somewhat better in taming the saturation and working tones a bit but I’m happy.
“Wait a minute Bob I thought the HDR feature saves images as jpegs. How are you going to process the file in ACR??”
If you have the image highlighted in Adobe Bridge using CMD R (mac) or Ctrl R (pc) will open the jpeg image in Adobe Camera Raw allowing you to use those controls. Very handy!
I also captured some 4K video that I haven’t had time to process. That will have to wait for another post…
Yours in Creative Photography, Bob
