by successfulbob | fine art photography, photography, photography education
I’ve been working with a way to shoot flat art that really simplifies the set-up and gets you better color than some other ways. No longer a need for polarizing filters and busting butt trying to get even light across the field of the artwork by trying to use 45 degree angles with lights pointed at the art… See the diagram for the set up here’s how it works for me…
Take a measurement of the art. The lights should be at a distance as an equilateral triangle that is longer than the longest dimension of the art to be photographed. If you have really large art you can stack another umbrella light over the first to get larger coverage.
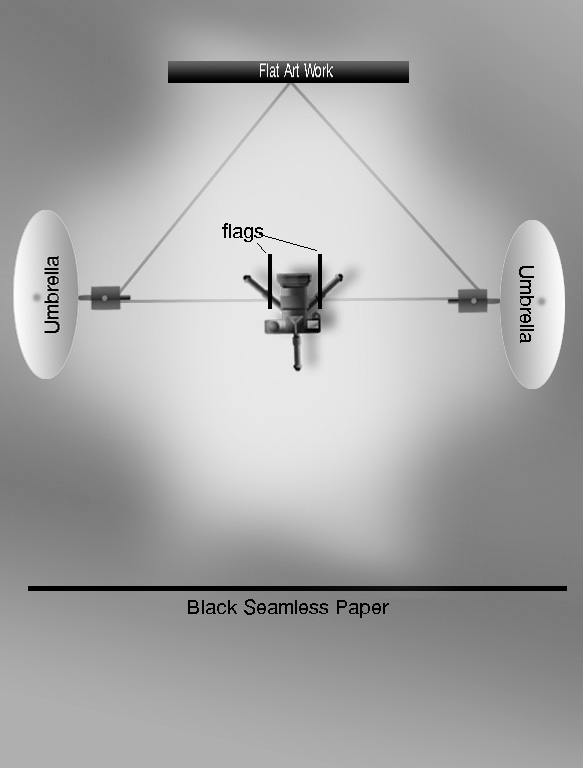 Lighting Diagram
Lights on umbrellas should be facing the CAMERA. We are lighting the flat art with the spill from each umbrella. This makes it extremely easy to get the light falling on the art to 1/10 of a stop over the entire surface with virtually no effort.
Set up flags so that the light doesn’t flare the lens since the lights are pointing toward the camera.
Take meter readings to ensure the light is within even across the art. Use that reading on your camera with an expo disk. Make an exposure with the expo disk in place with the metered settings from the artwork’s position and use that exposure to set a custom white balance on your camera.
If you are shooting artwork with glass or with highly specular highlights from the paint or glaze set up a black background behind the camera and cover the tripod with black velvet. Get out of the way and trigger the camera with a remote. There will be no reflections or any light for the artwork to “see” hence no glare or specular hotspots to deal with. The color will be spot on since you are using a custom white balance. I’m sure you could also use the Macbeth checker system also but the Expo disk works great for me. I also add a checker chart and gray card just in case, but haven’t had to use them since adding expo disk….
BTW the camera can be anywhere along the center line it doesn’t have to be in between the lights it can be forward or behind the lights.
One other thing to be careful about is lens choice. Ideally a tilt shift or very flat lens with no distortion is best. Use a level on the artwork and the camera lens to make sure they are on the same plane. Spending more time here will save you lots of hassles once you get to the computer. If you use a wider angle lens you can get some barrel distortion. If you don’t do enough of this work you can use the flattest you have. Camera raw has a lens correction tool that can get you very close but even then you should check that the image is perfectly square by pulling down some guides. A VERY small amount of transform tool using warp can get you back on the straight and narrow.
Since I have been using this system I no longer have issues with shifts in color from hot spots or polarizing filters. And most important no more fighting with artists about getting the ‘right’ color. Before there were always problems, no more. Try it you’ll like it!! Any questions give me a shout….
The black seamless paper is only necessary when you have glass that you can’t remove for one reason or another or if there are specular reflections in your room. You would also need to cover your tripod with black velvet to reduce reflections also..
Yours in Creative Photography, Bob
PS Thanks to commercial photographer and educator Jim Lersch for the diagram materials… Jim Lersch Photography
Save
Save
by successfulbob | fine art photography, photography, photography competition, photography education, success education
Thanks to New Mexico Professional Photographers Association (NMPPA) for hosting a convention of which to be proud. They did a great job. I was there to give a program on art and imaging competition and to help judge the annual print competition. There were a lot of great images.
If you are in the NM area and want to get in on some great learning you should join the organization. Organizations always go through ups and downs and it looks like they are on the ups with a solid board excited about getting quality photo education from photography speakers for their members.

Image made during the NMPPA convention during my ‘Photo-Synthesis’ Photoshop class.
Books, magazines, the web, DVD tutorials, Creative Live & PhotoVision are all great ways to gather photography education!
BUT, nothing beats in-person photo education and networking with fellow photographers and competing in the PPA system of Imaging Competition. A great place to start is with your state Professional Photographers Association whether you are in New Mexico, Arizona or any other state. Not sure where your closest PPA Affiliate is? Find out here.
Yours in Professional Photography, Bob
by successfulbob | Lumix Lounge, photography education, success education
In Albuquerque, New Mexico for the PPANM annual convention. Will be serving as a judge for print competition today (Sunday) starting at 1 PM. Then tomorrow I’ll be presenting my ‘Photo-Synthesis’ program with a side of print competition from the state through PPA District through PPA International. A bit about the why it’s good for your business and how to do your best in what the judges may be looking for in your images.
Will I see you there?? Or, at another one of my speaking programs?
Yours in Creative Photography, Bob
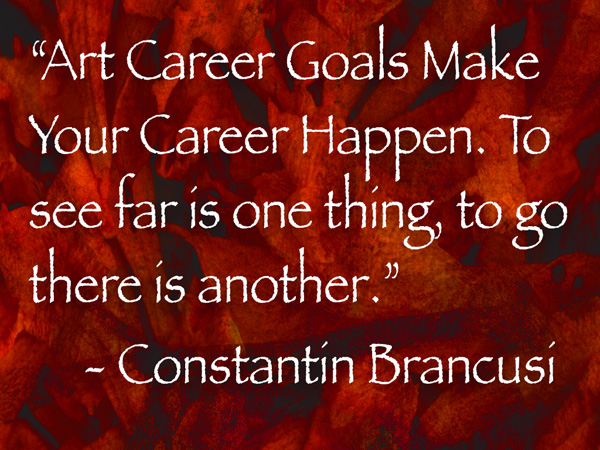
by successfulbob | fine art photography, photography, photography - art quote, photography education
There are often conversations with photographers of whether they are creating art or fine art with their imaging. Some are – some aren’t – but who are we to judge? The point is once we get over whether we are artists or not we need to work, not just dream, to make our dreams happen. Today’s Photo/Art quote from Constantin puts it very succinctly. (especially the second sentence!)
“Art career goals make your career happen. To see far is one thing, to go there is another.” Constantin Brancusi
What are you doing to work on your career and push it into the direction you would like it to go?
Yours in Creative Photography, Bob
by successfulbob | commercial photography, fine art musician portrait, graphic design, Lumix GH4, Lumix Lounge, musician photography, people photography, photography, photography lighting resources
Honored…
That’s what I am when I am asked to help fellow artists, in this case musicians, to photograph and create images and packaging to help them sell their CD.
Eric Miller and Ralf Illenberger are releasing a new music project on March 22nd at Relics Restaurant in Sedona and asked me to come by and make a photo showing them in their creation space. Of course, I asked what vision was in their mind and I headed for the shoot with all sorts of ideas on how I was going to light the scene. And then found them in this ‘closet-like’ space and had to start from scratch on what I was going to do. First we had to revisit the vision. Recreate working the feeling of working late into the night… Possible moods to depict? Serious, fun, thoughtful, etc…
Small room. Large window. First task – make the sun go away by blocking the light from the window. 2nd task – find a way to light the scene. Used the wall to bounce a large strobe because there was no room for light modifiers. Note that the walls are painted reflective gold and deal with the color change that would occur. Add a small LED light from camera left to fill shadows and add detail. Find point of view. Choose a viewpoint outside the door looking in to give the viewer a sense of peeking in at these guys at work. Almost voyeuristic.
Process image for the mood I was looking. Change mind as experimentation led to processing a warmer gold tone image taking advantage of the golden walls. Sharp. But layers of soft at the same time. A little painterly kind of fantasy look.
To the design. Choose one working photo for the cover and add several additional photos to help tell the different moods of the story. Choose fonts. Design.
Show initial layout. Get feedback and more information. Refine layout. Retouch.
Repeat.
Move graphics and refine to create CD information. Send for final review of layout, spelling clearance and last minute tweaks.
Convert files for the printer. (repeat a couple times as we found a couple small errors and additions)
And here it is.
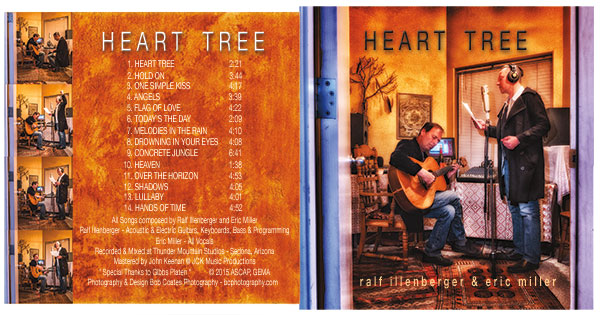
Heart Tree CD Jacket for Ralf and Eric
The capture was with the Lumix GH4 and the 12-35mm f2.8 Vario Lens. I ended up using just the 250 watt modeling light on the Paul C Buff White Lightning X-3200 light plus a little kicker fill from the Fiilex Brick LED light This is a pretty handy light to have in your quiver. Color balance and brightness is adjustable and the light is quite soft. Give you a nice WYSIWYG and doubles as a video light.
Yours in Creative Photography, Bob