by successfulbob | architectural photography, black & white, graphic design, Lumix GX7, Lumix Lounge, photography education
Had great time in Chicago at the Out of Chicago Conference put on by Chris Smith. What an incredibly successful event with over 160 people registered in it’s first year. You’ve missed it for this year but I suggest keeping an eye out for next year’s dates and get them on your calendar.
While out and about on one of the photo walks I moved to the Illustrative Art Mode on the Lumix GX7 and tweaked it to Black and White. This gives a very high contrast look with a bit of a glow. I enjoy this look for architecture with a graphic twist. But I had to try something just a bit different on top of that. Capturing images in RAW plus jpeg allows me to get to the full color information presented to the camera and I’m starting to play with mixing them and adding a gradient on a mask to blend them together.
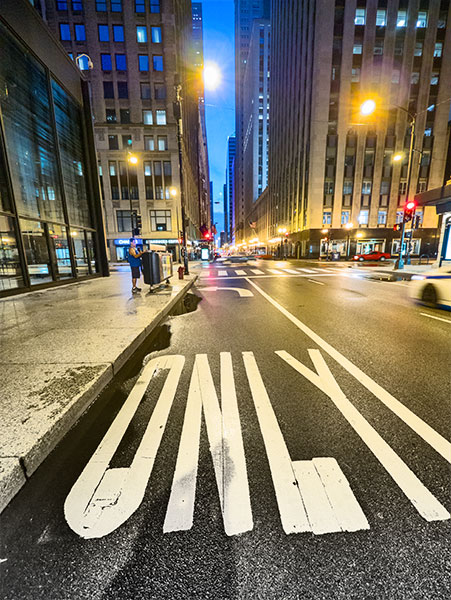 Splitting the photo into Black and White and color. Bottom to top.
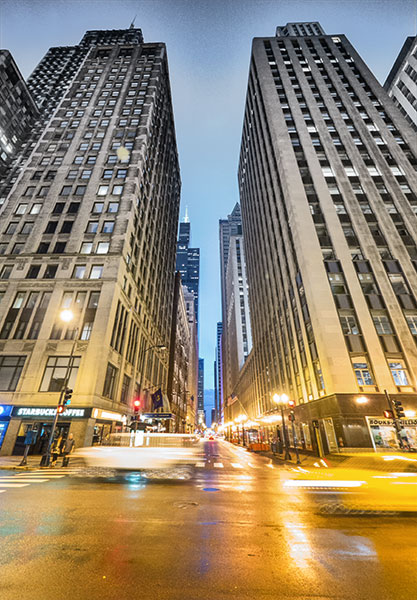 Reversed the gradient for this photo.
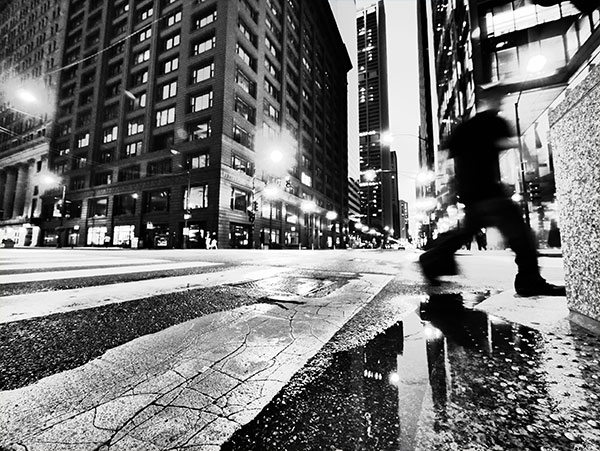 Tried the split on this one and it lost it’s ‘Cartier Bresson Decisive Moment’ feel so I took away the color.
Experimentation is key to growing your photography. Does the split color work? For some images maybe but as I play with it some more I may find the perfect place to use this technique. Let me know what you think!
Yours in Photography, Bob
by successfulbob | photography, photography - art quote
I’m at the airport in Chicago after presenting at the Out of Chicago Conference so this Photo/Art Quote is getting published a wee bit late. Thanks for bearing with me! Here we go…
Let’s head to the funny papers for some inspiration this week. Ever read the cartoon Dilbert? Scott Adams is the author and I found a quote by him about creativity that we can use. It actually contains two ideas strung together that I believe wholeheartedly.
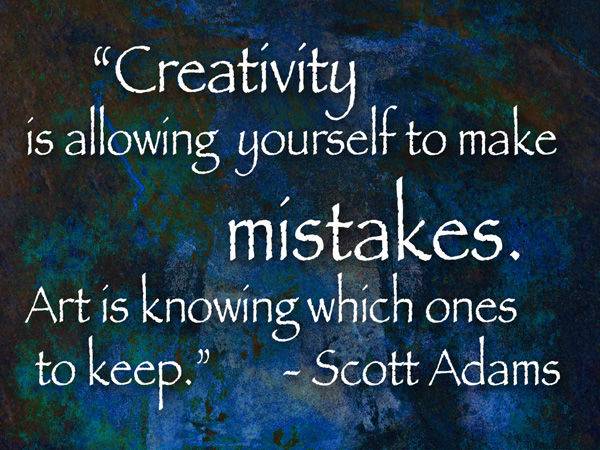 “Creativity is allowing yourself to make mistakes. Art is knowing which ones to keep.” – Scott Adams
Creating art can be accelerated by experimentation. Trying new things and giving yourself permission to fail is key. There is a tendency to keep recreating things with which we have had success. We set lights in the same place most of the time, or worse, lock them down without thought of who the subject is and what changes could really highlight the best features of our subject.
Or when we work with our manipulation programs like Adobe Photoshop we repeatedly use the same settings. I encourage you to take some chances. Play with Photoshop. Try new things. Play some more! By the way if you haven’t upgraded to Photoshop CC yet know that they have the $9.99 a month rate for getting the Lightroom & Photoshop bundle. Learn more here.
Get on you computer and mash down some buttons you’ve never tried before. Use new blend modes. don’t worry if it doesn’t work out perfect. You can always try again!
Yours in Photography, Bob
by successfulbob | landscape photography, Lumix GX7, Lumix Lounge, panorama, photography, photography education
Been enjoying the hikes more and more. This is on the Templeton Trail along Oak Creek in Sedona, Arizona. With the Lumix GX7 camera so light I’ve got it with me all the time… No excuse for seeing something I want to share and not having a camera at hand…
Used the Panorama setting to get in more of the creek view I was seeing.
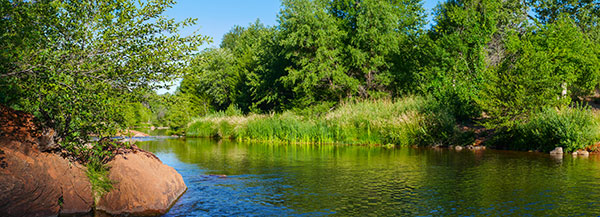 From the Templeton Trail Near Cathedral Rock.
Lens 35-100 f2.8 Vario at 35mm. Camera was held in the vertical position to get a taller file while still maintaining the panoramic photo dimensions. ISO 200 Exposure Settings – 1/640 sec. F 4.5 (pre-set by the camera) More panoramas and information on shooting panoramas here. https://chd.lzi.mybluehost.me/panoramic-photo-red-rocks
Hit the trails or hit the streets it’s a great time to be making images…
Yours in Photography, Bob
by successfulbob | landscape photography, Lumix GX7, photography education, photography seminar
Morning hikes in Sedona are a great excuse to test out some of the features of the Panasonic Lumix GX7.
Yesterday’s test involved one of my favorite features in the camera – in panoramic stitching. The images below are of Courthouse Butte on the loop trail from Bell Rock Vista trail-head in the Village of Oak Creek. Both images were captured from the exact same place with the exact same settings. The camera was set to capture vertical panos to give a bit taller image. Exposure compensation was at minus 1/3 of a stop to increase saturation just a bit. The camera must be set to capture in jpeg because the file is being processed in the camera. RAW doesn’t cut it in this situation. If you wanted the value of RAW capture you would have to make multiple exposures and the process the files in Photoshop or another stitching program a much more labor intensive deal.
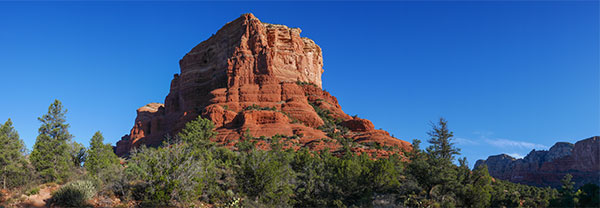 Panorama of Courthouse Butte in Sedona, Arizona panned at a fast rate of speed. Image was 54MB when opened
“Wait a minute Bob! You said these were both shot with everything the same on the camera but they are very different…” Yep they are and that’s the point of today’s post. The technique you use when making the capture is important. On the bottom image I moved very slowly so more on the frames were overlapped. In this case I felt I wanted a more “panoramic photo” aspect ratio so I did it again at a faster rate of speed starting further to the left and was able to capture a lot more of the landscape. Regardless of how fast you pan good technique is key to getting a good pano. Hold the camera tight to your forehead with elbows down. Point your feet toward the end direction of the image. Then coil your waist back to the starting point. Begin shooting while keeping the camera level. Use stomach muscles to rotate through the end of the pan. Check your results by reviewing the image on the camera. Happy with the result. Move on. Not sure? Try again at a different speed of rotation.
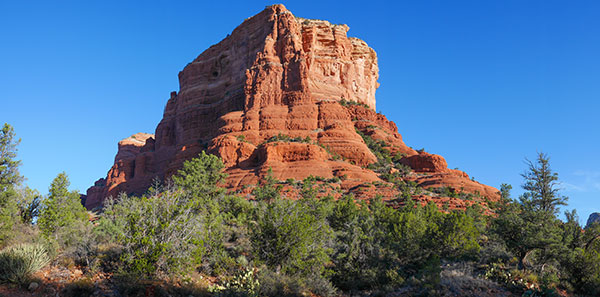 Panorama of Courthouse Butte in Sedona, Arizona panned at a slower rate of speed during capture. Image was 38MB when opened.
Just because you are shooting in jpeg doesn’t mean you can’t use Adobe Camera RAW to help process and tweak the image. From Adobe Bridge highlight the image(s) you would like to process and hit Cmd ‘R’ on MAC or Crtl ‘R’ on the PC and you can work on the images. In this case I used the Shadows Slider to open up the shadows just a bit to reveal some more detail and gave the Saturation a little bump.
If you have any questions about this technique or any other you’ve read about on Successful-Photographer don’t hesitate to ask. Interested in attending a workshop in Sediona? Let me know. I’m starting to gather ideas for an intimate workshop with 1-4 people that would include hiking trails, & Photoshop concepts and art ideas…
Yours in Photography, Bob
by successfulbob | people photography, photography, photography - art quote, photography education
Wikipedia on photography reports, “The word “photography” was created from the Greek roots φωτός (phōtos), genitive of φῶς (phōs), “light” and γραφή (graphé) “representation by means of lines” or “drawing”,together meaning “drawing with light”
Many of us have heard the term stretched a little bit more as ‘Painting with Light’. Whichever definition you use LIGHT IS WHAT IT’S ALL ABOUT… And today’s Photo/Art Quote comes from someone who knew quite a bit about light.
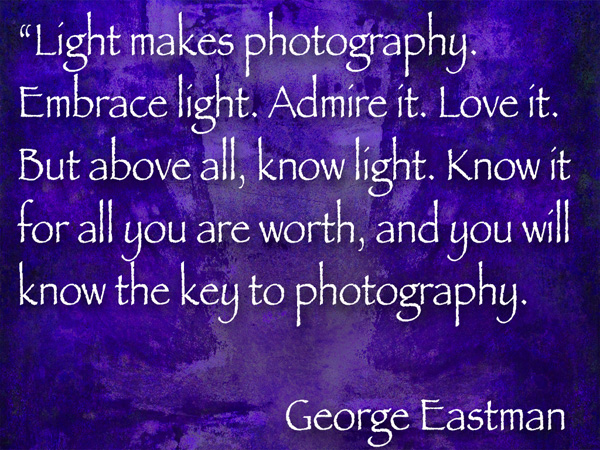 “Light makes photography. Embrace light. Admire it. Love it. But above all, know light. Know it for all you are worth, and you will know the key to photography.” – George Eastman
I think we become more aware and stronger as photographers when we give a language to light. Check out the portrait of Eastman from the Wikipedia web site. Can you talk about the quality of the light? Can you give a ratio to the light? Describe the lighting pattern on his face? How large is your lighting vocabulary? Why is it good? Or Not?
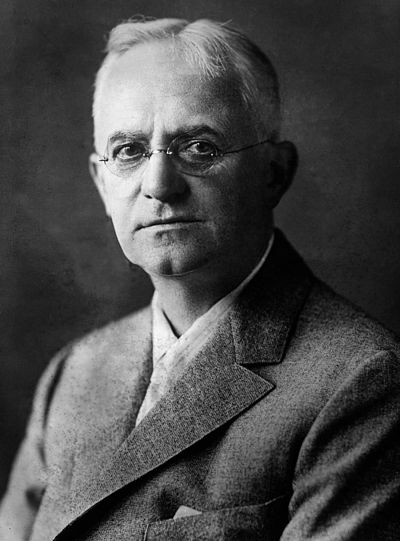
Photographic portrait of George Eastman from Wikipedia web site.
Once the brain learns more words for lighting it can offer more thoughts and combinations, mixing ideas and allowing you to see light in a new light if you’ll pardon the expression. I will be having more blog posts about the ‘Language of Light’ here on Successful-Photographer and I hope you’ll join in. In the meantime study the photograph of George and see what you photography vocabulary is like. Drop your thoughts in the comments here to get the dialog started. I’ll revisit this in a couple days with my thoughts in another post.
Yours in Photography, Bob