by successfulbob | landscape photography, Lumix GX85
Night Sky Photography – Lumix GX85
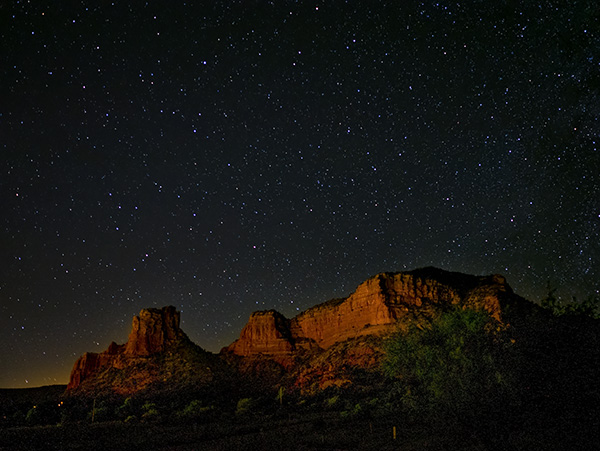
Thought I’d give the red rocks under the night sky a shot. We have dark skies ordinances in Sedona and the Village of Oak Creek. Add to that the undeveloped land under the Park Service and State Parks the stars can shine.
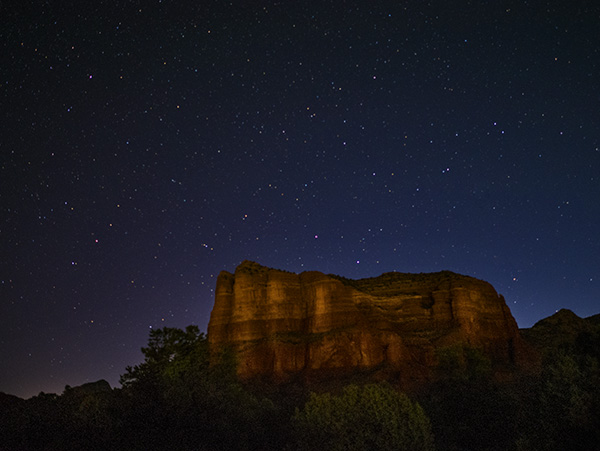
It was a new moon night, and the clouds had parted for places unknown. It was a very clear night. When the cat woke me up, I decided to run out and see what I could do with the new Lumix GX85. I added the 15mm f1.7 lens and started taking multiple exposures for combining later in post-production. There are all kinds of rules for focusing properly and how long your exposures can be before the stars start to move and streak during your exposure depending on lens choice. I’m not going to share that part cause some photographers have been doing night photography much longer than I. A bit of searching on the web can get you that info. After I have practiced more, I’ll share some of that information after I’ve tested more.
 Castle Rock in the Village of Oak Creek, Sedona, AZ
 Courthouse Butte Looking north. I will share time-lapse video sequences captured by the GX8 in a future post.
Both images were made with multiple exposures layered together using Adobe Photoshop.
It’s a new world for me to play in.
Now all I have to do is be able to stay awake overnight!
Yours in Creative Photography, Bob
Save
by successfulbob | fine art photography, photography, photography competition, photography creativity, tuesday painterly photo art
Tuesday Painterly Photo Art
Nylora-Joy Bruleigh M.Photog., M. Artist, Cr., CPP
I met Nylora when I was speaking and judging at a convention. I was impressed with the animal/people composite work she was creating. After Nylora earned both her Master of Photography and Craftsman Degrees in 2012, she decided it was time to step up her game and take the plunge into entering the Master Artist Category through Professional Photographers of America International Photographic Competition. She shares, “I had no idea these would become my favorite type of images to create! I quickly determined after creating my first image that I had to make a series. By doing this, not only did it give me a place to start but it helped me move from one image to another. The series I began with is titled Once Upon a Time and is all inspired from fairytales.”
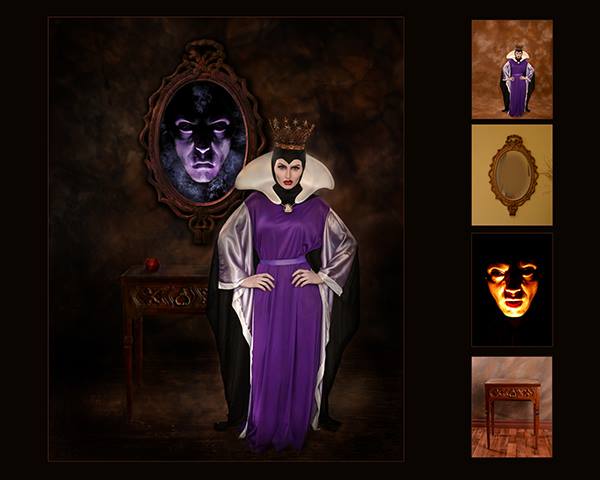 One of Nylora’s first attempts was “Who’s the Fairest of them all?” © Nylora Bruleigh (Images with guide images as in this photograph are presented so PPA judges may see how much work goes into the final)
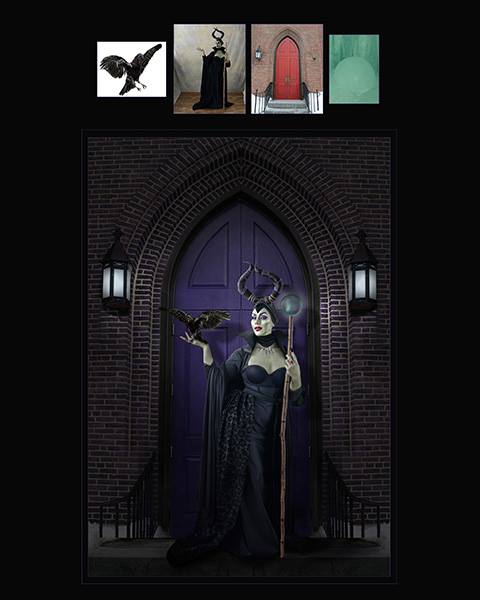
“I am lucky to have young women that are willing to model for me whenever I need them too. I connected with a local modeling agency early on in this adventure. I can contact them with the look I need, and they send me options, and we go from there! When I decide on a new image, I pull all my ideas together and start piecing the parts together. For this picture, I found this mirror at a yard sale for a couple of dollars, had the costume from an after Halloween sale and had the table in my stash. The model was someone I had photographed before, and the man in the mirror is my husband taken with a flashlight in the bathroom! I also work with a local makeup artist.
“Most of the time, I have a good idea of what the finished image will look like before I even start, sometimes that is how the final image looks, and sometimes I make some changes along the way. The trick is to keep an open mind and be willing to go with the flow of what the process tells you to do.”
Here are a couple of others from her fairy tales series.
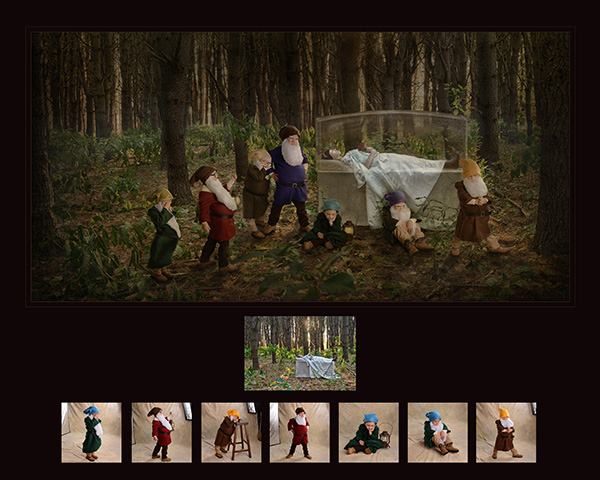 The Seven Dwarves personified – © Nylora Bruleigh
 Look familiar?? – © Nylora Bruleigh
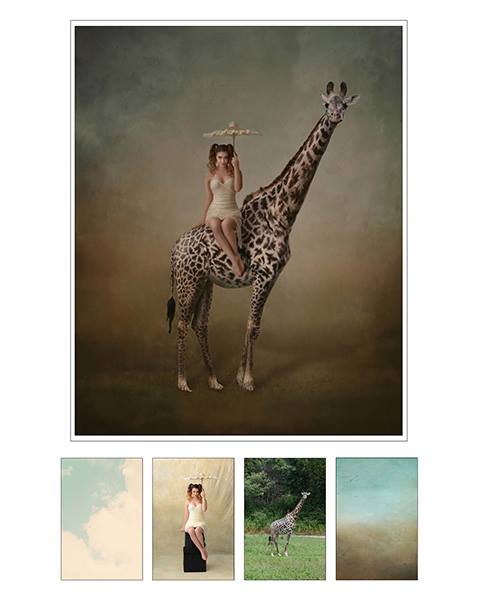
“Another series that I have been working on is my Animal Series. This was inspired by my daughter who loves animals. I found a young lady that was happy to do it. I have spent some time at the zoo photographing all the animals knowing that I would be using them for this next series posed with young ladies to tell a story. All of the animals are shot first in their environment, and then I look through and decide what look I want and what the story will be. Then I photograph the women in the studio to fit with the animal so that I can get the pose and light for the subjects to match and then add the background.”
 This one is titled “Living the Highlife” – © Nylora Bruleigh
 © Nylora Bruleigh
“I would encourage you to push yourself and try something new with your photography every chance you get! Not only will it keep you from getting in a rut with your work and keep things fresh but it will continue to inspire you and create new idea! It may just change the course you are on!”
Nylora-Joy Bruleigh’s Biography
Nylora Bruleigh has been specializing in women’s portraiture. In 2009 Bruleigh decided she needed a more creative outlet and started focusing on a more fine art feel to her portraits.
Bruleigh travels New England teaching seminars about creating fine art portraiture and training others to look inside themselves to set up their thought provoking pieces. In 2012 she received both her Master Photographer and Photographic Craftsman Degrees. In 2015 Bruleigh received her Master Artist Degree through PPA and is proudly the only one in her state of NH to hold that degree. She has many international awards for her fine art and portrait work most including 2 top 10 awards for the GIA, the Kodak Gallery Elite and most recently received the Canon Par Excellence Award in the Master Artist Category Northeast Districts.
You can see more of Bruleigh’s work in her book titled “Fine Art Portrait Photography” published by Amherst Media.
Nylora’s website www.PhotographyByNylora.com
Blog: www.Nylorajoy.com Instagram: NyloraJoy
Yours in Creative Photography, Bob
Save
Save
Save
Save

by successfulbob | landscape photography, Lumix GX85, Lumix Lounge, panorama
Lumix GX85 In-Camera Panorama Photos
If you follow me and my work you’ll find I enjoy capturing panoramic photos. Maybe it’s because I live in wide-open spaces. Whatever the reason they give a slightly different viewpoint of an area that doesn’t come across in storytelling in any other format.
Today I wanted to share a couple ideas about the in-camera feature in a lot of the Panasonic cameras. Stitched panoramic photos and how I use them. When I want a full-on capture of a panoramic scene I will tell you I shoot multiple images and stitch them together using Photoshop or another program. That is what will get the best quality beyond a shadow of a doubt. I will also, depending on the density of the scene shoot bracketed exposures to ensure the highest quality rendering for a print including the highlights and shadows.
Let’s give you a little preview of one of my favorite spots to photograph here in Sedona.
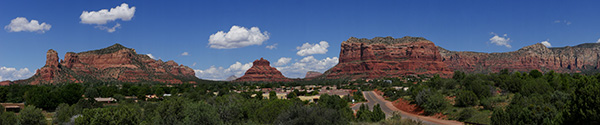 Castle Rock formation with Bell Rock and Courthouse Butte in the Village of Oak Creek in Sedona, Arizona
This image came out of the camera 6100 pixels wide 1/2000 sec ISO 800 f13 with Lumix Vario 35-100 f2.8 lens
When I want a full-on capture of a panoramic scene I shoot multiple images and stitch them together using Photoshop or another program. That is what will get the best quality beyond a shadow of a doubt. I will also, depending on the density of the scene, shoot bracketed exposures to ensure the highest quality rendering for a print including the highlights and shadows.
I use the in-camera pano feature more as a ‘sketch’ of a scene. Why is that? Number one – When making the pano capture there can be some slight stitching errors. You’ll sometimes find these in very simple areas like plain blue sky or conversely in very, very detailed areas. Number two – The files are rendered as a jpeg which means that the camera settings are baked into the file and that information will be stripped during the compression process. Number three – Finally, the files are not that large. Panoramas tend to need to be printed large to appreciate them.
So why do them in camera at all? I mentioned the ‘sketch’. Number one – This finished jpeg stands as a quick reference of the scene which can be filed with the RAW captures. Number two – It can be uploaded via the in-camera Wifi to send off to others to share what I’ve just seen. Number three – There might not be time, for example when traveling with others to complete a full-on capture of the frames. Number four – Sometimes I am just looking for a ‘record’ of the area to remember to go back to because there weren’t great conditions. I do this when scouting locations.

An overcast day in Sedona. This image ends up with quite a bit of ‘depth’ due to the weather and distant mountains. In-Camera Pano 7600 pixels wide. 1/100th at f7.1 ISO 800
Hope this give you some ideas on how to leverage features in a way you might not have considered before.
Yours IN Creative Photography, Bob
Save
by successfulbob | photography - art quote, photography education
Sunday Photo/Art Quote – Carl Mydans
I’ll make this one short and sweet.
Learn your gear inside and out. If you are fumbling or thinking about what buttons do what or how to get the proper exposure for the scene that tells the story you would like to tell it’s going to be tough to get beyond make memorable images.
Carl Mydan’s is more succinct than I so here’s the Photo/Art quote for today.
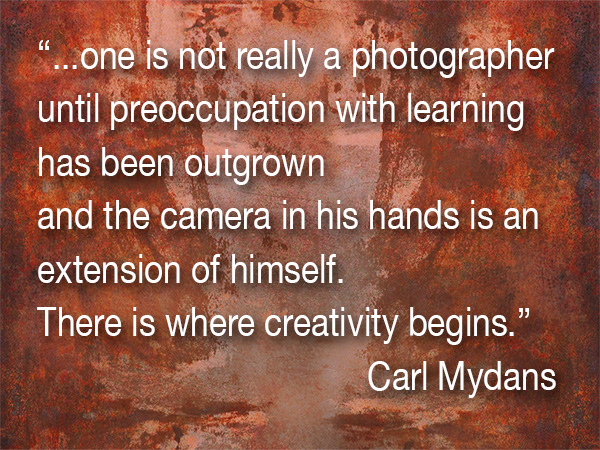
 “…one is not really a photographer until preoccupation with learning has been outgrown and the camera is an extension of himself (/herself ed.). There is where creativity begins. – Carl Mydans
Learn your stuff.
Go create.
Nuff said!
Yours in creative Photography, Bob
Save
by successfulbob | black & white, cloud photography, infrared photography, landscape photography, Lumix G6, Lumix Lounge
Infrared Image Wetlands Near Sedona, Arizona
The Lumix G6 is coming in very handy now that it is converted over to infrared capture by LifePixel. Midday is not the best time in the world for catching beautiful photos with standard color capture. But move to infrared and the middle of the day is a whole new world.
I was out scouting some new areas to photograph with wildlife and really didn’t think I would be capturing any images but I had the new Lumix GX85 and the 100-300mm lens and had some fun there in spite of the time of day. (check the post here) And I also had the G6 in IR. This is one of the advantages to shooting with micro 4/3rds gear. I was able to have all these options with me with no strain when hiking around and scouting. Used to be I would leave gear behind until I was absolutely certain I wanted to make images. Now opportunity abounds and I’m having more fun and getting more images.
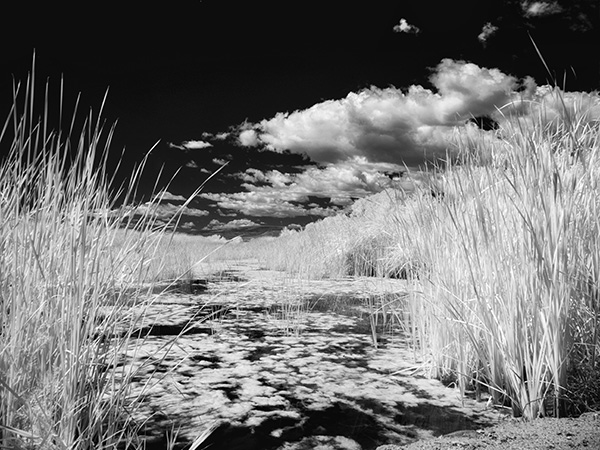
 Sedona Wetlands (learn more about them here). Designed land to help with the processing of wastewater while creating habitat for wildlife. There are quite a number of species taking advantage of the new ‘watering holes’!
I’ve started to narrow down my processing of infrared images. I have bee taking the RAW file and lowering the color and tint sliders to 0. Dialing in highlight and shadow to taste. A pinch of Clarity. Add some black. Add some white. Then tweak the contrast. Open the image and take it to NIK Color FX Pro 4 for a little Glamour Glow and we are looking pretty good. Once I am pretty certain this is the processing path I want to take I’ll set up a preset in ACR which will dial in all the goodies to get me close then tweak. When I set that up I’ll share it here on the Successful-Photographer blog. You can see a bit more in-depth info on this IR conversion in this post on LifePixel.
Yours in Creative Photography, Bob