by successfulbob | black & white, infrared photography, landscape photography, people photography, photography education
Infrared Photography – Some Members
of Infamous Mopar AZ Chapter Car Club in Sedona
You never know who you might run into when you are out photographing clouds. While I was catching some infrared photos at Bell Rock Vista in the Village of Oak Creek in Sedona, three pretty cool cars started backing into spaces right behind me. When I realized they were lining up to take photos of their cars I moved out of their frame.
We started to chat, and it turns out we have a lot in common. They are members of the Infamous AZ Chapter Mopar Car Club, and I once had a cat I named Mopar because of the way she purred. OK, I have a weird sense of humor, but you get used to it I think. I believe all people are connected in one way or another.
Since the cars were lined up, I captured some photos with my infrared set-up. (see this post on processing infrared files from this session)
Here are a couple of captures.
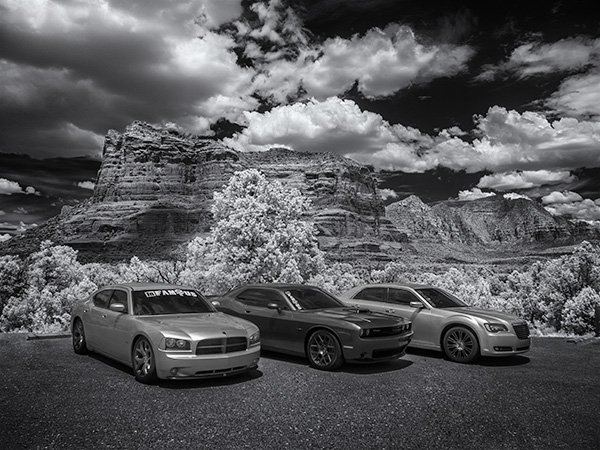
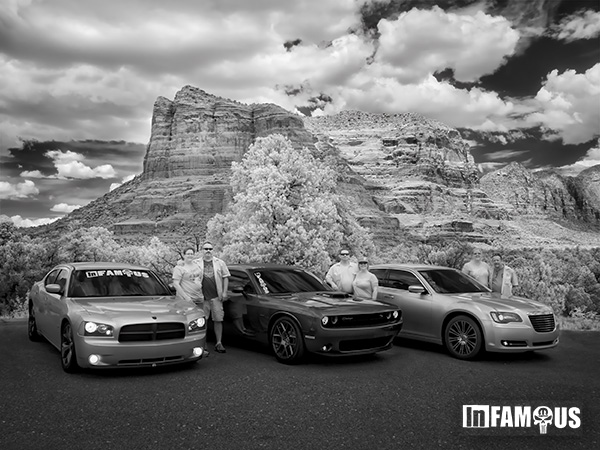 Three couples from the INfamous Mopar AZ Chapter
The three couples I met while photographing with my infrared Lumix G6 camera at Bell Rock Vista. This image was processed in the same way as was described in the other post.
 Cars from the Infamous Mopar Car Club AZ Chapter in front of Courthouse Butte in the VOC, Sedona
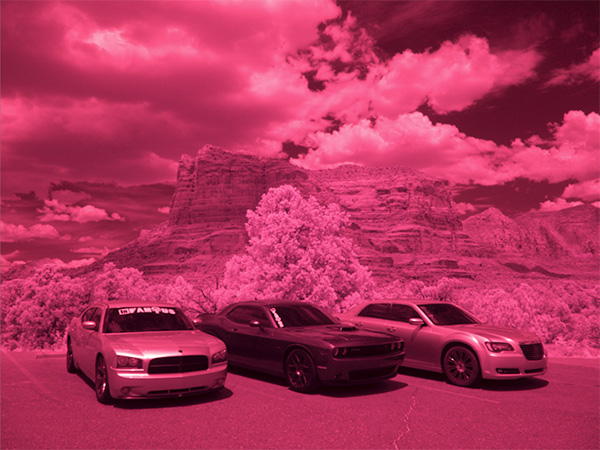
 Straight out of Camera (SOOC)
This image was processed in a different manner from the on above. I started with the RAW file. In infrared converted cameras, the RAW image will have a severe magenta cast.
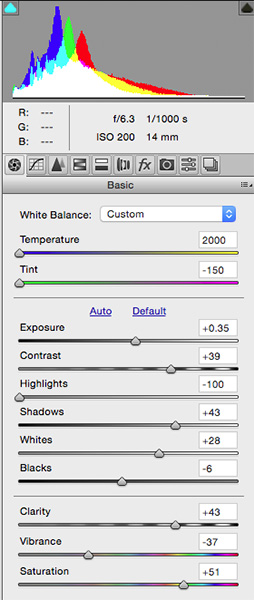
 ACR Palette with settings
First stop was into Adobe Camera RAW for initial processing. Settings were to move the Temperature Slider all the way to Blue. The Tint Slider all the way to Green. Exposure boosted 1/3 stop. Contrast increased. Highlights were lowered, and Shadows raised. Whites bumped up a bit, and Blacks brought down. A small amount of Clarity was added, and Vibrance was lowered. 
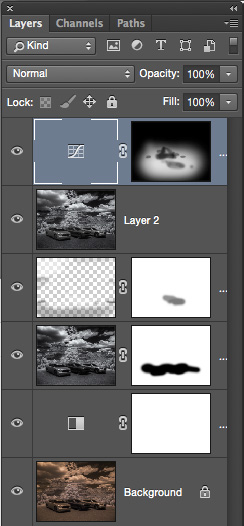
Adobe Photoshop Layers Palette
The Background Layer shows how the image comes out of Adobe Camera RAW with the processing shown. It is quite a Sepia tone which cold be OK but not the look for which I was going Above that is a Black & White Adjustment Layer. Next up, is the Layer generated by a trip to NIK Silver FX Pro 2. (available free of charge from Google) It created the full black & white conversion. I added some structure, grain, and controlled the intensity of the black and white. There’s a Layer Mask to allow some of the original image to show through without the processing from NIK. Above that is a Layer in Soft Light Mode for dodging and burning. The top Layer is a Curves Layer to allow some selective lightening of the image to bring some extra attention to the cars.
I think these infrared images would look great printed on metal.
Yours in Creative Photography, Bob
Save
Save

by successfulbob | photography, photography creativity, photography education, tuesday painterly photo art
Tuesday Painterly Photo Art
John Hartman, M.Photog.Cr, CPP, A-ASP, EA-ASP
Jealous.
If I have one word to share about John that would be it. I am jealous of his ability to absorb information and ideas about photography and photographic arts and then find a way to earn income from it. John has been sharing his photography and business knowledge for over thirty years and he’s still breaking new ground on a regular basis.
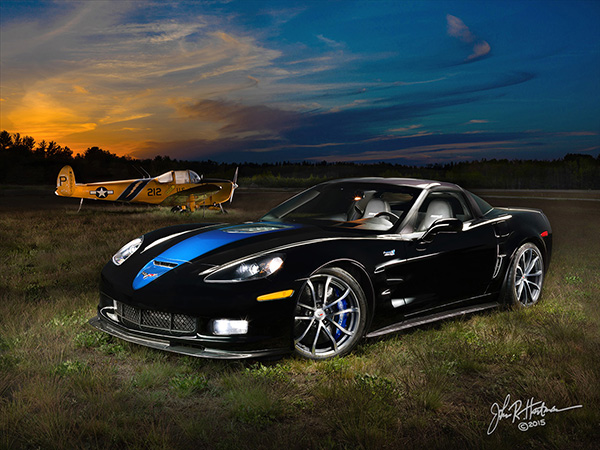
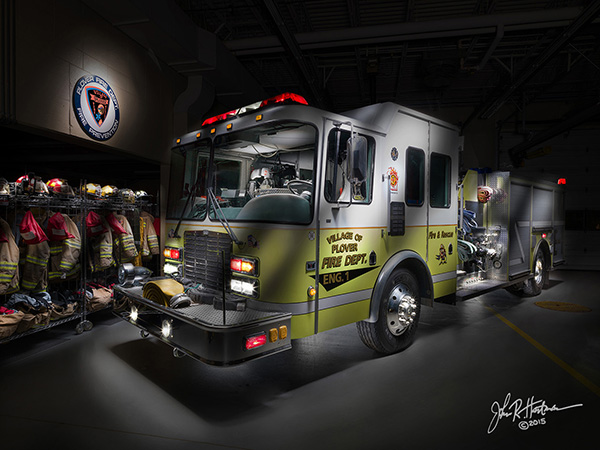
Throughout his 42-year professional career, this Wisconsin-based photographer has made it his life and business mission to find out what everyone is doing and then doing something different. One of his recent personal projects has been mastering the art, science, and business of the technique of painting with light. Exposing dozens or sometimes hundreds of separate shots with continuous LED lights and then blending them together in Photoshop, a light painted photograph simply looks like no other image.
 All images in this post are © John Hartman. Light painted art.
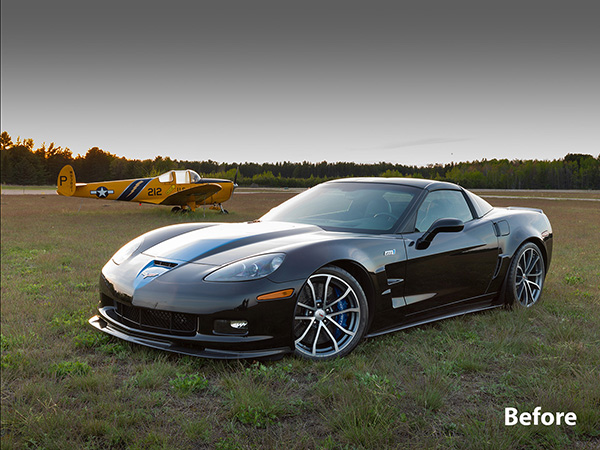
 Before Light painting
Once the process was mastered, he began testing the commercial viability of this new product. Clients have responded enthusiastically, resulting in commissions that include images up to 10 feet long and sales that often reach into five figures. Subjects include automobiles, jewelry, food, architecture, motorcycles, musical instruments, farm tractors and aircraft. His clients include corporations, collectors, hobbyists, enthusiasts and others who own and appreciate the finer things of life.
 Light Painted Fire Truck in station
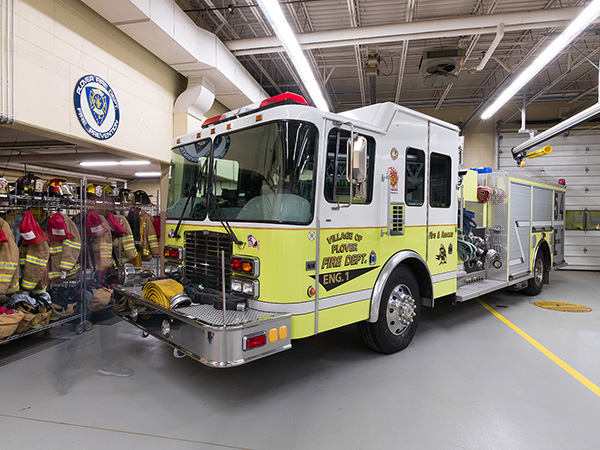
  Single Capture of firehouse
One of his light paintings of a Ferrari F12 Berlinetta was chosen as a Grand Imaging Award finalist at Imaging USA in 2015, and was also included in the 2015 World Cup Photographic Competition.
Interestingly, nearly 100% of John’s light painting clients are males, who are proud of their ‘babies’ and are willing to invest whatever it takes for a unique image for their office, home, garage or man cave.
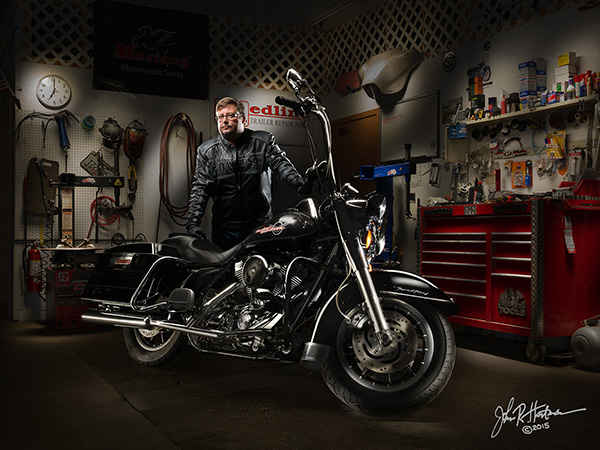
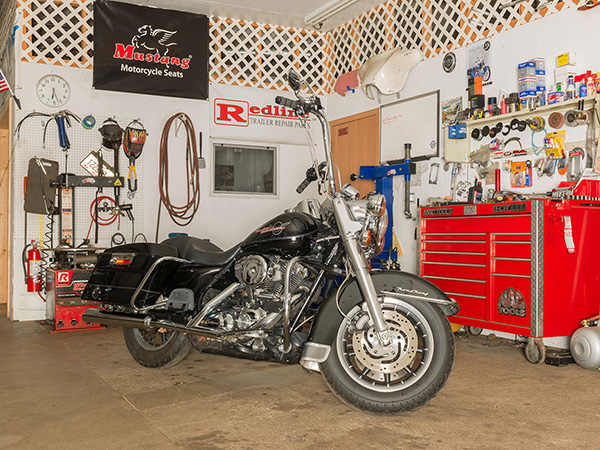
 Motorcycle Garage Light Painting
  You got it. This is before!
“The process of painting with light is neither simple nor intuitive,” says Hartman. “The high skill level required ensures the look will remain unique and will not be bastardized or diluted by a set of actions or plug-ins. The photographer willing to invest the time and effort required to become proficient in light painting can develop and retain 100% of that lucrative business in their market area.”
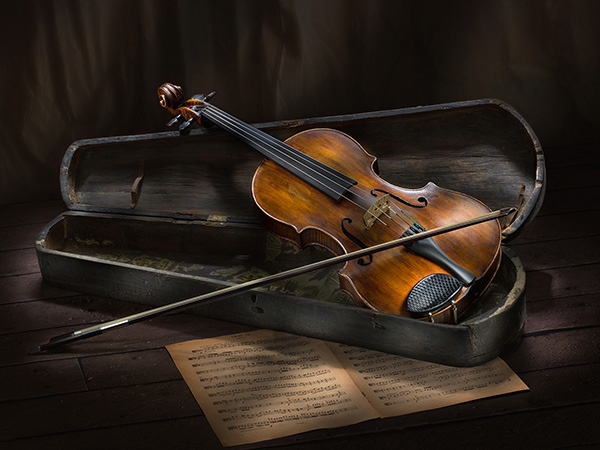
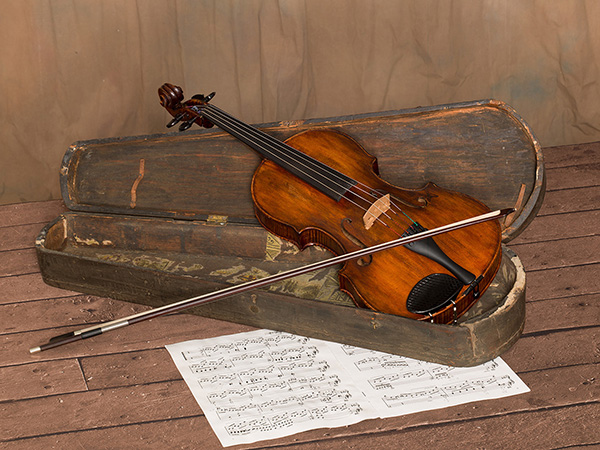
 Violin & case Light Painting
 The violin looks just a wee bit different in the before image
John is currently experimenting with an unmanned aircraft vehicle (a drone) using a mounted LED to light paint larger subjects such as buildings, landscapes and large vehicles such as farm implements and fire trucks.
You can see a short video showing him light painting a 1957 Lincoln Continental Mark II here.
Photographers have taken notice of John’s work, and requests to learn his process have resulted in a four-city tour titled The John Hartman Light Painting Workshop, to be held in his hometown of Stevens Point, WI, as well as in Pittsburgh, Seattle, and Sedona, AZ (hosted by Bob Coates). Click here for more information.
Yours in Creative Photography, Bob
Save
Save

by successfulbob | black & white, HDR photography, infrared photography, landscape photography, Lumix G6, Lumix Lounge, photography creativity
Infrared Photography Panorama Style
“The sailing clouds went by, like ships upon the sea.” — Henry Wadsworth Longfellow
Clouds scudding across the azure skies. Words can take you to some beautiful places but as the Chinese say, a picture is worth a thousand words. That’s why I keep an eye peeled on the sky. When the clouds start racing, or even lumbering through the red-rock country of Sedona I grab a camera because interest is added to the scene.
Even if it’s mid-day, I grab a camera and head outdoors. My camera of choice for these times is infrared. I enjoy the high contrast black and white rendering of clouds rendered against a deep dark sky. A Lumix G6 was converted by LifePixel and it has expanded my shooting times as infrared shines when it’s time to put the camera up for regular color photography. I used the Kit lens that came with the camera and was pleasantly surprised at the solid quality of the captures. (G Vario 14-42mm f3.5-5.6) It makes for a super light-weight combo.
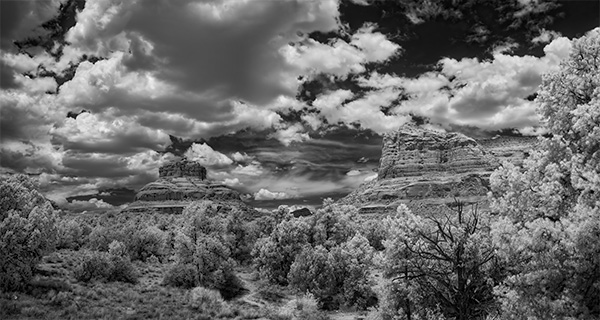
 Bell Rock Vista in Sedona – Infrared Panoramic image with Courthouse Butte
I tend to try to push the envelope and experiment when I’m on self-assignment. In yesterday’s adventure, it was to add panorama to infrared. It took quite a bit more work. I’ll let you be the judge to see if it was worth it.
Five images overlapping by about 40% were captured. With the camera set to black & white, three exposures one stop apart were saved in jpeg format to ensure detail in highlight and shadow areas once they were processed. Each set of three images were treated in Aurora HDR software.
 Screenshot of images used before processing
Each of the final five images was loaded into Adobe Photoshop to process the panorama. Whoops! That was an unusual fail. Could be the handheld capture caused some extra deformity in the files. Usually, I can depend on Photoshop to render a solid panorama but with this set of images, there was way too much distortion in the resulting output. (I’ll experiment with these files again when I have some more time and see if different rendering intent might be of help) I couldn’t find my AutoPano Pro software on this computer so I resorted to having Photoshop load all the files into Layers and added my own Masks blending the images together by hand. It’s good to remember the ‘Old School’ methods when the automatic software options aren’t there for you.
Yours in Creative Photography, Bob
PS – Another cloud description I enjoy. “Clouds hastening like messengers through heaven.” —John Hall Wheelock
PPS – Cloud quotes referenced in this post were found in The Free Dictionary by Farlex. I’m book-marking that page for future reference!
Save

by successfulbob | Lumix GX8, Lumix Lounge, musician photography, photographer of musicians, photography, photography - art quote, photography creativity, photography education
Sunday Photo/Art Quote – Yogi Berra
A major league baseball manager, Yogi Berra, was a font of excellent one-liners that more than stated the obvious.
The one I wish to share with you today can easily be applied to the arts. Yes, while it’s obvious, sometimes we need reminders of just that. And Yogi was a pro at that!
 “You can observe a lot by watching.” Yogi Berra
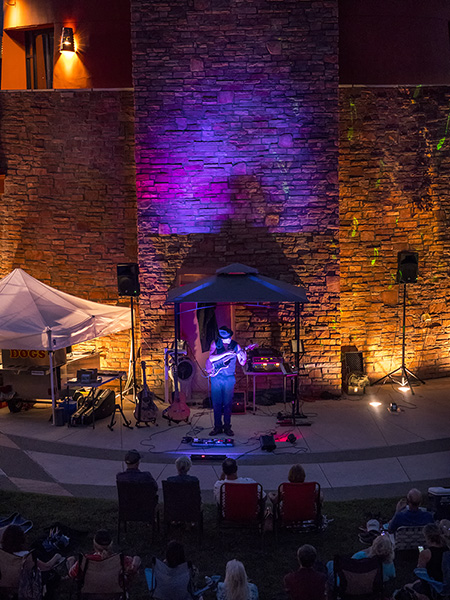
The reason I bring this up today is the quote jumped out at me after returning from a guitar concert under the stars last night by Anthony Mazella at The Collective in Sedona. Anthony is a world class musician who creates magical times with his guitar.
As always I carry my camera. Lately, I’ve been trying to follow Yogi’s advice although I didn’t realize it was coming from him. I’ve been trying to be more aware of light. Paying attention to it. And trying to capture more of it in challenging situations.
I used the Lumix GX8 with a 35-100mm f2.8 Vario lens. While Anthony filled my head with his music, I kept myself aware of the changing light as the sun dropped below the horizon. The lights in the area began their illuminating dance through the venue. And I recorded.
Here are a few of those captures.
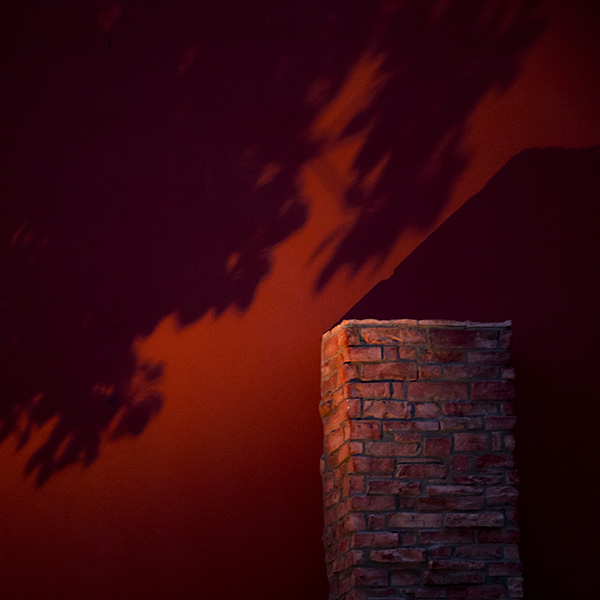
 Shadow, color, composition, shape, and form were the things that caught my eye
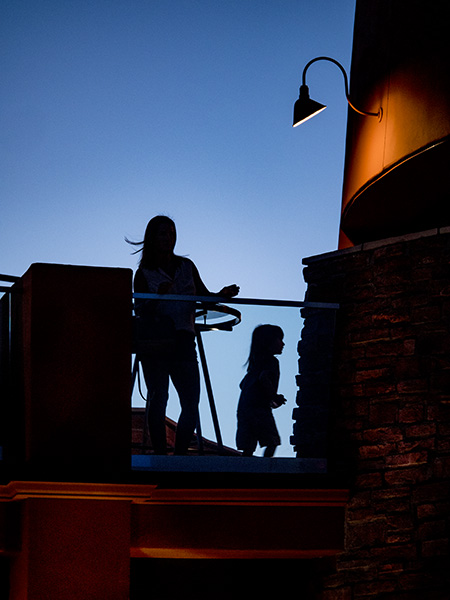
 A glance up and this silhouette appeared. I watched for a few moments, and the little girl was moving in and out of the frame I waited until she was moving out to capture this. The play of the complementary colors was a bonus.
 Of course, the star of the show couldn’t be left out. The blue, purple and magenta lights added some serious color to the warm toned brickwork.
Had I not been aware and keeping my eyes peeled for an opportunity to see I might have missed these little vignettes of light and color. So remember Yogi’s advice, “You can observe a lot by watching.”
Yours in creative Photography, Bob
PS – Here are 50 Yogisms gathered in an article by USA Today. It’s a fun read.
Save
Save
Save
Save
Save

by successfulbob | fine art photography, landscape photography, Lumix GX8, Lumix Lounge, photography, photography education
Playing with Images
What do you do for fun?
I find myself playing with my photography images in Photoshop.
This is where I test out new ideas, explore possibilities, and have a bit of a romp through Adobe Photoshop’s Blending Modes just to see what I might discover.
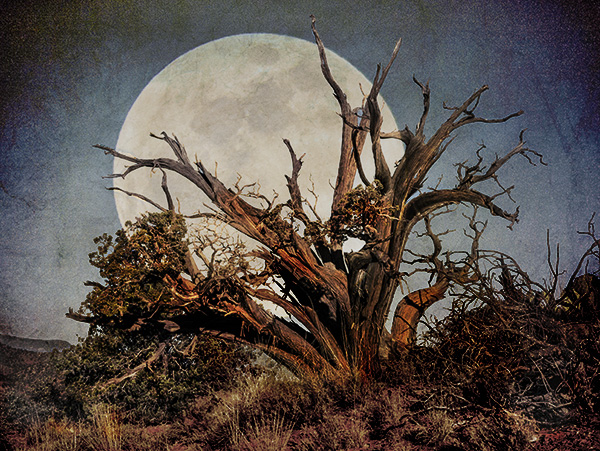
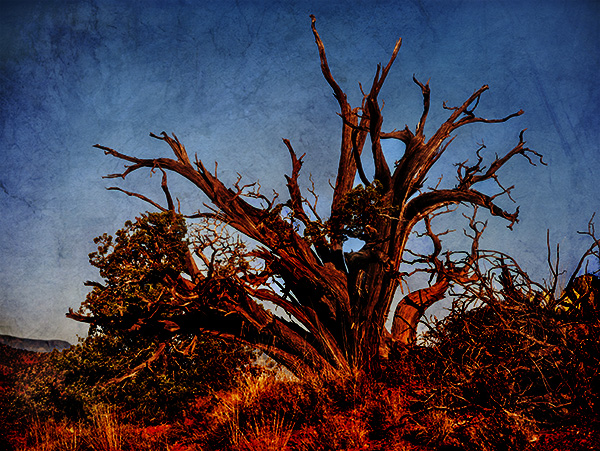
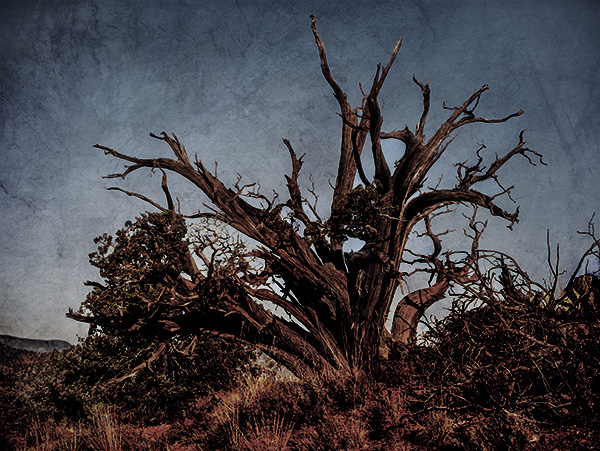
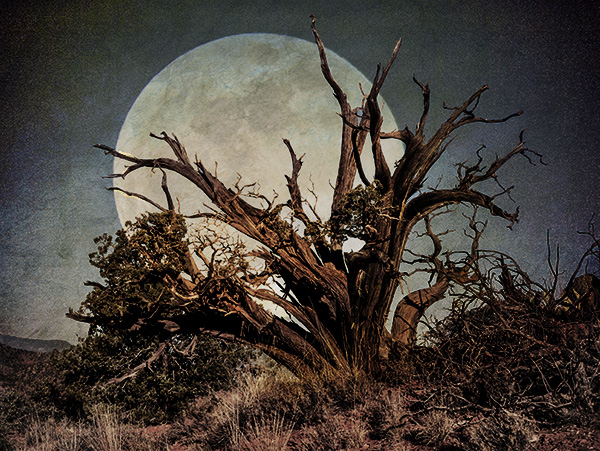
A Juniper tree was the subject. Depth, dimension, and color were the objectives.
Here are some results.
 Here’s one that’s good fun but a bit over the top of in saturation. If you don’t push the boundaries, you don’t know how far to go.
 Easing up the saturation through changing blend modes makes this an entirely different image.
 Adding the moon changes things once again
 Here’re a few tweaks to the moon addition. Gives it a bit more life.
If I were doing this as more than an exercise or decided that I wanted to make this into an art piece for printing, I would have spent much more time on making selections and blending the various textures and layers together. Play doesn’t always have to have a pay-off more than a new feel for the tools with which you are working.
Lessons learned in this session. Be careful with selections from the beginning of the process. Verify before moving too far along in the project. Once a mask is made and reused throughout the process any mistakes will be magnified. Ultimately, having had this session I will save time and frustration in the future.
Initial image was captured with the Lumix G7 with a 20mm f1.7 lens. The moon photograph was created with the Lumix GH2 handheld with a 100-300mm lens extended to 600mm equivalent. I keep lots of reference files of textures and various elements on hand to help in the art process. I think of my texture images as an artist would their paint & set of brushes.
Yours in Creative Photography, Bob
Save

 Three couples from the INfamous Mopar AZ Chapter
 Cars from the Infamous Mopar Car Club AZ Chapter in front of Courthouse Butte in the VOC, Sedona