by successfulbob | Lumix GH4, Lumix Lounge, musician photography, photographer of musicians
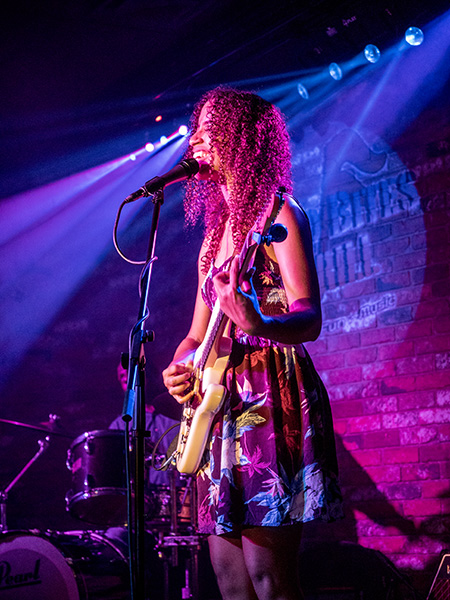
Sound Bites Grill Wall of Fame – Jackie Venson
Solid entertainer. Stage presence. Beautiful voice. Guitar licks that take you down with the blues our make you soar with riffs that just kicks a**! Add to that two super-pro backup musicians on bass and drums and the evening is made!
I normally don’t post images of performers from Sounds Bites Grill shows until I have the artwork completed for the ‘Wall of Fame.’ But, add to the fact I so enjoyed Jackie’s performance and she is so photogenic I had to slip a couple in for a ‘sneak peek.’
 Jackie Venson – Captured with Lumix GH4 and 35-100mm f2.8 Lumix Vario lens SOOC
 Jackie with Alán Uribe on bass/backvox and Rodney Hyder on drums. Captured with the Lumix GX8 and the 12-35mm f2.8 Lumix Vario lens
 Jackie breakin’ out of the blues.
If you want some more info on this talented artist check out Jackie’ website. Stand by for the art image coming soon.
Yours in Creative Photography, Bob
PS – Can’t wait ’til Jackie comes back to Sedona! I wanna be in the house for that!
Save

by successfulbob | landscape photography, Lumix GX8, Lumix Lounge, panorama, photography, photography software
Panorama Photography – In Camera
Playing with my Lumix GX8 in panorama mode is a fun time. Being able to have a panoramic image of the scene in front of you stitched in-camera can be a great help. Sometimes these are all I need. Sometimes there can be a bit of a ‘hitch-in-the-giddyup’. Let’s look at the good, the bad, and the sometimes ugly and how to make the best use of all of them.
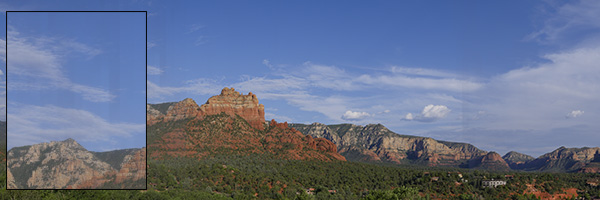
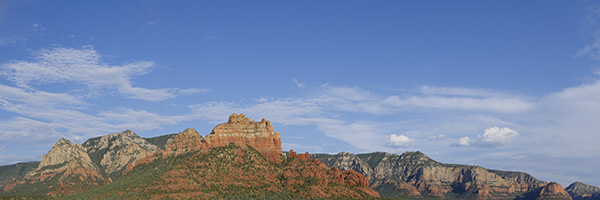 Sedona, Arizona red rocks – All panoramas were captured with Lumix GX8 in panorama mode
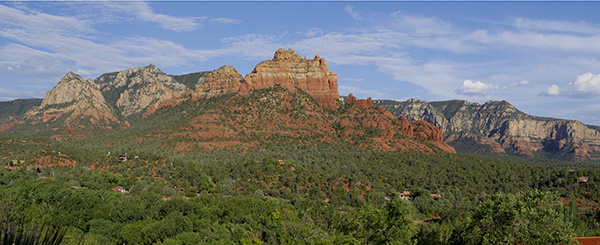 Here’s the same view with a different amount of foreground
Sometimes a panorama gives you the field of view you are looking for, but its height is just not quite right. Then it’s time to do another row and stitch them together in post-production.
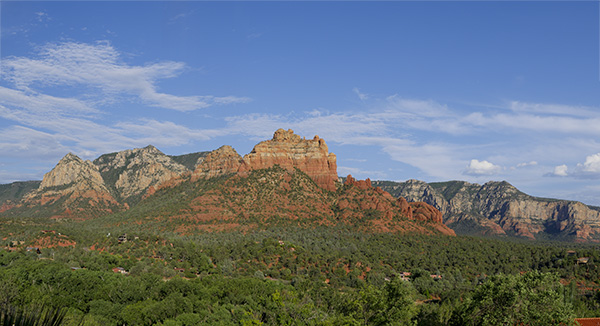 The two panorama images above combined in Adobe Photoshop
When making in-camera panoramics proper technique is imperative. I learned an old videographer’s trick that makes for better captures. Point your feet where you would like the panorama to end. Place the camera against your forehead and lock elbows down to the side. Use your stomach muscles to rotate the lens to the start of the pano. Press the shutter and use the stomach muscles to turn to the end of the image. With in-camera images, I recommend going past where you wold like the final part of the picture to finish because the image will cut off a little before it appears to in the viewfinder. There’s a ‘Goldilocks’ speed for the rotation. You don’t want to go too fast or too slow. You want to move ‘just right’ to help the camera give you a good image. If it is radically wrong, the camera will notify you that it can’t process the image because of processing errors.
 Poor technique led to lines captured in the image. It’s important to play your panorama back to ensure you’ve achieved a good result. It can sometimes show OK with a quick glance. I will often shoot the scene a couple of times to make sure I’ve got a good clean result.
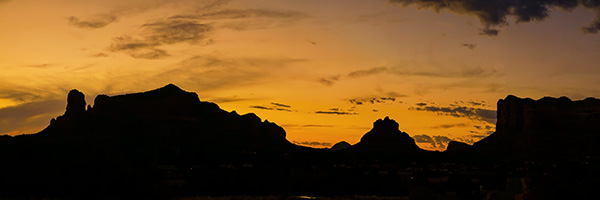 Panorama in silhouette. I saw this scene developing in the distance and stopped the car the first chance I could. I used MacPhun’s Intensify plugin* for Mac to help bring the scene back to what had attracted me to make the image. By the time I was able to pull over the sky had started to lose its color. The software brought back the sky as it was moments before.
We have incredible tools at our disposal in the photographic world. I enjoy learning how to push them to the next level.
How about you?
Yours in creative Photography, Bob
* Special deal on MacPhun’s Intensify and Uplet (a software for uploading images to Instagram from your computer)

by successfulbob | fine art musician portrait, Lumix GH4, Lumix GX7, Lumix Lounge, musician photography, people photography, photographer of musicians
Photography of Musicians at Sound Bites Grill
The Black Market Trust
Photographing musicians during a live performance can be a bit of a challenge.
But I dig it!
If you follow this blog you know I am charged with creating the marketing images for bands who play at Sound Bites Grill in Sedona. Also, the ‘Wall of Fame’ is a record of performers who have graced the stage and is becoming a history of entertainment at the restaurant. To date, there are over eighty art pieces presented on the wall.
Here is the latest.
 The Black Market Trust Band
 Here is the finished piece as presented on the ‘Wall of Fame.’
While the band is performing, I isolate each member and extract them from the scene and then blend them back together while creating the art piece for the wall. These were captured with the Lumix GX7 and the 35-100mm f2.8 Vario lens. After each member is placed on the new canvas layers of texture, drop shadows, and lighting effects are added to create depth and dimension.
While the musicians are on site, I gather their ‘message to the house’ and autographs for inclusion in the final art piece. These are signed in black Sharpie on white paper. After scanning, using Adobe Photoshop they are imported to the final image, sized and inverted to white text. The Blend Mode of the Layer is changed to Screen. This makes the inverted paper, which is now black disappear with no further selections necessary.
Images for the newspaper are also prepped. I shoot in color but do the prep to black and white for the best printing results. Many times a color image is just changed to greyscale by the paper and using NIK Silver FX Pro 2 makes for better contrast and tones. These were captured with the Lumix GH4 and the 12-35 f2.8 Vario lens.
 Black & White photo The Black Market Trust Band
 Color image of the BMT Band
Yours in Creative Photography, Bob
Save

by successfulbob | black & white, HDR photography, infrared photography, landscape photography, Lumix G6, Lumix Lounge, photography creativity
Infrared Photography Panorama Style
“The sailing clouds went by, like ships upon the sea.” — Henry Wadsworth Longfellow
Clouds scudding across the azure skies. Words can take you to some beautiful places but as the Chinese say, a picture is worth a thousand words. That’s why I keep an eye peeled on the sky. When the clouds start racing, or even lumbering through the red-rock country of Sedona I grab a camera because interest is added to the scene.
Even if it’s mid-day, I grab a camera and head outdoors. My camera of choice for these times is infrared. I enjoy the high contrast black and white rendering of clouds rendered against a deep dark sky. A Lumix G6 was converted by LifePixel and it has expanded my shooting times as infrared shines when it’s time to put the camera up for regular color photography. I used the Kit lens that came with the camera and was pleasantly surprised at the solid quality of the captures. (G Vario 14-42mm f3.5-5.6) It makes for a super light-weight combo.
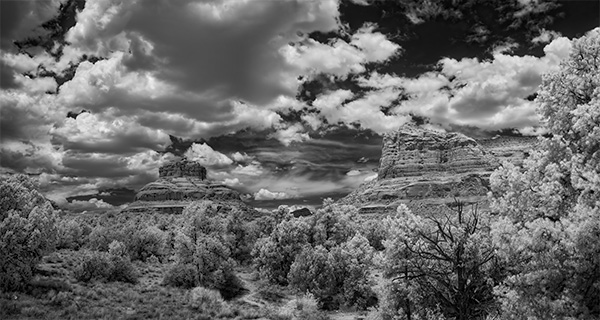 Bell Rock Vista in Sedona – Infrared Panoramic image with Courthouse Butte
I tend to try to push the envelope and experiment when I’m on self-assignment. In yesterday’s adventure, it was to add panorama to infrared. It took quite a bit more work. I’ll let you be the judge to see if it was worth it.
Five images overlapping by about 40% were captured. With the camera set to black & white, three exposures one stop apart were saved in jpeg format to ensure detail in highlight and shadow areas once they were processed. Each set of three images were treated in Aurora HDR software.
 Screenshot of images used before processing
Each of the final five images was loaded into Adobe Photoshop to process the panorama. Whoops! That was an unusual fail. Could be the handheld capture caused some extra deformity in the files. Usually, I can depend on Photoshop to render a solid panorama but with this set of images, there was way too much distortion in the resulting output. (I’ll experiment with these files again when I have some more time and see if different rendering intent might be of help) I couldn’t find my AutoPano Pro software on this computer so I resorted to having Photoshop load all the files into Layers and added my own Masks blending the images together by hand. It’s good to remember the ‘Old School’ methods when the automatic software options aren’t there for you.
Yours in Creative Photography, Bob
PS – Another cloud description I enjoy. “Clouds hastening like messengers through heaven.” —John Hall Wheelock
PPS – Cloud quotes referenced in this post were found in The Free Dictionary by Farlex. I’m book-marking that page for future reference!
Save

by successfulbob | Lumix GX8, Lumix Lounge, musician photography, photographer of musicians, photography, photography - art quote, photography creativity, photography education
Sunday Photo/Art Quote – Yogi Berra
A major league baseball manager, Yogi Berra, was a font of excellent one-liners that more than stated the obvious.
The one I wish to share with you today can easily be applied to the arts. Yes, while it’s obvious, sometimes we need reminders of just that. And Yogi was a pro at that!
 “You can observe a lot by watching.” Yogi Berra
The reason I bring this up today is the quote jumped out at me after returning from a guitar concert under the stars last night by Anthony Mazella at The Collective in Sedona. Anthony is a world class musician who creates magical times with his guitar.
As always I carry my camera. Lately, I’ve been trying to follow Yogi’s advice although I didn’t realize it was coming from him. I’ve been trying to be more aware of light. Paying attention to it. And trying to capture more of it in challenging situations.
I used the Lumix GX8 with a 35-100mm f2.8 Vario lens. While Anthony filled my head with his music, I kept myself aware of the changing light as the sun dropped below the horizon. The lights in the area began their illuminating dance through the venue. And I recorded.
Here are a few of those captures.
 Shadow, color, composition, shape, and form were the things that caught my eye
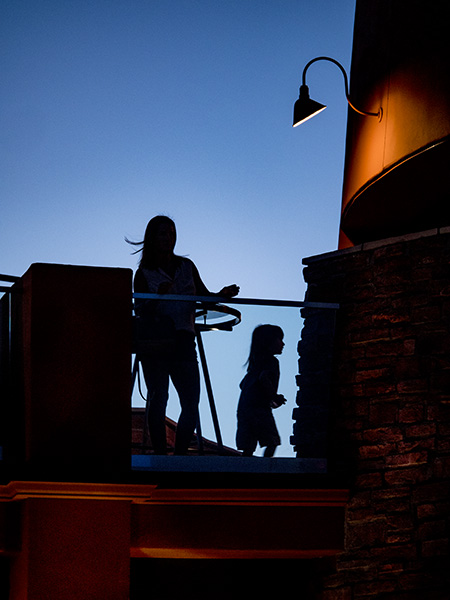 A glance up and this silhouette appeared. I watched for a few moments, and the little girl was moving in and out of the frame I waited until she was moving out to capture this. The play of the complementary colors was a bonus.
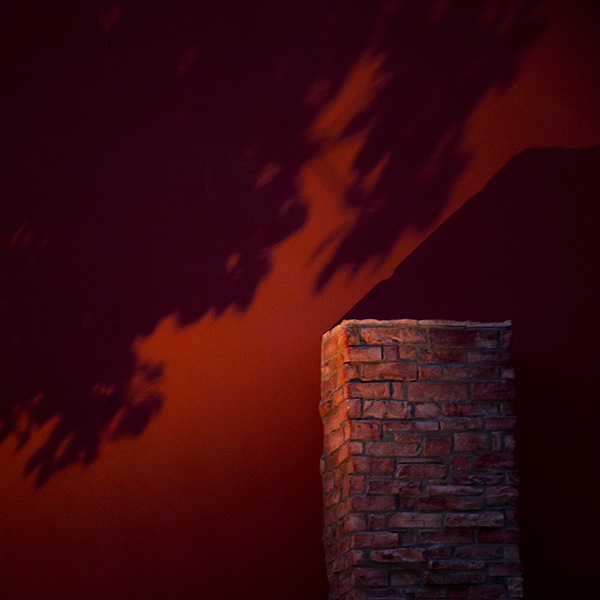
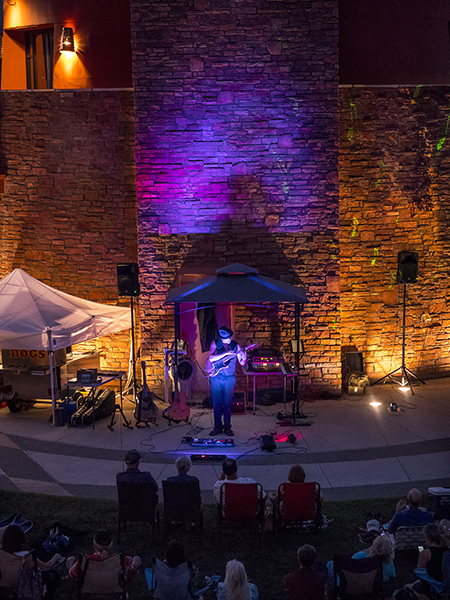 Of course, the star of the show couldn’t be left out. The blue, purple and magenta lights added some serious color to the warm toned brickwork.
Had I not been aware and keeping my eyes peeled for an opportunity to see I might have missed these little vignettes of light and color. So remember Yogi’s advice, “You can observe a lot by watching.”
Yours in creative Photography, Bob
PS – Here are 50 Yogisms gathered in an article by USA Today. It’s a fun read.
Save
Save
Save
Save
Save
by successfulbob | fine art photography, landscape photography, Lumix GX8, Lumix Lounge, photography, photography education
Playing with Images
What do you do for fun?
I find myself playing with my photography images in Photoshop.
This is where I test out new ideas, explore possibilities, and have a bit of a romp through Adobe Photoshop’s Blending Modes just to see what I might discover.
A Juniper tree was the subject. Depth, dimension, and color were the objectives.
Here are some results.
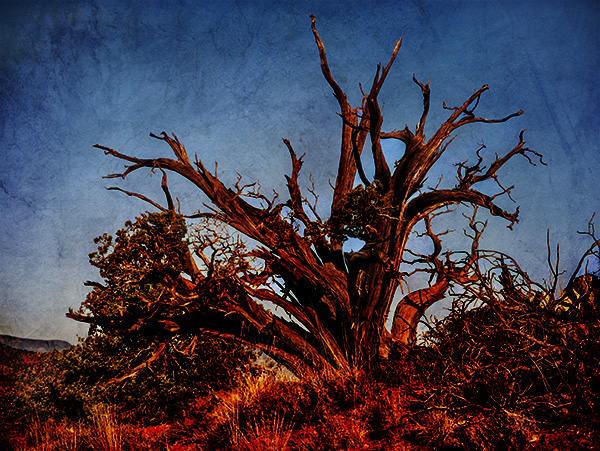 Here’s one that’s good fun but a bit over the top of in saturation. If you don’t push the boundaries, you don’t know how far to go.
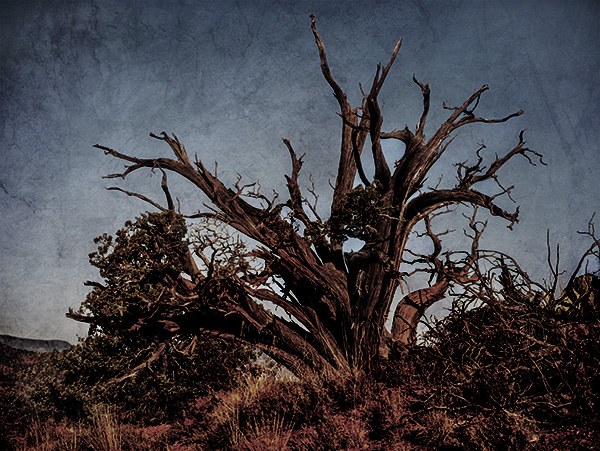 Easing up the saturation through changing blend modes makes this an entirely different image.
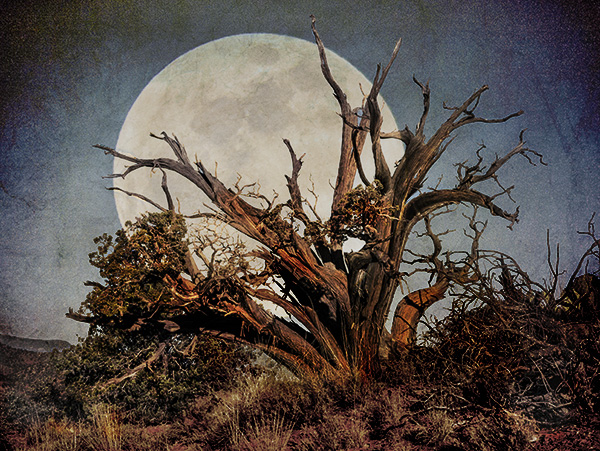
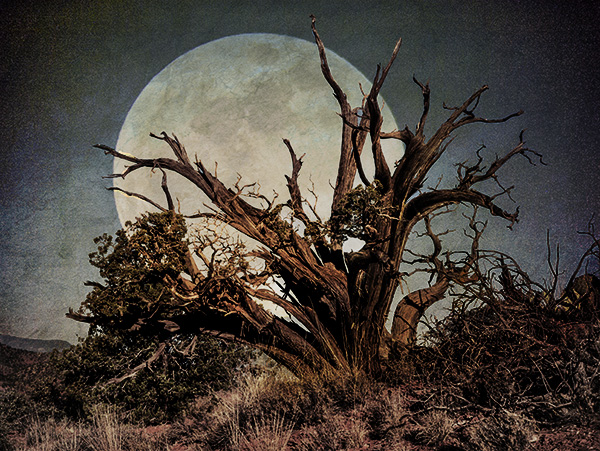 Adding the moon changes things once again
 Here’re a few tweaks to the moon addition. Gives it a bit more life.
If I were doing this as more than an exercise or decided that I wanted to make this into an art piece for printing, I would have spent much more time on making selections and blending the various textures and layers together. Play doesn’t always have to have a pay-off more than a new feel for the tools with which you are working.
Lessons learned in this session. Be careful with selections from the beginning of the process. Verify before moving too far along in the project. Once a mask is made and reused throughout the process any mistakes will be magnified. Ultimately, having had this session I will save time and frustration in the future.
Initial image was captured with the Lumix G7 with a 20mm f1.7 lens. The moon photograph was created with the Lumix GH2 handheld with a 100-300mm lens extended to 600mm equivalent. I keep lots of reference files of textures and various elements on hand to help in the art process. I think of my texture images as an artist would their paint & set of brushes.
Yours in Creative Photography, Bob
Save
