by successfulbob | cloud photography, landscape photography, Lumix GX8, Lumix Lounge, panorama, photography education, photography gear
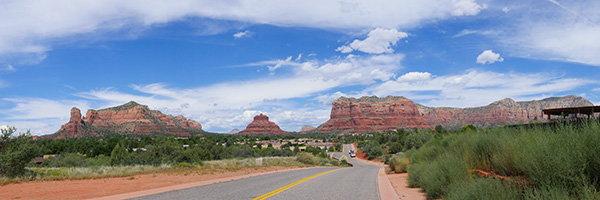
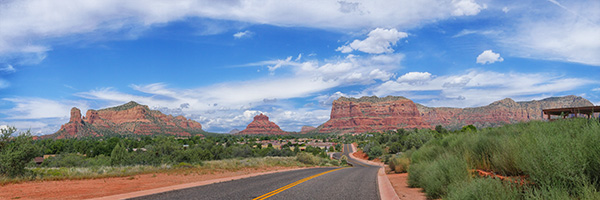
Playing some more with the in-camera panorama stitching on the Lumix GX8 again… This time in the Village of Oak Creek with Bell Rock and Courthouse Butte as the stars of the show. I used the 20mm f1.7. This combo worked very well when keeping the lens pointed straight ahead. If you tilt the camera up there will be a bit of bending of the horizon.

Here’s the original capture SOOC with a minus 2/3rds of a stop exposure adjustment to bring down the sky to a deeper blue. One of the benefits of being able to see what you camera is capturing I could tell that it was going to be a bit overexposed before shooting.

Here’s the finished image with a bit of post production. Darkened the road. Removed a couple vehicles. Increased saturation a little. Added some contrast with Google’s NIK Detail Enhancer. The only place I ran into a stitching evidence was after applying the Detail Enhancer the blue portions of the sky showed the beginnings of unwanted lines. Using a Layer Mask took care of that problem.
This image could easily print to 14 X 42 inches and probably larger if I wanted to work at it a bit and depending on what material I was printing on.
Yours in Creative Photography, Bob
by successfulbob | landscape photography, Lumix FZ 1000, Lumix Lounge, panorama, photography education
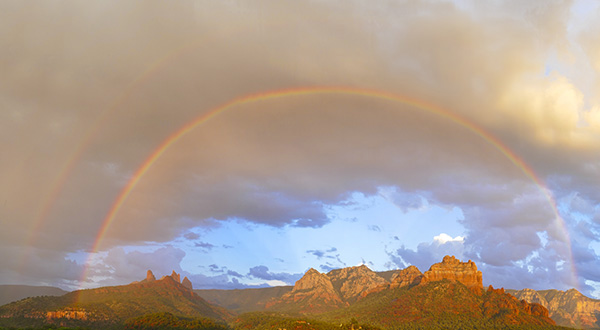
During the rainy season here in Arizona it pays to keep a camera nearby and one eye peeled for the ever-changing weather conditions. I was at dinner and noticed a rain shower passing by and thought I’d better go scope it out. I had the Lumix FZ1000 with me when I checked outside to find this rainbow (trying to double-up) from the deck at Sound Bites Grill.

Working on a double rainbow over the red rocks of Sedona
I used the Panorama Mode to capture the entire rainbow. With the FZ1000 I had to make a few passes for this scene because there was nt a lot of detail in the sky for the software to see and stitch. I was wishing for the Lumix GX8 or the G7 as they have new stitching that does a better job in situations like this. The FZ1000 has so many easy options it’s hard not to make it your carry around camera. Next time I’ll grab one of the others and my small Think Tank Mirrorless Mover 20 bag with a couple lenses to add a few more options…
I should also have captured a series of RAW images for later stitching in Photoshop or Autopano Pro. Next time.
Yours in Creative Photography, Bob
by successfulbob | landscape photography, Lumix GX8, panorama, photography
Panorama Photos
I’ll put on my ‘Old Man’ hat here and say, “Back in the day (can you hear the creaky voice??) we had to make notes with a pencil and paper to record what lens was used, and the settings on the camera like Aperture and shutter speed. We knew the ISO ’cause that was on the film.”
OK. you probably already know I’m a fan of the in-camera panoramic format with the Lumix line of cameras. Well I gotta tell ya’ they’ve made it even better. Must be some new math working but you can make your panoramas longer and the stitching is even better than before in the G7 and the GX8.
I’m stoked!
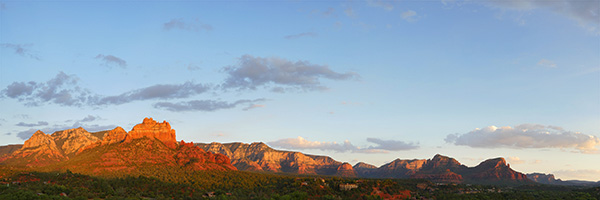
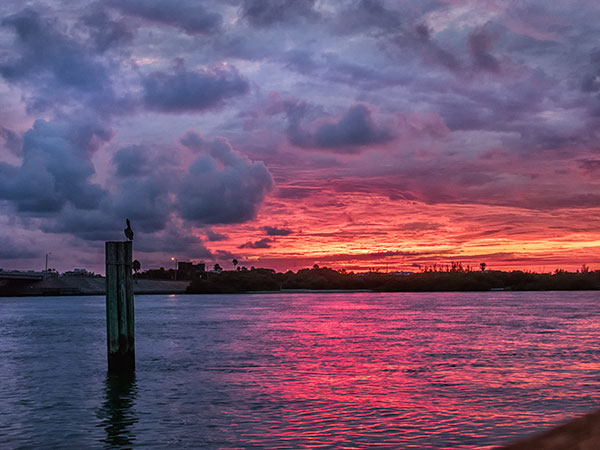
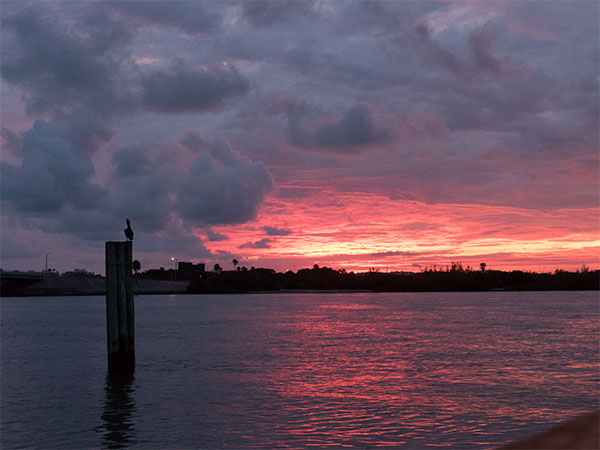
My wife and I went out to dinner tonight and I slipped out for a couple minutes as the scene was unfolding with some nice light. I dialed the GX8 to the pano setting and opened up one stop of exposure compensation to keep the shadows from blocking up since there was so much sky in the image. In Adobe Photoshop I added a Soft Light Layer to gently burn the top ot the sky back in just a bit. Here’s the result.

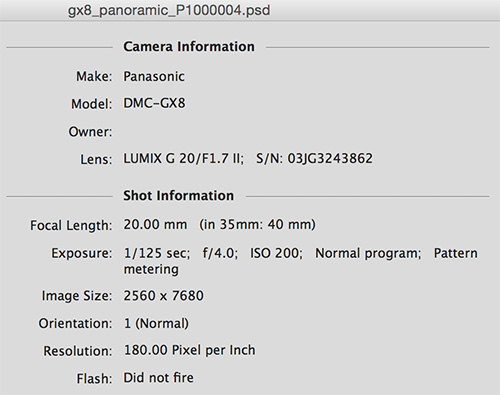
Red rock view from Sound Bites Grill in Sedona, Arizona at sunset. Camera and lens information below.

One of the best pieces of information we have as photographers today is the metadata secured in the file for all of our images.
This information is accessed in Photoshop by going to File > File Info >Camera Data. This info makes it possible to understand settings and study how to make our images more consistent and to make situations repeatable as we understand more how our camera’s work.
Yours in Creative Photography, Bob
by successfulbob | landscape photography, Lumix FZ 1000, Lumix Lounge, photography gear
Finally catching up with some of my posts after being on the road for an entire week working with the Lumix Luminary Team and helping to judge the PPA International Photographic Competition outside Atlanta.
Here’s an image from our first night in Sarasota. This was captured with the Lumix FZ1000, a camera I find in my hand on a regular basis because it is so versatile. As they say, the best camera to create an image is the one you have on you. With a built in 25-400mm f2.8-f4.0 lens that weighs under two and a half pounds it makes it pretty easy to have on hand.

Sunset after processing with NIK Filters and Adobe Camera RAW Renders the scene closer to my memory of the scene. (OK maybe a little extra zing but not much)

Capture straight from the camera. I could have preprocessed the image in camera but we were busy enjoying getting together with fellow Luminaries and even though we are all photographers we tend to ‘grab’ some images when we are not officially being paid for a specific job.
Yours in Creative Photography, Bob
by successfulbob | landscape photography, photography, photography education, photography gear
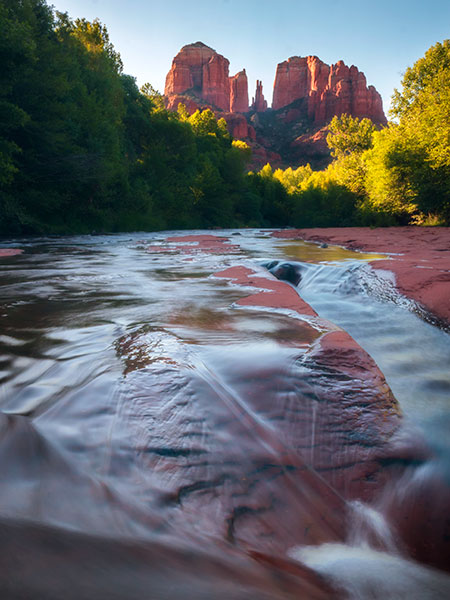
Up early as dawn was breaking I had my tripod set up in the bed of Oak Creek in Sedona, AZ. In the distance was water’s opposite – the stoic red rock formation of Cathedral Rock. I wanted to have the water slow flowing and that required a longer shutter speed than I was able to obtain with just the camera settings… Neutral density filters to the rescue.

Cathedral Rock on Oak Creek in Sedona, AZ. One of the top ten most photographed places in the country.
In the image above I used a 4 stop ND filter in the holder and added a 2 stop graduated ND filter at an angle across the top right hand corner where the sun was streaking across the trees.
Chris Kalmbach, one of the members in my Cohort in the new educational platform called the Arcanum, has been creating beautiful imagery using some long exposures using neutral density filters. Seeing and critiquing his images made me want to play with ND filters again.

Long exposure with ND filter notice water smoothed out by exposure. © Chris Kalmbach All Rights Reserved
I personally didn’t want to invest a boatload of money into filters I might only use a few times so I did some poking around and found these very inexpensive plastic filters with a full range of step rings, holders, lens shades and more from Neewer. See the ND Filter kit Here.
Yours in Creative Photography, Bob
PS – Enjoyed this water quote… “My fake plants died because I did not pretend to water them.” Mitch Hedberg
by successfulbob | fine art photography, landscape photography, Lumix GH4, Lumix Lounge, people photography, photography, photography education, photography gear
Ocotillo.
That’s not a word you hear everyday… Even if you live in the Southwest where these very interesting cactus reside. Ocotillo are long stalks that most of the year look like they are a bit worse for wear and have moved on past the living stage.
BUT, when nature’s green paint brush, AKA rain, moves through the area at the right time of year these seemingly greyish brown sticks with thorns turn green and put on a show with bright crimson blooms.
Kinda gives you hope when you see this process. And that’s where a phrase you hear even less, the name of this post, Dance of the Ocotillo. Which I think is easier to say than Dance of the Fouquieria splendens which is it’s binomial name.
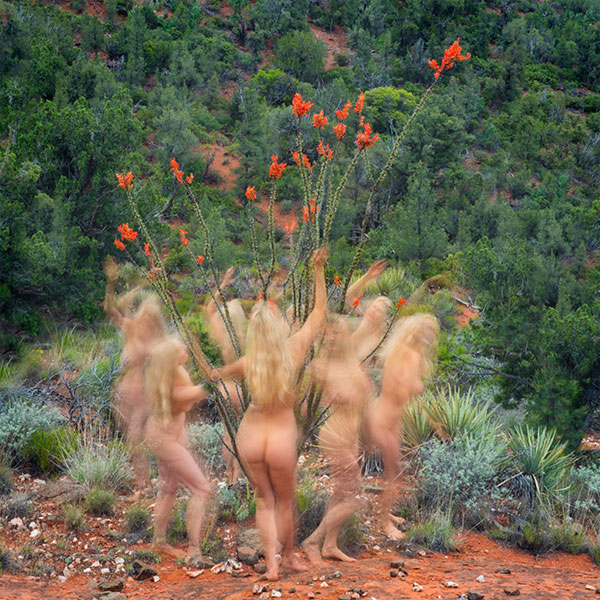
My model friend Pash Galbavy said she really enjoys these plants and wanted to be photographed with them when in bloom. “Was I game to get up and hike into the wild before the sun chose to make an appearance?” “Sure,” I said. “Always up for a challenge and creating some art.”

Pash made individual dance moves around the cactus. Camera was mounted on a tripod and multiple exposures were blended together using Layers and Masks in Adobe’s Photoshop.

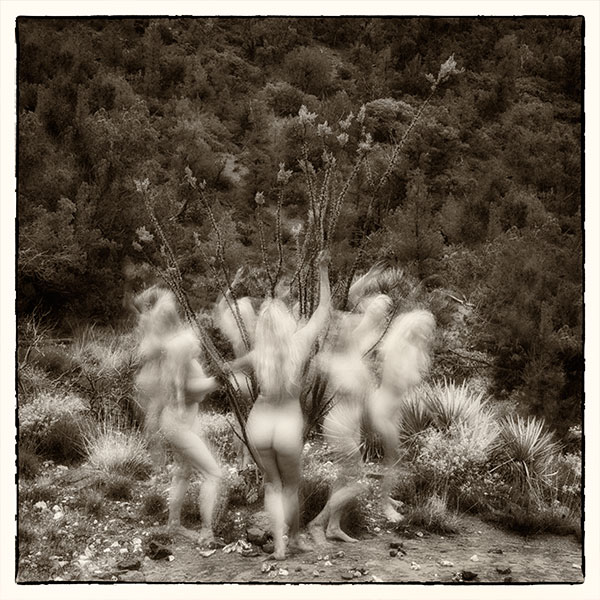
This is an alternate version I enjoy even more created using multiple NIK filters. Included in the mix were Pro Contrast, Glamour Glow, Sepia Toning, Edge Efx and Film Noise.
I used the Lumix GH4 with the Vario 12-35mm f2.8 lens mounted on a tripod. I wanted to capture motion on each movement but I couldn’t get the shutter speed slow enough without some extra help. Camera settings 19mm, 2 sec, f22 ISO 200 manual mode.
Getting the shutter speed this slow required the help of a 2 stop neutral density filter. I had just received a set of very inexpensive filters from Neewer because I wanted to experiment with them for water effects. The kit is less than 25 bucks and I was pleasantly surprised at the quality. I just happened to throw them in my kit before this shoot… Who knew??
Yours in Creative Photography, Bob
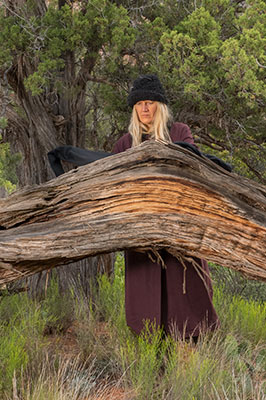
PS – If you want to talk about someone dedicated to her art here is a photo of Pash dressed in clothing more appropriate to the per-dawn temperature!

Pash dressed for the 47 degree pre-dawn temps we were working in.
PPS – Making purchases on Amazon and through other links helps support the education on the Successful-Photographer web site… TIA.

