Heads-up here! This is my first foray into photographing water droplets. I’m sharing my current setup, and sure it will change as I learn more and experiment. I am taking you along on my adventure showing you the kind of work I’ve been able to create with this setup. Once again I will share I am no expert with this type of photography. If you’ve got some ideas for me, I’d love to hear them!
This photography is not for the faint of heart. By the way, you CAN do this photography with a couple of Speedlights and in some ways that may be better for more control of the results. I like the variability with the gear which I’ve been working. OK, with the disclaimers out of the way lets look at a water droplet photo and then the layout of all the stuff.
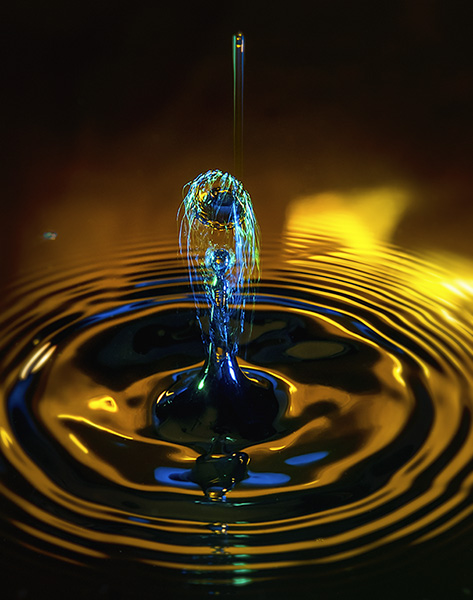
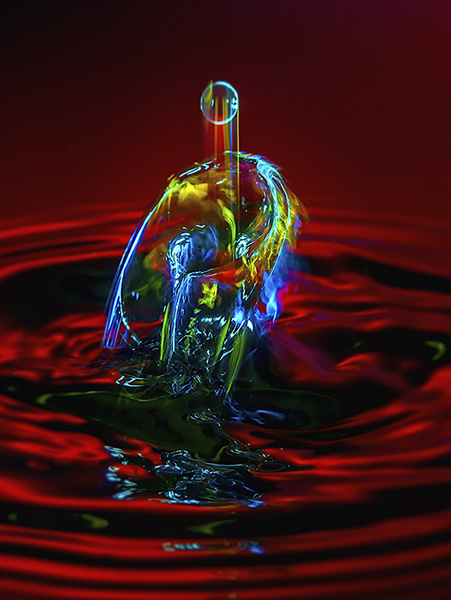
Photograph achieved with the equipment setup as seen below. Exposures are made at f14 with @ one second ISO 200.
Here’s my gear. I’ll ‘splain below.
I decided to get a little head start on this type of photography by getting some necessary tools. The Pluto Trigger and Pluto Valve can save you a LOT of time. The Trigger is connected to the camera and controls the show. It tells the water drops when to fall. What size they should be and when to trigger the flash. All of these durations are in milliseconds (MS).
Backgrounds are only limited by your imagination. The one showing above is with a colored Savage Paper background. There is a gelled flash with a snoot to vary the light and add interest. With this setup, I have also used a reflective background with a gel over it lit by a flash at various angles and directions. You can use cloth or photos or printed patterns or almost anything you like. As I learn I’m trying to be careful not to overwhelm the waterdrops but we’ll see as I play how that transitions.
I used the Lumix G7 to capture these photos. Lens used was the Vario 35-100mm f2.8 lens with a 10mm or 16mm Vello extension tube. You will need a camera that has a trigger port or can communicate with the Pluto Trigger.
Connected to the camera is a remote flash trigger that fires the flash Paul C Buff flashes from the camera. The Lumix 360L flashes are triggered by the light from the Buff’s because I have them set to Slave Mode. It is the flash that freezes the motion of the water. Adding gels to the flashes adds color and interest to the splashes. In my images, you often see some streaks of color in addition to the frozen droplet. This is because I am using multiple types of flash. The Buff units are not as fast as the Speedlights. And the Speedlights can be of different durations if you change the amount of light you ask them to produce. The lower the power, the shorter the duration of light. Bogen Cine gels Vivid color are juicy. Roscoe gels work well too. You can get gel packs that are just the right size for fitting on your Speedlight. Here’s one from Roscoe holder for the gels.
Lumix Speedlight with gel taped in place. Once you see how the gels perform you can also buy larger sheets and cut them to size for larger flashes.
I used a black bowl of water for the reflection. Black allows the color of the background to shine through. Fill the bowl as high as possible, so the edge of it doesn’t show. Science says you can fill a vessel higher than it top because of surface tension. Well, let’s not get into that too far, but as a side note, know that you can put 32 dimes in a shot glass before it overflows after you have filled it with water. Make sure you have a drip tray underneath the bowl or tray to catch any spills as you work.
If you don’t have enough lights, or just want to add another variable, note that you can add a mirror to the set to reflect light back from another direction.
The Manfrotto Magic Arm is extremely helpful in positioning the valve in place over the water. The Manfrotto Super Clamp holds the valve. When you are setting up the position of the water drops, watch where the water drop falls and put something in place to use to set your focus. Remove before shooting.
Working with water droplet photography is like photographing fireworks! You are never quite sure what you are going to get. You get to control the variables but there is never a guarantee and always fun surprises. (well sometimes not so fun but always a learning experience)
An icon in photography, Ansel Adams wrote quite a bit about photography and created a wealth of quotes to share on the subject. This morning’s quote has to do with thinking about becoming a better photographer. I believe you can accelerate the process if you consciously work at it with thought and purpose.
Today’s quote begs the question. “With what do you fill your mind?”
“You don’t make a photograph just with a camera. You bring to the act of photography all the pictures you have seen, the books you have read, the music you have heard, the people you have loved.” Ansel Adams
I find the basis of this quote to be true.
About five or six years ago I started spending more time in art museums and studying specific artists. I found myself drawn to the impressionists such as Renoir, Monet, Degas and Van Gogh among others. I picked up this advice from fantastic fellow photographer Thom Rouse and think I have become a better photographer for it. The study o
What kind of things did I learn? The study of how colors work when placed side by side gave me a new insight to look for those color patterns in nature. I found there were more compositional techniques available than the rule of thirds. Using some of these ideas I began to blend multiple images together to create more painterly images.
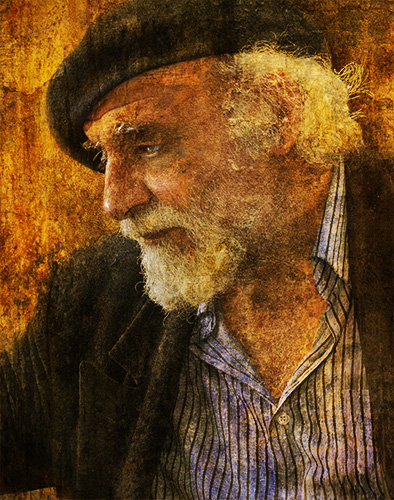
An artist I met at the Montmartre in Paris. Monsieur Gorghy was my first full ‘painting’ using a technique I’ve dubbed ‘PhotoSynthesis.’
As you can see from the image above it turns out the impressionists began to inhabit my work. It didn’t happen overnight. Some of it was intentional but I recognized that it worked it’s way into other areas of my work as well. I now try to view different genres of art on a regular basis through books, movies, online and, of course, in museums.
Ansel got it right. I ask again, With what are you filling your mind?
Yours in Creative Photography, Bob
PS – Another wonderful photographer full of artistic ideas is Arthur Rainville You might want to check out some of his very emotive and emotional work.
I’ve always wanted to attempt water droplet photography.
And now I have!
It’s kinda like photographing fireworks in that you never are quite sure what you are going to capture when the shutter is fired, but you don’t have to wait for the Fourth of July either. This is something that could consume me as there are endless variables to throw into the mix. What can change the look of any image? Type of liquid, the color of the fluid, the temperature of the liquid, the size of the drop(s), flash duration, add another flash, and another, change the background color, add color gels on the flash…
Arrghh! It’s fun if a little frustrating at times when you think you have done everything exactly the same but get an entirely different result. I now understand where someone had said that making these images is part science, part art and lots of luck. As Thomas Jefferson said, “The harder I work the luckier I get.” That might not be an exact quote, but you get the idea.
Here’s are some examples from my first couple of days.
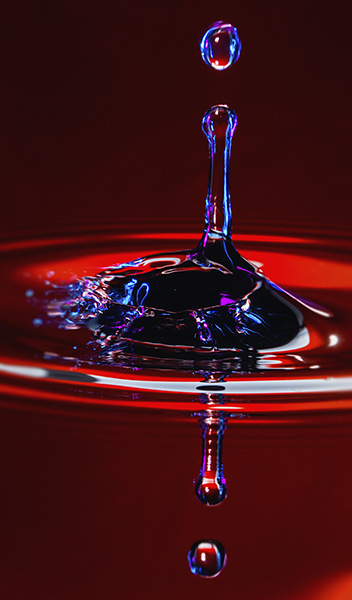
This is from day one of playing in the water with splash photography
This from day two shooting. Playing with lights and droplet timing.
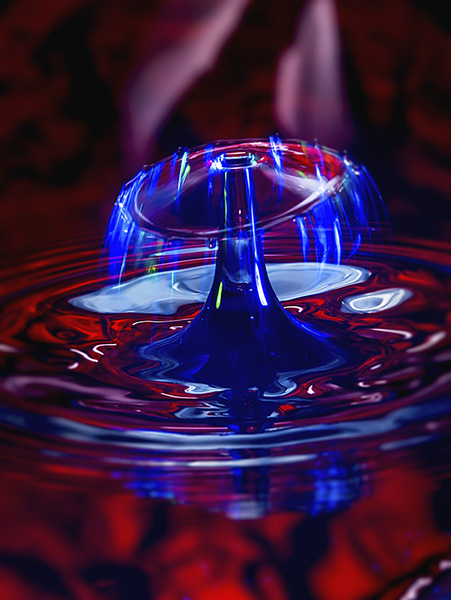
Day Three
Day Four with thickened water and new timings for dropping the drops.
As I said, the photographing of the drops is part science and part luck. You can increase your luck by adding to the science in your arsenal. I purchased some help in the form of the Pluto Trigger and the Pluto Valve. The Pluto Trigger is a pretty amazing controller for your camera. In this case, the trigger releases the waterdrops and times the firing of the flash. Even with that control, there are still a lot of variables in play.
And I like it.
In the next couple of days, I’ll share my set-up and some things I learned as I have started this new photography genre.
Yours in Creative Photography, Bob
PS – I’ve just bought the Pluto Trigger, and like it so much I’ve signed on as an affiliate
Yesterday I shared a time-lapse video shot and processed with my Lumix GX8 and Adobe Premiere Pro.
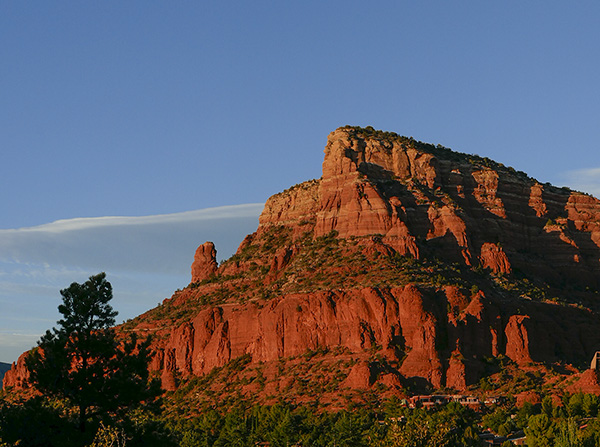
While those frames were being recorded I used the GX85 to photograph some still images. Here are a couple in-camera panoramas. Cameras are becoming more like portable imaging computers with each new release.
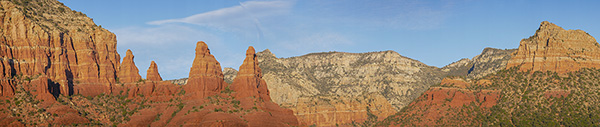
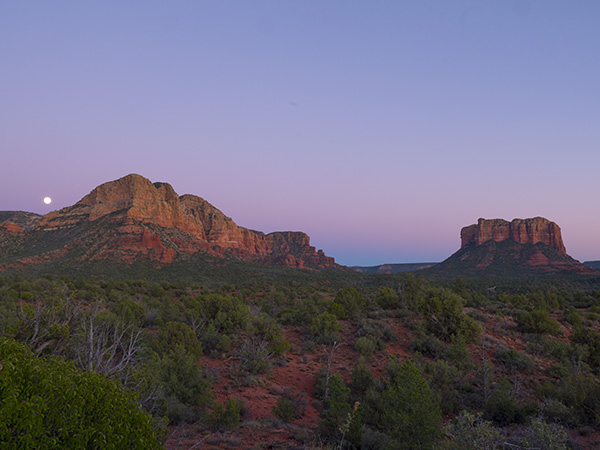
Stitched in-camera Sedona pano. Hwy 179. The camera is held in the vertical orientation to give a slightly taller image. If there was lots of cloud action I would have taken a second pano and stitched them together in Photoshop for an even taller rendition of the scene.
The field of view depends on how long you continue to pan. A longer panning time gives a different aspect ratio.
Here’s a tip for creating smooth panorama photos with clean stitching. This is an old videographer’s trick. Point your body and feet to where you would like the panorama to end. Then using your stomach muscles turn back to the starting point of the image. Make sure the camera is tight against your forehead and is not tilted. Then using your stomach muscles gently pivot to the end of the field of view. The stomach muscles are larger and more stable giving you a smoother movement resulting in less stitching errors. One final note, there is a preview of your capture in the viewfinder. You will want to go a little bit further than you see or your image will be truncated just a bit. If you are moving too fast or too slow or the light is too low, the camera will return an error message.
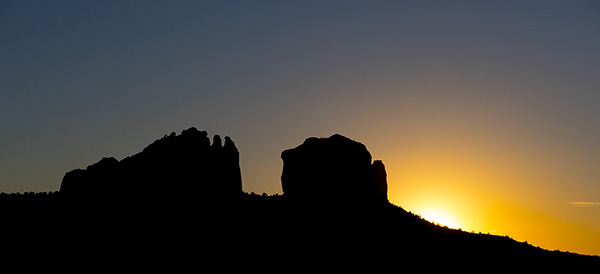
Of course as the sun begins to set colors can change immensely
And of course, don’t forget to turn around. This is the back side of Cathedral Rock in silhouette.
Our creative tools are getting better and better. It’s a fun time to be an image maker.
While out waiting for the moon to make its appearance the night before the Supermoon I worked a couple of cameras. I set up the Lumix GX8 to do a time-lapse of the sunset/moonrise. Glad that I also had the Lumix GX85 as a second camera to mess about with while the time-lapse was being recorded.
Here’s a still I pulled for the time lapse sequence.
The time-lapse was pretty simple. The settings are available in the camera. No need for an intervalometer. Under the Time Lapse Shot menu, you have the choice of Start time which can be immediately (now) or a time set in the future. Shooting Interval which is the amount of time between frame captures. Image Count which is the number of frames to be captured. In this case, I fired one frame every four seconds.
I thought I had a better position for the moonrise which was quite a bit to the right of where it actually showed up. I stopped the captures pretty early after the moon made its appearance. Looks like I need to calibrate my compass.
I was able to add some interest because I choose to have the camera process the still images to a 4K video. 4K video enables you to move around in the image without losing quality which I did in Adobe Premiere. Did you catch that part about the camera processing the time-lapse? A very cool feature. I choose the output settings including quality and frames per second. In this case, I used twenty-four.
For the video below I changed the output settings to 12 frames per second. I did a little color correction and added movement in Adobe Premiere.
Tomorrow I’ll show you what I was photographing with the Lumix GX85.
That’s an age-old question that has been debated for many years and will continue on into the future. I think it is and this is my blog so until I hear from you otherwise, we will proceed with the concept that photography is art, especially as we push the boundaries with composite work and adding paint strokes with programs like Adobe’s Photoshop and Corel’s Painter.
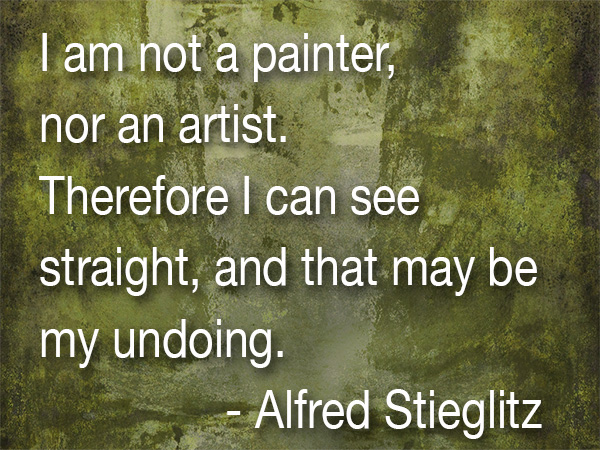
Which brings me to today’s quote from Alfred.
“I am not a painter, nor an artist. Therefore I can see straight, and that may be my undoing.” – Alfred Stieglitz
We all get to times when we doubt our skills and techniques in making our imagery. I feel like I am in good company, and you should too when I realize that even a talented and renown photographer such as Stieglitz showed that he felt not being loose enough in his thinking was a detriment to his work.
What can we do to make it easier for ourselves in creating our images?
I think number one on the list is to study in the other arts such as painting. You learn a lot about color, composition, and feel to add to your toolbox. More tools, More thought equals better imagery.
When you are searching for these extras for your knowledge base you can find them in books, from discussions with other artists, magazines, the Internet and strangely enough even cartoons. I found this wonderful cartoon from the 50’s from Disney with Donald Duck traveling through Mathmagic Land with great explanations of composition. You can see it below. It’s about 25 minutes long and fun to watch. If you don’t have that much time you can see segments of the video in bite-sized pieces by doing a search on YouTube.
For infrared conversion of my cameras I use LifePixel. Infrared allows you to put an older camera to use and opens up a new time time of day for productive image creation.
Learn Photoshop in a fun environment. Aaron Nace applies the right amount of fun with easy to understand and follow tutorials. Actions and brushes are included with lessons!
Best embroidery ever. Give Queensboro a try, get a $20 instant credit to get started by clicking on the logo! They specialize in great quality custom logo apparel and promotional products with the best customer service.
Platypod has become a great resource for being creative in getting your camera gear easily into unusual places. As an Platypod Pro I get to work/play with the gear even before it comes out. Head over to Platypod, subscribe to the newsletter and you will get special discounts reserved only for subscribers.
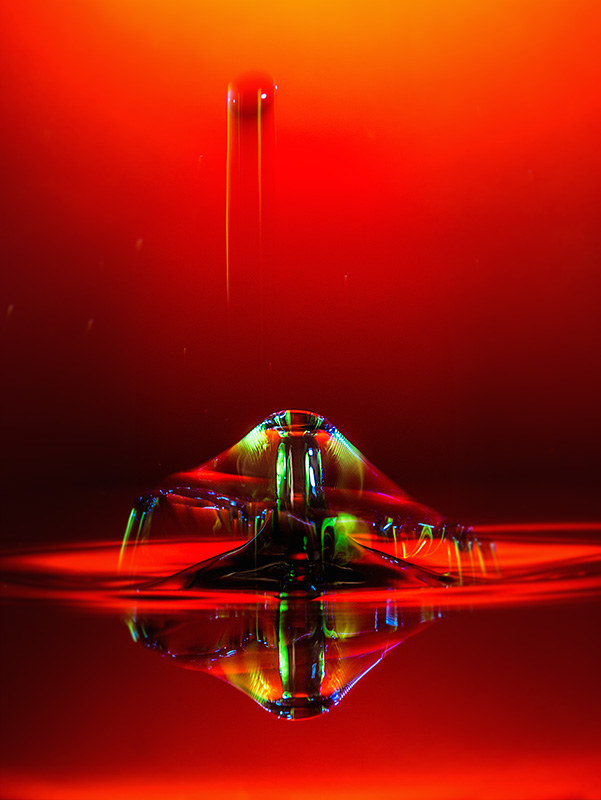
 Photograph achieved with the equipment setup as seen below. Exposures are made at f14 with @ one second ISO 200.
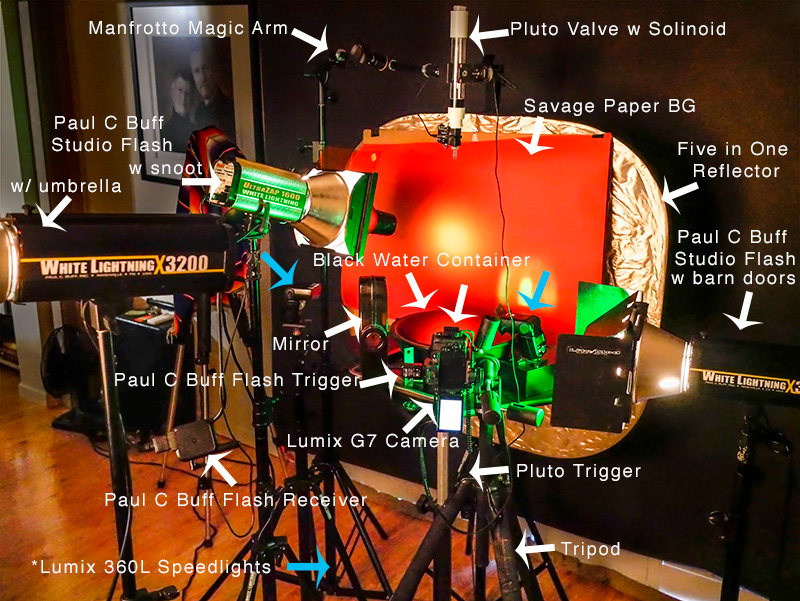 Here’s my gear. I’ll ‘splain below.
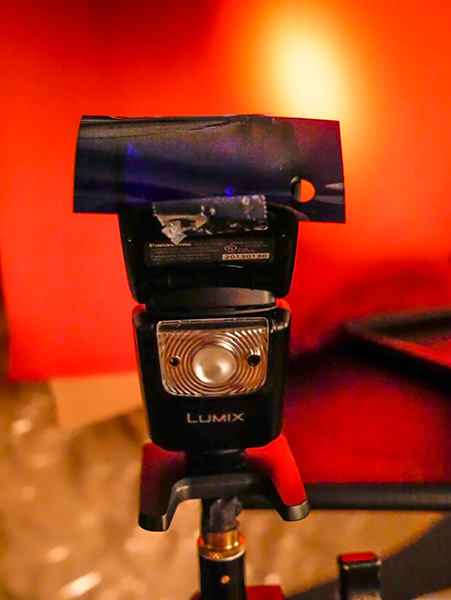 Lumix Speedlight with gel taped in place. Once you see how the gels perform you can also buy larger sheets and cut them to size for larger flashes.