by successfulbob | photography, photography education, photography retouching
OK this was a tough one.
My almost ninety year old client wants to use this image of her sister in a book about her life. Does that give you an idea of how old this photo is??
Oh yeah, can you please remove the ink?
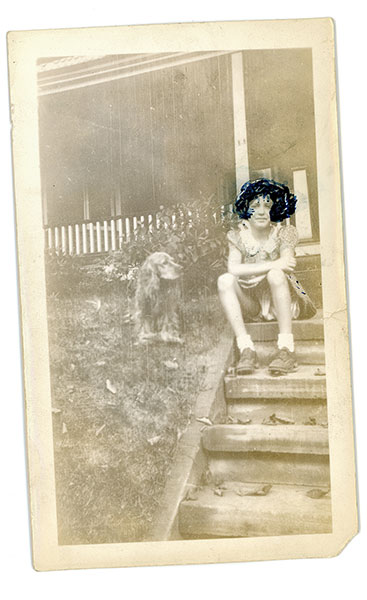
This is the original scanned photo for repair. I make a safety scan to preserve the original before attempting any rehab on a photo
Can Photoshop do the whole job?
So off to the Internet to see how other people have conquered this problem. What did we do before the Internet? I found this suggestion to use hand sanitizer and a Cue-Tip to help remove the ink from the photo without destroying it. I made the scan above as a safety measure in case the idea didn’t pan out we at least would have the original to work with. My first thought was I might be able to see through the ink by working the Channels in Photoshop. But, it turns out the ink was solidly applied. I could rescue a little detail but not enough to see her hair.
To the sanitizer!
So it’s time to try the hand sanitizer. I had some Purell hand sanitizer ‘Refreshing Gel’ that I use when traveling and thought it would be better than straight liquid. And, I was right. Being in gel form allowed gentle application without too much moisture hitting the photo. Please note that this is a resin coated print which allowed this. I believe if this was a fiber print I would not have had near as much success.
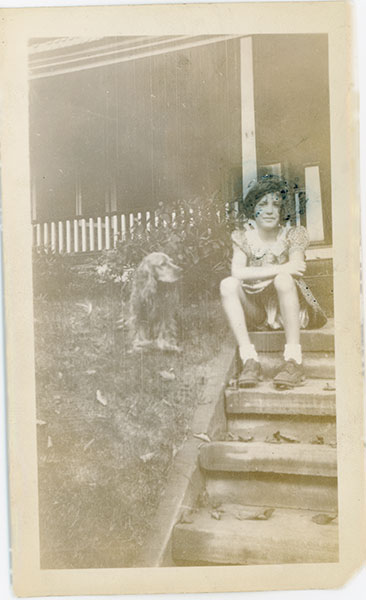
Scan of the print after as much ink as possible had been removed.
(note: I made safety scans throughout the process on a regular basis of ink removal each time I acquired more detail)
Back to Photoshop (to the Rescue!)
With as much ink removed as possible enough detail has bee revealed to begin the process of restoration. Removing scratches, age spots, restoring color, retouching out the rest of the blue ink involved various tools including the Rubber Stamp (clone) Tool, Patch Tool, Spot Healing Brush, Dodge & Burn Layers, **NIK Silver FX Pro 2, **NIK Color FX 4, Add Noise and more.
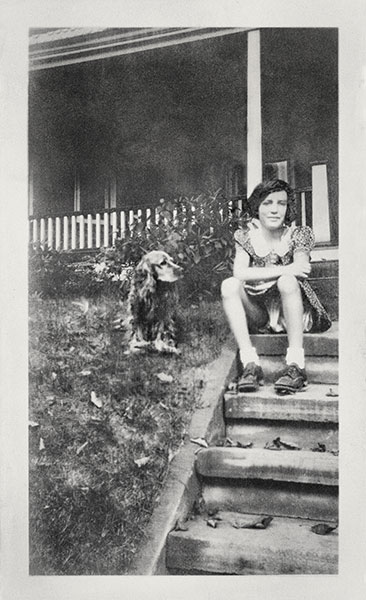
Here’s the final image.
Yours in Creative Photography, Bob
PS – **NIK software is now owned by GOOGLE. The whole NIK Suite of plug-ins is now available for only $149. If you own any of the individual programs and have the serial number GOOGLE will give you the rest of the suite at no charge.
by successfulbob | Lumix G7, photography, photography education, photography gear, photoshop tutorial
Just got my hands on the new Panasonic Lumix G7 – Lumix G7 w 14-140mm lens ($1098) or G7 w 14-42 ($798) – and have been putting it through some paces.
There are some beautiful desert plants that my wife has been landscaping the yard with vs having water-sucking plants since we live in the super dry climate of Sedona, Arizona. This is the bloom of the Apache Plume plant.
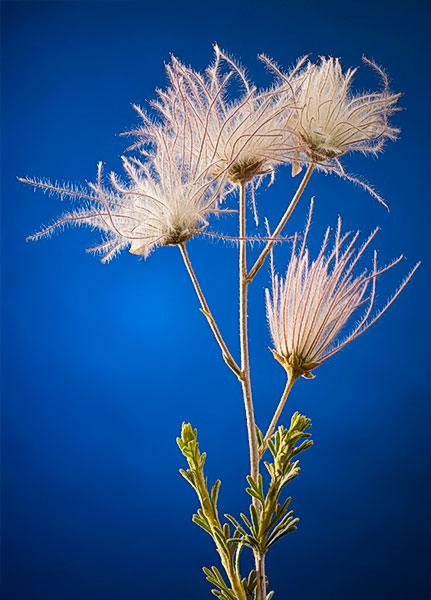
Apache Plume Bloom
Capture info
I used the 45mm f2.8 Macro to make the details of the ‘plume’ feathering jump. In order to get the most detail I set the aperture to f8 and used studio flash. Shoot through umbrella to the side and just behind the plant with soft reflector fill opposite. Black background paper lit with flash with snoot and 2 layers of blue gel. Used the Wifi from the camera to allow the Ipad to run the camera changing focus using the free Panasonic Image APP. Never having to touch the camera makes for better, easier blending because there’s no camera shake or movement.
Here’s How to Focus Stack
I captured fifteen exposures with focus through the image and used Photoshop to stack them together and achieve sharpness from front to back. Take the images into Adobe Camera RAW and tweak any color or shadow/highlight settings. From the Tools menu ask Bridge to Load Files into Photoshop Layers. Highlight all Layers in the Layers Palette. Under the Edit Menu > Auto-Align Layers. With all Layers still selected, Edit > Auto-Blend Layers with the Radio Button Stack Images Selected with Seamless Tones and Colors checked. Then go through your image and look for areas that might not have been blended perfectly by Shift clicking on the individual Layer Masks to see if there is a sharp image that might be blended better. **Note – Subjects that contain a lot of white will have more issues with Blending the Sharpness in this process than others with more color and contrast.
Initial Thoughts on the G7 (more to come in future posts)
This camera would make a great back-up to the GH4 if you are a pro on a budget. Controls are slightly different but not so much you would have a problem switching in the middle of a job or if you are doing a two camera shoot. Pros – VERY light weight, super-easy 4K Photo Mode, interchangeable lenses, image quality on par with GH4. Cons – Tripod plate needs to be undone to get to battery and SD card compartment, smaller battery, built on plastic body vs magnesium.
If you are really on a budget two or three of these cameras would make great kit to have pro backup capabilities.
Yours in Creative Photography, Bob
by successfulbob | inspirational video, photography education, video
Sometimes inspiration comes from different places…
Seeing what the Wilson sisters have done with the classic Led Zeppelin anthem Stairway to Heaven makes me want to create something special. Watch this video all the way through. It brought tears to my eyes…
Led Zeppelin Stairway to Heaven performed at the Kennedy Center with songwriter Robert Plant in the audience.I’m not sure what I want to create… but the itch is there! How about you?Yours in creative Photography, Bob
by successfulbob | photography, photography - art quote, photography education
“Look for the light!” is often shouted from the rooftops when telling new, and experienced, photographers how to create great images.
Today’s quote is from Trent Parke, an Australian photographer. He’s created photography books; won numerous national and international awards including four World Press Photo Awards; and his photographs are held in numerous public and private collections according to Wikipedia.
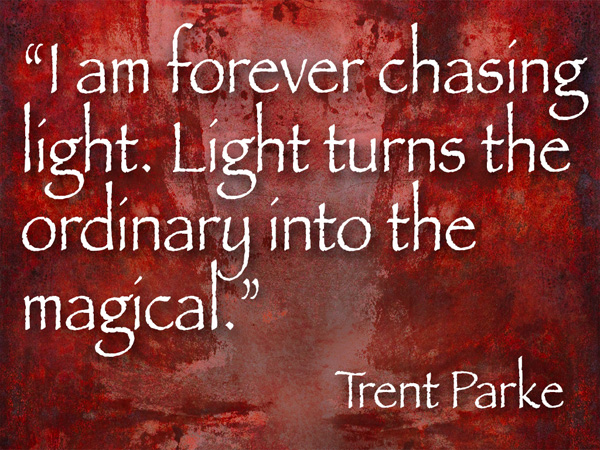
“I am forever chasing light. Light turns the ordinary to the magical.” Trent Parke
I have seen absolutely horrendous photographs of fabulous rock formations and exquisite images if mundane subjects.
What is the difference??
Light. And shadow.
I’ll give you a hint about finding that sweet light that makes images come alive with depth and dimension. Look for the the shadows that define the light. It is a change of mindset that I believe helped take my image making skills to a higher level. Think about shadow edge transition. It defines the light.
Deciding on the shadow can help set a mood. Soft shadow edge transitions help give shape and form and 3 dimensionality to your subject. Harsh shadow edge transitions can give an edgy harsh feel to an image, think sunlight at noon or a strong light source in a very low light situation.
I’ve found watching for the shadows makes it easier to find the ‘right’ light.
Go create some magic of your own…
Yours in Creative Photography, Bob
by successfulbob | photography, photography education, podcast
I was interviewed about participation in imaging competition in a Podcast put together by Mark Oehler called The Twelve Elements. We chat about my imaging submissions from last year where I was fortunate to have five of my eight image entries be added to the PPA Loan Collection and the rest made it to the Merit category.

12 Elements Podcast
The next International Imaging Competition from Professional Photographers of America is coming up very shortly. Get your image entries ready. More PPA Competition information can be found here on the PPA web site.
I feel that participating in competition has helped to make me the photographer I am today.Even though I have my Master and Artist degrees from PPA I still entered again…
What are you doing to push yourself to make better images?
Yours in Creative Photography, Bob
by successfulbob | people photography, photography education, salute, salute to business
How often do you meet truly happy people?
Truly happy?
I’ve been staying at and attending events at the Hilton Phoenix Airport Hilton Hotel for the last 16 years so I get to know most of the people who work at the property. There are lots of standout, long term employees there. (AFAIK unusual in the service industry)
I was having a conversation with shuttle driver Nat about being happy. He shared that he was in the corporate world making good bucks, switched some stuff, got down-and-out sized and then decided to do something that made him happy rather than making him huge dollars. He’s been picking up and dropping off guests between the Phoenix Airport Hilton the Sky Harbor Airport for the last seven and a half years. I’ve seen him a lot in that time and never seen him without a big smile and a huge hello for me and everyone he comes in contact with.

Hilton Phoenix Airport Hotel Bell Captain/shuttle-driver/ambassador Nat
“What’s your point, Bob?”
Point is there are lots of ways to make money with your camera.
Do YOU still enjoy what you do?
Or are you just workin’ for the dollar. Life is short. Make sure you enjoy the ride. And, if you need a smile come on down to the Hotel and say ‘Hey!’ to Nat.
Yours in Creative Photography, Bob
